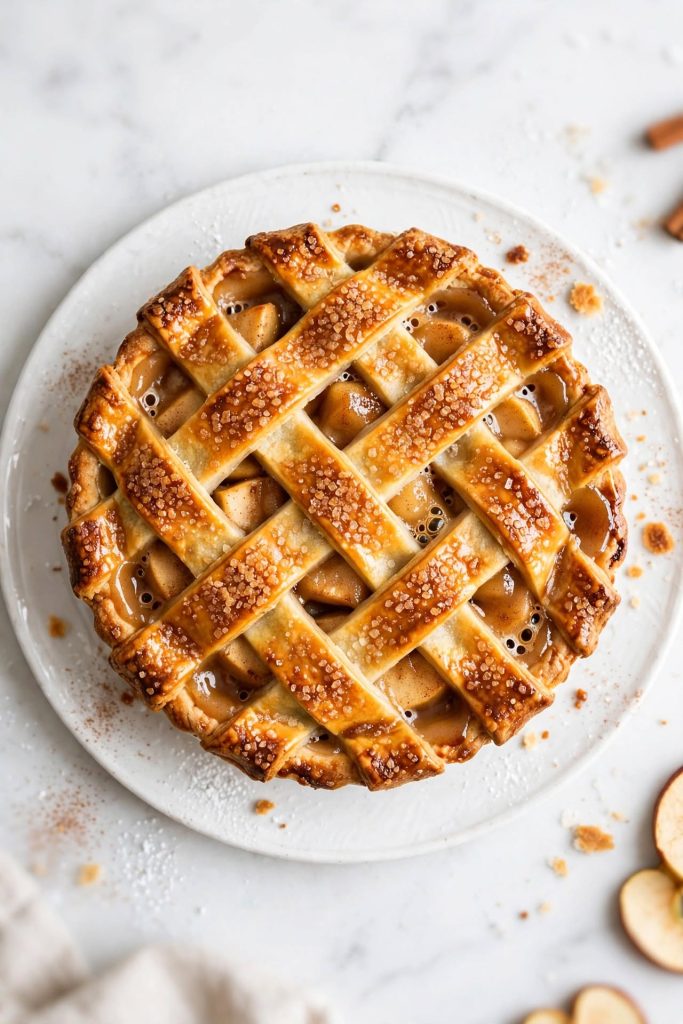
Apple pie is a double-crust baked dessert made with a spiced apple filling encased in a buttery, flaky pastry. It uses a cold-butter pie crust and a pre-tossed filling that sets firmly after cooling. Prep takes about 40 minutes and baking takes 50 to 60 minutes. Best for home bakers who want a reliable, classic result that holds its shape cleanly when sliced.
This apple pie recipe gives you a flaky, golden crust and a spiced filling that holds its shape cleanly when you slice it. Eight core ingredients. One reliable method. If your biggest concern is a soggy bottom or a watery center, this method addresses both directly — a cold-butter crust and a pre-tossed, drained filling are the two things that fix it. I tested this recipe five times before publishing to confirm the method gives consistent results across different ovens and apple varieties.
Why This Apple Pie Recipe Works
Every component here is built around a specific, observable result — not convention.
- Cold butter throughout the entire process — keeps fat in distinct, separate layers as it bakes, producing the shatter-and-flake texture that a softer or over-worked crust cannot deliver.
- The filling is tossed and rested before baking — this draws out concentrated moisture before the pie goes into the oven, so it cooks off rather than collecting beneath your crust and turning it soft.
- A mix of firm-tart and firm-sweet apple varieties — one variety holds its structure through the full bake, the other adds flavor depth. Together, you get defined slices and a balanced sweet-tart center rather than mush or one-note sweetness.
- Thickening with cornstarch, not flour — cornstarch produces a clearer, more firmly set filling that slices cleanly from the dish. Flour can leave the filling slightly gummy and clouded.
- A full 2-hour cooling window before slicing — the filling is still liquid at oven temperature. It needs the entire cooling period to reach the set, sliceable texture you are aiming for. This step cannot be shortened.
- No specialty equipment needed — a standard 9-inch pie dish, a rolling pin, and a pastry cutter or box grater are all you need.
If you are looking for more classic fall dessert recipes, our collection is a good place to start.
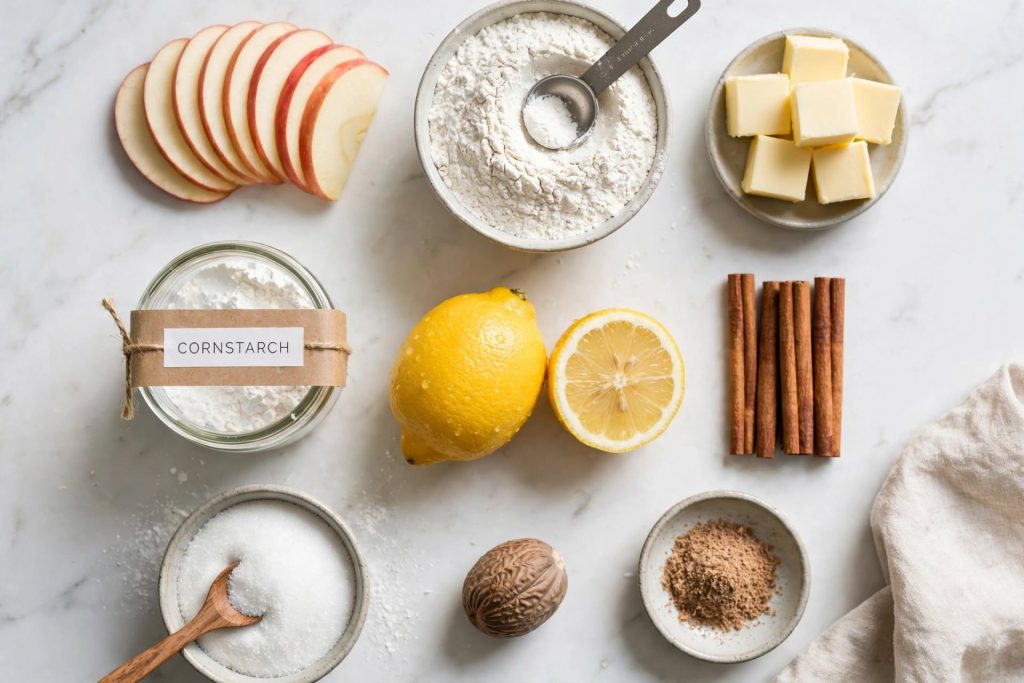
Ingredients for Apple Pie
Every ingredient here has a specific job. Here is what each one does — and what to use if you need to make a substitution.
The Pie Crust
| Ingredient | Amount | What It Does | Best Substitute + Impact |
|---|---|---|---|
| All-purpose flour | 2½ cups | Structure and framework for the pastry | Whole wheat flour works — gives a denser, slightly nuttier crust |
| Unsalted butter (cold) | 1 cup (2 sticks) | Fat layers = flakiness | Lard gives a flakier result; vegetable shortening gives a tender but less flavored crust |
| Ice water | 6–8 tbsp | Binds the dough without over-activating gluten | No substitute — temperature matters as much as the ingredient |
| Salt | 1 tsp | Flavor balance throughout the pastry | Table salt works at ¾ tsp |
| Granulated sugar | 1 tbsp | Slight surface browning on the crust | Can omit — minimal impact on structure |
The Apple Filling
| Ingredient | Amount | What It Does | Best Substitute + Impact |
|---|---|---|---|
| Apples (mixed varieties) | 6–7 medium | The filling itself — texture and flavor | See Apple Selection Guide below |
| Granulated sugar | ¾ cup | Sweetness + draws out apple moisture before baking | Brown sugar adds molasses depth but softens the filling slightly more |
| Cornstarch | 3 tbsp | Thickens the filling to a clear, firm set | Tapioca starch gives similar clarity; all-purpose flour gives a cloudier result |
| Cinnamon | 1½ tsp | Warm spice base — the primary flavor note | Reduce to 1 tsp if sensitive to strong cinnamon |
| Nutmeg | ¼ tsp | Background warmth and depth | Can omit — the cinnamon carries the profile |
| Lemon juice | 1 tbsp | Prevents browning, balances sweetness | White wine vinegar at ½ tbsp works in a pinch |
| Unsalted butter | 2 tbsp | Richness; dotted over filling before top crust | Can omit — filling will be slightly less rich |
Key Ingredient Notes
Butter: Must be cold — straight from the refrigerator or chilled in the freezer for 15 minutes. Room-temperature butter blends into the flour rather than staying in distinct pieces — and those distinct pieces are exactly what create the flaky layers you are after.
Apples: Aim for at least one firm-tart variety. A single soft variety will collapse during baking and give you a chunky applesauce-style filling rather than defined apple slices.
Cornstarch: Do not swap for flour without adjusting quantity. If using flour, use double the amount and expect a cloudier, slightly starchier set.
Equipment You Need
- 9-inch pie dish — ceramic or glass preferred for even heat distribution
- Pastry cutter or box grater — for incorporating cold butter into flour
- Rolling pin
- Plastic wrap — for chilling the dough discs
- Rimmed baking sheet — place the pie on this to catch any overflow
The Apple Selection Guide
The apple variety you choose is the single biggest factor in whether your filling holds its shape or turns to mush. Bake time is 50 to 60 minutes — not every apple survives it intact.
| Apple Variety | Texture After Baking | Flavor | Use for This Recipe? |
|---|---|---|---|
| Granny Smith | Very firm | Tart | ✅ Best — holds shape, balances sweetness |
| Honeycrisp | Firm | Sweet-tart | ✅ Best — great flavor, holds well |
| Braeburn | Firm | Mildly spiced | ✅ Good option |
| Golden Delicious | Soft | Sweet | ⚠️ Use only in combination with a firmer variety |
| McIntosh | Very soft | Sweet-tart | ❌ Breaks down — avoid as the primary apple |
| Fuji | Firm | Very sweet | ⚠️ Use in combination — reduces perceived spice |
Best combination: 3 Granny Smith + 3 Honeycrisp. You get firm, defined slices, a balanced sweet-tart flavor, and a filling that sets without being dense.
Workaround if Honeycrisp is unavailable: Use 4 Granny Smith + 2 Braeburn. The result will be slightly more tart — add 1 extra tablespoon of sugar to compensate.
How to Make Apple Pie — Step by Step
Follow these steps in order. The single most important rule: keep every piece of butter cold until it hits the oven.
Step 1 — Combine Flour and Cold Butter
Cut cold butter into ½-inch cubes. Add to the flour and salt in a large bowl. Use a pastry cutter or your fingertips to press the butter into the flour until you have pea-sized pieces with some flat, irregular flakes throughout. Work quickly — the warmth of your hands is the enemy here.
What to look for: the mixture looks sandy and uneven, with clearly visible butter pieces. It should not look smooth or uniform.
Step 2 — Add Ice Water and Chill the Dough
Add ice water one tablespoon at a time, tossing with a fork after each addition. Stop the moment the dough holds together when you press a handful in your fist — typically 6 to 8 tablespoons total. Divide into two equal discs, wrap tightly in plastic wrap, and refrigerate for at least 1 hour.
What to look for: the dough feels slightly rough and shaggy. It holds together under pressure without sticking to your hands.
⚠️ Do not skip this chill. Warm dough shrinks and slides down the dish walls during baking. One hour is the minimum — chilling overnight gives you the easiest-to-roll dough and the least shrinkage.
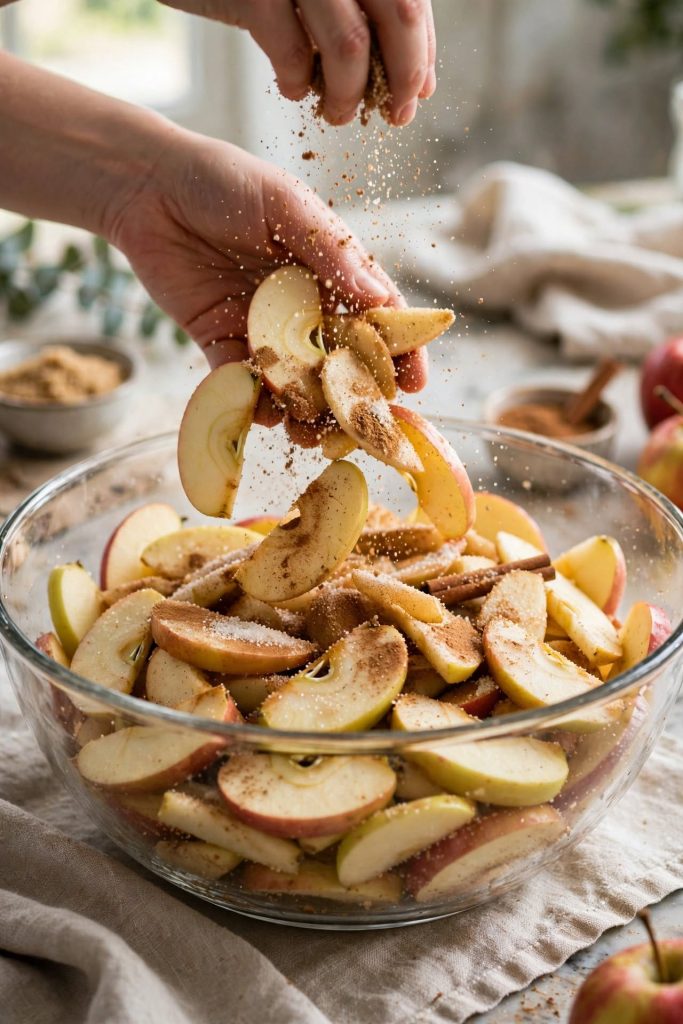
Step 3 — Prepare the Apple Filling
Peel, core, and slice apples to ¼-inch thickness. Toss with sugar, cornstarch, cinnamon, nutmeg, and lemon juice in a large bowl. Let the mixture rest for 20 minutes — a pool of liquid will collect at the bottom. Drain off this liquid completely before transferring the filling to the crust.
What to look for: the apples will look glossy and slightly translucent, coated in a spiced mixture. The pooled liquid in the bowl will be amber-colored and syrupy.
⚠️ Drain the liquid. That syrup is concentrated moisture — if it goes into the pie, it prevents the bottom crust from setting and produces a soggy base. Once comfortable with this technique, our guide to pastry fundamentals is worth bookmarking next.
Step 4 — Roll Out and Assemble
On a lightly floured surface, roll each chilled dough disc into a 12-inch circle, about ⅛-inch thick. Transfer the first circle to your pie dish, pressing gently into the base and sides. Let it hang slightly over the edge. Add the drained apple filling in an even layer, then dot the top with small pieces of butter.
What to look for: the bottom crust sits flush against the dish with no air pockets. The filling sits level or just below the rim.
Step 5 — Seal, Vent, and Egg Wash
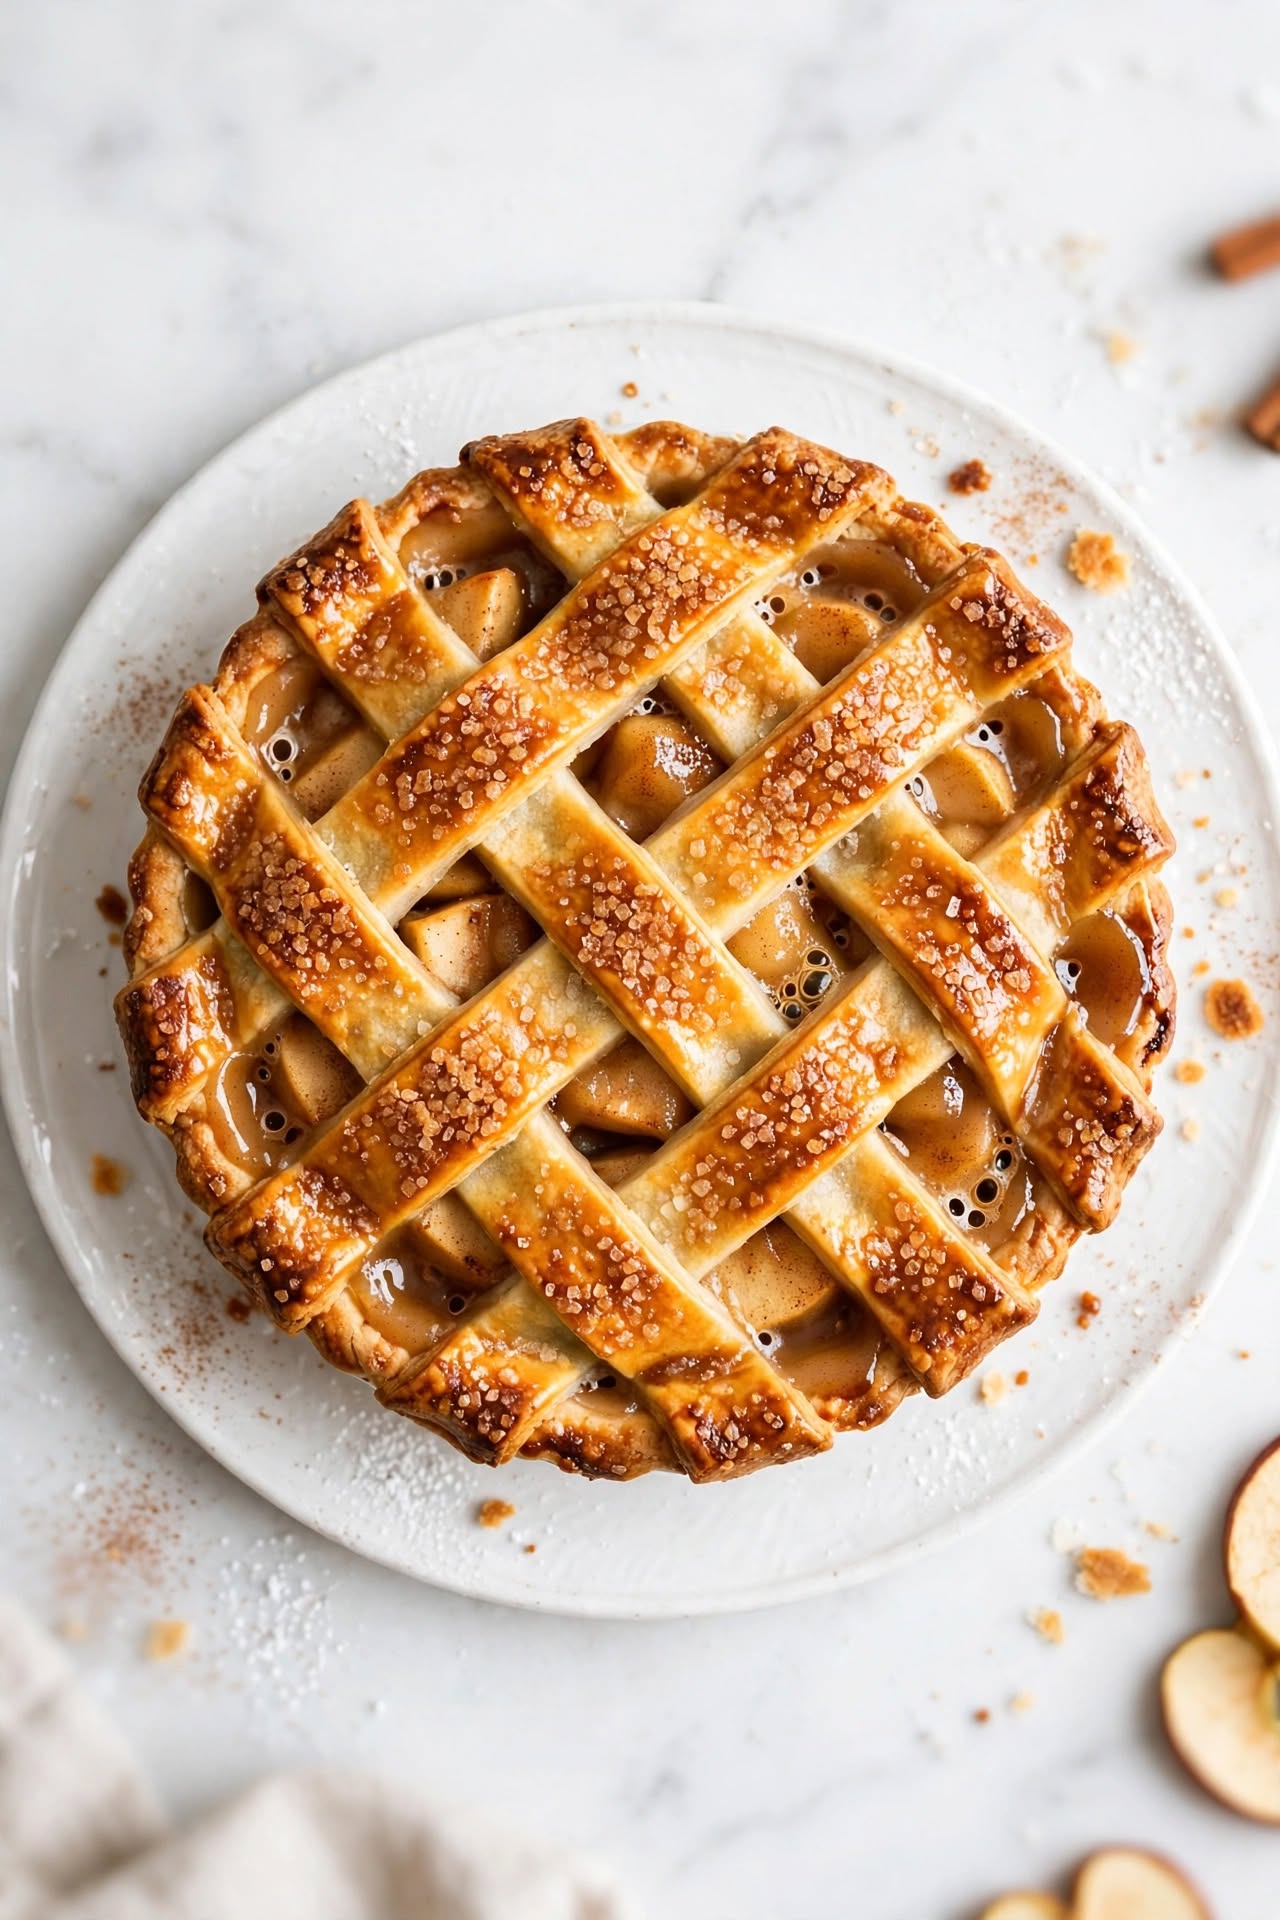
Lay the second dough circle over the filling. Fold the top crust edge under the bottom crust edge and crimp firmly to seal — press hard enough that the two layers bond. Cut 6 to 8 small slits in the top crust with a sharp knife. Beat one egg with 1 tablespoon of milk and brush it evenly over the entire surface. Sprinkle with coarse sugar.
What to look for: a glossy, evenly coated surface with clean, defined vents and firm crimping all the way around the edge.
Step 6 — Bake and Cool
Place the pie on a rimmed baking sheet to catch any drips. Bake at 425°F (220°C) for 20 minutes, then reduce heat to 375°F (190°C) and bake for an additional 30 to 40 minutes. The pie is done when the crust is deep golden all over and you can see the filling bubbling visibly through the vents. Cool on a wire rack for a minimum of 2 hours before slicing.
What to look for: deep amber crust color, visible steady bubbling at the vents, and a top that feels firm rather than hollow when lightly tapped.
The Science Behind a Perfect Apple Pie
A great result is not luck — it is the result of fat, starch, and temperature doing specific, predictable jobs inside the oven.
Why Cold Butter Gives You a Flaky Crust
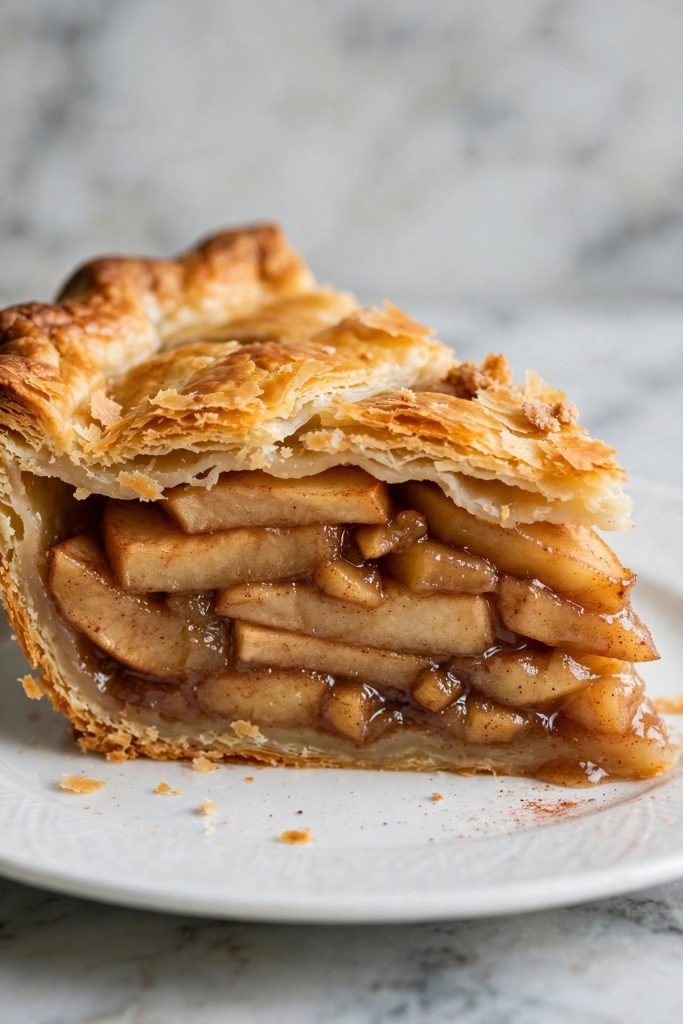
When cold butter pieces hit a hot oven, they release steam before they fully melt. That steam pushes the pastry apart layer by layer, creating the visible, shatter-and-flake texture of a good pie crust. Warm or fully blended butter melts before it can create steam — you get a crumbly, dense crust instead of layers.
Why You Toss the Apples in Sugar First
Sugar draws water out of the apple cells through osmosis. Resting the tossed apple slices for 20 minutes collects that moisture into a drainable pool — rather than having it steam and release under your crust during baking. This is the direct fix for a watery apple pie filling.
Why Resting the Dough Matters
Mixing develops gluten — the protein network that gives bread its chew. In pie pastry, gluten development is the enemy of tenderness. Chilling the dough allows those gluten strands to relax, which reduces shrinkage during baking and produces a more tender result. Never skip this step — a fresh, un-rested dough will contract the moment it hits heat.
Tips for the Best Result
These are the details that separate a good apple pie from one people ask you to make again.
- Freeze the butter for 15 minutes before use — the single fastest way to guarantee the cold temperature required for flakiness, particularly in a warm kitchen.
- Use a glass or ceramic dish, not metal — metal heats faster and can over-brown the bottom crust before the filling fully cooks. Glass lets you see the bottom color as it develops.
- Refrigerate the assembled pie for 20 minutes before baking — this re-chills the crust after rolling, reduces shrinkage, and gives you cleaner, crisper crimping.
- Tent with foil at 35 minutes if the crust edges are darkening too fast — every oven runs differently and edges are the first to over-brown. A tent takes 10 seconds and saves the crust.
- Drain the apple liquid every time — no exceptions — even when you are in a hurry. A watery filling is the most common complaint about homemade apple pie, and this single step prevents it entirely.
- Use coarse sugar on the egg wash — it bakes into a crisp, caramelized surface layer that adds texture contrast against the soft filling below.
- Make the crust dough the night before — cold, well-rested dough rolls out more evenly and is far easier to handle than same-day dough.
Common Mistakes to Avoid
These are the six mistakes that produce the most complaints about homemade apple pie — each with the exact fix.
❌ Using the Wrong Apple Variety
Result: Your filling turns to mush. Soft apple varieties break down completely during the 50-minute bake and you end up with a thick, sauce-like center rather than defined slices.
Fix: Use at least one firm-tart variety — Granny Smith is the most reliable choice available year-round.
❌ Skipping the Dough Chill
Result: The crust shrinks away from the edges during baking, slides down the sides, and loses its shape entirely.
Fix: Chill the dough for a minimum of 1 hour after mixing, and chill the fully assembled pie for at least 20 minutes before it goes into the oven.
❌ Overfilling the Pie Shell
Result: The filling bubbles over during baking, burns on the oven floor, and pushes the top crust up and away from the edge seal.
Fix: Keep the filling level at or just below the dish rim. Always bake on a rimmed baking sheet to catch overflow.
❌ Not Venting the Top Crust
Result: Steam builds up inside the pie, the top crust balloons away from the filling, and the filling becomes waterlogged beneath a puffed, under-baked crust.
Fix: Cut at least 6 slits in the top crust before it goes in the oven — or use a lattice design, which vents naturally.
❌ Slicing the Pie Too Soon
Result: The filling is still liquid when you cut — every slice collapses and the filling pools across the plate. This is the most common first-bake mistake with apple pie.
Fix: Cool for a minimum of 2 hours at room temperature. For the cleanest slices, refrigerate for 1 additional hour after cooling before cutting.
❌ Using Warm Butter in the Crust
Result: The pastry bakes up crumbly and dense with no visible layers and none of the flaky texture you are aiming for.
Fix: Return the butter to the freezer for 15 minutes if it has warmed during prep. There is no workaround for this — cold butter is not optional.
For more guides to solving common baking problems, our baking troubleshooting archive covers everything at the same level of detail.
Variations Worth Trying
Dutch Apple Pie (Crumble Topping)
Skip the top pastry crust and replace it with a streusel made from butter, brown sugar, flour, and oats. The topping adds a crunchy, caramelized layer and takes less time to make than rolling a second crust. The filling recipe stays exactly the same — only the top changes.
Caramel Apple Pie
Add 3 tablespoons of salted caramel sauce directly to the drained apple mixture before filling the crust. The caramel deepens the overall flavor and makes the filling slightly richer. Use 1 tablespoon less granulated sugar in the filling to keep the sweetness balanced.
Spiced Apple Pie with Cardamom
Add ¼ teaspoon of ground cardamom and a small pinch of black pepper to the filling alongside the cinnamon. The cardamom adds a floral warmth that makes the classic spice profile noticeably more complex — a good option when you want to serve something slightly different from the standard.
Apple Pear Pie
Replace 2 of the apples with firm Bosc pears, peeled and sliced to the same ¼-inch thickness. Bosc is the only pear variety that holds up to this bake time — do not use Bartlett or Anjou. Reduce the baking time by 5 minutes and use visible bubbling through the vents as your done signal rather than a set timer.
Mini Apple Hand Pies
Use the same dough and filling to make 8 individual hand pies. Cut the dough into 5-inch circles, add 2 tablespoons of filling per circle, fold in half, and crimp the edges firmly. Bake at 400°F (205°C) for 20 to 25 minutes until golden. Portable and well-suited to batch baking.
If batch baking is something you enjoy, our guide to baking in advance fits perfectly into that routine.
How to Store Apple Pie
Room Temperature
Apple pie keeps at room temperature for up to 2 days — loosely covered with foil or a clean kitchen towel. Do not wrap it airtight while warm, as this traps steam beneath the cover and softens the top crust.
Refrigerator
For up to 5 days, cover the pie dish loosely with foil and refrigerate. The crust will soften over time — bring slices to room temperature for 20 minutes before serving, or warm them in a 300°F (150°C) oven for 8 to 10 minutes to revive the crust texture.
Freezer — Complete Guide
Apple pie freezes well in two forms:
Baked pie: Cool completely — at least 3 hours. Wrap the whole pie tightly in two layers of plastic wrap, then one layer of foil. Freeze for up to 3 months. Thaw overnight in the refrigerator, then warm in a 350°F (175°C) oven for 15 to 20 minutes before serving.
Unbaked pie: Assemble the pie completely and freeze before baking. No need to thaw first — bake from frozen at 425°F (220°C) for 20 minutes, then 375°F (190°C) for 60 to 75 minutes, until the filling bubbles and the crust is deep golden. Freezing an unbaked pie and baking it straight from frozen typically produces a particularly crisp bottom crust.
How to Serve Apple Pie
Classic Ways to Serve
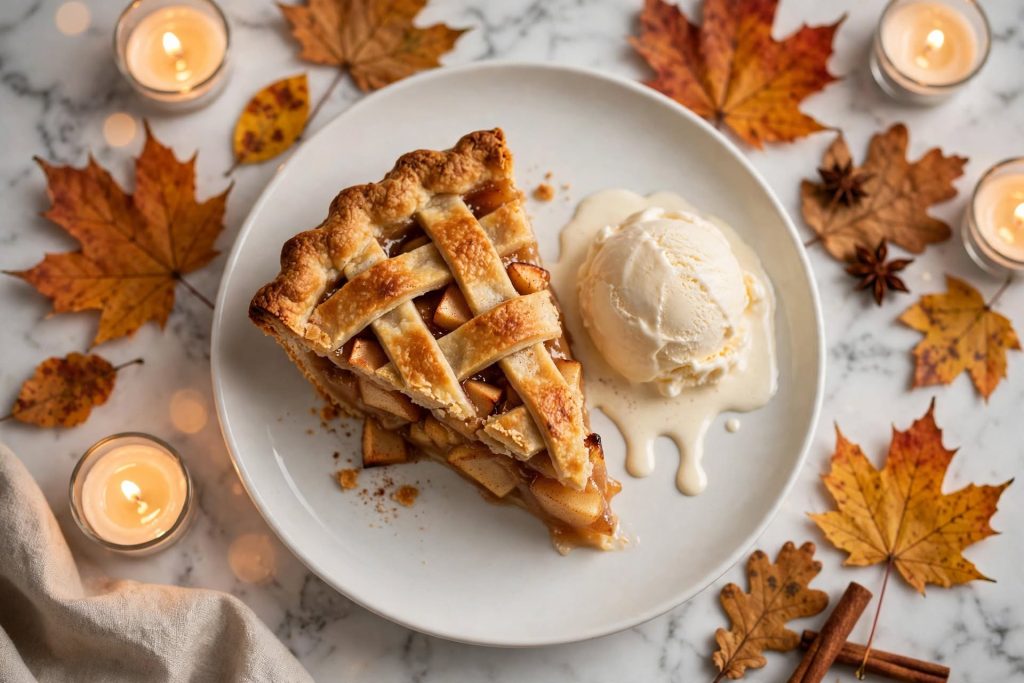
- With vanilla ice cream — the contrast between warm filling and cold ice cream is the most well-known pairing. Serve the pie warm, not piping hot straight from the oven.
- With freshly whipped cream — unsweetened or lightly sweetened. The fat in the cream cuts through the richness of the butter crust without competing with the spiced filling.
- Plain, at room temperature — a well-set filling at room temperature shows off the texture and spice profile more clearly than a hot slice, where the steam mutes the flavor.
Upgraded and Occasion-Worthy
- Warm salted caramel drizzle — added to each slice at the table, not baked in. Gives you the caramel flavor without changing the pie structure.
- Sharp cheddar cheese — a thin slice served alongside is a traditional pairing in parts of New England and the American Midwest. The saltiness and fat in the cheese balance the sweetness of the filling in a way that works better than it sounds.
- Cinnamon whipped cream — fold ¼ teaspoon of cinnamon into 1 cup of whipped cream before serving. It ties the spice profile of the filling back into the accompaniment.
Frequently Asked Questions
Can I Make Apple Pie Without a Homemade Crust?
Yes. A store-bought refrigerated pie crust produces a good result and is a practical choice for a first attempt. Homemade crust gives you better flavor, a flakier texture, and more control over thickness — but the filling method, the draining step, and the baking technique are identical either way.
Why Is My Apple Pie Filling Watery?
The most common cause is skipping the drain step. After you toss the apples in sugar and let them rest, a pool of concentrated liquid collects at the bottom of the bowl — that needs to come out before the filling goes into the crust. A second cause: slicing the pie before it has fully cooled. The filling is liquid at oven temperature and needs 2 full hours to set.
What Are the Best Apples for Apple Pie?
Granny Smith and Honeycrisp are the most reliable combination for a home-baked result. Granny Smith provides firmness and tartness; Honeycrisp provides sweetness and also holds its shape through the full bake time. Using only soft varieties such as McIntosh will result in a mushy, sauce-like filling.
Can I Make It Ahead of Time?
Yes — apple pie is one of the better make-ahead options for gatherings. Bake the pie up to 2 days in advance and store it loosely covered at room temperature. Reheat the whole pie in a 300°F (150°C) oven for 15 to 20 minutes before serving. Both the filling and the crust hold their texture through this process. If you enjoyed this recipe, our fall entertaining recipe collection is the next one worth making.
How Long Does Apple Pie Last?
At room temperature, up to 2 days. In the refrigerator, up to 5 days. In the freezer, a fully baked and tightly wrapped pie keeps for up to 3 months. Quality is best within the first 2 months of freezing.
Can I Freeze Apple Pie?
Yes — both baked and unbaked. For a baked pie, cool completely, then wrap tightly in two layers of plastic wrap and one layer of foil before freezing. For an unbaked pie, assemble it fully, freeze solid, then bake from frozen without thawing — bake at 425°F for 20 minutes, then 375°F for 60 to 75 minutes. The freezer guide in the storage section above covers both methods with exact temperatures.
What Can I Use Instead of Butter in the Crust?
Lard is the most direct substitute and produces an even flakier crust, though without the butter flavor. All-vegetable shortening gives a tender, neutral-flavored pastry. Vegan butter works at a 1:1 swap — use a brand with 80% fat content, as lower-fat versions add excess water to the dough and change the texture of the final pastry.
Can I Double the Recipe?
Yes — the filling scales directly with no adjustments needed. For the crust, make two separate batches rather than doubling in one bowl. The dough is difficult to mix evenly at large volume, and overworking develops gluten, which produces a tough pastry rather than a tender one.
Why Did My Crust Shrink During Baking?
The most common cause is skipping the dough chill. Chilling allows the gluten developed during mixing to relax. If you bake immediately after mixing, the gluten contracts in the oven and the crust pulls away from the dish walls. Minimum 1 hour in the refrigerator before baking. Chilling the assembled pie for 20 minutes before baking adds another layer of protection.
What Size Pie Dish Should I Use?
A standard 9-inch dish is the correct size for this recipe. A 10-inch dish works — the filling will be shallower and may cook 5 to 8 minutes faster. Do not use a deep-dish springform pan unless you have scaled the filling quantity upward to match the larger volume.
Why Is My Bottom Crust Soggy?
Three common causes: the apple liquid was not drained before assembly; the pie was not positioned on a lower rack during baking; or the crust was rolled too thin. A glass or ceramic dish lets you see the bottom crust color directly as it bakes. If the bottom is still pale when the top is golden, lower the rack by one position and continue baking until the base is evenly colored.
Can I Add Other Fruits to the Filling?
Yes — firm Bosc pears, fresh cranberries (up to ½ cup for tartness), or fresh quince are compatible additions. Soft fruits such as strawberries or peaches do not hold up to the full bake time. When adding berries or high-moisture fruit, reduce the cornstarch by 1 teaspoon and expect the filling to be slightly looser after cooling.

Ingredients
Method
- Mix flour, salt, and sugar. Cut in cold butter until pea-sized pieces form. Add ice water one tablespoon at a time until the dough just holds together. Divide into two discs, wrap in plastic, and chill for at least 1 hour.
- Peel, core, and slice apples to ¼-inch thickness. Toss with sugar, cornstarch, cinnamon, nutmeg, and lemon juice. Rest for 20 minutes, then pour off and discard all accumulated liquid.
- Preheat oven to 425°F (220°C). Roll one dough disc into a 12-inch circle and transfer to a 9-inch pie dish. Add the drained filling in an even layer. Dot with butter pieces.
- Roll the second dough disc and lay over the filling. Fold the top crust under the bottom crust edge and crimp firmly to seal. Cut 6 to 8 vents in the top. Brush with egg wash and sprinkle with coarse sugar.
- Place on a rimmed baking sheet. Bake at 425°F for 20 minutes. Reduce heat to 375°F (190°C) and bake 30 to 40 minutes more until deep golden and filling is bubbling through the vents.
- Cool on a wire rack for at least 2 hours before slicing. Do not rush this step.
Notes
More Baking Recipes
- Classic Pecan Pie
- Homemade Blueberry Pie
- Pumpkin Pie from Scratch
- Buttery Pie Crust — Standalone Guide
- Apple Crumble
Did you make this apple pie? Leave a ⭐⭐⭐⭐⭐ rating below and let me know in the comments how it turned out. I read every comment and would love to know what worked for you.