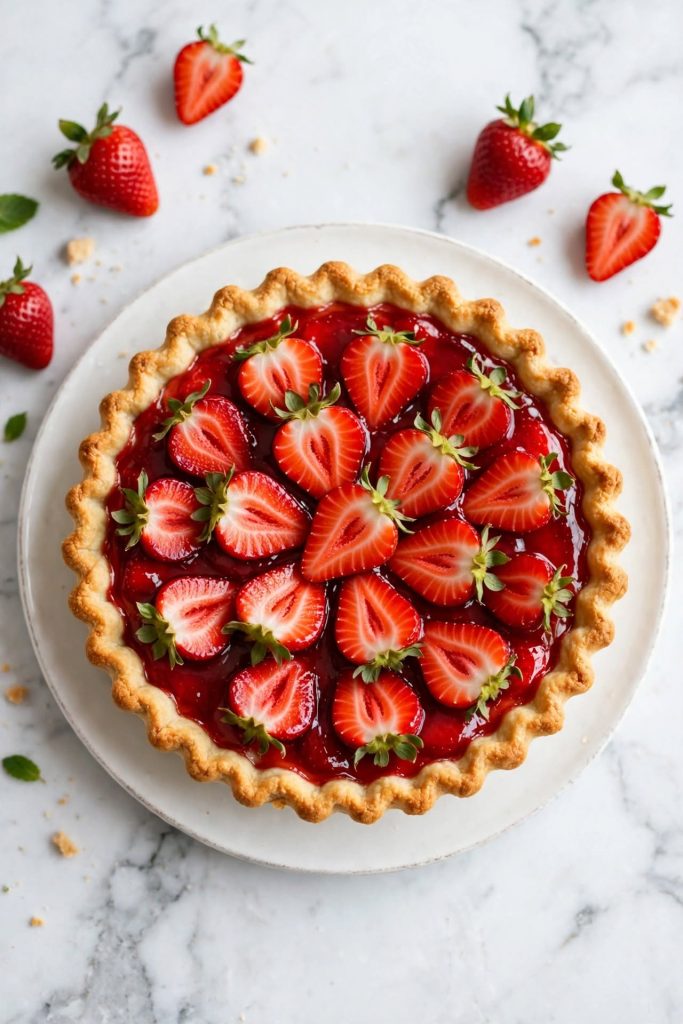
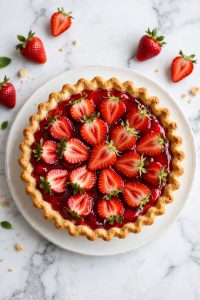
Strawberry pie is a chilled fresh-fruit dessert made with whole strawberries set in a homemade cornstarch glaze inside a pre-baked pie crust. It uses no Jello — just sugar, cornstarch, and lemon juice cooked into a glossy coating that firms up as it chills. Ready in under 30 minutes of active work. Best for anyone who wants a reliable, slice-ready fruit pie.
This strawberry pie gives you a clean slice every time — firm glaze, fresh berries, no runniness. It uses six ingredients and a pre-baked crust, which means the filling stays glossy and the base holds its texture without going soft. If your biggest worry is a soggy crust or a filling that pools on the plate, this method solves both problems before they start. The cornstarch glaze sets as it chills and keeps its shape from the first slice to the last. I tested this recipe six times across two strawberry seasons before publishing — the method here is the one that held up every time.
Why This Recipe Works
Most strawberry pie recipes leave you guessing. This one gives you measurable results at every stage — a glaze you can see set, a crust you can hear crisp, a slice that holds its shape on the plate.
- Cornstarch glaze instead of Jello — the homemade glaze sets firmer, tastes cleaner, and lets the fresh strawberry flavor lead without artificial sweetness cutting through.
- Pre-baked crust is built into the method — a blind-baked shell creates a moisture barrier that keeps the base dry and flaky even after 24 hours of refrigeration.
- Six ingredients total — no specialty items, no unusual equipment. Everything is available at any grocery store, and most of it is already in your pantry.
- Designed for any skill level — each step includes a visual cue so you know what to look for, not just what to do. No guesswork.
- Make-ahead reliable — the filling holds its shape for up to two days refrigerated, which makes this practical for dinner parties and summer gatherings where advance prep matters.
- Works with any size strawberry — halved berries fit tighter and give a cleaner top layer; quartered berries work well for larger fruit without changing the method.
If you are looking for more fresh fruit desserts, that collection is a good place to start.
Ingredients for Strawberry Pie
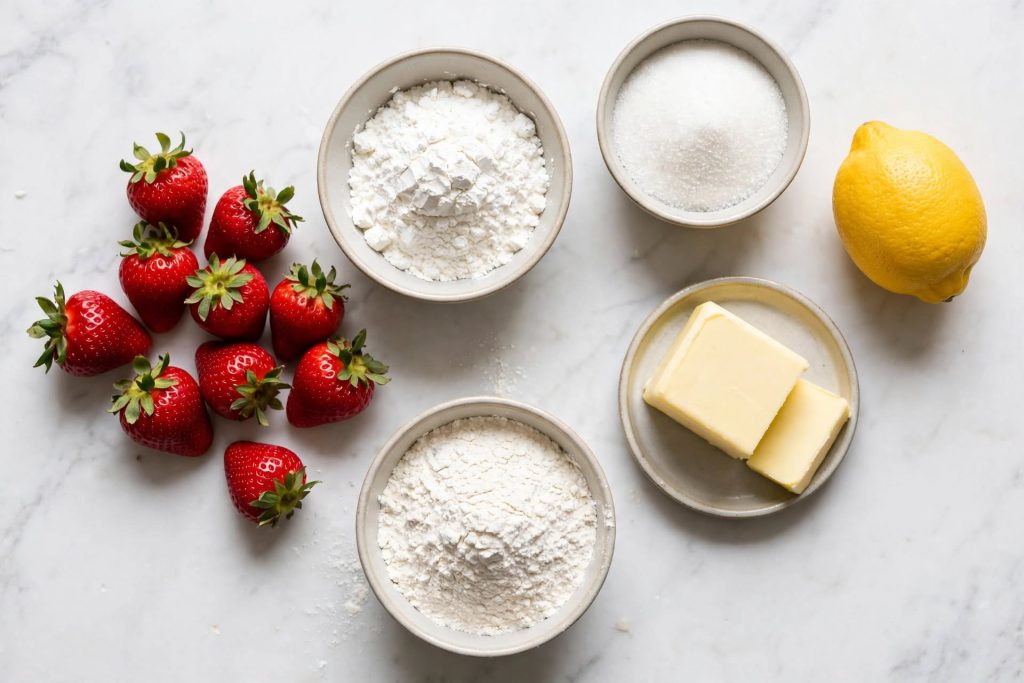
Every ingredient here has a specific job. Here is what each one does — and what to use if you need to make a substitution.
The Crust
| Ingredient | Amount | What It Does | Best Substitute + Impact |
|---|---|---|---|
| All-purpose flour | 1¼ cups | Provides structure and flakiness | Gluten-free 1:1 flour blend — slightly crumblier texture, press into dish instead of rolling |
| Cold unsalted butter, cubed | ½ cup (1 stick) | Creates flaky layers through steam pockets | Vegan butter — use solid, not soft, for a similar result |
| Cold water | 3 tablespoons | Hydrates the flour without developing gluten | Add 1 tsp at a time — do not overpour or the crust toughens |
| Salt | ¼ teaspoon | Balances flavor and controls gluten development | Do not skip — flavor falls flat without it |
| Sugar | 1 teaspoon | Light sweetness in the shell itself | Optional — leave out for a neutral, savory-style crust |
The Filling and Glaze
| Ingredient | Amount | What It Does | Best Substitute + Impact |
|---|---|---|---|
| Fresh strawberries | 2 lbs | Primary fruit — structure, flavor, and color | Frozen (thawed, thoroughly drained) — softer texture, less vivid color |
| Granulated sugar | ¾ cup | Sweetens and helps glaze reach gel temperature | Reduce to ½ cup for a less-sweet result — glaze will be marginally thinner |
| Cornstarch | 3 tablespoons | Thickens and sets the glaze firm | Arrowroot powder 1:1 — sets softer but still sliceable |
| Fresh lemon juice | 1 tablespoon | Brightens flavor and keeps glaze color vivid | White wine vinegar — works but adds a slight sharpness |
| Cold water | ½ cup | Carries the glaze and dissolves the cornstarch | No substitute needed |
Key Ingredient Notes
Strawberries: Use fresh berries at peak ripeness — bright red to the stem, firm enough to hold their shape when hulled. Pre-sliced or overly soft berries release excess moisture into the glaze and prevent a clean set.
Cornstarch: Whisk it into cold water before adding to the pan — adding dry cornstarch to hot liquid causes clumping and an uneven glaze. The cold slurry disperses evenly and gives you a smooth, glossy result.
Butter (for crust): Keep it cold until it goes into the dough. Warm butter coats the flour instead of creating separate layers — the result is a dense, cracker-like shell rather than a flaky one.
Equipment You Need
- 9-inch pie dish (ceramic or glass — conducts heat more evenly than metal for blind baking)
- Saucepan, 2-quart minimum
- Whisk
- Rolling pin
- Parchment paper and pie weights (dried beans or rice work)
- Pastry brush (optional, for egg wash on the crust edge)
The Strawberry Ripeness Guide
Strawberry ripeness is the single biggest factor in how your strawberry pie turns out. The same glaze recipe produces two completely different results depending on the berry you start with.
| Stage | Description | Use for This Recipe? |
|---|---|---|
| Underripe | Pale pink or white near the stem, firm, sour flavor | No — flavor reads sour against the sweet glaze, color is dull |
| Just ripe | Bright red to the stem, firm, balanced sweet-tart flavor | Best — holds shape, releases minimal water during chilling |
| Fully ripe | Deep red, highly fragrant, slightly soft when pressed | Yes — peak flavor, but hull quickly before they soften further |
| Overripe | Mushy, very dark, visibly leaking juice at the cut | No — the filling will not set and the crust will go soggy |
Workaround when ideal berries are not available: If your berries lean underripe, macerate them with 1 tablespoon of sugar for 20 minutes, drain the liquid completely, and pat dry. This concentrates flavor and draws out excess moisture before they go into the glaze.
Visual cue for “ideal”: Press a berry gently at its widest point. It should give very slightly without collapsing — that slight resistance is the texture you are looking for.
How to Make Strawberry Pie — Step by Step
Follow the steps in order. The glaze and the crust are prepared independently — both need to be fully cooled before they come together.
Step 1: Blind Bake the Crust
Roll the chilled dough into a 12-inch circle and press it into a 9-inch pie dish. Trim the overhang to ½ inch, fold it under, and crimp the edge with your fingers or a fork. Refrigerate for 20 minutes. Line with parchment paper, fill with pie weights, and bake at 375°F for 15 minutes. Remove the weights and parchment, then bake for another 10 to 12 minutes.
What to look for: The base should be golden and completely dry to the touch. A pale or shiny base means it needs more time — a damp-looking crust will soften the moment the filling goes in.
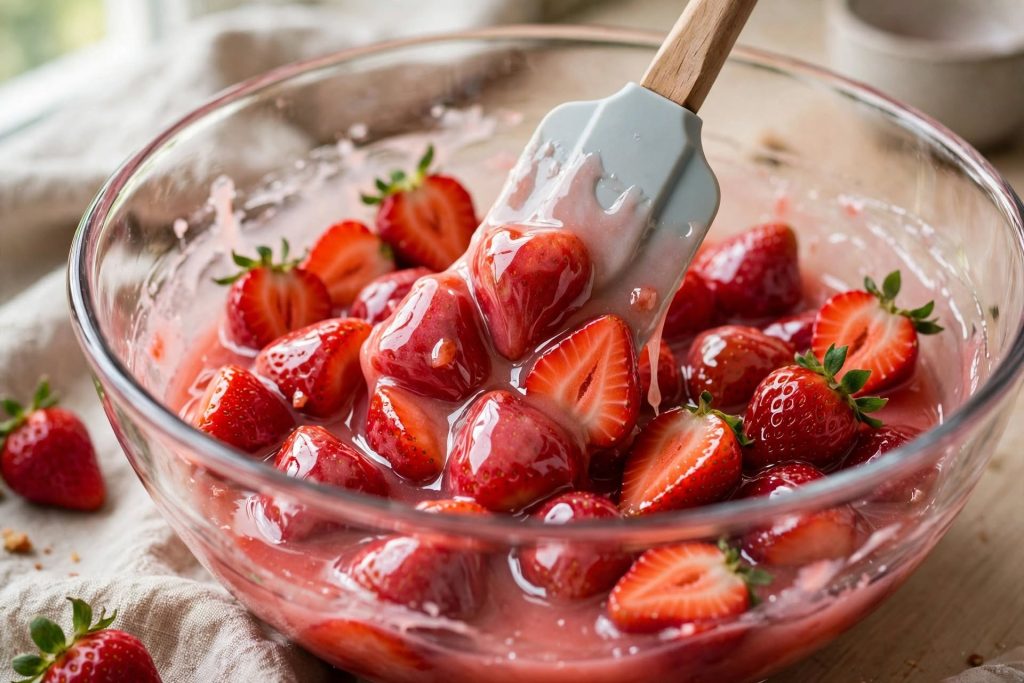
⚠️ Step 2: Cook the Cornstarch Glaze
Step 2: Cook the Cornstarch Glaze
Whisk the cornstarch into the cold water until fully dissolved — no dry streaks. Combine the dissolved cornstarch, sugar, and lemon juice in a saucepan over medium heat. Stir constantly as the mixture heats. The moment it shifts from cloudy white to translucent and thickens to a glossy, spoonable consistency, remove it from the heat immediately.
What to look for: The glaze should coat the back of a spoon cleanly and hold a line when you run your finger through it. If it slides off thin, cook for 1 to 2 more minutes — then test again. Overcooking past this stage can cause the gel to break down.
Once you are comfortable with this method, homemade fruit glaze techniques is worth trying next.
Step 3: Hull and Halve the Strawberries
Hull and halve the berries lengthwise. Lay them cut-side down on a clean kitchen towel and pat completely dry — any surface moisture prevents the glaze from coating evenly and dilutes the set.
What to look for: No visible water on the cut surface before the berries go into the glaze. If the towel is wet, switch to a dry section and pat again.
⚠️ Step 4: Coat the Berries and Fill the Crust
Step 4: Coat the Berries and Fill the Crust
Let the glaze cool for 5 to 8 minutes off the heat before adding the berries — hot glaze begins to cook the cut surface of the strawberries, which softens them within hours and gives the filling a stewed rather than fresh texture. Fold the dried berries gently into the warm glaze until every one is coated. Pour the mixture into the cooled baked crust and arrange the top layer cut-side down for a clean, jewel-like finish.
What to look for: Every berry should carry a thin, glossy coating. Dry patches mean those berries were not fully folded — return them to the bowl and coat again before filling.
Step 5: Chill Until Set, Then Serve
Refrigerate the pie uncovered for a minimum of 3 hours before slicing. Four to six hours gives you the cleanest cut — the cornstarch gel continues to strengthen as the temperature drops. Cover loosely with plastic wrap after the first hour if the pie will sit longer than 6 hours.
What to look for: Press the top of the filling gently at the center. If it springs back firmly, the glaze is set. If it yields and feels soft, return it to the refrigerator for another 30 to 60 minutes.
The Science Behind a Firm, Glossy Filling
Understanding why each component works means you can troubleshoot on the fly rather than wondering what went wrong after the pie is already on the table.
Why Cornstarch Controls the Set
Cornstarch is a pure starch — when you heat it with liquid and sugar, the starch granules absorb water and swell, creating a gel network that traps liquid in place. Undercook it and the network stays weak — the result is a runny filling that pools on the plate the moment you slice. Overcook it past translucency and the network can break down and weep, releasing liquid back out. The target window is clear: cook until the mixture turns translucent and holds a clean line on the back of a spoon, then stop. That is the gel at its strongest point.
Why Lemon Juice Brightens the Flavor
Fresh strawberries lose some of their natural acidity when combined with a large amount of sugar. Lemon juice restores that balance — it sharpens the flavor so the pie tastes bright rather than flat-sweet. It also interacts with the cornstarch to keep the glaze clear and glossy rather than cloudy. Without it, the filling can taste one-dimensional and the glaze appears slightly murky in color.
Why Chill Time Matters
The cornstarch gel continues to strengthen as it cools — the molecular bonds in the starch network tighten at lower temperatures. A homemade strawberry pie sliced at the 1-hour mark will be soft at the center and difficult to cut cleanly. At 4 hours, the gel is fully set and the slice will hold its shape from pie dish to plate. Overnight refrigeration gives you the firmest, most cleanly sliceable result of all.
Tips for the Best Result
These are the details that separate a pie that photographs well from one that holds up for a second day in the refrigerator.
Choose Strawberries at Peak Ripeness
Look for berries that are uniformly red to the tip of the stem — no white shoulders, no soft spots. Berries with white near the stem are under-flavored and taste sour against the sweet glaze. Farm-stand or locally grown in-season berries produce a noticeably brighter filling than out-of-season supermarket fruit. If you are buying in bulk, check a few from the bottom of the container — they tend to hide the softest berries there.
Let the Glaze Cool Before Adding Berries
Add berries to warm glaze — not hot. Hot glaze starts to cook the cut surface of the berries, softening them within a few hours and shifting the filling texture from fresh-fruit to stewed-fruit. Five to eight minutes off the heat is all the cooling you need — the glaze stays pourable and coats evenly, but it is no longer cooking the fruit.
Always Use a Pre-Baked Crust
A raw crust baked with a wet filling will go soggy within 2 hours — sometimes less. Blind baking the shell first creates a firm, dry barrier that prevents moisture from penetrating the base. This step is not optional; it is the reason the crust stays crisp and sliceable even after a full day in the refrigerator. For an additional barrier, brush the hot baked crust with a thin layer of melted white chocolate immediately after it comes out of the oven and let it set before filling.
Dry Your Strawberries Thoroughly Before Coating
Surface water from washing dilutes the glaze on contact and creates thin, uneven coverage — the coating slides off rather than adhering. After washing, lay the berries cut-side down on a clean towel for at least 5 minutes. The difference in coating adhesion is visible: properly dried berries pick up a thick, jewel-bright layer; wet ones get a thin, watery film that slides off.
Slice Just Before Serving
Cornstarch-thickened glazes hold their set well in a whole pie, but a sliced pie begins releasing small amounts of moisture from the exposed cut surfaces. Slice as close to serving as possible — within 15 to 20 minutes — for the cleanest presentation. Run the knife under hot water, wipe dry, and use one clean downward motion rather than sawing.
Scaling the Recipe Up
This recipe fills a standard 9-inch pie dish. For a 10-inch dish, increase all filling ingredients by 25%. For a deep-dish 9-inch, increase by 30% and add 30 minutes to the minimum chill time. Scale the crust independently — a 10-inch crust needs 1½ cups flour and 6 tablespoons butter.
Common Mistakes to Avoid
These are the six errors that account for the vast majority of runny, soggy, or flavor-flat results.
❌ Using Overripe or Underripe Strawberries
Overripe berries release excess water into the glaze and prevent it from setting. Underripe berries are sour and pale — they drag down the entire flavor of the pie. Both produce a filling that will not hold its shape at the table. Neither can be fixed after assembly. Select your berries carefully at the store; check the bottom of the container and smell for a strong, sweet fragrance before buying.
For more guides like this one, fresh fruit dessert troubleshooting covers everything in the same detail.
❌ Adding Berries to Hot Glaze
Hot glaze cooks the berries and makes them mushy within a few hours. The texture shifts from fresh-fruit to stewed-fruit — the strawberries lose their structural integrity and the filling becomes dense rather than light and clean. The fix is simple: time it. Pull the glaze off the heat, set a 6-minute timer, and add the berries when the timer goes off.
❌ Skipping the Chill Time
Cutting into a homemade strawberry pie before the glaze is fully set gives you soup, not slices. The cornstarch gel needs at least 3 hours of cold refrigeration to reach its full strength. Four hours is better. Overnight is ideal for the cleanest cut. If you are making it for a specific event, build the 4-hour chill into your prep schedule the day before.
❌ Using an Underbaked Crust
A pale, partially cooked crust absorbs moisture from the filling immediately — within two hours you have a soft, wet base that sticks to the pie dish and crumbles when sliced. Bake the shell until it is golden and dry all the way through. If it puffs during blind baking, press it gently back down with the back of a spoon before removing the weights.
❌ Not Drying the Strawberries First
Surface water from washing dilutes the glaze on contact and creates a thin, watery coating that does not grip the fruit. Properly dried berries hold a thick, glossy layer through refrigeration. Wet ones develop a film that slides off and pools at the bottom of the crust. This is a 5-minute step that changes the visual and structural result significantly.
❌ Cutting the Pie Too Early
Set a timer and put the pie in the refrigerator. Three hours minimum — but do not rely on estimates. Press the center of the filling at the 3-hour mark. If it springs back, it is ready. If it yields softly, give it another 30 minutes. A pie cut too early will have a semi-liquid center and an uneven slice that falls apart before it reaches the plate.
Variations Worth Trying
Each of these changes one or two things about the base recipe — the core method stays the same.
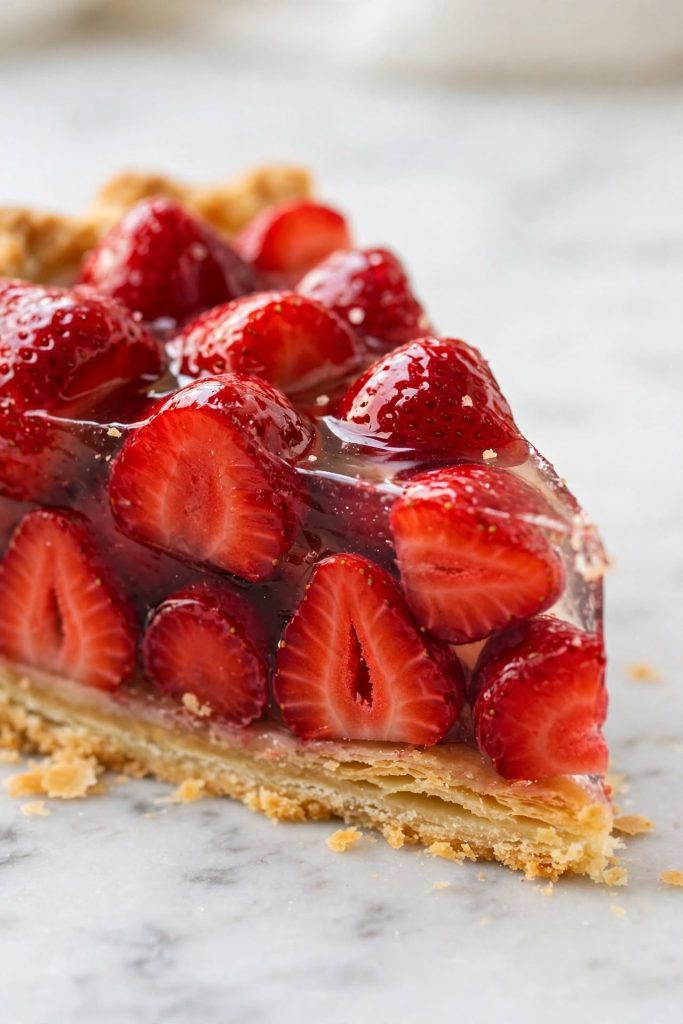
Chocolate Drizzle Strawberry Pie
What changes: Melt 2 oz of dark chocolate with 1 teaspoon of coconut oil. Drizzle over the fully set pie immediately before serving.
When: After the 4-hour chill, just before plating.
Result: Bitter chocolate threads against sweet berries — a contrast that works especially well with a buttery, salted crust. The drizzle sets quickly in the cold and adds a visual texture to the top layer.
Strawberry Cream Cheese Pie
What changes: Beat 4 oz of cream cheese with 2 tablespoons of sugar and 1 teaspoon of vanilla until smooth. Spread this layer over the base of the cooled baked crust before adding the glazed berries.
When: Between Step 1 (crust) and Step 4 (filling) — the cream cheese goes in first, filling goes on top.
Result: A denser, richer slice with a tangy base that complements the bright berry layer. The cream cheese also acts as an additional moisture barrier between the crust and the glaze.
Gluten-Free Version
What changes: Substitute the all-purpose flour in the crust with a 1:1 gluten-free flour blend (King Arthur or Bob’s Red Mill work well).
When: At the crust-making stage — the filling is naturally gluten-free.
Result: Slightly crumblier and more delicate than the standard crust — press it into the dish rather than rolling it for better results. The flavor holds very well.
Mini Strawberry Tarts
What changes: Use a standard 12-cup muffin tin instead of a pie dish. Press dough rounds into each cup, blind bake at 375°F for 10 minutes, then fill with the same glaze and berries (cut the strawberries smaller — about ½-inch pieces).
When: Blind baking and assembly stages.
Result: Individual portions that set faster (2 hours) and are easier to serve at parties without slicing. The crust-to-filling ratio is higher, which some people prefer.
Strawberry Rhubarb Pie
What changes: Replace ½ lb of strawberries with ½ lb of chopped rhubarb (¼-inch pieces). Cook the rhubarb directly with the sugar and cornstarch mixture — it will soften and blend into the glaze over 8 to 10 minutes.
When: During the glaze-cooking stage — the rhubarb goes into the pan with the sugar and cornstarch.
Result: A tarter, more complex filling with a deep pink-red color and a sharper fruit flavor. The rhubarb breaks down into the glaze and adds body, while the remaining strawberries provide texture.
How to Store
Fresh strawberry pie has a shorter shelf life than baked pies — the berries are raw and the glaze is set, not cooked through. Plan accordingly.
Room Temperature
Strawberry pie does not hold well at room temperature for extended periods. The glaze softens and the crust begins to absorb moisture from the filling after about 1 to 2 hours at room temperature. At a summer gathering, this is a quality window — not a food safety deadline. Cover the pie loosely if it will sit out during a meal, and return it to the refrigerator as soon as serving is done.
Refrigerator
Store the pie loosely covered with plastic wrap or foil — not sealed airtight, which can cause condensation to drip onto the filling. Best quality for up to 2 days from the day the pie was made. Beyond the 2-day mark, the strawberries begin to break down and release additional moisture into the glaze, softening the set. The crust also softens noticeably by day 2, though the filling remains flavored well. Remove from the refrigerator 10 minutes before serving — cold pie straight from the fridge tastes less sweet because low temperature suppresses flavor perception.
Freezer — Complete Guide
Strawberry pie can be frozen, but the texture changes significantly on thawing. The berries soften because their cell walls break down in the freeze-thaw cycle, and the glaze can weep slightly. If freezing is necessary: freeze individual slices rather than the whole pie. Place slices uncovered on a parchment-lined tray for 1 hour until solid, then wrap each one in plastic wrap and seal in a freezer bag. Best quality for up to 1 month. To thaw, move slices to the refrigerator overnight — do not thaw at room temperature, which speeds breakdown. Expect a softer texture and slightly more liquid at the base compared to a fresh-made slice. Use your judgment — if it smells off or shows any mold after thawing, discard it.
If batch baking and make-ahead desserts fit your routine, make-ahead summer desserts fits perfectly into that schedule.
How to Serve
A clean, well-set slice of this homemade strawberry pie stands up on its own — but a few simple additions change who it works for.
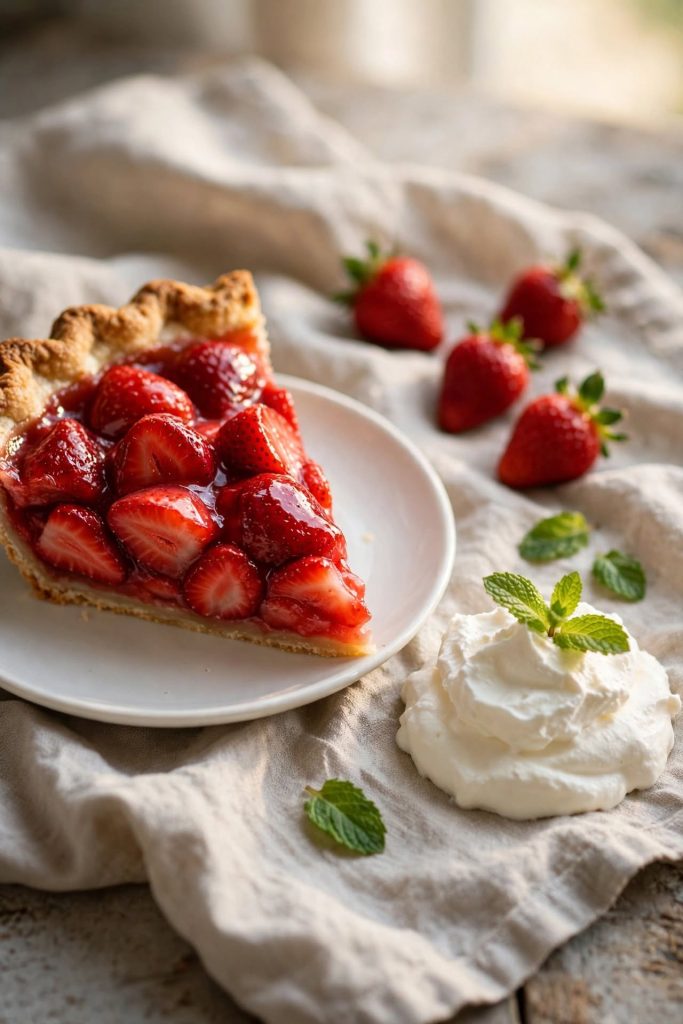
Classic Ways to Serve
- A plain slice straight from the refrigerator — the glaze is the garnish
- A slice with a spoonful of freshly whipped cream on the side
- A slice with a scoop of vanilla ice cream — the cold cream contrasts the bright berry flavor
Upgraded and Occasion-Worthy
- Topped with sweetened mascarpone whipped cream and a fresh mint leaf for dinner parties
- Plated in mini tart form (see Variations) for a tea party or bridal shower where individual portions matter
- Finished with a thin drizzle of white balsamic reduction for a bistro presentation that looks more complex than it is
Pairs well with: Strong black coffee, chamomile tea, or a lightly chilled Prosecco.
Best occasion: Summer gatherings, potlucks, and dinner parties where you need a make-ahead dessert that travels well and holds up without any last-minute assembly.
Frequently Asked Questions
Can I Make Strawberry Pie Without Jello?
Yes — this recipe uses no Jello at all. The filling is set with a homemade cornstarch glaze made from sugar, cornstarch, lemon juice, and water. The result is a cleaner, fresher flavor with no artificial color or sweetness. The glaze sets just as firm as a Jello-based version when cooked correctly — most people prefer the flavor of the cornstarch version once they have tasted both side by side.
Why Did My Strawberry Pie Turn Out Runny?
The most common reason is undercooking the glaze. The cornstarch needs to reach a translucent, glossy, spoonable consistency before it is removed from the heat — if pulled off too early, the gel network is incomplete and the filling flows rather than holds. Wet strawberries are the second most common cause — surface water from washing dilutes the glaze on contact. Pat every berry completely dry before adding it to the bowl.
How Do I Know When the Filling Is Ready?
The filling is ready when the glaze is fully set and no longer jiggles at the center of the dish. Press the top gently with one finger — it should feel firm and spring back slightly, not yield or stay dented. After a minimum of 3 hours of refrigeration, also run a thin knife along the inner edge of the crust before slicing — this loosens any filling that set against the dish and makes for a cleaner first slice.
Can I Make This Ahead of Time?
Yes — homemade strawberry pie is an excellent make-ahead dessert. You can make it up to 24 hours before serving. The filling holds its shape well and the flavor actually improves slightly after overnight refrigeration, as the berries have more time to absorb the glaze. Assemble the pie, cover loosely with plastic wrap, and refrigerate. Do not slice until ready to serve — the whole pie holds its set better than cut portions.
How Long Does Strawberry Pie Last?
Best quality for up to 2 days in the refrigerator, loosely covered. Beyond 2 days, the berries begin to break down and release additional moisture into the glaze, softening the set and making the crust noticeably wetter. Use your judgment — if the filling has separated, the crust smells off, or any mold is visible, discard it. Do not leave the pie at room temperature for more than 2 hours at a stretch.
Can I Freeze Strawberry Pie?
You can, but the texture changes significantly. The berries soften on thawing and the glaze can weep slightly. Freeze individual slices on a parchment-lined tray until solid (about 1 hour), then wrap in plastic and seal in a freezer bag. Best quality within 1 month — thaw overnight in the refrigerator. If you enjoyed this recipe, fresh fruit tart recipes is the next one worth making.
What Can I Substitute for Cornstarch?
Arrowroot powder works as a 1:1 substitute — same amount, same method. The glaze sets slightly softer and is more transparent in color, but the result is still sliceable and holds its shape. Tapioca starch also works in the same ratio. Flour is not recommended — it produces a cloudy, starchy-tasting glaze that dulls the bright color and flavor of the strawberries significantly.
Can I Double This Recipe?
Yes — double all ingredients and use two 9-inch pie dishes, or scale the filling up by 30% for a large 11-inch dish. Cook the glaze in a larger saucepan and allow extra time for it to thicken — the larger volume typically takes 3 to 4 additional minutes to reach the translucent, spoonable consistency you are looking for. Chill time remains the same. Make both pie shells separately for best results rather than trying to crowd one large pan.
Why Did My Crust Go Soggy?
Almost always caused by skipping the blind bake. A raw or under-baked crust has no moisture barrier — the wet glaze soaks straight through within hours. Blind bake the crust until it is golden and dry before adding any filling. For extra insurance, brush the hot crust with a thin layer of melted white chocolate immediately after it comes out of the oven and let it set completely (about 5 minutes) before the filling goes in. The chocolate creates a water-resistant seal without affecting the flavor.
What Size Pie Dish Should I Use?
A standard 9-inch pie dish is the right size for this recipe. Ceramic or glass dishes distribute heat more evenly than metal for blind baking, which gives you a crust that bakes uniformly rather than burning on the bottom while the edges stay pale. A deep-dish 9-inch dish can be used — increase all filling ingredients by 30% and add 30 minutes to the minimum chill time to account for the greater depth of filling.
Can I Use Frozen Strawberries?
You can use frozen strawberries, but the result differs noticeably from fresh. Frozen berries release significantly more water when thawed — drain them in a colander for 20 minutes, then pat completely dry before using, or the extra liquid will prevent the glaze from setting. The texture of thawed berries is softer and the color is less vivid. Fresh strawberries at peak ripeness are the right choice for this recipe when they are in season; frozen is an acceptable substitute for off-season baking when fresh are not available.
Can I Add Other Fruits?
Yes — blueberries and raspberries both work well alongside strawberries in the same cornstarch glaze. Add them at the same stage as the strawberries, after the glaze has cooled to warm. Keep the strawberry proportion at 60% minimum so the flavor profile and glaze balance hold. Fruits with very high water content — watermelon, fresh citrus segments, kiwi — are not suitable and will dilute the glaze too much to allow it to set.
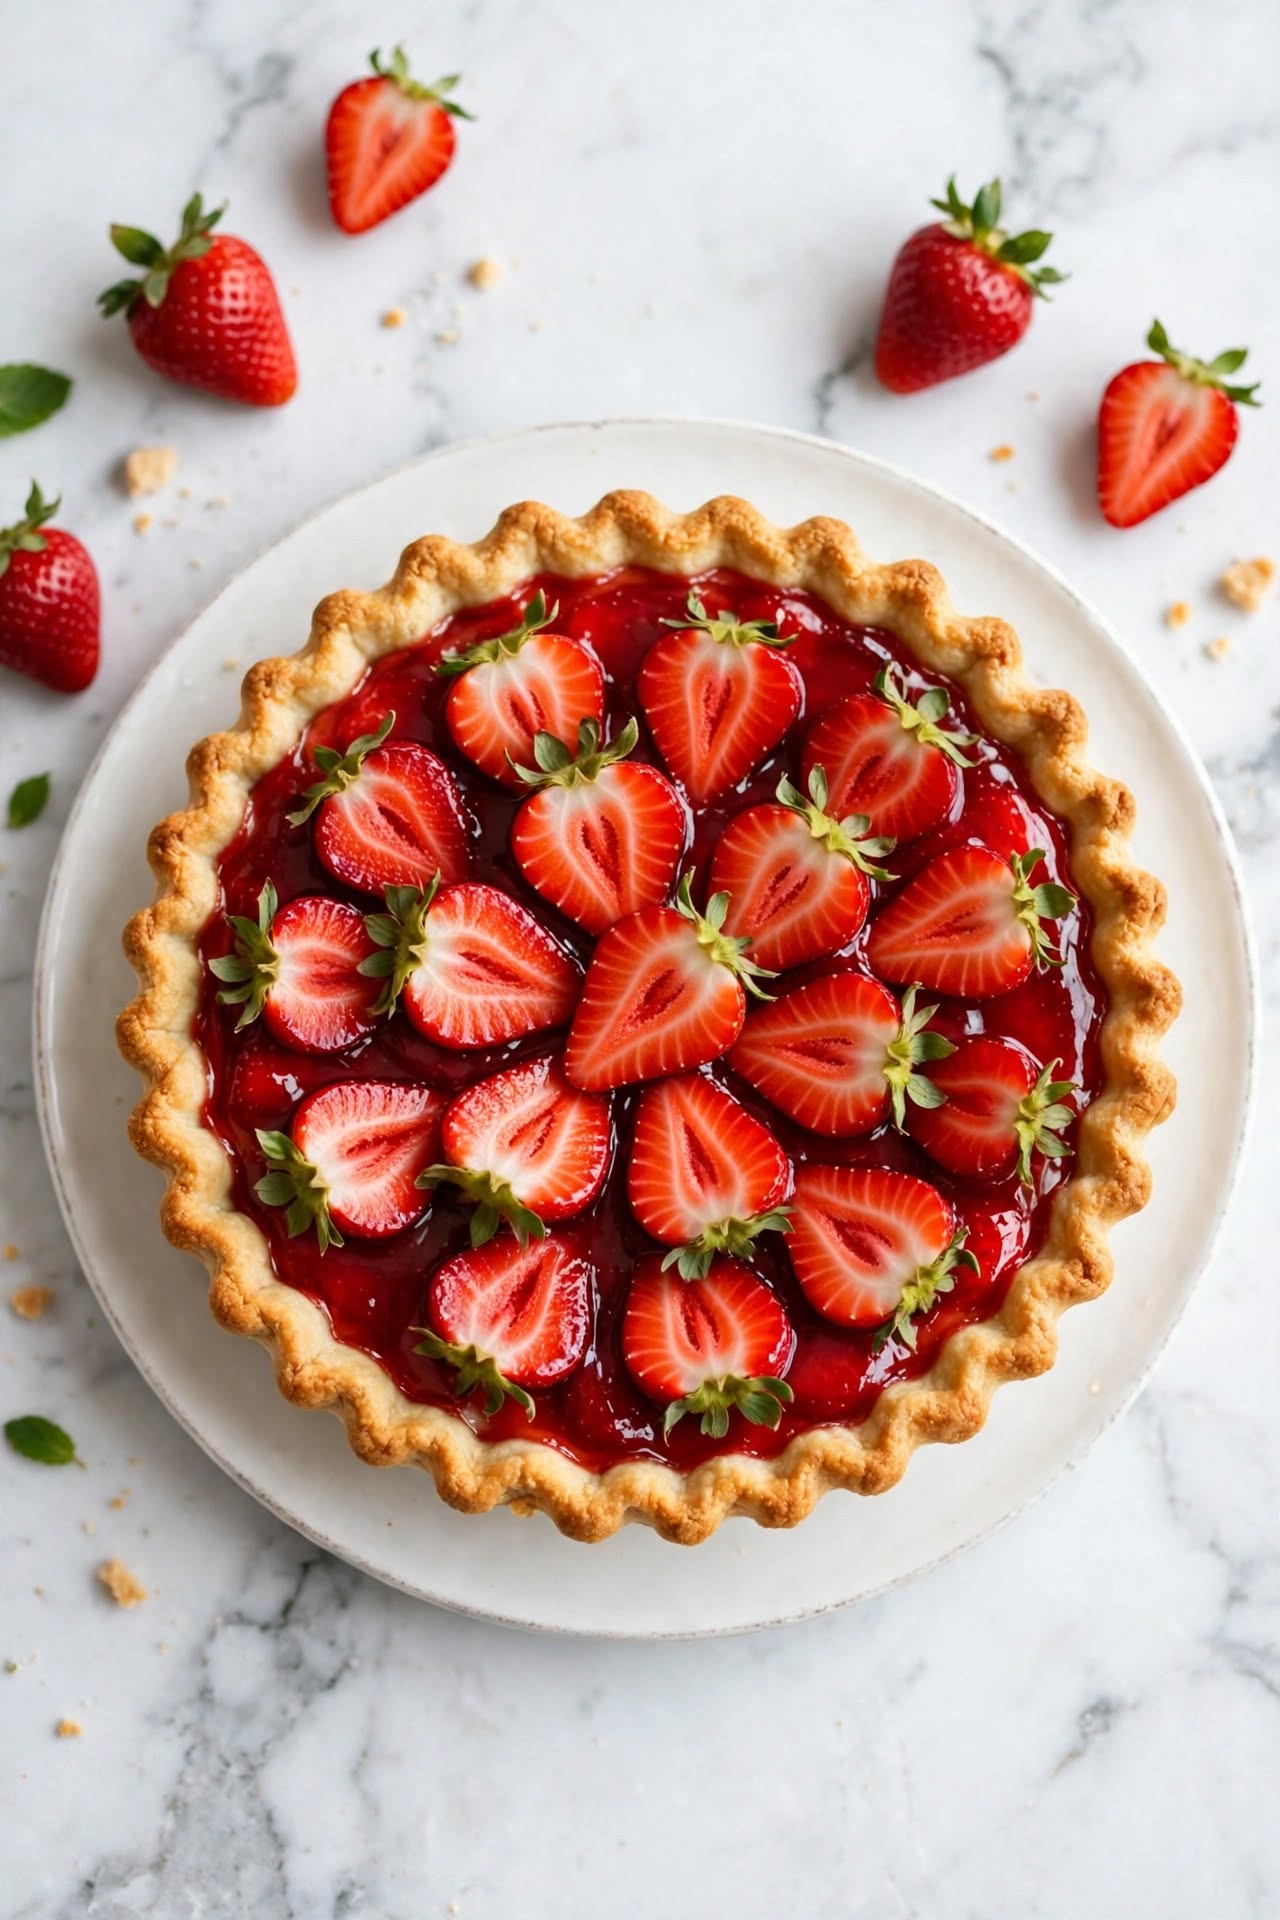

Strawberry Pie
Ingredients
Method
- Make the crust. Combine flour, salt, and sugar. Cut cold butter into the flour using a pastry cutter or two forks until the mixture resembles coarse crumbs. Add cold water one tablespoon at a time, mixing just until the dough comes together. Shape into a disk, wrap, and refrigerate for 30 minutes.
- Blind bake. Preheat oven to 375°F. Roll dough into a 12-inch circle and press into a 9-inch pie dish. Trim and crimp the edge. Line with parchment and fill with pie weights. Bake 15 minutes, remove weights, bake another 10 to 12 minutes until golden and dry. Cool completely.
- Cook the glaze. Whisk cornstarch into ½ cup cold water until dissolved. Combine with sugar and lemon juice in a saucepan over medium heat. Stir constantly until the mixture turns translucent and thickens to a glossy, spoonable consistency — typically 6 to 8 minutes. Remove from heat.
- Prep the berries. Hull and halve the strawberries. Pat completely dry with a clean towel — no surface moisture should remain.
- Fill the pie. Let the glaze cool for 5 to 8 minutes. Fold the dried strawberries gently into the warm glaze until every berry is coated. Pour into the cooled crust and arrange the top layer cut-side down.
- Chill and serve. Refrigerate uncovered for a minimum of 3 hours, ideally 4 to 6 hours. Slice just before serving — run the knife under hot water and wipe dry for the cleanest cut.
Notes
- If your strawberries are under-ripe, macerate with 1 tablespoon of sugar for 20 minutes, drain the liquid, and pat dry before using.
- Do not skip blind baking the crust — this single step keeps the base dry and sliceable.
- Cornstarch can be swapped 1:1 with arrowroot powder — the glaze sets slightly softer but holds.
- For an extra crust moisture barrier: brush the hot baked crust with a thin layer of melted white chocolate and let set before filling.
- Best quality within 2 days refrigerated. The filling holds well; the crust softens slightly by day 2.
Nutrition (per slice, approximate)
More Dessert Recipes You Will Love
- “Classic Blueberry Pie” — uses the same blind-bake crust method with a spiced berry filling that sets just as firm, and slices just as cleanly.
- “No Bake Lemon Cheesecake” — six ingredients, no oven, ready after one night of chilling. The lemon flavor is bright against the cream cheese base.
- “Fresh Peach Galette” — a free-form pastry that skips the pie dish entirely and works with any stone fruit at peak season.
- “Strawberry Shortcake with Biscuits” — the same peak-season berries used differently, layered with whipped cream over a flaky biscuit base.
- “Cherry Pie with Lattice Crust” — the lattice technique explained step by step, with a cornstarch-thickened filling that holds a clean, jewel-colored slice.
Did you make this strawberry pie? Leave a ⭐⭐⭐⭐⭐ rating below and let me know in the comments how it turned out. I read every comment and would love to know what worked for you.