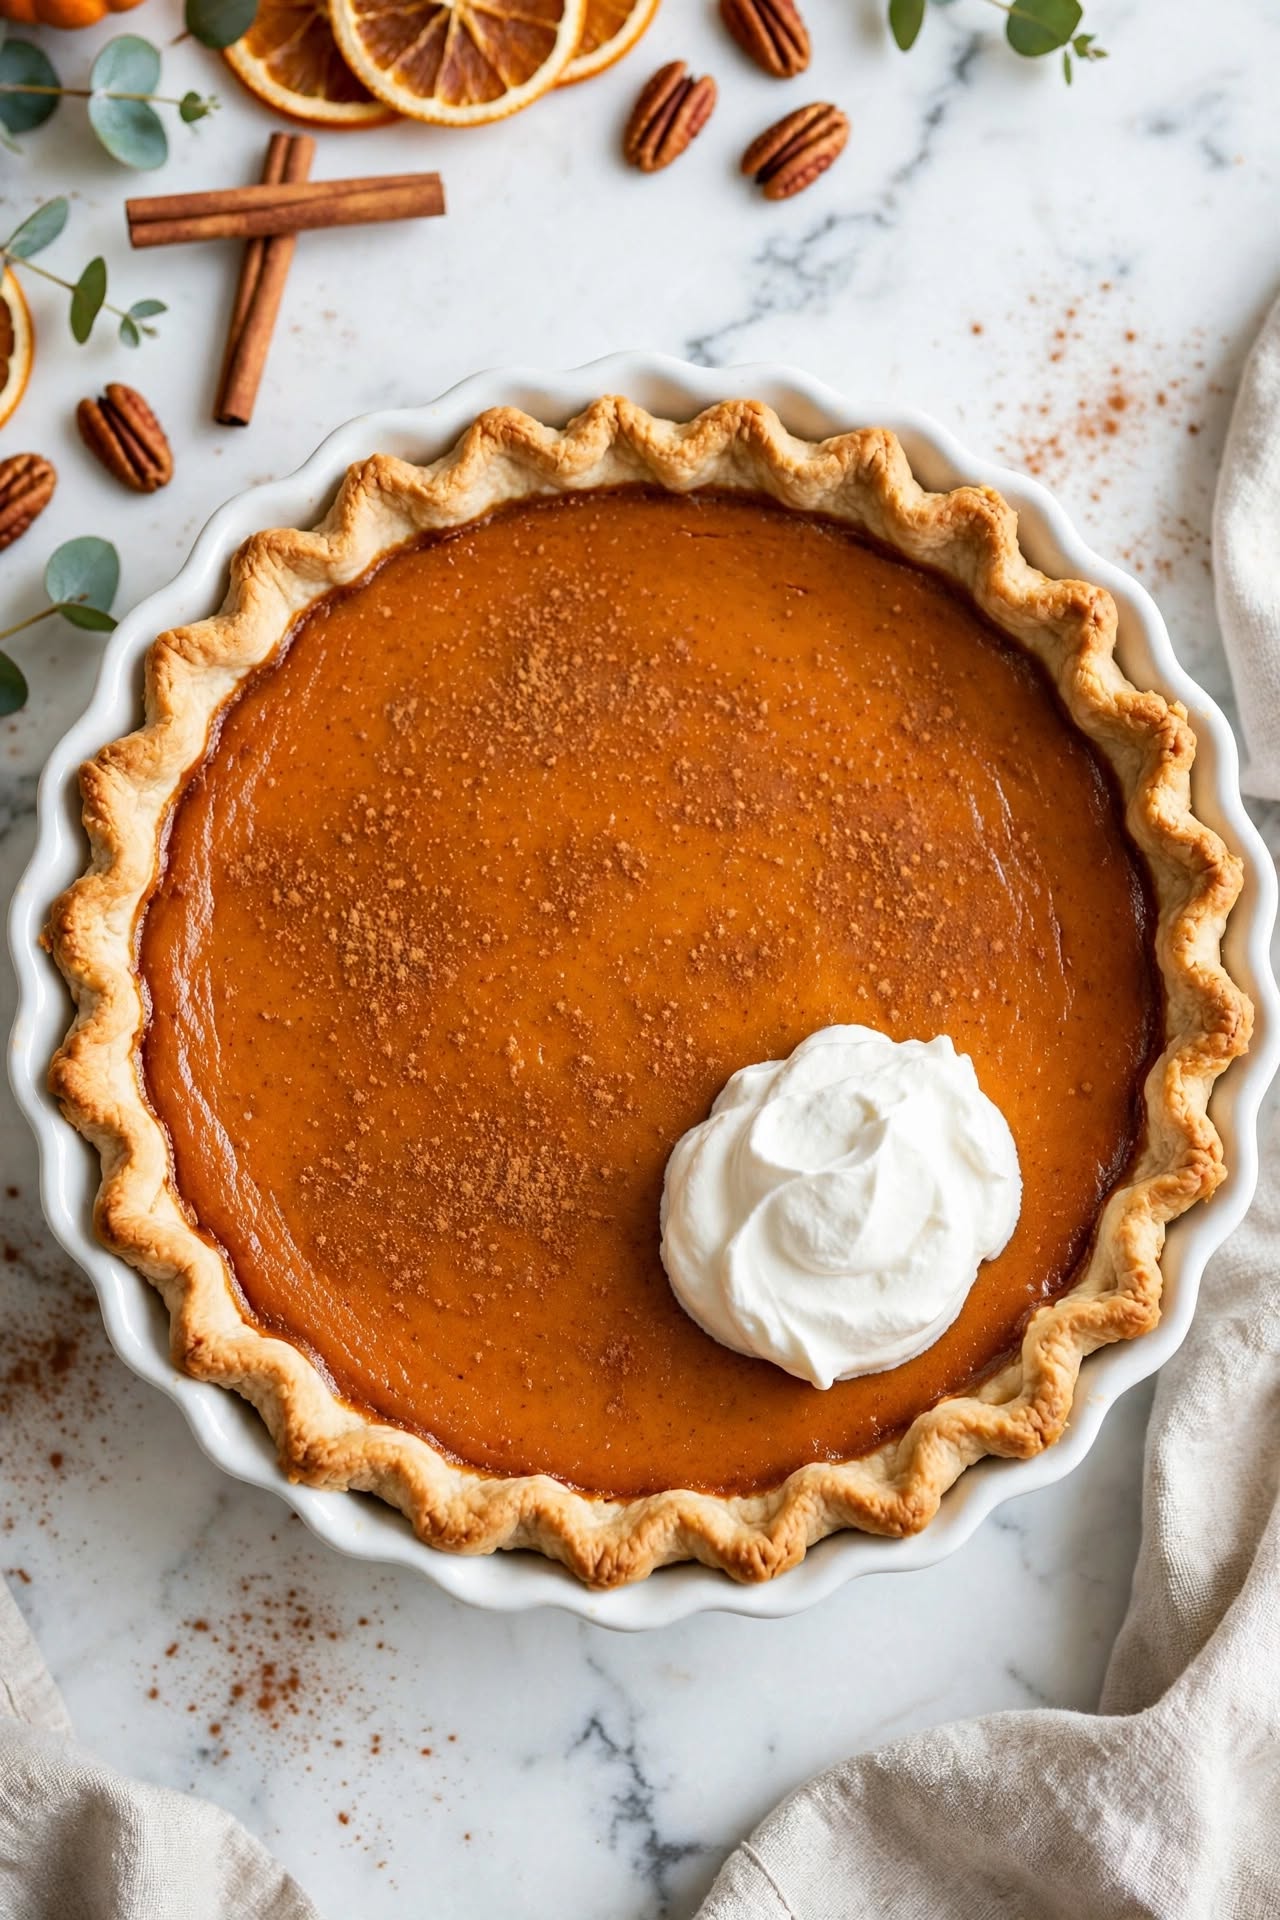
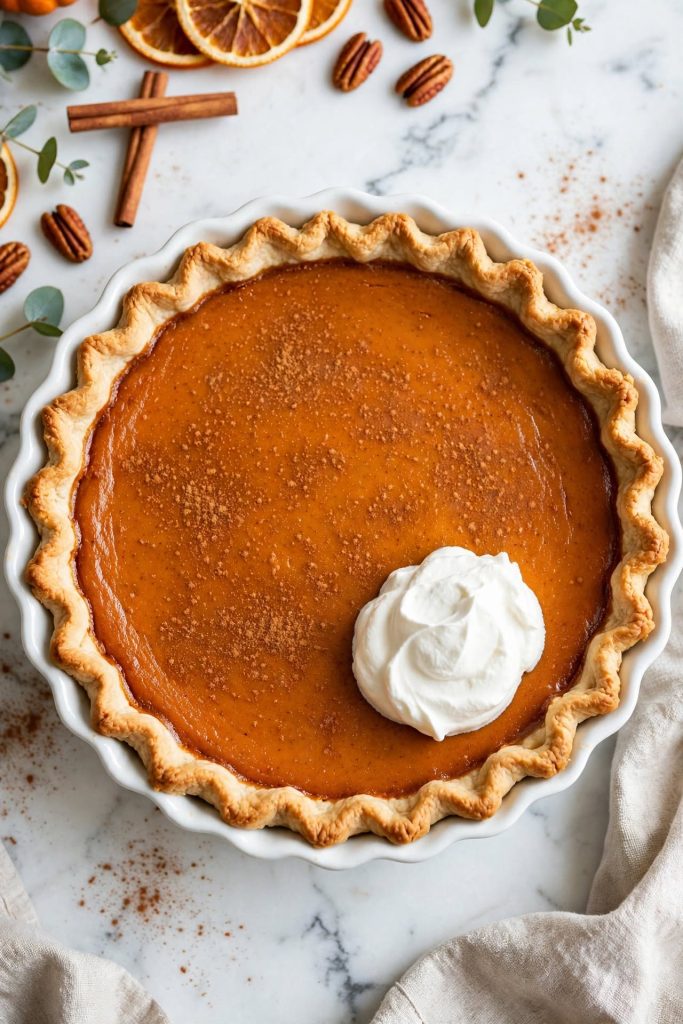
Sweet potato pie is a classic Southern American custard pie made from mashed roasted sweet potatoes, eggs, evaporated milk, butter, and warm spices — baked in a flaky pie crust. It is sweeter, silkier, and more complex in flavor than pumpkin pie, with a natural richness that comes from the sweet potato flesh itself. Prep time is about 30 minutes; total time including roasting and cooling is around 5 hours. Best made a day ahead — the filling sets firmer and the spices deepen overnight.
This sweet potato pie has the silky, deeply spiced filling that makes it worth making from scratch — roasted sweet potatoes (not boiled, not canned), a custard strained smooth before it goes into the crust, and a blind-baked base that stays crisp all the way through. It is a cornerstone of Southern and Black American baking, with roots going back centuries, and it deserves to be made with the same care and precision as any showpiece dessert. If your previous sweet potato pies came out grainy, too loose, or just underwhelming, this method addresses all three problems directly. I tested this recipe multiple times across different sweet potato varieties and oven types before publishing to confirm the technique works consistently.
Why This Recipe Works
Sweet potato pie has a reputation for being either transcendent or disappointing — and the difference almost always comes down to technique at three specific points: the sweet potato preparation, the crust, and how long you let the pie rest before slicing.
- Roasted sweet potatoes, not boiled — roasting caramelizes the natural sugars and drives off excess moisture. Boiling does the opposite: it dilutes the flavor and adds water to the flesh, which makes the filling loose and bland even after baking.
- Blind-baked crust — a custard filling is wet and bakes at low temperature for a long time. Going in on a raw crust guarantees a soggy bottom. A 20-minute blind bake sets the pastry before the filling ever touches it.
- Strained filling — sweet potato flesh has natural fibers. Pressing the finished filling through a fine-mesh sieve takes 2 minutes and is the single step that separates a silky filling from a slightly grainy one.
- Evaporated milk, not cream — evaporated milk has a concentrated dairy flavor without the extra fat of cream. It keeps the filling light enough to set cleanly without cracking, while cream can make the custard too rich and cause it to pull away from the crust.
- Brown sugar in the filling — the molasses notes in brown sugar echo the caramel sweetness already in the roasted sweet potato. Using all white sugar produces a flatter, less complex flavor.
- Make-ahead design — this pie is measurably better after a night in the refrigerator. The filling sets more firmly, the spices bloom fully, and the crust holds its shape when sliced. Build the schedule around making it the day before serving.
If you are looking for more holiday pie guides, [our holiday pie recipes collection] is a good place to start.
Ingredients for Sweet Potato Pie
Thirteen ingredients, two components. The filling does the heavy lifting — the crust is the vehicle.
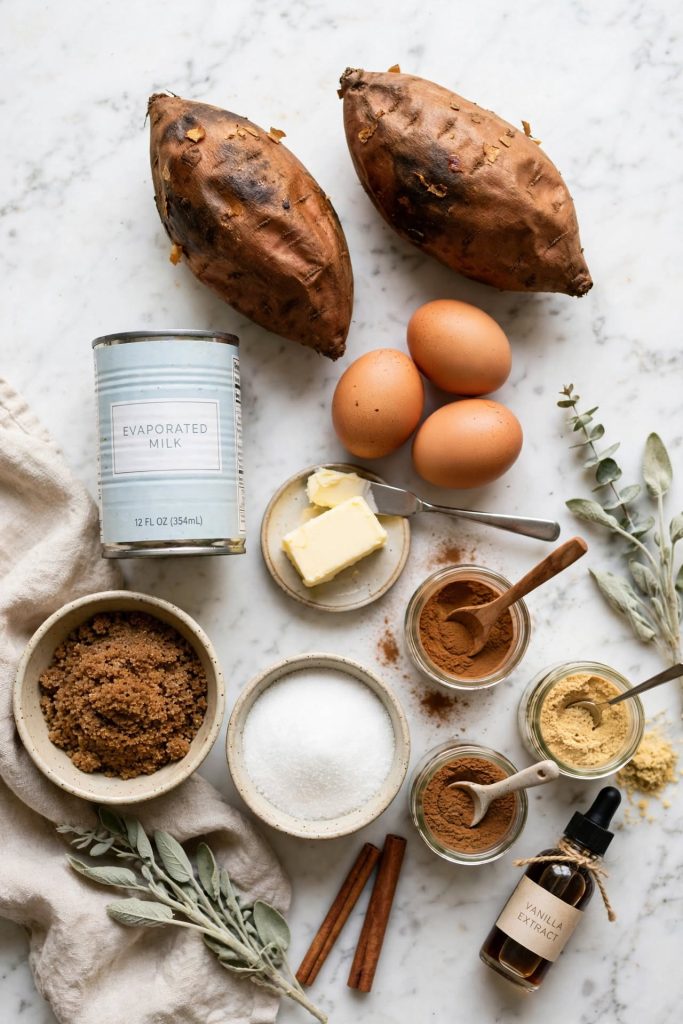
The Sweet Potato Pie Filling
| Ingredient | Amount | What It Does | Best Substitute + Impact |
|---|---|---|---|
| Fresh sweet potatoes | 2 medium (680g / 1½ lbs) | Base of the filling — roasting concentrates flavor and removes water | Canned drained sweet potato — cook 5 min in saucepan to remove excess moisture first |
| Unsalted butter, melted | 115g / ½ cup | Adds richness and helps the filling set with a smooth, glossy surface | Browned butter — deeper, nuttier flavor; highly recommended upgrade |
| Granulated sugar | 200g / 1 cup | Primary sweetener; helps filling set by concentrating with the egg proteins | Caster sugar — no difference |
| Brown sugar | 50g / ¼ cup | Adds molasses depth that echoes the caramel notes in roasted sweet potato | All white sugar — noticeably flatter flavor |
| 2 large eggs + 1 yolk | — | Set the custard; yolk adds richness and a golden color | 3 whole eggs — slightly firmer set, less silky |
| Evaporated milk | 240ml / 1 cup | Concentrated dairy flavor without excess fat; keeps the filling light enough to set cleanly | Half-and-half — works; filling may be slightly lighter in color and flavor |
| Vanilla extract | 1 tsp | Rounds out spice and amplifies sweetness without adding sugar | Vanilla bean paste — stronger, more complex vanilla presence |
| Ground cinnamon | 1 tsp | Primary warm spice — backbone of the spice profile | Reduce if using pumpkin pie spice blend |
| Ground nutmeg | ½ tsp | Adds warmth and depth — freshly grated is noticeably better | Pre-ground nutmeg — use same amount |
| Ground ginger | ¼ tsp | Adds a gentle heat that balances the sweetness | Omit — minor difference |
| Ground allspice | ¼ tsp | Adds complexity — the note that makes people ask what the secret ingredient is | Cloves, a pinch — similar role, more assertive |
| Salt | ¼ tsp | Sharpens sweet and spice notes; keeps the filling from tasting flat | Fine sea salt — same amount |
The Pie Crust
| Option | What to Use | Trade-offs |
|---|---|---|
| Homemade flaky crust | All-butter or butter-shortening blend, 9-inch deep dish | Best flavor and texture; takes 30 extra minutes + chill time |
| Store-bought refrigerated | Pillsbury or equivalent deep-dish crust | Reliable and convenient; blind bake the same way |
| Store-bought frozen | Deep-dish frozen shell, thawed | Works well; let thaw fully before blind baking to prevent cracks |
| Graham cracker crust | 9-inch pre-made or homemade | No blind bake needed; sweeter base — changes the flavor profile significantly |
Key Ingredient Notes
Sweet potato variety: Beauregard or Jewel sweet potatoes (the orange-fleshed varieties most common in US grocery stores) are the best choice — they are moister, sweeter, and more flavorful than white-fleshed varieties. Look for medium-sized potatoes with no soft spots or blemishes.
Evaporated milk: do not substitute regular whole milk — the water content is too high and will make the filling loose. Do not use sweetened condensed milk — it will make the pie unpleasantly sweet. Evaporated milk has had about 60% of its water removed, which is exactly what the filling needs.
Freshly grated nutmeg: the difference between freshly grated whole nutmeg and pre-ground nutmeg is significant in a recipe where spice is the entire flavor story. A microplane and a whole nutmeg cost under $5 and last years — worth it for this pie.
Equipment You Need
- 9-inch deep-dish pie dish (ceramic or glass)
- Parchment paper and pie weights (or dried beans)
- Hand or stand mixer, or food processor
- Fine-mesh sieve and large measuring jug or bowl
- Rimmed baking sheet (to catch any overflow and for easier oven transfer)
- Wire cooling rack
The Sweet Potato Guide — Fresh vs. Canned
This is the most consequential decision you make in this recipe. Fresh roasted sweet potatoes and canned sweet potatoes produce noticeably different results.
| Type | Flavor | Moisture Level | Prep Required | Verdict |
|---|---|---|---|---|
| Fresh, roasted | Deep, caramelized, complex | Low — roasting evaporates water | 45–55 min roasting + cooling | Best — this is the method |
| Fresh, boiled | Muted, watery, flat | High — absorbs water during boiling | 20 min boiling + draining | Not recommended — results in runny filling |
| Fresh, steamed | Moderate — better than boiled | Moderate | 20 min steaming | Acceptable if roasting is not possible; dry further in pan |
| Canned in syrup, drained | Sweet but one-dimensional | Moderate — drain and cook down | Drain, saucepan cook 5 min | Workable in a pinch; reduce sugar by 25g |
| Canned purée (no syrup) | Better than syrup-packed | Low–moderate | Saucepan cook 3 min | Good backup; still less flavorful than roasted fresh |
How much sweet potato you need: 2 medium fresh sweet potatoes (about 680g / 1½ lbs raw) yield approximately 2 cups (450g) of mashed roasted flesh — exactly what this recipe calls for. Weigh them before roasting to confirm; sizes vary significantly.
What properly roasted sweet potato looks like: the skin should be wrinkled and the flesh should feel completely soft when you squeeze it. When you cut one open, the flesh should be caramelized at the edges and pull away from the skin cleanly. Any resistance means it needs 10 more minutes.
How to Make Sweet Potato Pie — Step by Step
Follow these steps in order. The timeline works best when the sweet potatoes roast while you make the crust, the crust blind bakes while you make the filling, and the pie cools overnight before serving.
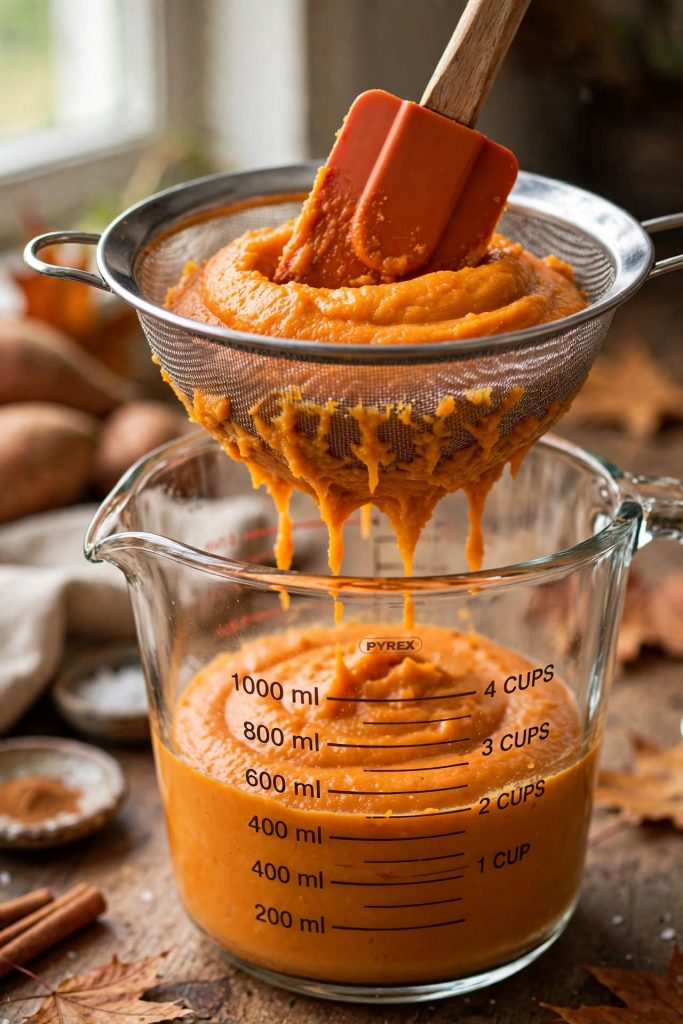
Step 1 — Roast and Mash the Sweet Potatoes
Preheat oven to 200°C / 400°F. Scrub the sweet potatoes, pierce each one several times with a fork, and place on a foil-lined rimmed baking sheet. Roast for 45 to 55 minutes until the skins are wrinkled, the flesh is completely tender, and caramel-colored liquid is beginning to ooze from the piercings. Remove from the oven and let cool until you can handle them — about 20 minutes. Peel the skins off (they pull away easily) and place the flesh in your mixing bowl. Mash until no large lumps remain — a hand mixer on low speed for 60 seconds gives the smoothest result.
⚠️ Do not rush the cooling step before peeling. Hot sweet potato flesh is very soft and tears rather than peeling cleanly — wait until the exterior is cool enough to hold in your hands before removing the skin.
What to look for: the mashed flesh should be uniformly smooth, deep orange, and smell intensely sweet and caramelized — almost like sweet potato candy. Any stringy texture means there are fibers remaining; the straining step in the filling prep will catch these.
Step 2 — Make or Prep the Pie Crust
If using homemade pastry: make your pie dough, chill for 30 minutes minimum, then roll to a 12-inch circle and fit into a deep-dish 9-inch pie dish. Crimp the edges, press plastic wrap against the surface, and chill for another 30 minutes before blind baking. If using store-bought: fit the crust into the pie dish and refrigerate for 20 minutes before blind baking — cold pastry holds its shape better in the oven and shrinks less during the blind bake.
What to look for: the crust should sit snugly against the dish with no air pockets between the pastry and the dish wall. Lift and press gently to remove any gaps — air pockets expand during baking and cause the crust to puff and slide.
Step 3 — Blind Bake the Crust
Reduce the oven to 190°C / 375°F. Line the chilled crust with parchment paper and fill with pie weights or dried beans — make sure the weights reach up the sides of the crust, not just the base. Bake for 15 minutes until the edges are just beginning to turn golden. Remove the parchment and weights carefully. Return the crust to the oven for 5 more minutes until the base looks dry and pale gold. Remove and set aside to cool slightly while you make the filling. Reduce the oven temperature to 175°C / 350°F.
⚠️ If the crust puffs during the blind bake even with weights, use the back of a spoon to gently press it flat as soon as it comes out of the oven — the pastry is soft enough to reshape while hot. Do not press once it has cooled or it will crack.
Once you are comfortable with this technique, [our complete pie crust guide] covers every method in detail.
Step 4 — Make the Filling
Measure 2 cups (450g) of the mashed sweet potato into your mixing bowl — reserve any excess for another use. Beat the sweet potato with the melted butter on medium speed until the mixture is completely smooth and the butter is fully incorporated — about 60 seconds. Add both sugars and beat until combined. Add the eggs and yolk one at a time, beating after each addition. Pour in the evaporated milk, vanilla, cinnamon, nutmeg, ginger, allspice, and salt. Mix until fully combined and the filling is a uniform deep orange with no streaks. Press the entire filling through a fine-mesh sieve into a large measuring jug or bowl, using a rubber spatula to push it through. This removes any remaining fibers and ensures a completely silky texture.
What to look for: the strained filling should flow smoothly and be entirely lump-free. Tilt the bowl — the filling should move like a thick custard, not a solid mash. If it is too thick to flow at all, whisk in 2 tablespoons of additional evaporated milk.
Step 5 — Bake, Cool, and Slice
Place the blind-baked crust on a rimmed baking sheet. Pour the filling into the crust — it should fill to about ½ inch below the top of the crimped edge. Carefully transfer the baking sheet to the oven. Bake at 175°C / 350°F for 50 to 60 minutes. The pie is done when the edges of the filling are set and no longer jiggle, and the center has only a slight wobble — like gelatin, not liquid. Remove from the oven and place on a wire rack. Cool at room temperature for 2 hours, then refrigerate for at least 2 more hours before slicing — or overnight for the best result.
⚠️ Do not move the pie to the refrigerator while it is still hot. The sudden temperature change can cause the filling to crack and weep liquid. Cool fully at room temperature first.
What to look for: a knife inserted halfway between the edge and the center should come out mostly clean with just a little custard clinging to it. The top should be a deep, even amber-orange with no wet spots or dips.
If you enjoyed the custard technique in this recipe, [our guide to custard pies] covers chess pie, buttermilk pie, and sugar pie in the same level of detail.
The Science Behind a Silky Custard Filling
Sweet potato pie is technically a vegetable custard — the egg proteins and sweet potato starch work together to set the filling. Understanding why each element works is how you troubleshoot when something goes wrong.
Why Roasting Beats Boiling
Roasting is a dehydration process. At 200°C / 400°F, the moisture inside the sweet potato evaporates through the skin, concentrating the sugars and flavor compounds in the flesh. The natural sugars caramelize slightly at the edges, producing a complex sweetness that tastes nothing like the raw vegetable. Boiling does the exact opposite — it pushes water into the flesh and leaches flavor out into the cooking water. A boiled sweet potato filling will always taste thinner, paler, and less sweet than a roasted one, even if you use identical quantities of everything else.
Why Evaporated Milk, Not Heavy Cream
Fat content determines how the custard sets. Heavy cream (35–40% fat) produces a very rich custard that can be too dense and may pull away from the crust edges as it cools. Evaporated milk (about 8% fat) gives enough body and dairy flavor to carry the spices and sweet potato without overwhelming the filling. It also has a slightly caramelized flavor from the evaporation process itself — a gentle depth that works well in this pie. Whole milk is too thin; cream is too thick. Evaporated milk is the right choice, and it is the choice that most Southern sweet potato pie recipes have used for over a century.
Why the Filling Must Cool Before You Slice
Custard sets through cooling, not just baking. When the pie comes out of the oven, the egg proteins have coagulated but the starch from the sweet potato is still loose and fluid in the center. Cooling at room temperature allows the starch network to firm up gradually — which is why the center jiggle test works: the center is still setting as the pie cools. Cutting into a warm pie releases that partially set center as liquid, producing a runny slice rather than a clean one. The refrigerator accelerates the final set and is why overnight refrigeration gives you the cleanest, most defined slices.
For more guides like this one, [our guide to custard pie science] covers the chemistry in the same depth.
Tips for the Best Result
These are the details that separate a good sweet potato pie from one that disappears before the Thanksgiving table is cleared.
- Use a deep-dish pie dish — a standard 9-inch dish holds about 3 cups of filling; a deep-dish holds 4 to 5 cups. This recipe produces just over 4 cups of filling. A standard dish will overflow — use deep-dish, always.
- Grate the nutmeg fresh — pre-ground nutmeg loses its volatile oils quickly after grinding. A whole nutmeg grated on a microplane takes 10 seconds and produces a noticeably warmer, more complex flavor in the finished pie.
- Tent the crust edges with foil — the crust edges can over-brown before the filling is done, since the filling takes 50 to 60 minutes. After the first 30 minutes, loosely cover the crimped edges with foil strips or a pie shield.
- Use a rimmed baking sheet under the pie — sweet potato filling is thin enough to bubble over on occasion. A baking sheet under the pie catches any spills and also makes it much easier to slide the pie in and out of the oven without disturbing the liquid filling.
- Make it the day before — this is not just advice, it is the best version of this pie. The filling sets more firmly after 12 hours in the refrigerator, the spices bloom fully, and the crust holds its shape under the filling without softening. A day-old sweet potato pie slices more cleanly and tastes more complex.
- Serve at room temperature — a cold sweet potato pie straight from the refrigerator has a muted flavor and a slightly grainy texture from the chilled fat. Let it sit at room temperature for 30 minutes before serving — the flavor opens up significantly.
Common Mistakes to Avoid
❌ Using Boiled Instead of Roasted Sweet Potatoes
Result: a watery, flat-tasting filling that does not set firmly — it can look done in the oven but sag and weep liquid when you slice it.
Fix: roast the sweet potatoes at 200°C / 400°F until the flesh is completely tender and caramelized — 45 to 55 minutes depending on size. The extra time is entirely worth it and cannot be replicated by draining boiled sweet potatoes.
❌ Skipping the Blind Bake
Result: a soggy, undercooked bottom crust that sticks to the dish and tears when you try to serve individual slices.
Fix: always blind bake for 15 minutes with weights and 5 minutes without before adding the filling. This is not optional for a custard-based pie baked at low temperature for a long time.
❌ Overbaking Until the Center Is Fully Set
Result: the filling cracks as it cools and the texture turns dry and grainy rather than silky — this is the most common cause of cracked sweet potato pie.
Fix: pull the pie when the edges are set and the center still has a noticeable jiggle. It will finish setting as it cools at room temperature over 2 to 3 hours.
❌ Slicing While the Pie Is Still Warm
Result: the center is still liquid or semi-set — the filling runs out of the slice and the piece collapses.
Fix: minimum 2 hours at room temperature plus 2 hours in the refrigerator before slicing. Overnight refrigeration is the gold standard. Warm pies look done; they are not.
❌ Not Straining the Filling
Result: a slightly fibrous, grainy texture in the finished filling — noticeable on the palate even if invisible to the eye.
Fix: press the finished filling through a fine-mesh sieve before pouring into the crust. It takes 2 minutes and is the step most home bakers skip and most professional bakers never skip.
❌ Using Pumpkin Pie Spice in the Same Quantity
Result: an aggressively spiced pie where the clove and allspice notes overpower the delicate sweet potato flavor — the filling tastes like spiced filling, not like sweet potato.
Fix: use individual spices at the quantities in this recipe (cinnamon, nutmeg, ginger, allspice). If you must use pumpkin pie spice, use half the quantity you would for a pumpkin pie and add extra cinnamon.
For more guides like this, [our pie troubleshooting guide] covers every common failure point in the same detail.
Variations Worth Trying
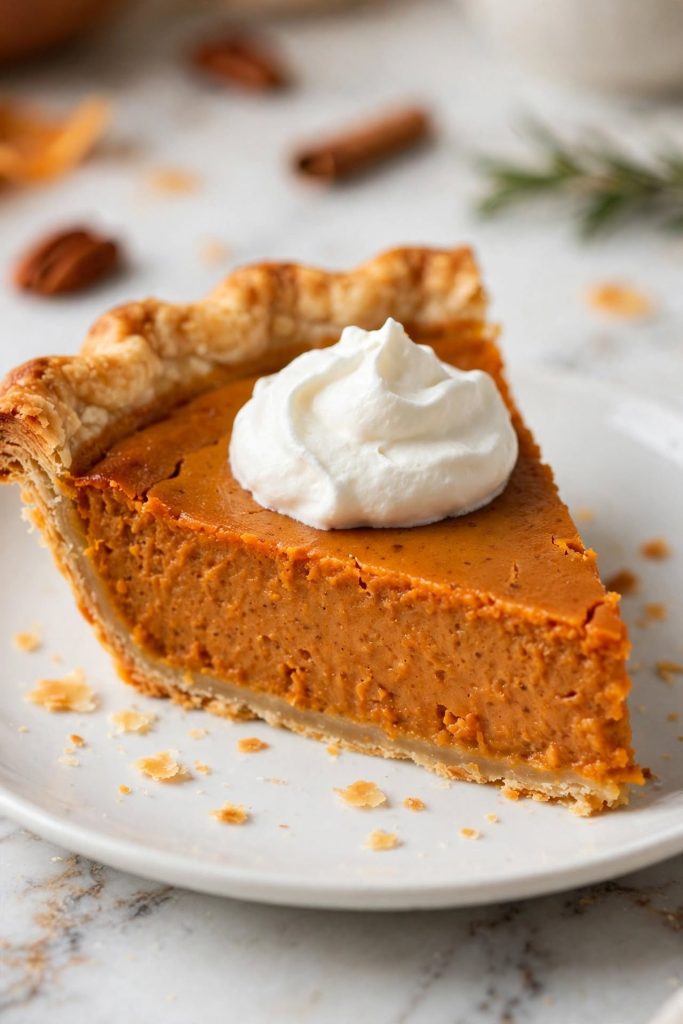
Brown Butter Sweet Potato Pie
What changes: instead of using melted butter, brown the butter in a light-colored saucepan over medium heat until it turns amber and smells nutty — about 5 to 6 minutes. Cool to room temperature before using.
When: at the butter preparation step, before making the filling.
Result: the browned milk solids add a toasted, almost caramel-hazelnut note that deepens the sweet potato flavor significantly. This is the version that tends to convert people who claim they do not like sweet potato pie.
Sweet Potato Pie With Pecan Streusel
What changes: combine 60g (½ cup) chopped pecans, 40g (3 tbsp) brown sugar, 30g (2 tbsp) flour, and 30g (2 tbsp) cold cubed butter. Rub together into a crumble and scatter over the top of the pie for the last 15 minutes of baking.
When: at the 35-minute mark of the bake, after the filling has begun to set at the edges.
Result: a crisp, buttery pecan topping that contrasts with the silky custard filling — visually striking and texturally compelling. Tent the crust edges with foil as soon as you add the streusel to prevent over-browning.
No-Bake Sweet Potato Pie
What changes: use a pre-made graham cracker crust. Make the filling as written but replace the eggs with 225g (8 oz) of softened cream cheese beaten smooth. No baking required — set in the refrigerator for 4 hours minimum.
When: replaces the entire bake step.
Result: a cream cheese-based no-bake pie that is lighter and tangier than the custard version. Best in situations where oven space is limited — a common Thanksgiving constraint.
Sweet Potato Pie Bars
What changes: press a shortbread crust (120g flour, 60g butter, 30g sugar, pinch of salt, pressed into a 9×13 inch pan) and blind bake for 15 minutes. Pour the filling over the pre-baked base and bake 35 to 40 minutes at 175°C / 350°F.
When: at the pan and bake step — replaces the round pie entirely.
Result: handheld squares that need no slicing or serving utensils — ideal for potlucks, bake sales, and events where a full pie is impractical to serve.
Vegan Sweet Potato Pie
What changes: replace eggs with 3 tablespoons of cornstarch whisked into 3 tablespoons of water. Replace butter with refined coconut oil (same quantity, melted). Replace evaporated milk with full-fat canned coconut milk. Use a vegan pie crust.
When: substitutions happen at the filling step.
Result: a slightly less silky but still well-set filling with a faint coconut undertone that works well with the warm spices. The cornstarch thickens during baking in place of the egg proteins. Bake time is the same.
Sweet Potato Pie vs. Pumpkin Pie — Key Differences
This is the most-searched question connected to this recipe — and it deserves a clear, honest answer.
Flavor
Sweet potato pie is sweeter and more naturally complex. The sweet potato flesh has its own distinct sweetness — almost candied — that does not need as much added sugar to shine. Pumpkin pie, made from a squash with much less natural sweetness, relies more heavily on sugar and spice to build flavor. Blind taste testers who prefer less assertively spiced desserts almost universally prefer sweet potato pie.
Texture
Sweet potato pie is denser and creamier. Sweet potato flesh is fattier than pumpkin, which gives the custard more body and a smoother mouthfeel. Pumpkin filling is slightly lighter and airier — closer to a mousse at its best, a puddle at its worst. A well-made sweet potato pie holds a clean slice without the filling collapsing the way pumpkin pie sometimes does.
Spice Profile
Sweet potato pie uses a warmer, more subtle spice blend — cinnamon and nutmeg carry most of the work, with ginger and allspice playing a supporting role. The spice should complement the sweet potato, not mask it. Pumpkin pie is typically more aggressively spiced — the spice has to compensate for the more neutral flavor of the pumpkin base. Using pumpkin pie spice quantities in a sweet potato pie overwhelms the filling.
Which One to Make
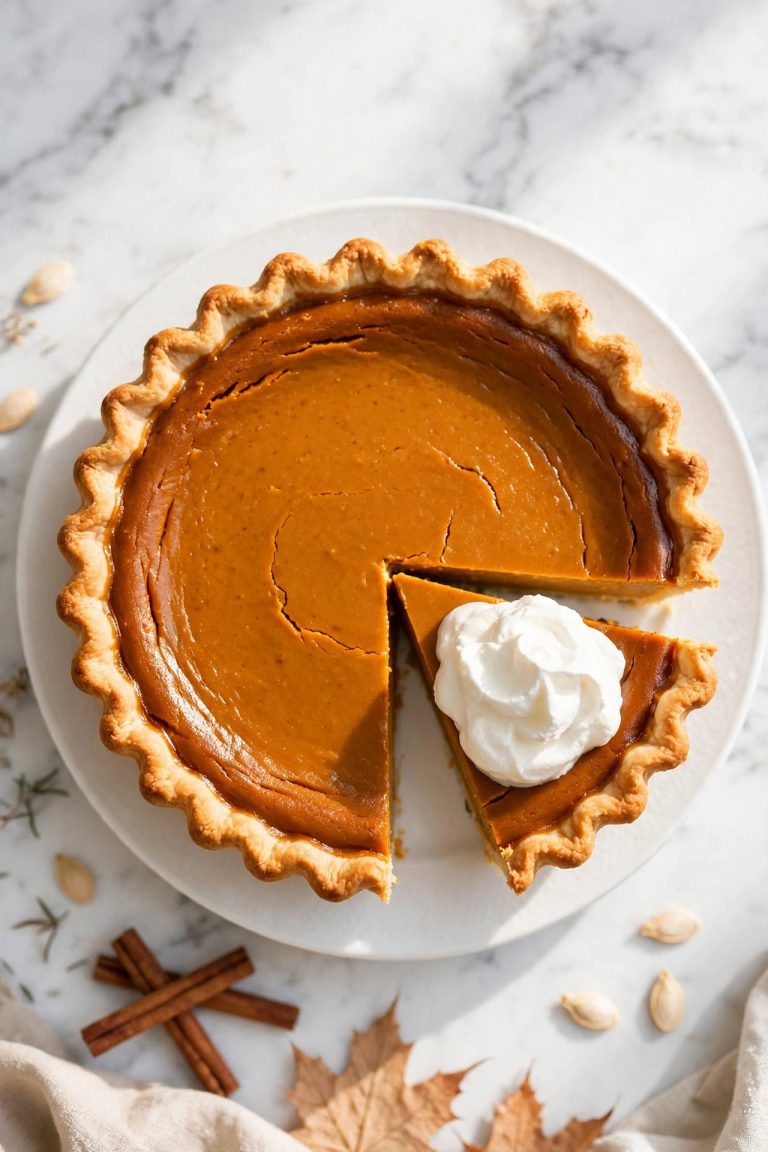
Make sweet potato pie when you want a dessert with more natural flavor, a silkier texture, and a more interesting story to tell at the table. Make pumpkin pie when tradition demands it or when the crowd has strong expectations. If you are making both for Thanksgiving, make the sweet potato pie the day before (it is better that way) and the pumpkin pie the morning of — and watch which one runs out first.
How to Store
Room Temperature
Because the filling is an egg custard, sweet potato pie is more perishable than fruit pies. The USDA recommends treating custard pies the same as eggs — refrigerate within 2 hours of baking. You can serve the pie at room temperature (it tastes better that way), but do not leave it out for more than 2 hours total. A pie set on the table at the start of a meal should be refrigerated within 2 hours of when it came out of the oven or the refrigerator — track the time rather than assuming it is fine.
Refrigerator
Refrigerating extends the quality window to up to 4 days. Cover the pie loosely with plastic wrap — pressing it directly against the filling leaves marks and can disturb the set surface. Store on a flat shelf, not the door. The filling actually improves over the first 24 to 48 hours: the spices develop, the texture firms slightly, and the flavors become more integrated. Let a refrigerated pie sit at room temperature for 30 minutes before serving for the best flavor and texture.
Freezer — Complete Guide
Sweet potato pie freezes better than most custard pies because the dense filling holds together well after thawing. Cool completely, then wrap the entire pie (or individual slices) in two layers of plastic wrap followed by foil. Freeze for up to 2 months. To thaw: place in the refrigerator overnight — do not thaw at room temperature, as the filling can weep as it warms unevenly. The crust may soften slightly; crisp it by warming the thawed pie uncovered in a 150°C / 300°F oven for 10 minutes. If you enjoyed this recipe, [our make-ahead holiday desserts guide] fits perfectly into your Thanksgiving timeline.
How to Serve
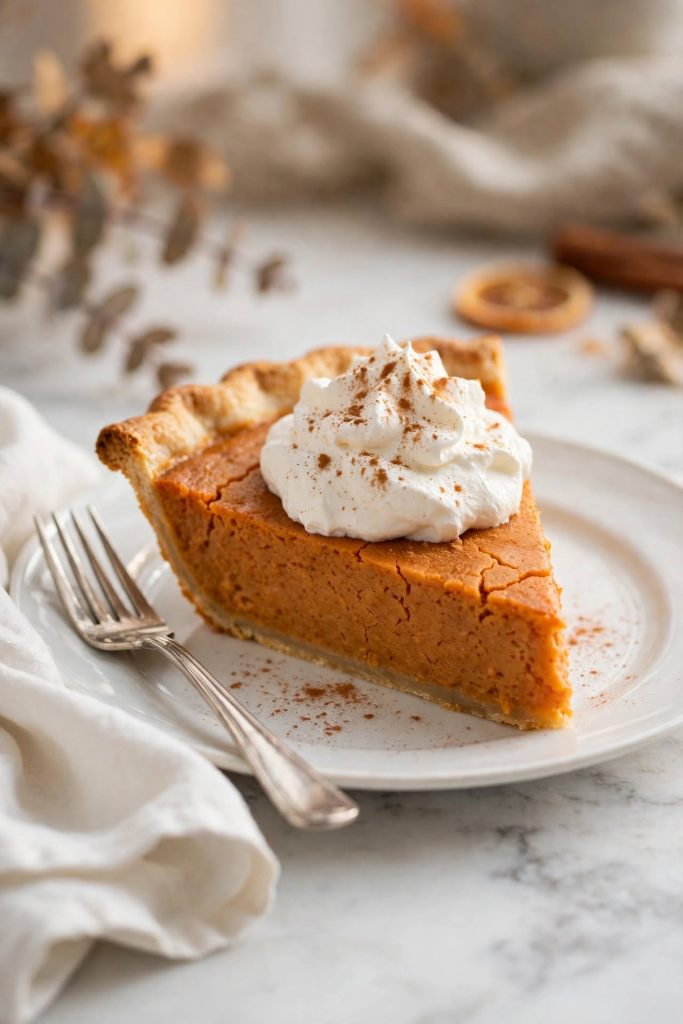
Classic Ways to Serve
- Serve at room temperature with a generous dollop of freshly whipped cream — lightly sweetened with powdered sugar and a splash of vanilla, the cream contrasts with the dense, spiced filling without competing with it.
- Slice with a thin, sharp knife dipped in hot water and wiped dry between cuts — the custard releases more cleanly from a warm blade, and the slices hold their shape better when the knife is clean.
- Dust the top with a light pinch of cinnamon just before serving for a finished, aromatic presentation that signals the flavor profile to guests before they take a bite.
Upgraded and Occasion-Worthy
- Serve with a small scoop of vanilla bean ice cream instead of whipped cream — the temperature contrast between cold ice cream and the ambient-temperature pie is one of the best combinations in holiday desserts.
- Drizzle lightly with warm salted caramel sauce at the table — the caramel echoes the roasted sweetness in the filling and makes the presentation feel restaurant-worthy without any additional prep.
- For a Southern-style celebration spread, serve alongside pecan pie and banana pudding — sweet potato pie is the richest of the three and is traditionally served in smaller slices than pumpkin pie.
Sweet potato pie pairs well with black coffee, spiced chai, or a small glass of bourbon. Best occasions: Thanksgiving, Christmas, Juneteenth celebrations, family reunions, and any gathering where you want to bring something with both flavor and history.
Frequently Asked Questions
What is the difference between sweet potato pie and pumpkin pie?
Sweet potato pie is sweeter, denser, and more custard-like than pumpkin pie. It has a natural sweetness that requires less added sugar, a creamier texture because sweet potato flesh is fattier than pumpkin, and a warmer, less assertive spice profile. Pumpkin pie has a lighter, slightly more watery filling and a more pronounced spice flavor. Sweet potato pie is a cornerstone of Southern and Black American cuisine; pumpkin pie is more broadly associated with New England Thanksgiving traditions. Both are custard pies — the key differences are in the vegetable base and the balance of sweetness to spice.
Can I use canned sweet potatoes?
Yes, but with caveats. Drain them fully, then cook the mash in a saucepan over medium heat for 5 minutes, stirring constantly, to evaporate excess moisture. Use 425g (15 oz) drained weight to replace 2 cups of roasted mash. Reduce added sugar by 25g, as canned sweet potatoes in syrup are already sweetened. The flavor will be less complex and slightly more one-dimensional than roasted fresh sweet potato — workable, but noticeably different.
Why is my sweet potato pie filling runny?
Three causes in order of likelihood: sweet potatoes that were boiled rather than roasted (boiling adds water to the flesh), a filling that was not strained before baking, or a pie pulled from the oven too early. Roast your sweet potatoes, strain the filling through a fine-mesh sieve, and bake until the edges are set and the center has only a slight jiggle — about 50 to 60 minutes at 175°C / 350°F.
How do I know when sweet potato pie is done?
The pie is done when the edges of the filling are set and no longer jiggle when you shake the pan, and the center has only a slight wobble — like gelatin, not liquid. A knife inserted halfway between the edge and the center should come out mostly clean. The center will finish setting as the pie cools. Start checking at 50 minutes; most pies need 55 to 60 minutes at 175°C / 350°F. An oven thermometer is useful here — ovens running 10°C low can add 15 minutes to the bake time.
Can I make sweet potato pie ahead of time?
Yes — and it is measurably better made ahead. Bake the pie 1 to 2 days before serving and refrigerate, loosely covered. The filling sets more firmly and the spices develop overnight. Let the pie sit at room temperature for 30 minutes before slicing and serving.
How long does sweet potato pie last?
The egg custard filling makes this pie more perishable than fruit pies. Refrigerate within 2 hours of baking — up to 4 days covered in the refrigerator. Up to 2 months in the freezer, well wrapped. Do not leave at room temperature for more than 2 hours total after baking.
Can I freeze sweet potato pie?
Yes. Cool completely, wrap in two layers of plastic wrap then foil, and freeze for up to 2 months. Thaw overnight in the refrigerator. The texture holds well after thawing; the crust may soften slightly but can be crisped in a 150°C / 300°F oven for 10 minutes after thawing.
Do I need to blind bake the crust?
Strongly yes. The custard filling is wet and bakes at low temperature for a long time — a raw crust going in will produce a soggy, undercooked bottom. A 15-minute blind bake with weights followed by 5 minutes without sets the pastry enough to resist the filling for the full bake. Store-bought and homemade crusts both benefit from this step equally.
What spices go in sweet potato pie?
The classic blend is cinnamon (1 tsp), nutmeg (½ tsp), ginger (¼ tsp), and allspice (¼ tsp). Cinnamon and nutmeg carry the primary flavor; ginger and allspice add warmth and complexity. The spice profile should be warmer and more subtle than pumpkin pie — the sweet potato’s natural sweetness does a lot of the flavor work. Freshly grated nutmeg makes a noticeable difference in the finished pie.
Can I use a store-bought crust?
Yes — a deep-dish refrigerated or frozen pie crust works well. The filling quality matters far more than the crust origin in this recipe. Blind bake the store-bought crust the same way: weights for 15 minutes, then 5 minutes without. Let frozen crusts thaw fully before blind baking to prevent cracking.
Why does my sweet potato pie crack on top?
Cracking is caused by overbaking — the custard sets too firmly in the oven, then contracts as it cools and the surface splits. Pull the pie when the center still has a slight jiggle. Cracking can also be caused by moving the pie to the refrigerator while it is still hot — let it cool fully at room temperature first, then refrigerate.
How do I get a smooth filling?
Three steps in order: roast rather than boil (removes water, concentrates flavor and texture), beat the mashed sweet potato with butter before adding other ingredients (breaks down fibers), and strain the finished filling through a fine-mesh sieve (catches any remaining fibers or unmixed lumps). All three steps together produce the silky custard filling that makes this sweet potato pie worth making from scratch.

Sweet Potato Pie Recipe Card
Ingredients
Equipment
Method
- Preheat oven to 200°C / 400°F. Pierce sweet potatoes with a fork. Roast on a foil-lined baking sheet for 45 to 55 minutes until completely tender and caramelized. Cool 20 minutes, peel, and mash until smooth.
- Reduce oven to 190°C / 375°F. Fit pie crust into a deep-dish 9-inch pie dish. Line with parchment and fill with pie weights. Blind bake 15 minutes, remove weights and parchment, bake 5 more minutes until pale gold. Remove from oven.
- Reduce oven to 175°C / 350°F.
- Beat 2 cups (450g) of mashed sweet potato with melted butter until completely smooth. Add both sugars and beat until combined. Add eggs and yolk one at a time, beating after each. Add evaporated milk, vanilla, cinnamon, nutmeg, ginger, allspice, and salt. Mix until fully combined.
- Press filling through a fine-mesh sieve into a large measuring jug to remove fibers and ensure a silky texture.
- Place the blind-baked crust on a rimmed baking sheet. Pour filling into the crust. Bake at 175°C / 350°F for 50 to 60 minutes, until edges are set and center has a slight jiggle.
- Cool at room temperature 2 hours, then refrigerate at least 2 more hours before slicing. Overnight refrigeration gives the best results.
- Serve at room temperature with freshly whipped cream.
Notes
- Make 1 to 2 days ahead — the filling sets firmer and the spices develop overnight.
- Tent crust edges with foil after the first 30 minutes of the final bake to prevent over-browning.
- Do not move the pie to the refrigerator while still hot — cool at room temperature first.
- Do not substitute regular milk for evaporated milk — the filling will not set correctly.
- Freshly grated nutmeg makes a noticeable difference — use it if you can.
More Holiday Dessert Recipes You Will Love
- “Pumpkin Pie” — the direct comparison: same custard technique, same blind-baked crust, lighter filling and more assertive spice — make both and let your guests decide their favorite.
- “Pecan Pie” — another Southern Thanksgiving staple, served alongside sweet potato pie at virtually every traditional holiday table in the American South.
- “Banana Pudding” — the third leg of a classic Southern dessert spread — layers of vanilla wafers, banana, and homemade custard that can be assembled the day before and served cold.
- “Chess Pie” — the simplest custard pie in the Southern canon: butter, sugar, eggs, and a splash of vinegar in a blind-baked crust — four ingredients, extraordinary flavor.
- “Pralines” — a shareable confection to serve alongside pie slices: creamy, caramelized, pecan-studded candy that takes 20 minutes and stores for a week at room temperature.
Did you make this sweet potato pie? Leave a ⭐⭐⭐⭐⭐ rating below and let me know in the comments how it turned out. I read every comment and would love to know which variation you tried.