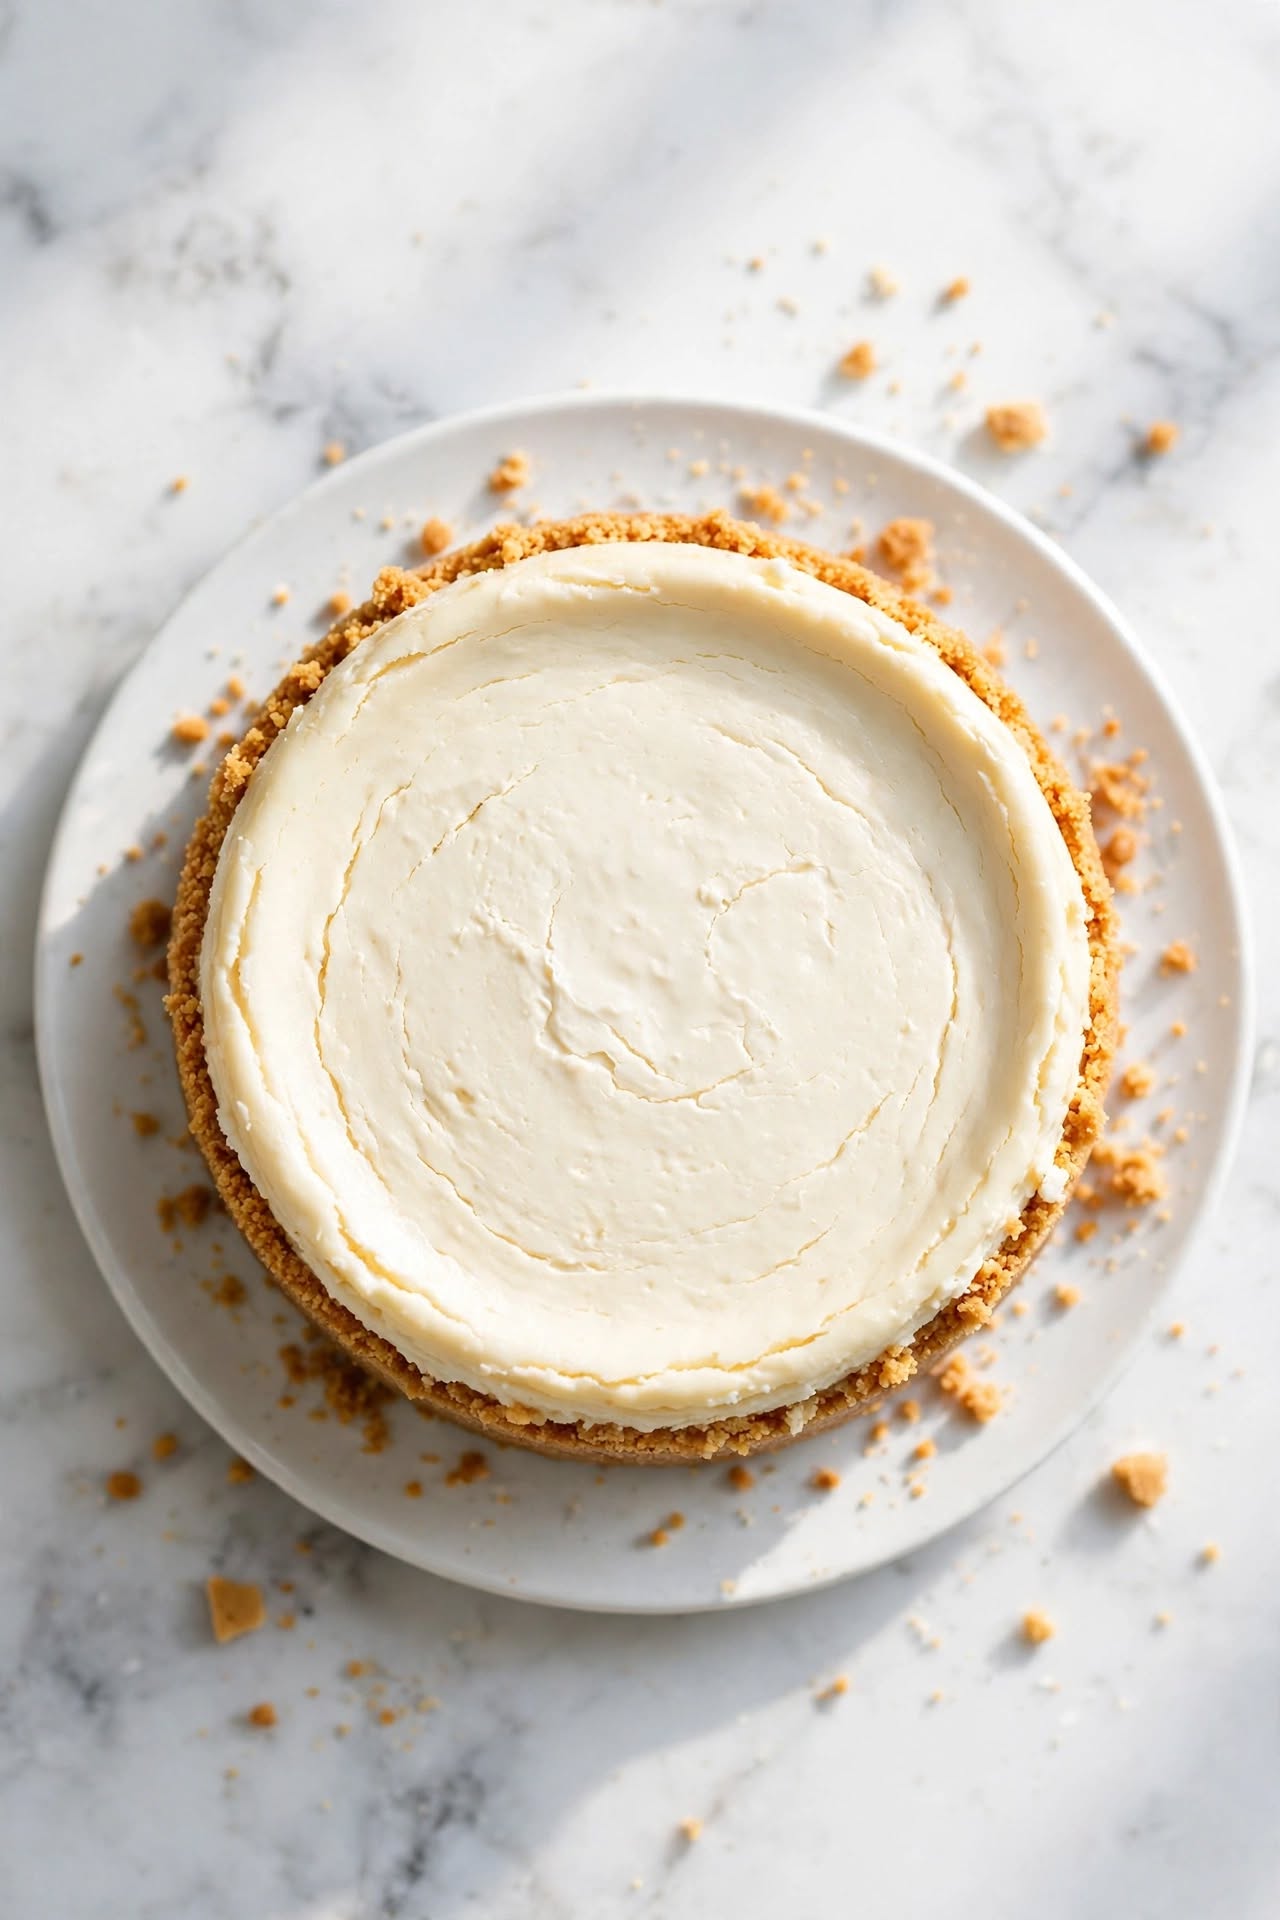
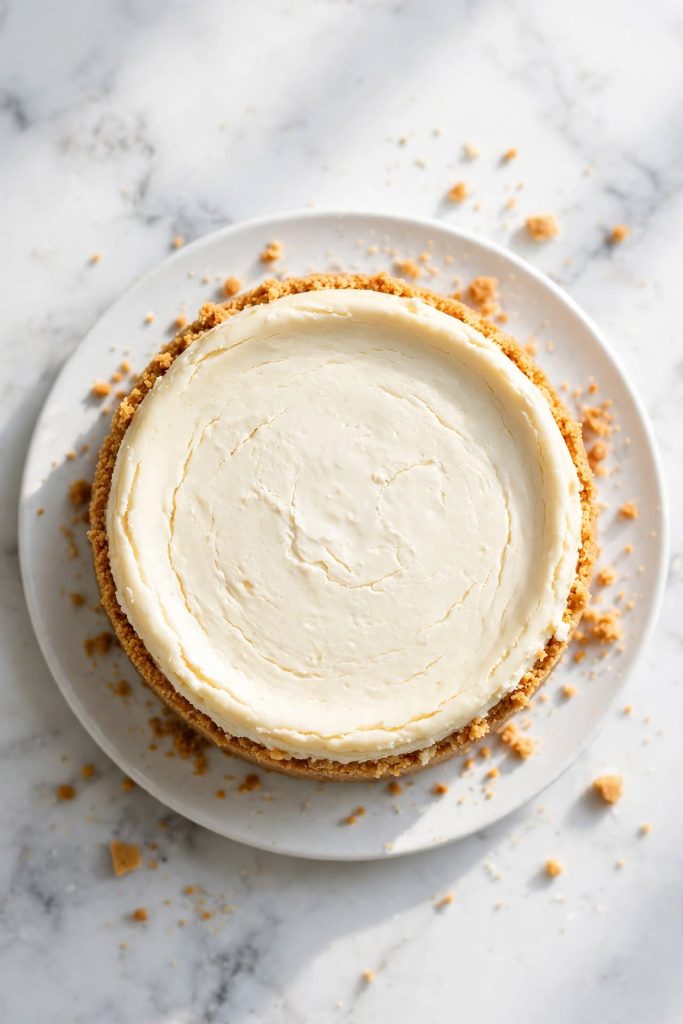
Classic cheesecake is a baked cream cheese dessert set on a buttery graham cracker crust. It uses a water bath technique to bake evenly, producing a smooth, dense filling with no cracks on the surface. Total time runs about 7 hours including chilling. Best for anyone who wants a showstopping dessert that holds its shape perfectly when sliced and looks as good as it tastes.
Classic cheesecake gives you a dense, silky filling on a crisp graham cracker base — and this version delivers that result without cracks or a sunken center. It uses five core ingredients and one technique (the water bath) that most recipes skip or make too complicated. If your cheesecakes have split or wobbled before, the issue is almost always ingredient temperature or cooling speed. This recipe fixes both. I tested this five times before publishing — the method here is the one that gave me consistent results every time.
Why Classic Cheesecake Recipe Works
What makes this different from every other baked cheesecake recipe you have tried is that every step is designed around avoiding the two most common failures — cracking and a soft center that won’t hold its shape.
- Room-temperature ingredients only — cold cream cheese creates lumps that no amount of mixing can smooth out, and those lumps bake into uneven pockets of dense texture throughout the filling.
- Water bath baking — surrounding the pan with hot water regulates the oven temperature around the filling and prevents the edges from setting before the center, which is the direct cause of surface cracks.
- Eggs added last, on low speed — overworked eggs introduce air bubbles that expand in the oven and collapse into a crater or crack as the cheesecake cools.
- A slow, staged cooling process — a cheesecake pulled straight from a hot oven contracts too fast from the sudden temperature drop, causing splits from the edges inward.
- A tested ratio of cream cheese to sour cream — sour cream loosens the texture just enough to give you a creamy, silky slice without making the filling soft or runny.
- A pre-baked crust — blind-baking the graham cracker crust for 8 minutes sets it firm so it does not crumble or go soggy when you slice the finished cheesecake.
📎 Internal Link 1 (IL-1): Replace this block before publishing. Suggested text: “If you are looking for more [broad dessert category anchor text], that is a good place to start.”
Ingredients for Classic Cheesecake
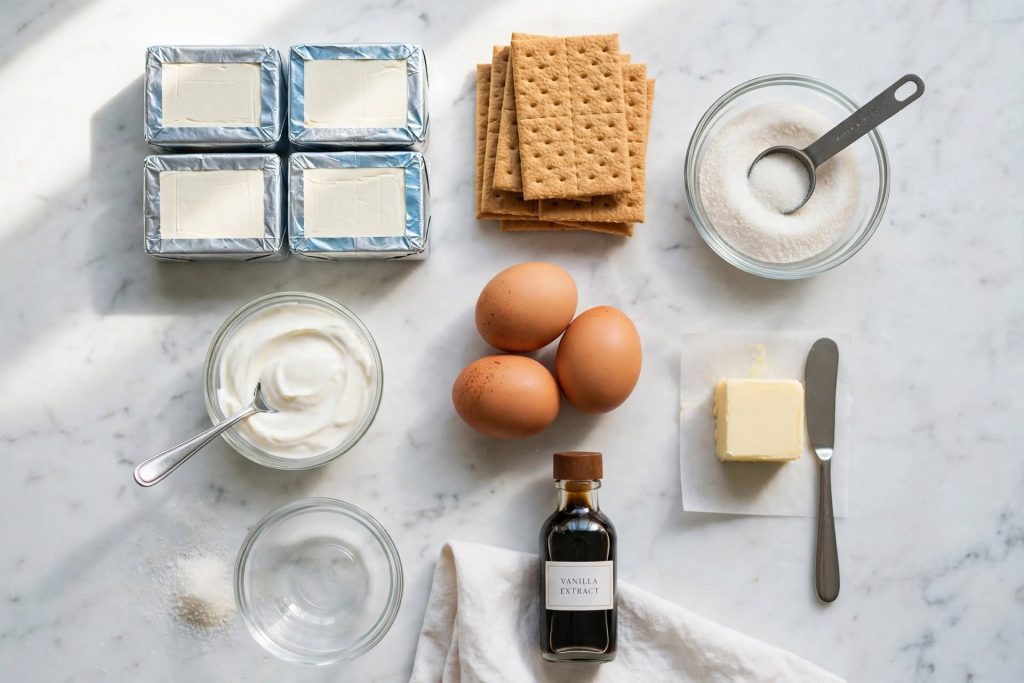
Every ingredient here has a specific job. Here is what each one does — and what to use if you need to make a substitution.
The Crust
| Ingredient | Amount | What It Does | Best Substitute + Impact |
|---|---|---|---|
| Graham crackers | 200g (about 13 full sheets) | Forms the base; absorbs butter to hold shape | Digestive biscuits — same texture, slightly less sweet |
| Unsalted butter, melted | 75g (5 tbsp) | Binds crumbs and crisps the crust when baked | Salted butter — reduce any added salt; result is the same |
| White sugar | 2 tbsp | Adds sweetness and helps crust hold structure | Brown sugar — slightly richer flavor, darker color |
The Filling
| Ingredient | Amount | What It Does | Best Substitute + Impact |
|---|---|---|---|
| Full-fat cream cheese, room temp | 900g (32 oz / 4 blocks) | The structural base — provides richness, tang, and firmness | Low-fat cream cheese — filling will be softer and may not slice cleanly |
| White sugar | 200g (1 cup) | Sweetens and softens the filling texture | Caster sugar — dissolves faster, same result |
| Full-fat sour cream, room temp | 120g (½ cup) | Loosens texture and adds tang without making filling runny | Full-fat Greek yogurt — same tang, slightly lighter texture |
| Large eggs, room temp | 4 | Set the filling during baking — structural role | No direct substitute — eggs are essential here |
| Pure vanilla extract | 1 tsp | Rounds out the flavor and adds depth | Vanilla bean paste — same result, visible specks |
| Lemon zest (optional) | 1 tsp | Brightens the overall flavor, cuts richness slightly | Omit without issue |
Key Ingredient Notes
Cream cheese: Must be full-fat and fully at room temperature — a minimum of 1 hour out of the refrigerator. Cold cream cheese will not blend smoothly, leaving dense lumps that bake into uneven pockets of texture.
Eggs: Room temperature is non-negotiable. Cold eggs tighten the batter on contact and can cause the filling to over-thicken before it even reaches the oven.
Sour cream: Use full-fat only. Low-fat versions contain stabilizers and extra water that can make the final filling slightly grainy after baking.
Equipment You Need
- 9-inch (23cm) springform pan
- Large roasting pan or deep oven-safe dish (for the water bath)
- Electric hand mixer or stand mixer
- Heavy-duty aluminum foil (to wrap the springform pan base)
- Offset spatula (to smooth the top of the filling before baking)
- Instant-read thermometer (optional but useful)
The Cream Cheese Temperature Guide
Cream cheese temperature is the single biggest factor in how your classic cheesecake turns out. Get this right and the rest of the recipe follows naturally.
| State | Description | Use for This Recipe? |
|---|---|---|
| Straight from refrigerator (35°F / 2°C) | Stiff, crumbles if pressed | ❌ No — will not blend smooth |
| Partially softened (50–55°F / 10–13°C) | Still firm, begins to give under pressure | ❌ No — still too firm for a smooth batter |
| Room temperature (65–68°F / 18–20°C) | Soft, holds a clean indent when pressed | ✅ Yes — ideal state |
| Warm (75°F+ / 24°C+) | Begins to separate or feel slightly greasy | ❌ No — oversoft, weakens filling structure |
| Microwaved | Hot and partially liquid in spots, uneven | ❌ No — uneven heat ruins the final texture |
Fastest workaround: If you forgot to take the cream cheese out early, cut each block into 8 cubes and rest them on a plate at room temperature for 20 minutes. The increased surface area brings them to the ideal state in roughly a third of the usual time.
Visual cue for “ideal”: Press your fingertip into a block. It should leave a clean indent with no resistance — like a fully ripe avocado. If it bounces back, it needs more time.
How to Make Classic Cheesecake — Step by Step
Follow these steps in order. Every tool, bowl, and ingredient should be at room temperature before you begin — this single preparation step is what separates a smooth batter from a lumpy onezStep 1 — Prepare the Pan and Preheat
Step 1
Preheat your oven to 325°F (160°C). Wrap the outside of your 9-inch springform pan tightly with two layers of heavy-duty aluminum foil, covering the base and coming up the sides completely. This seal keeps water out during the water bath — one gap is enough to turn your crust soggy.
What to look for: No gaps in the foil. Hold the wrapped pan up to the light to check. If you see any gaps, add a third layer.
Step 2 — Make the Graham Cracker Crust
Pulse graham crackers in a food processor until you have fine, even crumbs with no large chunks remaining. Mix with melted butter and sugar until the mixture holds together when you press it between your fingers — it should feel like damp sand. Press firmly into the bottom of the pan using the flat base of a glass, aiming for an even layer about 5mm thick with no bare spots or thin edges.
Bake the crust alone for 8 minutes until set and slightly golden at the edges. Remove and let it cool while you make the filling — a hot crust can begin cooking the bottom of your filling before you want it to.
What to look for: The crust surface should appear dry and matte, not shiny or wet. If it still looks damp, give it 2 more minutes.
Step 3 — Beat the Cream Cheese
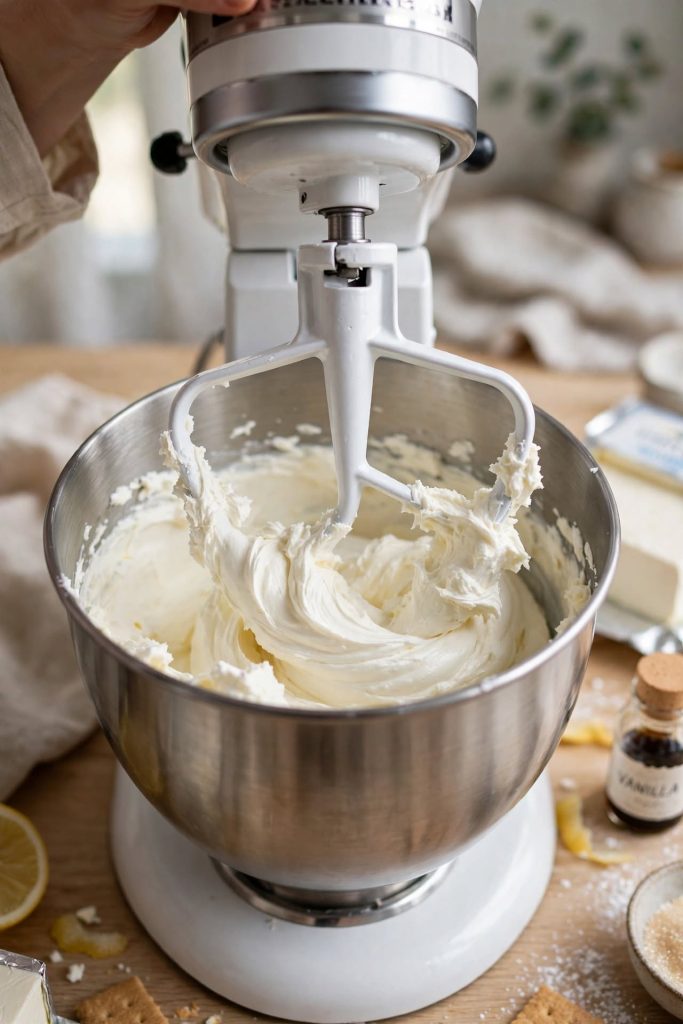
⚠️ Critical step: Beat the cream cheese alone on medium speed for 2 full minutes before adding anything else. This is the step that eliminates lumps — and lumps that survive this stage will bake permanently into the filling. If you rush past this, no additional mixing later will fix the texture.
Run a spatula around the bowl and across the beaters halfway through. You are scraping down hidden pockets of unmixed cream cheese that cling to the sides.
What to look for: No visible lumps, no streaks, no grainy patches. The cream cheese should look like thick, smooth frosting — uniform in color and texture throughout.
Step 4 — Add Sugar, Sour Cream, and Vanilla
Add the sugar and beat on medium for 1 minute until fully incorporated — the mixture will become slightly lighter in color. Add the sour cream and vanilla and mix on low until just combined, about 30 seconds. Stop the mixer and scrape the bowl and beaters once more.
What to look for: The batter should be smooth and slightly glossy. Run a spatula through the mixture — if you see streaks or pockets of unmixed sour cream, give it another 15 seconds on low.
Step 5 — Add the Eggs
⚠️ Critical step: This is where most cheesecakes are ruined. Switch to the lowest mixer speed and add eggs one at a time, mixing only until the yolk just disappears — roughly 15 seconds per egg. Stop immediately. Do not mix further.
Overmixing after the eggs go in traps air bubbles in the batter. Those bubbles expand in the oven, causing the cheesecake to puff up, then collapse as it cools — leaving a crater or crack directly in the center.
What to look for: The batter should look smooth, dense, and flat — not airy or foam-flecked. If you see bubbles forming on the surface, you have gone too far. The damage is not fully reversible, but letting the batter rest 10 minutes before baking allows some bubbles to escape.
📎 Internal Link 2 (IL-2): Replace before publishing. Suggested text: “Once you are comfortable with this method, [technique or ingredient anchor text] is worth exploring next.”
Step 6 — Bake in a Water Bath
Pour the filling over the cooled crust and smooth the top with an offset spatula. Place the foil-wrapped springform pan inside your roasting pan. Carefully pour hot tap water (not boiling — boiling water can heat the base of the pan unevenly) into the roasting pan until it reaches halfway up the sides of the springform pan.
Bake at 325°F (160°C) for 55 to 65 minutes. Every oven runs differently — start checking at 55 minutes.
What to look for: The edges should be set — they will not jiggle when you nudge the pan gently. The center should still wobble as a single cohesive mass, like a just-set jello. If the whole surface moves as liquid, it needs more time. If it is completely solid with no movement, it is slightly overbaked but still good.
Step 7 — Cool Gradually
Turn the oven off. Prop the oven door open about 1 inch using a wooden spoon. Leave the cheesecake inside for 1 full hour — this slows the temperature drop and is the most important crack-prevention step in the entire cooling process.
Remove the cheesecake from the water bath. Run a thin knife or offset spatula around the inside edge of the pan — this releases the filling from the sides so it can contract freely during cooling without pulling the surface apart. Let it cool at room temperature for another hour, then cover and refrigerate for a minimum of 4 hours. Overnight is significantly better.
What to look for: The surface should be flat and matte before refrigerating. Any shine indicates the center is still warm and not yet set. Slicing a warm cheesecake gives you a soft, runny center — even if the outside appears firm.
The Science Behind a Perfect Cheesecake
A consistent result is not luck — it is the outcome of six ingredients doing specific, predictable jobs inside your oven. Understanding what each one does makes it much easier to diagnose what went wrong and how to fix it.
Why Room-Temperature Cream Cheese Matters
Cream cheese provides the protein network that holds the filling’s structure when heat is applied. Cold cream cheese proteins are contracted and clumped — they do not blend smoothly and leave the batter lumpy at a molecular level, which bakes into an uneven, dense texture. At room temperature, those proteins are relaxed and dispersed, allowing a smooth, uniform batter that bakes consistently.
Why the Water Bath Prevents Cracks
The water bath raises the humidity inside the oven and caps the maximum temperature around the pan at 212°F (100°C) — the boiling point of water. This means the edges of the filling cannot overheat before the center sets. Without it, edge proteins seize and firm up while the center is still liquid — the tension between the two zones cracks the surface as each pulls in a different direction.
Why Eggs Are Added Last and Gently
Eggs add structure through protein coagulation during baking. Each egg stiffens the filling slightly more — four eggs gives you a dense, sliceable result; fewer gives you a filling that sags; more gives you something closer to a firm custard. The reason eggs are added last and on the lowest speed is to avoid incorporating air. Air bubbles expand when heated, puff the filling above the pan edge, then collapse as it cools — that collapse is the direct cause of sunken centers and surface cracks.
Tips for the Best Result
These are the details that separate a good classic cheesecake from one people ask you to make again.
- Take ingredients out one full hour early — set a timer the moment you start gathering your equipment. One hour at room temperature is the minimum; 90 minutes is safer in a cold kitchen.
- Use a 9-inch springform pan, not a cake pan — the release mechanism means you never have to flip or pry the cheesecake free, both of which damage the top surface and break the crust.
- Use hot tap water for the water bath, not boiling — boiling water heats the base of the pan faster than the steam-based moderation is designed for, creating a temperature gradient that works against even baking.
- Bake at 325°F — not higher — even 25°F above target is enough to cause the edges to overbake and crack before the center sets. Oven thermometers are worth using here.
- Chill overnight for the cleanest slices — a 4-hour chill is the minimum, but an overnight rest firms the texture significantly. Slices cut from a 24-hour-old cheesecake hold their shape completely and look noticeably cleaner on the plate.
- Run a hot knife between every slice — dip your knife in a glass of hot water, wipe dry, then cut. Repeat between each slice. A cold knife drags the filling and creates a ragged edge.
- Always run a knife around the edge after baking — this releases the filling from the pan sides. If the filling sticks and the sides contract inward during cooling, they pull the center surface down with them.
Common Mistakes to Avoid
❌ Using Cold Cream Cheese
Result: Your filling will be lumpy and uneven throughout — those lumps do not disappear during baking, they set permanently into the texture.
Fix: Take cream cheese out 60 to 90 minutes before mixing. If short on time, cube each block into 8 pieces and rest on a plate for 20 minutes — the increased surface area speeds softening significantly.
❌ Overmixing After Adding the Eggs
Result: Air bubbles form in the batter, expand during baking, and collapse as the cheesecake cools — leaving a crater, a large crack across the center, or both.
Fix: Add eggs one at a time on the lowest speed and stop the moment each yolk disappears. Fifteen seconds per egg is enough. The moment you see a smooth batter, stop the mixer.
❌ Skipping the Water Bath
Result: The edges set before the center, and the tension between the two zones cracks the surface — often in a single line running through the middle.
Fix: Set up the water bath. It takes 3 extra minutes and is the single highest-return step in the entire recipe. If you truly cannot use one, bake at 300°F and cool in the oven with the door cracked to reduce the risk.
❌ Opening the Oven Door Too Early
Result: A sudden cold air current causes the filling to contract rapidly in the first few minutes — almost always producing a long crack down the center that was not there before.
Fix: Do not open the oven for the first 50 minutes under any circumstances. Set a timer and step away.
❌ Cutting Into a Warm Cheesecake
Result: The center will be soft, runny, and look completely undercooked even though it is not — the cheesecake simply has not had time to set after the heat of baking.
Fix: Chill for a minimum of 4 hours before slicing. In an emergency, 2 hours in the freezer followed by 30 minutes in the refrigerator will work — but overnight is always better.
❌ Using the Wrong Pan Size
Result: A smaller pan creates a thicker filling — the edges overbake before the center can catch up. A larger pan creates a thinner filling that overcooks across the board in less time.
Fix: Use a 9-inch springform pan. If using an 8-inch pan, reduce the oven temperature by 10°F and add 10 to 15 minutes to the bake time.
❌ Rushing the Cooling Process
Result: Fast temperature changes cause the top to crack and the center to dip — the protein structure cannot absorb the thermal shock of going from hot to cold quickly.
Fix: Cool in the oven with the door cracked for 1 hour, then at room temperature for 1 hour, then refrigerate. All three stages are necessary — skipping any one of them increases crack risk substantially.
📎 Internal Link 3 (IL-3): Replace before publishing. Suggested text: “For more guides like this one, [problem-based anchor text] covers everything in the same detail.”
Variations Worth Trying
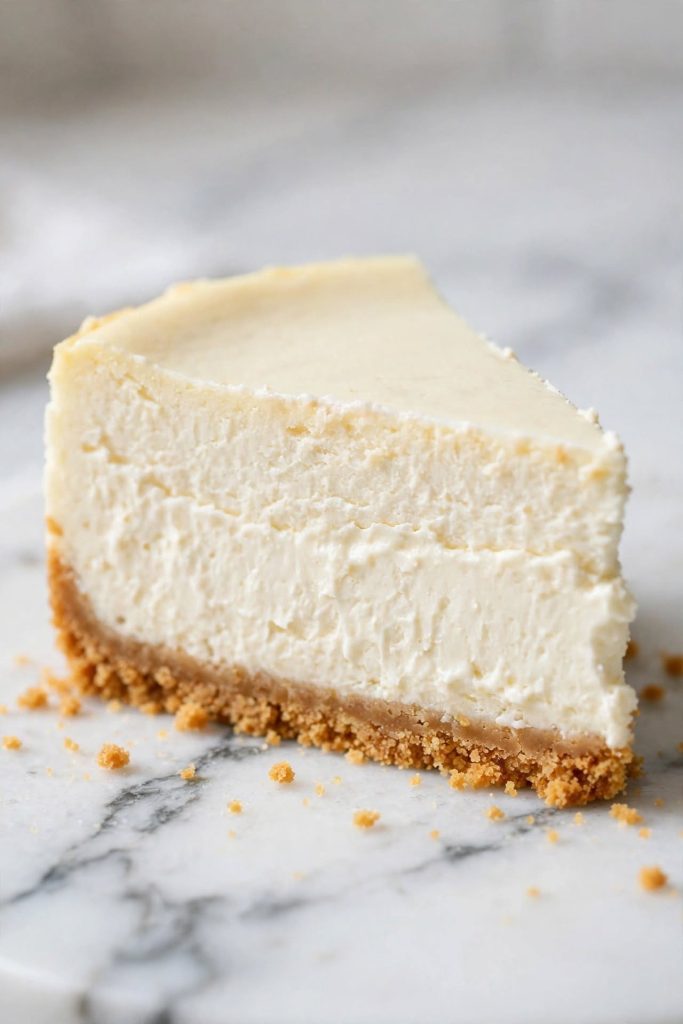
New York-Style Cheesecake
What changes: Add 2 tablespoons of cornstarch to the filling with the sugar, and replace the sour cream with the same amount of heavy cream.
When: Add cornstarch at Step 4 with the sugar.
Result: A denser, firmer filling with a more pronounced tang — the version most people picture when they think of New York cheesecake. Slices cleanly even at room temperature and holds its shape longer on the plate.
No-Bake Classic Cheesecake
What changes: Replace the eggs with 240ml (1 cup) of heavy cream, whipped to stiff peaks and folded gently into the cream cheese mixture. No oven, no water bath needed.
When: Skip Steps 5, 6, and 7 entirely. Fold in the whipped cream after Step 4, pour over the unbaked crust, and chill for at least 6 hours before serving.
Result: A softer, mousse-like texture that does not slice as cleanly as the baked version but is noticeably lighter. Best served very cold, straight from the refrigerator.
Lemon Cheesecake
What changes: Add 2 tablespoons of fresh lemon juice and 2 teaspoons of lemon zest to the filling.
When: Add with the sour cream at Step 4.
Result: A brighter, more acidic flavor that cuts through the richness of the cream cheese. The lemon does not alter the texture but makes the filling taste noticeably lighter and more refreshing — a particularly good option for spring and summer occasions.
Chocolate Marble Cheesecake
What changes: Melt 100g of dark chocolate and let it cool to room temperature. Pour the plain filling into the pan, then drop spoonfuls of the chocolate over the surface and swirl gently with a skewer or toothpick.
When: After pouring the filling into the pan, before baking.
Result: A visually striking swirl pattern with pockets of dark, slightly bitter chocolate running through the filling. The chocolate firms slightly after chilling, giving the filling a second distinct texture alongside the cream cheese base.
Mini Cheesecakes
What changes: Use a 12-cup muffin tin lined with cupcake papers. Divide the crust and filling evenly across all 12 cups.
When: All other steps remain the same. Reduce the bake time to 18 to 22 minutes.
Result: Individual servings that chill faster (2 hours minimum) and are far easier to plate and serve at parties. The texture is identical to the full-size version and the crust-to-filling ratio is noticeably higher, which many people prefer.
How to Store
Room Temperature
Classic cheesecake should not sit at room temperature for more than 2 hours — not as a food-safety limit, but for texture quality. The filling softens and loses its firm, sliceable consistency at room temperature, and any fresh fruit topping will begin to weep. If you are serving at a party or gathering, take the cheesecake out of the refrigerator 15 to 20 minutes before serving — this is the sweet spot for flavor without losing structural firmness.
Refrigerator
Store in an airtight container, or press plastic wrap directly onto the surface of the cheesecake before covering. Best quality for up to 5 days. After day 3, the graham cracker crust begins to soften slightly from moisture migration — this is normal and does not affect the flavor. To serve cold cheesecake at its best texture, take it out of the refrigerator 15 minutes before slicing. This allows the filling to relax just enough to cut cleanly without crumbling at the edges.
Freezer — Complete Guide
Classic cheesecake freezes well. Best quality for up to 2 months — safe beyond this window, but the filling texture may become slightly grainy after extended freezing.
To freeze a whole cheesecake: chill completely in the refrigerator first, then wrap tightly in two layers of plastic wrap followed by one layer of aluminum foil. Label with the date. Do not freeze in the springform pan — it takes up freezer space and the metal can transfer odors.
To freeze individual slices: place cut slices on a baking sheet and freeze uncovered for 1 hour until fully firm, then wrap each slice individually in plastic wrap and store together in a zip-lock freezer bag. This prevents them from freezing together and lets you pull one slice at a time without defrosting the whole cake.
To thaw: transfer from the freezer to the refrigerator and allow 8 hours (or overnight) for a whole cheesecake. Individual slices thaw in 3 to 4 hours in the refrigerator. Do not thaw at room temperature — the outside softens and the surface begins to weep before the center is ready.
Texture note: the cream cheese filling holds up very well to freezing. The crust may become slightly softer after thawing, but a 5-minute rest at room temperature before serving brings it close to its original crispness.
Use your judgment — if it smells off or shows any discoloration, discard it.
📎 Internal Link 4 (IL-4): Replace before publishing. Suggested text: “If batch baking is something you enjoy, [make-ahead or storage anchor text] fits perfectly into that routine.”
How to Serve
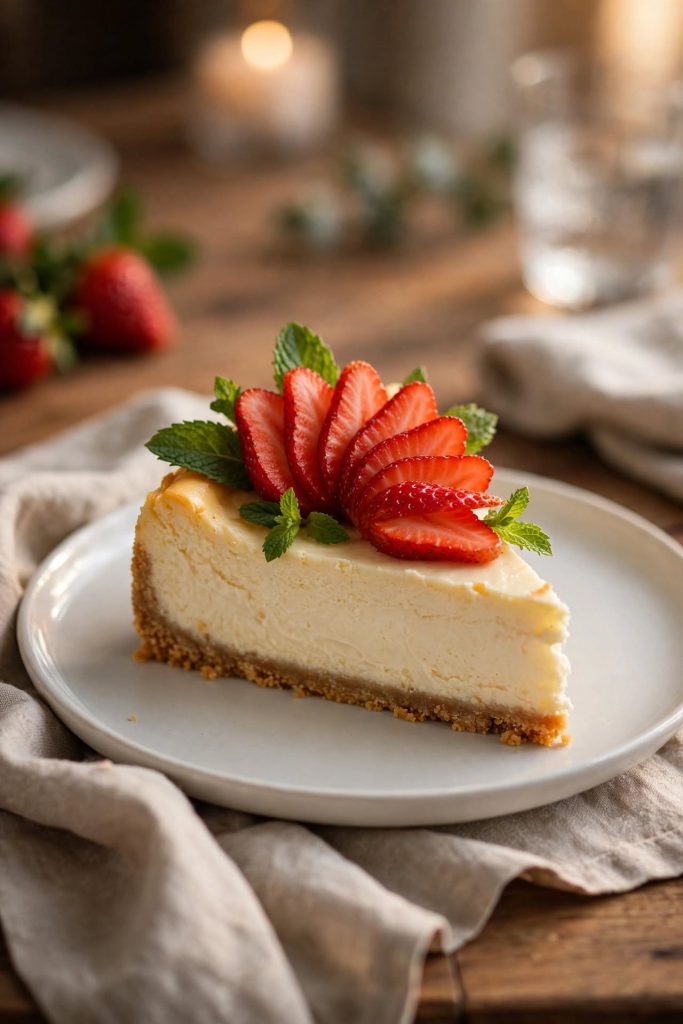
Classic Ways to Serve
- Chilled, sliced cleanly with a hot knife, served plain on a dessert plate — the texture and flavor need no addition
- With a spoonful of fresh strawberries or a simple berry compote on the side, allowing each person to add as much or as little as they want
- With a light dusting of powdered sugar over the top just before serving — adds visual polish without sweetness
Upgraded and Occasion-Worthy
- Topped with a sour cream glaze (mix 200g sour cream, 2 tbsp sugar, ½ tsp vanilla — spread over the top after baking and return to the oven for 5 minutes) for an ultra-smooth, glossy finish
- With a caramel drizzle and a pinch of flaky sea salt scattered over the top for a dinner party centerpiece
- Portioned into individual slices with a fresh strawberry fan and a mint leaf for clean event plating that looks restaurant-quality
Pairs well with freshly brewed coffee, Earl Grey tea, or a late-harvest dessert wine. Best for: dinner parties, holiday gatherings, birthdays, or any occasion where you want a dessert that holds its shape, photographs well, and requires almost no last-minute preparation.
Frequently Asked Questions
Can I make classic cheesecake without a water bath?
You can, but cracking becomes significantly more likely. Without the water bath, the edges of the filling set faster than the center, creating tension in the surface that splits it. If you skip it, bake at 300°F (150°C) instead of 325°F and leave the cheesecake in the oven to cool with the door cracked — this reduces but does not eliminate the crack risk.
Why did my classic cheesecake crack on top?
Cracking is almost always caused by one of three things: overmixing after the eggs were added (air bubbles expanding and collapsing), skipping the water bath (uneven baking and temperature tension), or cooling too fast. Identify which step was rushed, and you will know exactly what to adjust for your next bake.
How do I know when classic cheesecake is done?
The edges should be fully set and matte when you nudge the pan. The center should wobble as a single cohesive mass — like a just-set jello — not move as liquid. An instant-read thermometer inserted in the center should read 150°F (65°C) when the cheesecake is done. If the whole surface moves as liquid, it needs more time.
Can I make this ahead of time?
Yes — and it is actually better made a day ahead. The filling firms significantly and the flavors deepen overnight in the refrigerator. Make it up to 2 days before you need it and keep it covered until ready to serve. This also removes all time pressure on the day of your event.
How long does classic cheesecake last?
Best quality for up to 5 days in the refrigerator in an airtight container. The graham cracker crust softens slightly after day 3 from moisture migration, but the filling stays firm and flavorful through day 5. Use your judgment — if it smells off or the surface changes color, discard it.
Can I freeze classic cheesecake?
Yes. Wrap individual slices in plastic wrap, then in foil, and freeze for up to 2 months. Thaw in the refrigerator overnight. The filling holds its texture well after freezing; the crust may soften slightly, but a few minutes at room temperature before serving brings it close to its original state. [Related recipe anchor text] is worth making next if you enjoy baking ahead.
What can I substitute for sour cream?
Full-fat Greek yogurt is the closest substitute — same tang, similar fat content, nearly identical result. Heavy cream works (use the same volume) but produces a richer, slightly less tangy filling. Low-fat or non-fat alternatives are not recommended — the extra water and stabilizers can make the filling grainy after baking.
Can I double this recipe?
Yes, but use two separate 9-inch pans rather than trying to bake one very thick cheesecake. A deeper filling takes much longer to set in the center — the edges will overbake before the center reaches the correct temperature. Two pans bake consistently and both fit in most ovens side by side.
Why did my classic cheesecake sink in the middle?
Sinking after cooling is almost always caused by too much air in the batter (from overmixing after adding the eggs) or from opening the oven door before the filling had set. The trapped air puffs the filling upward during baking, then collapses as it cools — leaving a visible dip. Low-speed egg addition and a closed oven for the first 50 minutes prevent both causes.
What size pan works best?
A 9-inch (23cm) springform pan is ideal for this recipe. An 8-inch pan works but requires reducing the temperature by 10°F and adding 10 to 15 minutes to account for the deeper filling. Do not use a standard cake pan without a release mechanism — removing a cheesecake from one without damaging it is extremely difficult and almost always results in a broken surface.
Why does my cheesecake have a jiggly center after baking?
A jiggly center after baking is correct — the cheesecake is not undercooked. The filling continues to set as it cools. What you are looking for is the center wobbling as a single cohesive piece, like jello — not moving as loose liquid. If you see liquid movement across the whole surface, the cheesecake needs more baking time. If only the center wobbles as one mass, pull it out and begin the cooling process.
Can I use low-fat cream cheese?
You can, but the result will be noticeably softer and may not hold its shape cleanly when sliced. Full-fat cream cheese has the fat content needed to create a firm, dense, sliceable filling. Low-fat versions contain more water and stabilizers that can also produce a slightly grainy texture. For a lighter filling, use the no-bake variation instead — it is designed for that result.

Classic Cheesecake
Ingredients
Method
- Preheat oven to 325°F (160°C). Wrap the outside of a 9-inch springform pan with two layers of heavy-duty aluminum foil, sealing all gaps.
- Crush graham crackers to fine crumbs. Mix with melted butter and 2 tbsp sugar until the mixture holds together when pressed. Press firmly into the pan base. Bake 8 minutes. Let cool.
- Beat cream cheese alone on medium speed for 2 full minutes until completely smooth — no lumps or streaks.
- Add 200g sugar and beat 1 minute. Add sour cream, vanilla, and lemon zest if using. Mix on low for 30 seconds.
- Add eggs one at a time on the lowest speed, mixing only until the yolk disappears (~15 seconds each). Stop immediately after the last egg.
- Pour filling over cooled crust and smooth with an offset spatula. Place springform pan in a large roasting pan. Pour hot tap water into roasting pan halfway up the springform pan sides.
- Bake 55 to 65 minutes. Edges should be set; center should wobble as a single mass. Turn oven off, crack door 1 inch, leave inside 1 hour.
- Remove from water bath. Run a thin knife around the inside edge of the pan. Cool at room temperature 1 hour, then refrigerate a minimum of 4 hours (overnight preferred).
- Release the springform ring, slice with a hot clean knife, and serve.
Notes
- Ingredient temperature matters more than anything else — 60 to 90 minutes at room temperature before mixing, or cube the cream cheese blocks and rest 20 minutes.
- Do not substitute low-fat cream cheese — the filling will not hold its shape or slice cleanly.
- The center should still wobble when you pull it from the oven — this is correct. It sets fully during the cooling and chilling stages.
- For the cleanest slices: chill overnight rather than 4 hours. The texture difference is significant.
- To test doneness with a thermometer: the center should read 150°F (65°C).
More Dessert Recipes You Will Love
- “No-Bake Oreo Cheesecake” — if you want the same creamy texture with zero oven time, this is the version to make on a busy weeknzight.
- “New York Cheesecake“ — denser, tangier, and with a firmer slice — the version that holds its shape at room temperature for serving at gatherings.
- “Lemon Bars“ — a bright, citrus-forward bake that uses the same cream cheese base in a completely different format.
- “Chocolate Lava Cake“ — when you want a baked dessert that impresses but takes under 20 minutes of hands-on work.
- “Banana Bread“ — a no-fuss everyday bake that uses pantry staples and stays moist for days — worth having in your regular rotation.
Did you make this classic cheesecake? Leave a ⭐⭐⭐⭐⭐ rating below and let me know in the comments how it turned out. I read every comment and would love to know what worked for you.