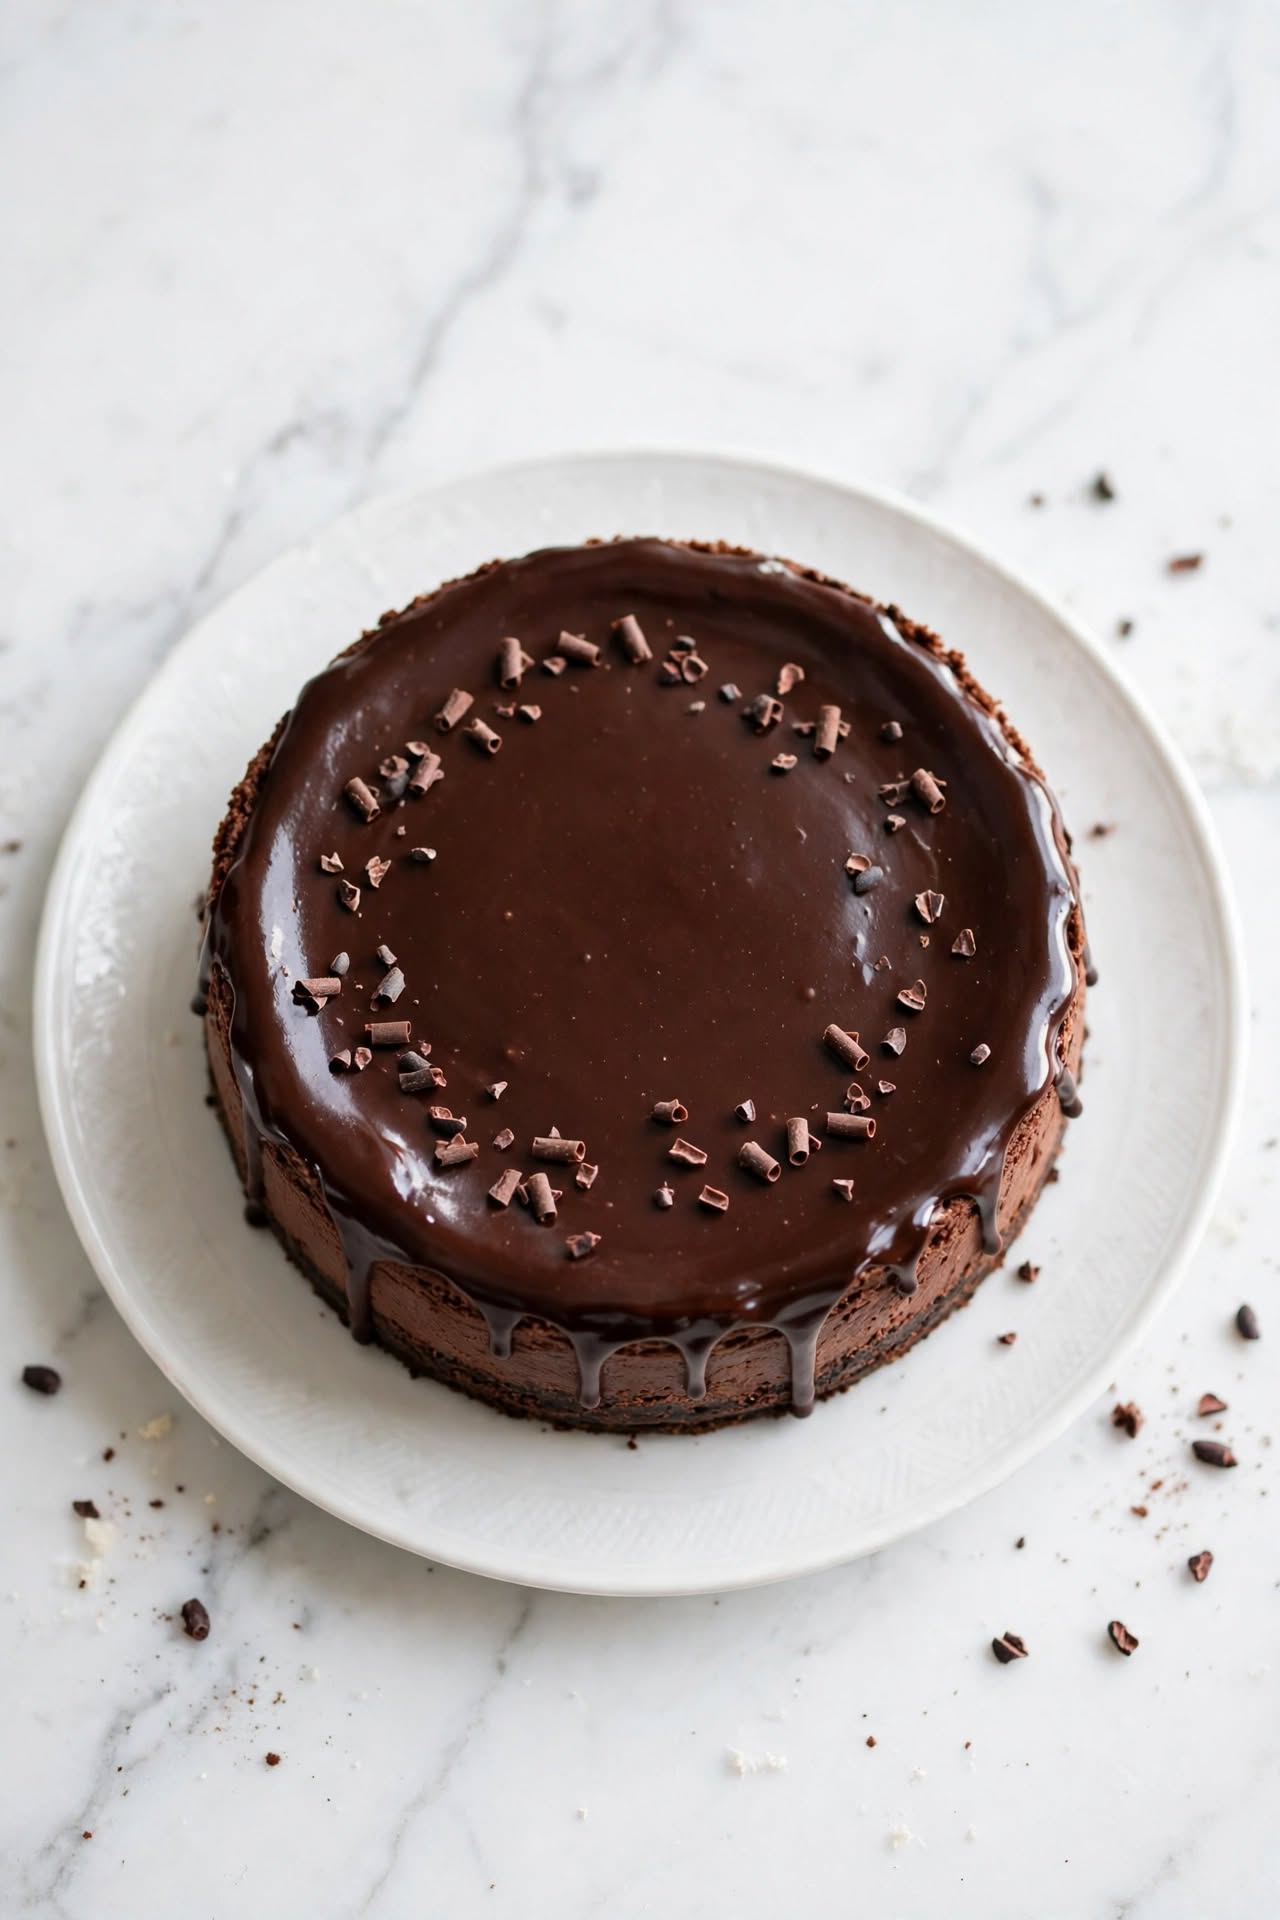
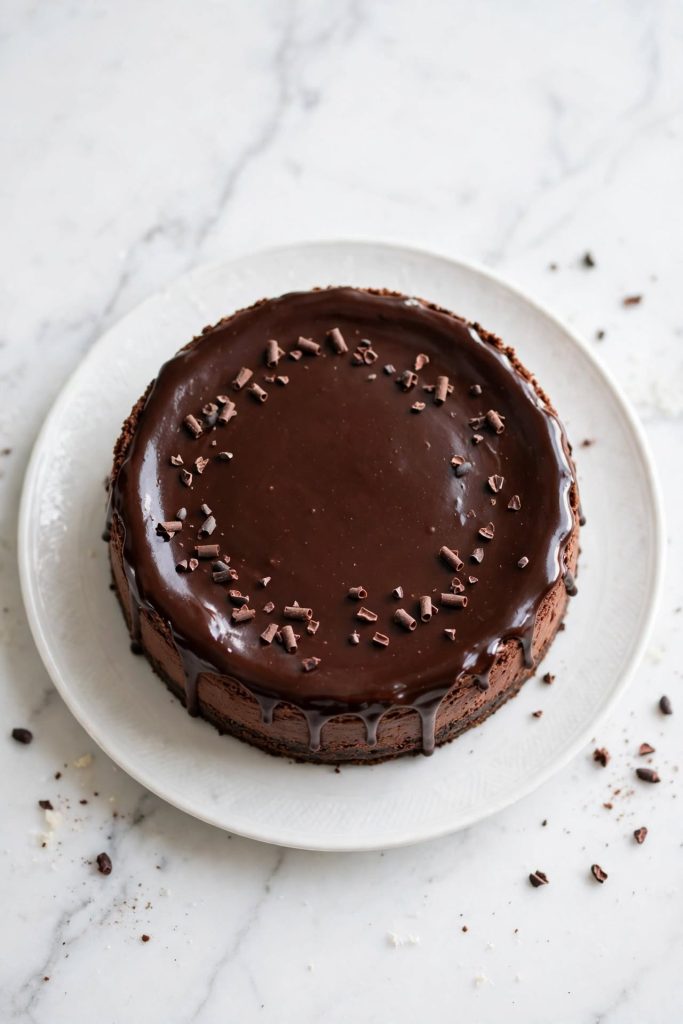
What is chocolate cheesecake? Chocolate cheesecake is a baked cream cheese dessert with a deep cocoa-and-dark-chocolate filling set on a crushed chocolate cookie crust. It uses full-fat cream cheese and melted dark chocolate for a dense, velvety texture that slices cleanly after 6 hours of chilling. Total hands-on prep time is under 30 minutes. Best for anyone who wants a make-ahead dessert that holds its shape and looks impressive without complicated technique.
This chocolate cheesecake gives you a deep, dark filling — rich from real melted chocolate, not just cocoa powder — sitting on a crisp, buttery chocolate cookie crust. It uses seven core ingredients and under 30 minutes of hands-on prep. The most common fear with any cheesecake is cracking — this recipe uses a water bath method that eliminates that problem before it starts. I tested this recipe six times before publishing to confirm the method delivers consistent results regardless of oven temperature variation.
Why This Recipe Works
Most cheesecake recipes fail at the same point — they rely on cocoa powder alone for chocolate flavor and skip the steps that prevent cracking. This version does neither.
- Melted dark chocolate in the filling — Cocoa powder adds color; real chocolate adds depth, gloss, and a fudgy texture that cocoa alone cannot produce. You taste the difference in the first bite.
- Room-temperature cream cheese only — Cold cream cheese stays lumpy no matter how long you beat it. Soft cream cheese beats smooth in under 2 minutes and produces the velvety texture you are going for.
- Water bath baking — Wrapping the pan and baking in water keeps heat even and humid. The result is a crack-free surface that needs no topping to hide damage.
- Cool-in-oven method — Pulling the cheesecake from a hot oven into a cool kitchen causes sudden contraction. Leaving it in the turned-off oven for 60 minutes eliminates that shock entirely.
- Chocolate cookie crust — A plain graham cracker base works, but a chocolate sandwich cookie crust reinforces the dark chocolate theme from bottom to top — and stays crisp for 2 days after baking.
- Make-ahead advantage — This cheesecake is best quality on day 2 after baking. Bake it the day before you need it and the flavor and texture will both be at their peak when you serve it.
If you are exploring more no-bake and baked cheesecake recipes, that guide is a good place to start.
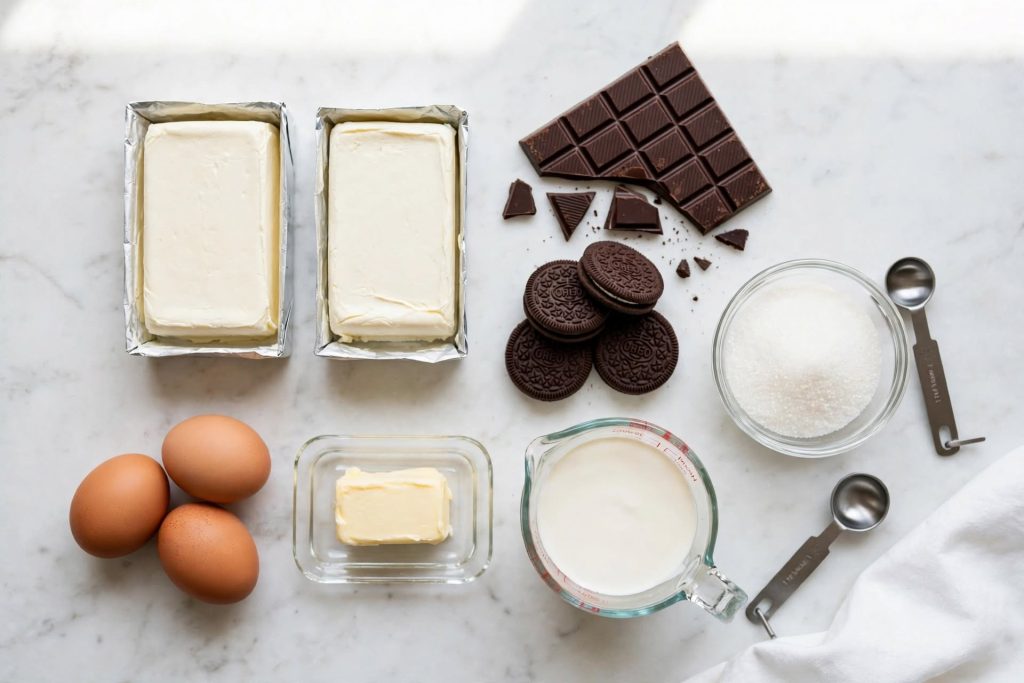
Ingredients for Chocolate Cheesecake
Every ingredient here has a specific job. Here is what each one does — and what to use if you need to make a substitution.
The Crust
| Ingredient | Amount | What It Does | Best Substitute + Impact |
|---|---|---|---|
| Chocolate sandwich cookies | 240g (2 cups) crushed | Forms the crisp, chocolatey base | Graham crackers — lighter flavor, less chocolate depth |
| Unsalted butter, melted | 80g (6 tbsp) | Binds the crumbs together and adds richness | Coconut oil — sets firmer, slight coconut flavor |
The Filling
| Ingredient | Amount | What It Does | Best Substitute + Impact |
|---|---|---|---|
| Full-fat cream cheese, room temp | 680g (3 × 8oz blocks) | Creates the dense, creamy base texture | Neufchâtel — slightly less rich; do not use low-fat |
| Dark chocolate (60–70% cacao) | 200g (7 oz) | Delivers deep chocolate flavor and glossy texture | Milk chocolate — sweeter, reduce sugar by 2 tbsp |
| Granulated sugar | 200g (1 cup) | Sweetens and helps stabilize the structure | Caster sugar — dissolves faster, same result |
| Large eggs, room temp | 3 | Set the structure and give the filling its body | No substitute — eggs are structural here |
| Heavy cream | 120ml (½ cup) | Helps melt the chocolate smoothly; adds creaminess | Full-fat sour cream — tangier, slightly denser |
| Vanilla extract | 1 tsp | Rounds out the chocolate flavor | Vanilla bean paste — same role, stronger flavor |
| Dutch-process cocoa powder | 2 tbsp | Deepens the color and reinforces chocolate intensity | Natural cocoa — lighter color, slightly more acidic |
Key Ingredient Notes
Cream cheese: Use full-fat Philadelphia-style blocks, not the whipped tub variety — the whipped version contains more air and water, and your filling will not set properly. It must be genuinely at room temperature — cold in the center does not count.
Dark chocolate: Chop a bar rather than using chips when possible. Chips contain emulsifiers (specifically soy lecithin) that stabilize them against melting — the bar melts cleaner and blends more smoothly into the batter.
Eggs: Cold eggs can shock a warm filling and affect how it sets. Leave them on the counter alongside the cream cheese for at least 30 minutes before you begin.
Equipment You Need
- 9-inch springform pan — The removable sides are non-negotiable for clean slicing.
- Heavy-duty aluminum foil — Wrap the outside of the pan to prevent water from seeping in during the water bath.
- Large roasting pan — Needs to be big enough to hold the springform pan with at least 1 inch of water around the sides.
- Stand mixer or hand mixer — For beating the cream cheese smooth without overworking it.
- Double boiler or heatproof bowl + saucepan — For gently melting chocolate without scorching it.
- Instant-read thermometer (optional but useful) — Takes the guesswork out of knowing when the filling is done.
The Chocolate Guide
The type of chocolate you use is the single biggest factor in how your chocolate cheesecake filling turns out — in both flavor intensity and final texture.
| Chocolate Type | Cacao % Range | Flavor Profile | Use for This Recipe? |
|---|---|---|---|
| Unsweetened baking chocolate | 100% | Intense, bitter, no sweetness | Not recommended — add sugar separately |
| Dark chocolate (recommended) | 60–70% | Deep, slightly bitter, complex | ✅ Best — use this |
| Semi-sweet chocolate | 45–55% | Balanced sweet and bitter | Works well — slightly sweeter result |
| Milk chocolate | 30–45% | Mild, creamy, sweet | Works — reduce sugar by 2 tbsp |
| White chocolate | 0% cacao solids | Sweet, vanilla, creamy | Not for this recipe — use the variation below |
What to look for when buying: The ingredient list on the package should read cocoa solids or chocolate liquor as the first ingredient — not sugar. If sugar comes first, the flavor in your baked cheesecake will be flatter and the texture slightly less dense.
Workaround when 60–70% is not available: Combine 55% semi-sweet chocolate with an extra tablespoon of cocoa powder to push the intensity closer to a 65% bar.
How to Make Chocolate Cheesecake — Step by Step
Follow these steps in order. The single most important rule: do not rush the cooling phase — it is where most cheesecakes fail.
Step 1 — Prepare the Pan and Preheat the Oven
Preheat your oven to 325°F (165°C). Wrap the outside of your 9-inch springform pan with two layers of heavy-duty foil — fold them up around the sides so no seams face upward. The foil must cover the bottom and come up at least 2 inches on the sides to block water during the bath.
Lightly spray the inside of the pan with non-stick spray, then press a circle of parchment onto the base.What to look for: foil with no tears or gaps — hold it up to light briefly to check.
⚠️ Critical: A gap in the foil means water enters the pan during baking. The crust absorbs that water and turns soggy — there is no fix once it happens. Double-check the foil before adding water to the roasting pan.
Step 2 — Make the Chocolate Cookie Crust
Pulse chocolate sandwich cookies (cream filling included) in a food processor until they reach a fine, even crumb — no large chunks. Pour in the melted butter and pulse again until the mixture holds together when you press a small amount between two fingers.
Tip the crumbs into the prepared pan. Use the flat bottom of a measuring cup to press them firmly and evenly across the base and about ½ inch up the sides. Bake for 10 minutes, then set aside to cool while you make the filling.What to look for: a crust that feels solid when you tap it lightly and does not shift when the pan is moved.
Step 3 — Beat the Cream Cheese Filling
Beat the room-temperature cream cheese in a stand mixer fitted with the paddle attachment on medium speed for about 2 minutes, until it is completely smooth with no lumps. Scrape down the sides and bottom of the bowl.
Add the sugar and cocoa powder and beat again on medium-low until the mixture is uniformly chocolate-colored and no white cream cheese streaks remain — about 90 seconds.What to look for: a batter that is glossy, uniform in color, and clings to the paddle without separating.
Once you are comfortable with this method, our guide to cream cheese baking techniques is worth exploring next.
Step 4 — Melt and Fold In the Chocolate
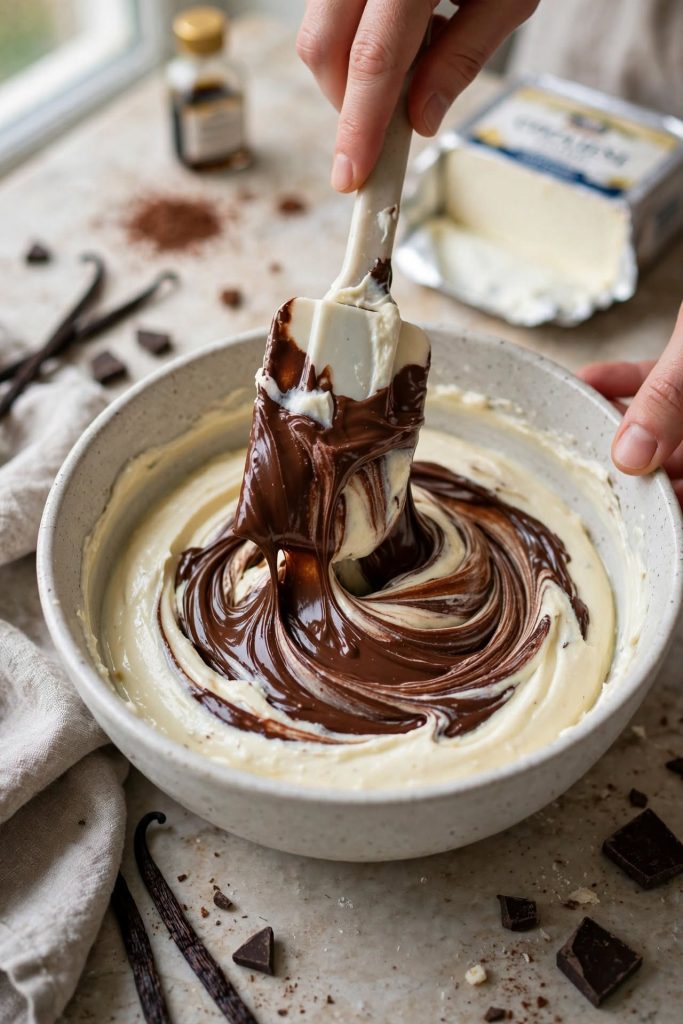
Combine the chopped dark chocolate and heavy cream in a heatproof bowl over a saucepan of barely simmering water — the bottom of the bowl must not touch the water. Stir gently until the chocolate is completely melted and the mixture is smooth and glossy. Remove from heat and let it cool until it is warm but no longer hot — about 10 minutes.
Add the cooled chocolate mixture to the cream cheese batter and beat on low until just combined. Then add the eggs one at a time on the lowest speed, beating only until each egg disappears into the batter — stop the moment you can no longer see streaks of egg white.What to look for: a dark, glossy batter with a uniform color and no white egg streaks visible.
⚠️ Critical: Adding hot chocolate to the cream cheese batter can scramble the eggs when they go in. The melted chocolate must feel warm, not hot, against the inside of your wrist before you combine them. Ten minutes of cooling is usually enough.
Step 5 — Pour, Smooth, and Bake
Pour the filling over the pre-baked crust. Tap the pan gently against the counter two or three times to release any large air bubbles, then smooth the top with a spatula. Place the foil-wrapped springform pan into the center of a large roasting pan. Fill the roasting pan with hot water from a just-boiled kettle until it reaches about 1 inch up the side of the springform pan.
Carefully transfer the entire setup to the oven and bake at 325°F (165°C) for 60 to 70 minutes.What to look for at the end of baking: the outer 2 inches of the filling are fully set and the center still has a visible jiggle — like a set custard, not sloshing liquid.
Step 6 — Cool In the Oven, Then Chill
Turn the oven off. Leave the cheesecake inside with the oven door cracked open about 1 inch for 60 minutes — you can prop the door open with a wooden spoon. Remove from the water bath and let it come to room temperature on a wire rack for another 60 minutes.
Run a thin knife or offset spatula around the inner edge of the springform pan to release the cheesecake from the sides — this step is what prevents the top from cracking as the filling contracts during cooling. Cover with plastic wrap (without touching the surface) and refrigerate for at least 6 hours before slicing, ideally overnight.What to look for before slicing: the center should feel firm to a gentle press through the plastic wrap, with no give at all.
The Science Behind a Perfect Chocolate Cheesecake
A crack-free, velvety result is not luck — it is the outcome of four ingredients doing specific, predictable jobs when handled correctly.
Why Room-Temperature Cream Cheese Matters
Cream cheese at room temperature → the fat molecules are fluid enough to disperse evenly when beaten → the result is a smooth, lump-free batter that bakes uniformly.
Cold cream cheese has tight, rigid fat globules. No amount of beating fully breaks them down — you end up with a slightly grainy texture and uneven pockets in the baked filling. If you forgot to soften your cream cheese, cut it into 1-inch cubes and microwave in 10-second intervals, checking each time. You want it soft throughout, not melted at the edges and cold in the center.
Why a Water Bath Controls Cracking
Baking in water → the oven temperature around the pan stays at a maximum of 212°F (100°C, the boiling point of water) → the filling heats slowly and evenly rather than setting at the edges before the center is done.
Without the water bath, the outer edge sets firm while the center is still liquid. As the center slowly catches up, the tension between the two zones pulls the surface apart — and you get cracks. The water bath removes that tension entirely by slowing the whole process down.
Why Dark Chocolate Beats Cocoa Powder Alone
Dark chocolate contains cocoa butter → cocoa butter is a fat → fat makes the filling richer, glossier, and more densely flavored than cocoa powder alone can produce.
Cocoa powder has had its fat (cocoa butter) removed during processing. It adds color and some bitterness, but the fat that carries chocolate flavor is gone. Using both together — melted dark chocolate for depth plus a small amount of cocoa powder for intensity — gives you the best of both. Do not skip the melted chocolate and try to compensate with extra cocoa; the texture of the filling changes significantly.
Tips for the Best Result
These are the details that separate a good baked cheesecake from one people ask you to make again.
- Ingredient temperature applies to eggs too — Cold eggs dropped into a warm cream cheese batter can cause the fat to seize slightly. Leave them out alongside the cream cheese for at least 30 minutes.
- Use the right pan size — A 9-inch springform pan gives you the correct depth-to-diameter ratio for even baking. A smaller pan means the filling is too thick to bake through at the correct time; a larger pan gives you a flat, overcooked cheesecake.
- Do not over-beat after adding the eggs — Beating the eggs on high speed incorporates air. Air expands during baking and then collapses when the cheesecake cools — the result is a sunken, cracked center. Keep the speed on low and stop the moment each egg is incorporated.
- The slow cool is not optional — Cooling in the turned-off oven for 60 minutes costs you nothing but time. Skipping it to save an hour can cost you the entire surface of your cheesecake.
- Make it the day before you need it — Overnight chilling develops the chocolate flavor further and firms the texture. A cheesecake you made the previous day will always slice more cleanly and taste more developed than one you made the same morning.
- For cleaner slices, warm the knife — Run a long sharp knife under very hot water, wipe it dry, and slice through in one smooth downward motion without sawing. Repeat the warm-wipe step between every slice.
- Doubling the recipe — Use a 10-inch springform pan and increase the baking time by 15 to 20 minutes. All other steps remain the same.
Common Mistakes to Avoid
These are the six most common points where a rich chocolate cheesecake goes wrong — and the exact fix for each one.
❌ Using Cold Cream Cheese
Result: Your filling will have visible lumps in the baked cheesecake — no amount of chilling fixes a lumpy batter once it is baked.
Fix: Set blocks of cream cheese out at room temperature for at least 45 minutes before you begin; it should leave an indent when pressed firmly but not feel greasy or melted.
❌ Overmixing the Batter
Result: Excess air from over-beating forms large bubbles that rise to the surface during baking and collapse as the cheesecake cools — you end up with a cracked, sunken top.
Fix: Add eggs on the lowest mixer speed and stop the moment each one disappears into the batter; ten extra seconds of mixing is all it takes to incorporate unwanted air.
❌ Skipping the Water Bath
Result: The outer edge of the cheesecake sets significantly faster than the center, and as the center contracts during cooling it pulls the surface into cracks.
Fix: The water bath setup takes under 3 minutes and prevents the single most common visual defect in baked cheesecake — it is worth doing every time.
❌ Opening the Oven Mid-Bake
Result: Opening the oven causes a sudden drop in temperature and humidity — the cheesecake hits cold air and the surface contracts sharply, which can cause cracking even with a water bath in place.
Fix: Do not open the oven door until the minimum baking time has elapsed; use the oven light to check the jiggle without opening the door.
❌ Slicing Before Fully Chilled
Result: A cheesecake sliced before 6 hours of chilling has a filling that is still partially soft at the center — slices will not hold their shape and the texture will feel undercooked.
Fix: Chill overnight for the cleanest result; if time is tight, a minimum of 6 hours in the refrigerator is the hard floor.
❌ Using Low-Fat Cream Cheese
Result: Low-fat cream cheese contains significantly more water and less fat — the filling will be looser and may not set firmly, giving you a texture closer to a mousse than a dense cheesecake.
Fix: Use only full-fat blocks, specifically products labeled “cream cheese” not “cream cheese spread” — the spread version has the same problem with excess water.
For more troubleshooting guides like this one, our baking common mistakes guide covers cheesecake and other desserts in the same level of detail.
Variations Worth Trying
Once you have the base recipe down, these five adjustments open up completely different flavor profiles — all using the same technique.
White Chocolate Swirl Version
Reserve 120ml (½ cup) of the plain cream cheese batter before adding the dark chocolate. Pour the chocolate filling into the pan, then add spoonfuls of the plain batter on top. Drag a skewer or toothpick through both layers in a figure-eight pattern to create a marble swirl. The visual contrast is striking — dark filling ribboned with pale cream.
No-Bake Chocolate Cheesecake
For a no-bake version, replace the 3 eggs with 240ml (1 cup) of cold heavy cream whipped to stiff peaks. Fold the whipped cream into the chocolate cream cheese base gently — overfold and you lose the airiness that allows it to set without baking. Press the crust into the pan as normal, add the no-bake filling, and refrigerate for at least 8 hours. It will not slice as cleanly as the baked version, but the mousse-like texture is notably lighter.
Chocolate Peanut Butter Version
Swirl 3 tablespoons of smooth peanut butter (thinned with 1 teaspoon of vegetable oil) into the top of the filling before baking. The peanut butter bakes to a deeper, nutty-caramel tone and creates pockets of contrast throughout the filling. Use salted peanut butter for a sharper contrast against the dark chocolate.
Mini Chocolate Cheesecakes
Line a standard 12-cup muffin tin with paper liners. Press 1 tablespoon of crust mixture into each cup, pre-bake for 5 minutes, then divide the filling evenly among all 12 cups. Bake at 325°F (165°C) for 20 to 25 minutes without a water bath — the smaller volume sets faster and more evenly in a standard tin. Chill for at least 4 hours.
Triple Chocolate Version
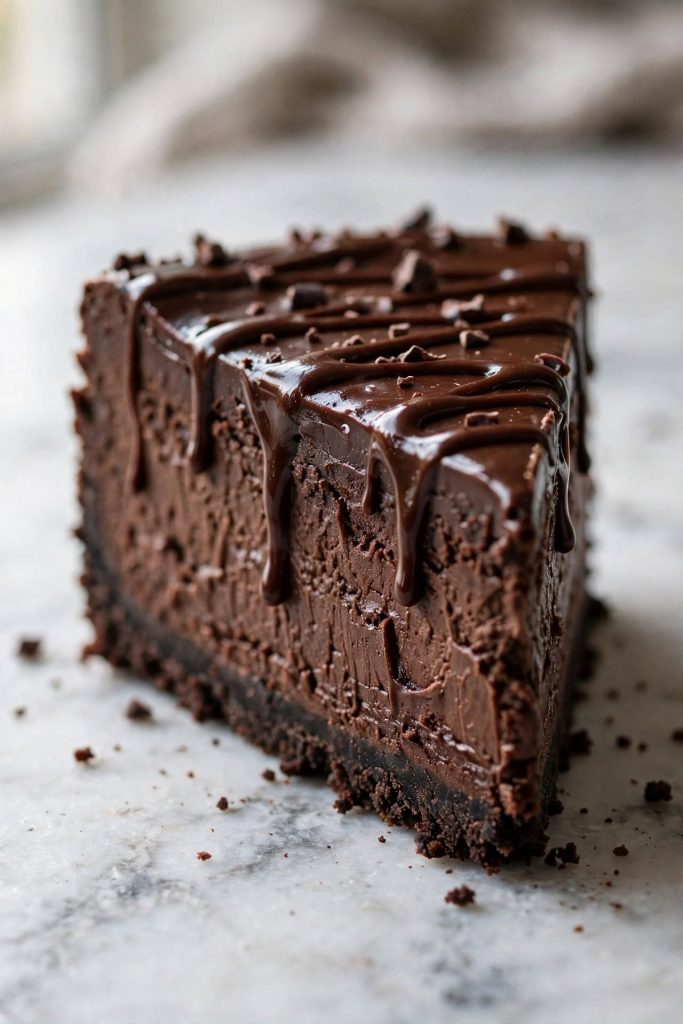
Add a layer of chocolate ganache on top after the cheesecake has fully chilled. Heat 120ml (½ cup) of heavy cream until just simmering, pour it over 100g (3.5 oz) of chopped dark chocolate, and stir until smooth. Let the ganache cool to room temperature before spreading it on the cheesecake surface. Return to the refrigerator for 30 minutes to set before slicing. The ganache adds a third layer of chocolate intensity and gives you a glossy, professional finish.
How to Store
Room Temperature
Do not store baked cheesecake at room temperature for more than 2 hours — the cream cheese and egg filling are perishable. If you are serving at a dinner table, cut it and return leftovers to the refrigerator within 2 hours.
Refrigerator
Store chocolate cheesecake in an airtight container or covered tightly with plastic wrap in the refrigerator for up to 5 days. Keep any ganache or whipped cream topping separate and add it just before serving — toppings stored directly on the cheesecake can make the surface wet and affect the texture of the top layer. The flavor tends to be at its best on days 2 and 3.
Freezer — Complete Guide
Chocolate cheesecake freezes well for up to 3 months when done correctly:
- Cool and chill the cheesecake completely first — at least 6 hours in the refrigerator.
- Remove the springform ring. Do not add any topping before freezing.
- Freeze the whole cheesecake uncovered for 1 hour until the surface is firm.
- Wrap the firm cheesecake in two layers of plastic wrap, then a layer of heavy-duty foil.
- Label with the date and freeze for up to 3 months.
- To thaw: transfer to the refrigerator the night before and leave overnight — never thaw on the counter or the filling may weep and the texture will degrade.
- Add any topping after thawing and just before serving.
Individual slices can be frozen the same way — wrap each slice separately so you can thaw only what you need.
If batch baking is part of your routine, our make-ahead dessert planning guide fits perfectly into that workflow.
How to Serve
Classic Ways to Serve
Serve slices cold, straight from the refrigerator — the filling holds its shape best when cold and the texture is at its densest and most satisfying. Run a hot, wiped knife through the cheesecake for slices that do not drag or crumble. A dollop of lightly sweetened whipped cream alongside cuts through the richness without competing with the chocolate flavor.
Upgraded and Occasion-Worthy
- Chocolate ganache pour — The triple chocolate variation above works as a topping for the standard baked version too; the ganache adds visual impact without extra baking.
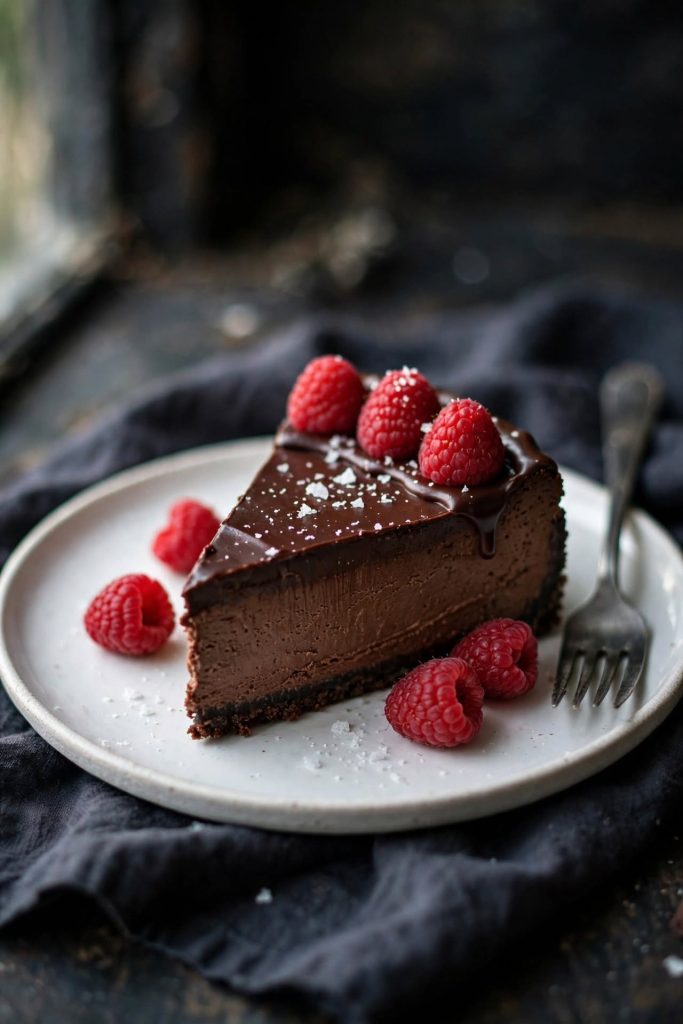
- Fresh raspberries — The acidity of raspberries contrasts sharply with the dense, rich filling and cleanses the palate between bites. Arrange them across the top just before serving.
- Sea salt flakes — A light scatter of flaked sea salt across each slice right before serving amplifies the chocolate intensity in the same way salt amplifies caramel. Use a light hand.
- Warm espresso on the side — The bitterness of espresso and the richness of baked cheesecake are a natural pairing — this is a dessert that earns a coffee course.
Frequently Asked Questions
Can I Make Chocolate Cheesecake Without a Water Bath?
Yes, you can skip the water bath, but your risk of cracking increases significantly. Without the humid oven environment, the outer edge sets faster than the center, which creates tension and surface cracks. If you skip it, bake at 325°F (not 350°F), and leave the cheesecake in the turned-off oven with the door cracked for 60 minutes after baking.
Why Did My Cheesecake Crack?
Cracking usually comes from one of three causes: overmixing the batter (which incorporates too much air), skipping the water bath, or letting it cool too quickly. Run a thin knife around the edge of the pan immediately after baking — this releases the cheesecake from the sides and prevents cracks as it shrinks during cooling. If cracks have already formed, a layer of chocolate ganache covers them entirely.
How Long Does Chocolate Cheesecake Need to Chill?
A minimum of 6 hours in the refrigerator is required for the filling to fully set. Overnight chilling (8 to 12 hours) gives you cleaner slices and a deeper, more developed chocolate flavor. Do not attempt to slice it at the 4-hour mark — the center will still be soft and the slices will not hold their shape.
Can I Make It Ahead of Time?
Yes — this is one of the best make-ahead desserts you can choose. Bake it up to 2 days before serving, cover it tightly with plastic wrap (without touching the surface), and refrigerate. The texture is actually better on day 2 than day 1 as the flavors settle and the filling firms slightly.
How Long Does Chocolate Cheesecake Last in the Fridge?
Stored properly in an airtight container or covered tightly with plastic wrap, chocolate cheesecake keeps well for up to 5 days in the refrigerator. After day 5, the crust begins to soften noticeably. Toppings such as ganache or whipped cream are best added just before serving.
Can I Freeze Chocolate Cheesecake?
Yes. Freeze the cheesecake without any topping. Let it cool and chill fully first, then wrap in two layers of plastic wrap followed by a layer of foil. Freeze for up to 3 months. Thaw overnight in the refrigerator — never at room temperature. Our no-bake Oreo cheesecake is the next one worth making if you enjoyed this recipe.
What Type of Chocolate Should I Use?
Use a good-quality dark chocolate with 60% to 70% cacao solids. Bar chocolate (chopped) melts more smoothly than chips, which contain stabilizers that resist melting. Milk chocolate works but makes the filling sweeter — reduce the sugar in the filling by 2 tablespoons to balance it.
Can I Use a Store-Bought Crust?
Yes, a 9-inch store-bought chocolate or graham cracker crust works. Press the pre-made crust into a 9-inch springform pan for better structure when slicing. The homemade version gives you a crisper, more buttery result, but a store-bought crust saves 10 minutes and still holds up well.
Why Is My Chocolate Cheesecake Dense?
Dense texture is almost always caused by cold cream cheese. Cold cream cheese does not mix smoothly — it stays compact and the filling never aerates properly. Use cream cheese that has sat at room temperature for at least 45 minutes. If it leaves an indent when you press it but springs back slowly, it is ready.
How Do I Know When It Is Done Baking?
The cheesecake is done when the outer 2 inches are set and the center still has a slight wobble — like set jelly, not liquid. An instant-read thermometer inserted 1 inch from the edge should read around 150°F (65°C). Do not wait for the center to stop wobbling completely — by that point, the filling is overbaked and the texture will be dry.
Can I Double the Recipe?
Yes. Double all ingredients and use a 10-inch springform pan. Increase baking time by 15 to 20 minutes and check for the wobble test at the 75-minute mark. The water bath still applies — use a roasting pan large enough to hold the bigger springform.
Can I Make This Without a Springform Pan?
A springform pan is strongly recommended because the removable sides let you release the cheesecake cleanly. As a workaround, use a 9-inch round cake pan lined with a double layer of overlapping parchment strips that hang over the edges — these act as handles to lift the cheesecake out after chilling. This method requires care when lifting.

Chocolate Cheesecake
Ingredients
Method
- Preheat oven to 325°F (165°C). Wrap the outside of a 9-inch springform pan with two layers of heavy-duty foil. Lightly grease the inside and press a parchment circle onto the base.
- Mix crushed cookies and melted butter until the mixture holds when pressed. Press firmly into the base and ½ inch up the sides. Bake 10 minutes. Cool completely.
- Combine chopped dark chocolate and heavy cream in a heatproof bowl over barely simmering water. Stir until smooth. Remove and cool for 10 minutes.
- Beat cream cheese on medium speed for 2 minutes until smooth. Add sugar and cocoa; beat on medium-low until uniformly colored with no white streaks.
- Add cooled chocolate to cream cheese batter and beat on low until just combined. Add eggs one at a time on the lowest speed — beat only until each disappears. Add vanilla. Stop mixing.
- Pour filling over cooled crust. Smooth the top. Place the springform in a roasting pan; add hot water to 1 inch depth. Bake 60–70 minutes until edges are set and the center wobbles slightly.
- Turn oven off. Crack door open 1 inch. Leave cheesecake in oven for 60 minutes. Remove from water bath, cool on rack for 60 minutes. Run a knife around the edge, cover, and refrigerate at least 6 hours before slicing.
Notes
- Cream cheese and eggs must be at room temperature — this is not optional.
- Chocolate chips can be used but bar chocolate melts more smoothly.
- For cleaner slices: warm the knife under hot water, wipe dry, and slice straight down. Repeat between every slice.
- Best on day 2 after baking.
- Stores in refrigerator for up to 5 days. Freezes well for up to 3 months.
More Cheesecake Recipes
- No-Bake Oreo Cheesecake
- Classic New York Cheesecake
- Strawberry Cheesecake Bars
- Lemon Ricotta Cheesecake
Did you make this chocolate cheesecake? Leave a ⭐⭐⭐⭐⭐ rating below and let me know in the comments how it turned out. I read every comment and would love to know what worked for you.