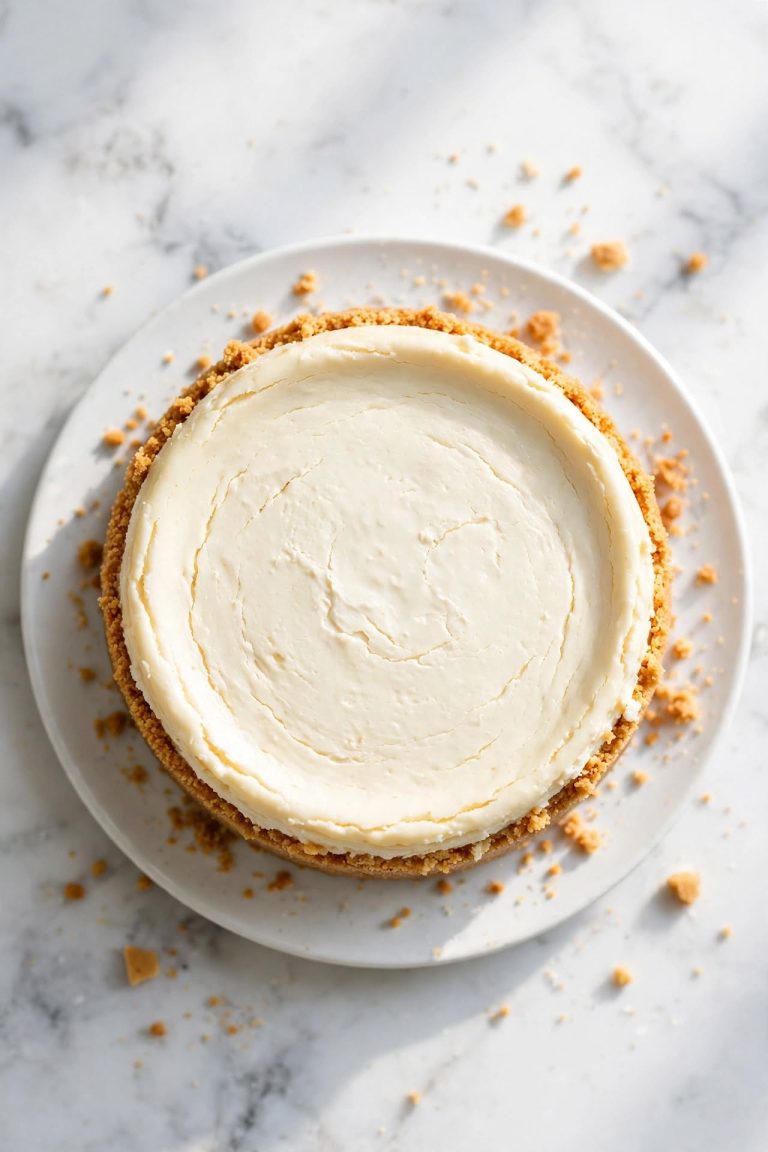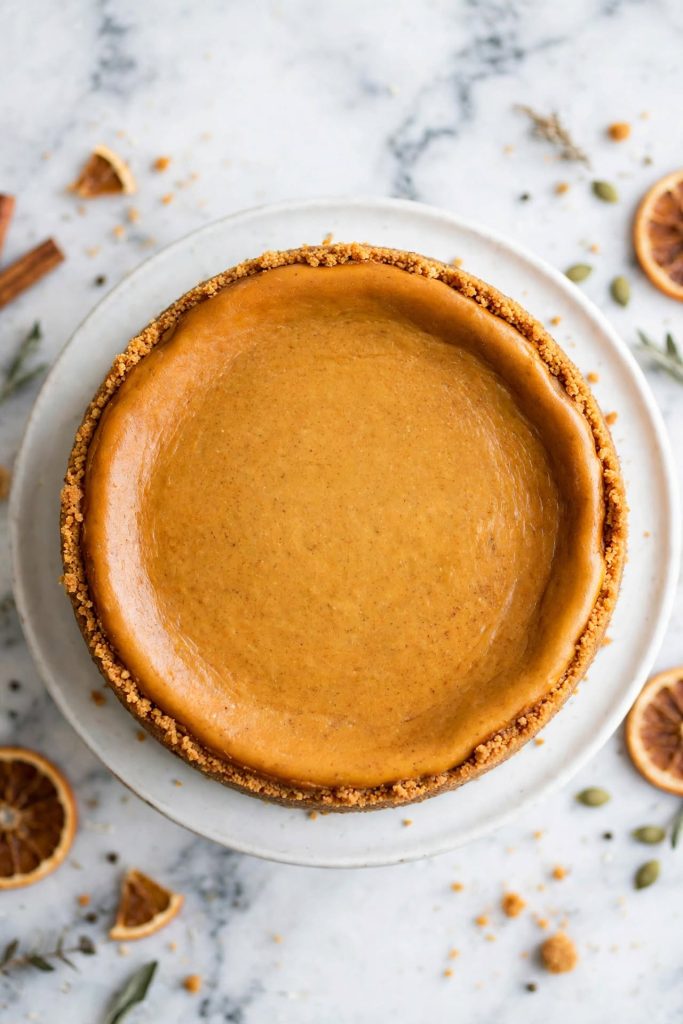
Pumpkin cheesecake is a baked cream cheese dessert that combines the dense, silky texture of cheesecake with the warm, spiced flavor of pumpkin. It uses a graham cracker crust, a cream cheese and pumpkin filling, and a water bath to prevent cracking. Prep takes about 30 minutes, with a total time of roughly 8 hours including chilling. Best for anyone who wants a showstopping fall dessert that slices cleanly and holds its shape every time.
This pumpkin cheesecake gives you a perfectly silky, deeply spiced dessert with a firm, cleanly cutting texture every time you slice it. It uses six core filling ingredients, a single water bath step, and no special decorating skills. If you have pulled a cracked or rubbery cheesecake out of the oven before, the problem almost always comes down to two things — overbaked filling and a skipped water bath. Both are fixed here. I tested this recipe four times to dial in the spice balance and texture before publishing — the method you see here is the only one that gave me consistent results every single time.
Why This Recipe Works
Most spiced cream cheese desserts give you a filling that sets unevenly — too firm at the edges, grainy in the center, or bland through the middle. This one doesn’t. Here is exactly what makes it different.
- Full-fat cream cheese, not reduced-fat — the fat content delivers the smooth, dense texture cheesecake is known for. Reduced-fat versions add water to the batter, which makes the filling looser and far more prone to cracking during baking.
- Pumpkin measured after a brief drain — canned pumpkin carries excess moisture. Blotting it on paper towels for two minutes removes enough liquid to keep the filling from turning watery at the center.
- A water bath throughout the entire bake — the steam caps the temperature around the pan at 212°F (100°C), so the outer edge never races ahead of the center. This single step is the difference between a smooth, flat top and a cracked one.
- A slow, gradual cool — not pulled straight from the oven — the cheesecake rests in the turned-off oven with the door cracked for a full hour before going into the refrigerator. Rapid temperature changes are the second most common cause of surface cracks.
- Make-ahead friendly by design — the filling actually improves overnight. The spices deepen and the texture firms to the ideal slicing consistency. You can make it two full days ahead with no quality loss.
- No stand mixer required — a hand mixer works perfectly here. The key is technique, not equipment.
If you are looking for more fall baking recipes, our complete autumn dessert guide is a good place to start.
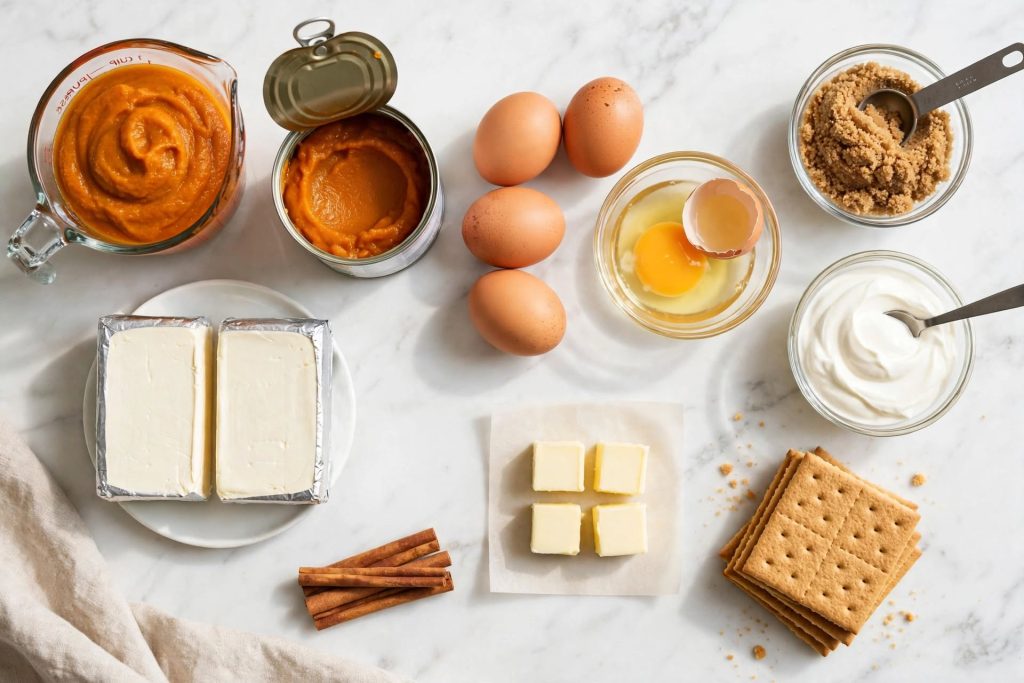
Ingredients for Pumpkin Cheesecake
Every ingredient here has a specific job. Here is what each one does — and what to use if you need to make a substitution.
The Graham Cracker Crust
| Ingredient | Amount | What It Does | Best Substitute + Impact |
|---|---|---|---|
| Graham cracker crumbs | 1½ cups | Forms the base structure and bottom layer | Gingersnap crumbs — spicier, more assertive flavor; excellent match for pumpkin |
| Unsalted butter, melted | 5 tbsp | Binds the crumbs and adds richness | Coconut oil — slightly softer crust texture at room temperature |
| Granulated sugar | 2 tbsp | Sweetens and helps the crust hold together | Brown sugar — adds a light caramel depth to the base |
| Ground cinnamon | ½ tsp | Adds warmth and connects crust to filling spice | Skip it — the filling carries the spice load on its own |
The Pumpkin Cheesecake Filling
| Ingredient | Amount | What It Does | Best Substitute + Impact |
|---|---|---|---|
| Full-fat cream cheese, room temp | 24 oz (3 blocks) | The base — provides structure, richness, and that signature dense texture | No reliable substitute; reduced-fat changes texture significantly |
| Canned pumpkin puree (100% pure) | 1 cup | Adds flavor, warm color, and slight moisture | Fresh roasted and drained pumpkin — works but moisture is less consistent |
| Granulated sugar | ¾ cup | Sweetens the filling and helps it set | Coconut sugar — slightly grainy texture, slightly less sweet |
| Packed brown sugar | ¼ cup | Adds depth, a molasses note, and extra warmth | All white sugar — slightly flatter, less complex flavor |
| Sour cream, room temp | ½ cup | Adds tang and keeps the texture silky | Full-fat plain Greek yogurt — slightly less creamy but good |
| Large eggs, room temp | 3 | Set the structure — essential to the bake | No reliable egg substitute for a baked cheesecake |
| Vanilla extract | 1 tsp | Rounds out and deepens the pumpkin spice notes | Vanilla bean paste — stronger flavor with visible specks |
| Ground cinnamon | 1½ tsp | Primary spice — warmth and familiarity | Use 2 tsp total pumpkin pie spice to replace all four spices |
| Ground ginger | ½ tsp | Adds brightness and a mild heat | Dried ginger — start with ¼ tsp, it is more concentrated |
| Ground nutmeg | ¼ tsp | Adds warmth and fragrance | Ground mace — nearly identical flavor |
| Ground cloves | ⅛ tsp | Adds depth; use sparingly | Ground allspice — slightly milder |
| Fine salt | ¼ tsp | Balances the sweetness and amplifies all other flavors | — |
Key Ingredient Notes
- Cream cheese: Use the block form, not the tub spread. Spreadable cream cheese contains more water and stabilizers — it changes the final texture from dense and sliceable to soft and loose. Pull it from the refrigerator at least 2 hours before baking.
- Eggs: Room-temperature eggs incorporate into the batter without causing the fat in the cream cheese to seize up. Cold eggs go in and the fat stiffens — creating lumps that no amount of mixing will remove.
- Pumpkin puree: Check the label. It must read “100% pure pumpkin” with a single ingredient. Pumpkin pie filling already contains added sugar, spices, and thickeners — you cannot control the final flavor or texture if you use it by mistake.
Equipment You Need
- 9-inch springform pan
- Electric hand mixer or stand mixer
- Large roasting pan (for the water bath)
- Heavy-duty aluminum foil (to seal the springform pan)
- Food processor or zip-lock bag with a rolling pin (to crush crackers)
- Rubber spatula
- Oven thermometer — strongly recommended, as most ovens run 10 to 25 degrees off
The Pumpkin Puree Guide
The type and consistency of your pumpkin puree is the single biggest variable in how your pumpkin cheesecake turns out. Not all pumpkin products work the same way.
| Type | Description | Use for This Recipe? |
|---|---|---|
| 100% canned pumpkin puree | Smooth, thick, highly consistent moisture level across brands | ✅ Best choice — consistent and reliable |
| Pumpkin pie filling (canned) | Pre-sweetened with added spices, sugar, and thickeners | ❌ Do not use — uncontrolled sweetness and set |
| Fresh roasted pumpkin | Variable moisture and sweetness depending on variety and size | ⚠️ Works, but must be drained thoroughly first |
| Butternut squash puree | Slightly sweeter than pumpkin, similar smooth texture | ✅ Good substitute — use the same quantity |
| Kabocha squash puree | Denser and more savory — great flavor, different balance | ⚠️ Test first — add an extra 2 tablespoons of sugar |
If using fresh pumpkin or squash, roast at 400°F (200°C), scoop out the flesh, and drain in a fine mesh sieve lined with cheesecloth for at least 30 minutes before measuring. The puree should hold its shape when spooned — not run, not clump. If it looks watery, drain it further. Excess moisture in the filling leads to a soft center that never fully sets.
How to Make Pumpkin Cheesecake — Step by Step
Follow these steps in order. The single most important rule: never rush the cooling stage.
Step 1: Preheat the Oven and Prepare Your Pan
Preheat your oven to 325°F (163°C). Wrap the outside of your 9-inch springform pan in a double layer of heavy-duty aluminum foil, covering the bottom and all sides completely up to the rim. The foil creates a watertight seal that keeps the water bath from seeping into the crust — a single layer is not enough. What to look for: no visible gaps in the foil seal, especially at the seam where the base meets the side wall.
Step 2: Make the Graham Cracker Crust
Combine the graham cracker crumbs, melted butter, sugar, and cinnamon in a bowl. Stir until every crumb is coated and the mixture looks like damp sand — it should hold its shape when you squeeze a small amount in your hand. Press the mixture firmly into the bottom of the prepared pan using the flat base of a measuring cup or a glass. Bake for 10 minutes until the crust smells toasty and feels slightly firm. Let it cool at room temperature while you prepare the filling. What to look for: crust should feel set and dry to the touch, not greasy or crumbly.
Step 3: Beat the Cream Cheese Until Smooth
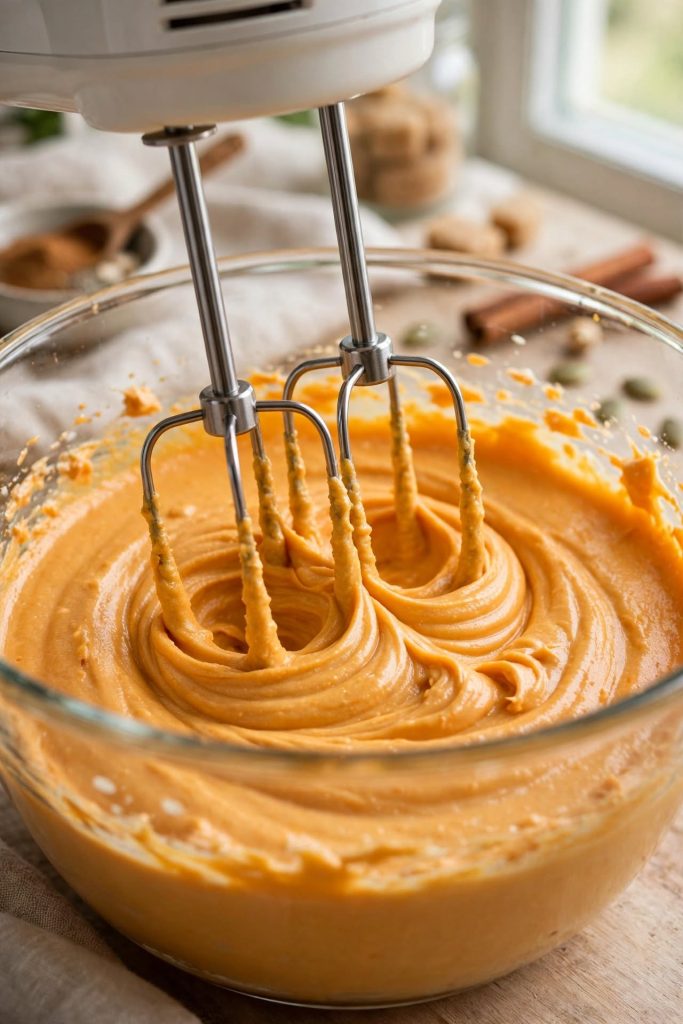
⚠️ Most critical step. Beat the room-temperature cream cheese with an electric mixer on medium speed for 2 to 3 minutes — until the texture is completely smooth with zero visible lumps. If you can see lumps at this stage, you will see lumps in the finished cheesecake. No amount of additional mixing after the eggs go in will smooth them out. What to look for: the batter should look like thick, fluid frosting — no pieces, no streaks, no white chunks.
Step 4: Add the Pumpkin, Sugar, and Spices
Add both sugars, cinnamon, ginger, nutmeg, cloves, and salt to the smooth cream cheese. Mix on medium-low until fully combined. Add the pumpkin puree and sour cream, then mix until the color is completely uniform — a deep, warm orange with no white streaks remaining. Keep the speed at medium or below. Higher speed incorporates air that will expand in the oven and cause the filling to dome and then collapse. What to look for: uniform deep-orange color, smooth and thick consistency throughout.
Step 5: Add the Eggs — One at a Time
⚠️ Second most critical step. Switch the mixer to low speed. Add eggs one at a time, mixing only until each egg disappears into the batter — approximately 20 seconds per egg. Over-beating at this stage forces air into the filling. That air expands during baking, causes the cheesecake to puff significantly, and then collapses as it cools — leading to a sunken center and surface cracks. Stop the mixer the moment the final egg is combined. What to look for: batter should look slightly glossy and very smooth, with no bubbles on the surface.
Once you are comfortable with this method, cheesecake baking techniques is worth exploring for additional approaches.
Step 6: Pour the Filling and Set Up the Water Bath
Pour the filling over the cooled crust in a steady stream. Tap the pan gently on the counter two or three times to bring any air bubbles to the surface, then use a spatula to smooth the top. Place the foil-wrapped springform pan inside a large roasting pan. Pour hot (not boiling) water into the roasting pan until it reaches halfway up the sides of the springform pan. Carefully slide the entire setup into the center of the oven. What to look for: water at the halfway mark — too shallow and the steam effect is reduced, too deep and you risk the foil seal.
Step 7: Cool Gradually to Prevent Cracks
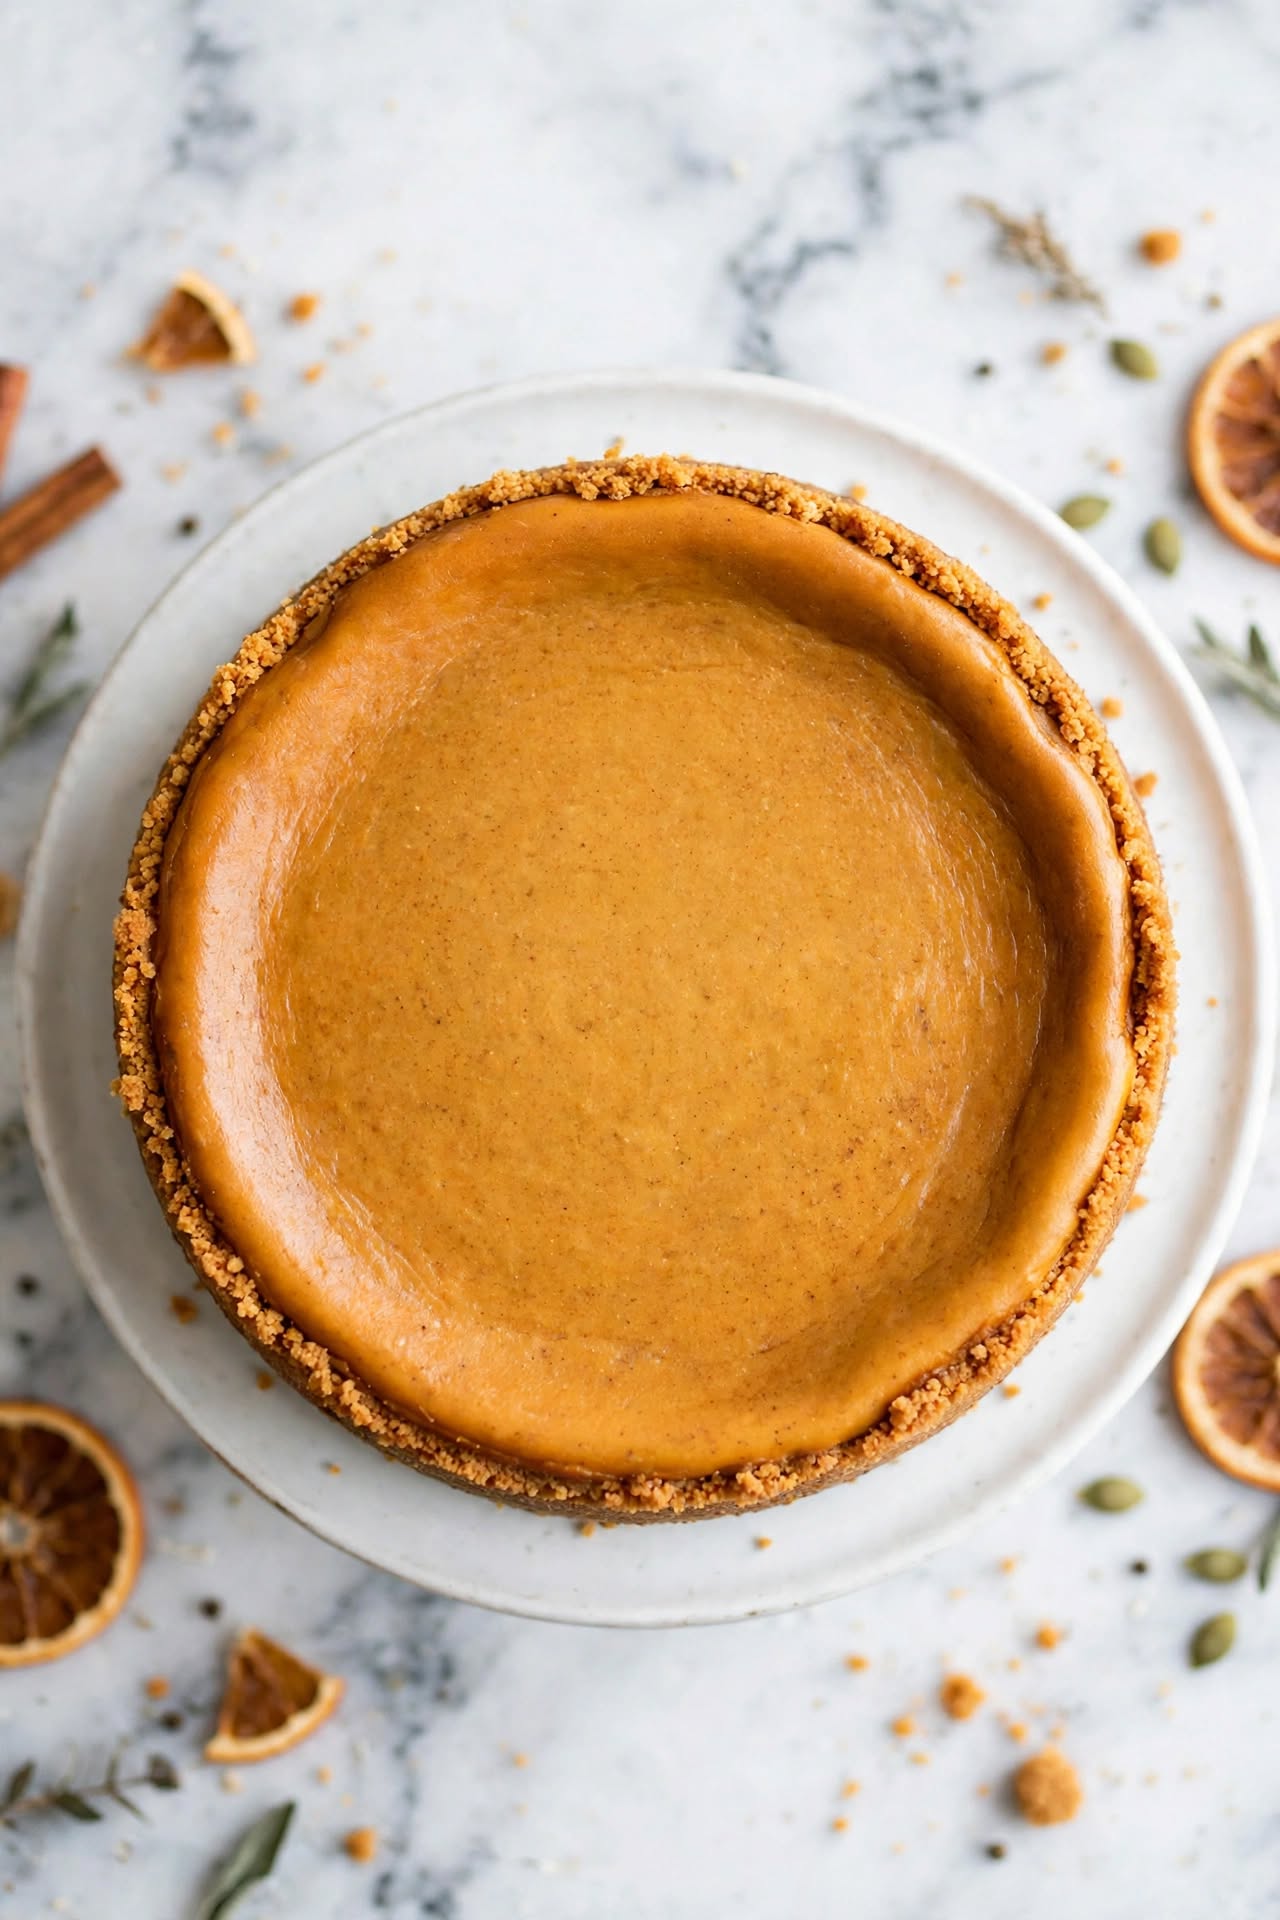
Bake for 60 to 70 minutes. At the 60-minute mark, open the oven and gently nudge the pan. The outer 2 to 3 inches should look set and not move. The center — roughly the size of a tennis ball — should still wobble slightly, like a just-set gelatin. Turn off the oven, prop the door open about an inch with a wooden spoon, and leave the cheesecake inside for a full hour. This gradual cool is what prevents cracking. Remove from the water bath, run a thin knife around the edge between the filling and the pan wall, and refrigerate uncovered for at least 6 hours. What to look for: after refrigerating, the top should be completely flat and smooth, with no cracks or dome.
The Science Behind a Crack-Free Cheesecake
A perfect result is not luck — it is the outcome of proteins, fat, and heat doing specific, predictable jobs at the right temperatures.
Why Room-Temperature Cream Cheese Matters
Cold cream cheese contains fat that is solid and stiff. When you beat cold blocks, you fragment the fat unevenly — creating tiny lumps that resist blending. Room-temperature cream cheese has fluid fat that incorporates smoothly with eggs and pumpkin, giving you a uniform emulsion rather than a lumpy one. The target temperature is around 65°F to 68°F (18°C to 20°C) — cool to the touch, but not cold. Two hours on the counter is typically sufficient.
Why a Water Bath Works
The water bath limits the oven temperature immediately surrounding the pan to 212°F (100°C) — the boiling point of water. This temperature ceiling means the outer edge of the baked cheesecake never gets significantly hotter than the center. Without it, the edges set firm while the center is still liquid. As the center eventually contracts during cooling, it pulls against the already-rigid edges — and that tension is what causes cracks across the surface.
Why You Should Not Overbake
Cheesecake is an egg-thickened custard. Egg proteins set between approximately 160°F and 180°F (71°C to 82°C). Past that range, the proteins tighten further and begin squeezing out moisture — giving you a grainy, dense filling instead of a silky one. The center should still have a visible wobble when you pull the pan from the oven. It continues setting in the refrigerator as it cools through the protein set range gradually. An internal temperature of 150°F (66°C) at the center is the signal to stop.
Tips for the Best Result
These are the details that separate a good spiced cream cheese tart from one people ask you to make again.
- Bring every dairy ingredient to room temperature — cream cheese, eggs, and sour cream should all sit out for at least 2 hours before you begin. Cold dairy causes uneven mixing, lumps in the batter, and a less cohesive final texture.
- Use an oven thermometer — most ovens run 10 to 25 degrees hotter or cooler than the dial indicates. A $10 oven thermometer eliminates the most common source of overbaking. If your cheesecake consistently cracks or has a grainy center, check your actual oven temperature before adjusting the recipe.
- Run a knife around the edge immediately after baking — as the cheesecake cools, the filling contracts toward the center. If it is still stuck to the pan wall, that contraction has nowhere to go but the surface — where it appears as a crack. Loosening the edge with a thin knife gives the filling room to shrink freely.
- Refrigerate overnight for the cleanest slices — after 6 hours the pumpkin cheesecake is set but still slightly soft and difficult to cut cleanly. After 12 hours or overnight, it firms fully and slices with a precise, even edge.
- Warm your knife blade before each cut — dip the knife in hot water, wipe it dry, then cut. Repeat between every slice. A cold or coated knife drags through the filling and tears the surface rather than cutting cleanly.
- Press the crust with real force — a loosely packed crust crumbles when sliced, regardless of how well the filling sets. Use the base of a glass or measuring cup and press firmly enough that the crumb layer feels compact and does not shift when you move the pan.
- Cover tightly after the first 4 hours of refrigerating — once the surface has firmed slightly, cover with plastic wrap to prevent the filling from absorbing refrigerator odors. Dairy desserts pick up surrounding smells quickly in a closed fridge.
Common Mistakes to Avoid
❌ Using Cold Cream Cheese
Result: Your filling will be lumpy, and no amount of extra mixing after the eggs go in will smooth it out.
Fix: Pull cream cheese from the refrigerator at least 2 hours before you start — or cut it into cubes and microwave in 10-second intervals, checking after each one, until it feels soft but not warm.
❌ Overmixing After the Eggs Go In
Result: You beat air into the batter. That air expands during baking, causing the cheesecake to dome dramatically — and then collapse as it cools, leaving a sunken center and cracks across the surface.
Fix: Switch to low speed the moment you add the first egg. Mix only until each egg disappears — no more than 20 to 25 seconds per egg. Stop the mixer immediately after the last egg is combined.
❌ Skipping the Water Bath
Result: The edges bake significantly faster than the center. As the center eventually contracts, it pulls on the already-firm edges and splits the surface.
Fix: The water bath is non-negotiable for a smooth top on a full-sized pumpkin cheesecake. If you truly cannot use one, reduce the oven temperature to 300°F (149°C) and place a separate pan of hot water on the rack below — it is not as effective, but it helps.
❌ Opening the Oven Door Too Soon
Result: A sudden temperature drop causes the partially-set batter to contract sharply — the center sinks and the surface cracks.
Fix: Do not open the oven before the 55-minute mark. Resist the urge to check early. The cheesecake needs an uninterrupted, steady heat environment for the first 55 minutes.
❌ Cutting the Cheesecake Before It Has Fully Chilled
Result: The center is still soft and will collapse under the knife — you get a jagged, uneven slice where the filling falls away from the crust.
Fix: Refrigerate for a minimum of 6 hours. Overnight is better. When in doubt, wait longer rather than risk a ruined first slice.
❌ Using Pumpkin Pie Filling Instead of Pumpkin Puree
Result: Pie filling contains added sugar, spices, and thickeners. Your cheesecake will be too sweet, unevenly spiced, and the setting may be unreliable.
Fix: Check the label every time. The ingredient list should say “pumpkin” and nothing else. If it lists sugar, sweeteners, or spices — it is pie filling, not puree.
For more guides like this one, our cheesecake troubleshooting guide covers every common problem in the same detail.
Variations Worth Trying
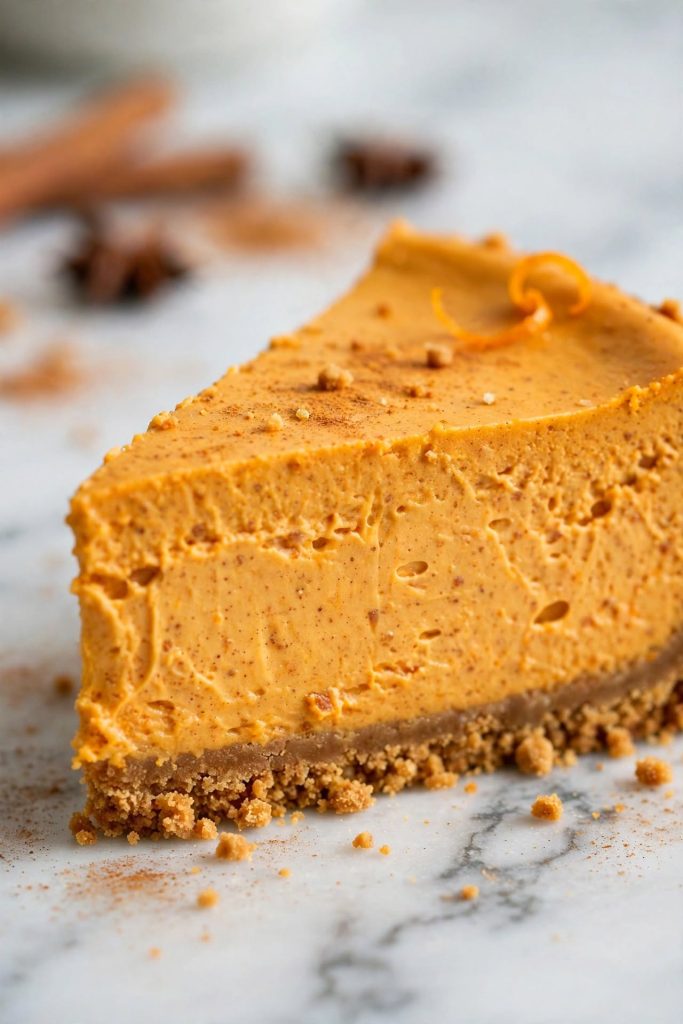
Gingersnap Crust Pumpkin Cheesecake
What changes: Replace the graham cracker crumbs with finely crushed gingersnap cookies — same quantity (1½ cups). Use the same butter and sugar ratio.
When: At the crust-making stage, before baking.
Result: A spicier, more assertive base with a distinctive snap when you bite through the edge. The gingersnap crust pairs particularly well with the pumpkin filling — the added ginger heat in the base reinforces the spice notes in the filling.
No-Bake Pumpkin Cheesecake
What changes: Skip the eggs and the water bath entirely. Use 24 oz cream cheese, 1 cup pumpkin puree, the same spices, ¾ cup powdered sugar, and ½ cup heavy cream whipped to stiff peaks. Fold the whipped cream into the pumpkin mixture and pour over a prepared graham cracker crust.
When: Assemble cold and refrigerate for at least 8 hours before serving.
Result: Lighter and mousse-like in texture. It will not slice as cleanly as the baked version, but it is a reliable choice when you want to skip the oven entirely.
Mini Pumpkin Cheesecakes
What changes: Divide the filling evenly among a 12-cup muffin tin lined with paper liners. Press a tablespoon of crust mixture into each cup before filling.
When: Reduce oven temperature to 300°F (149°C) and bake for 18 to 22 minutes.
Result: Individual portions that cool faster and are significantly easier to serve at a buffet or potluck. No water bath is needed at this size. A dollop of whipped cream on each one makes for a strong visual presentation.
Vegan Pumpkin Cheesecake
What changes: Use vegan cream cheese (Violife or Kite Hill work well), coconut cream in place of sour cream, and 3 tablespoons of cornstarch dissolved in ¼ cup of oat milk to replace the eggs.
When: Same method, same temperature, same baking time — but check for set at 55 minutes as the set point may differ slightly.
Result: Slightly softer and less firm at the center than the dairy version, but the spiced pumpkin flavor comes through clearly. Pair with a gingersnap crust made with vegan butter for the strongest overall result.
Brown Butter Caramel Topping
What changes: Pour 3 to 4 tablespoons of salted caramel sauce over the fully chilled cheesecake. Tilt the pan gently to spread it in an even layer and scatter a small pinch of flaky sea salt across the surface.
When: After the cheesecake has fully refrigerated, just before serving.
Result: The salted caramel adds a buttery-sweet contrast against the warm pumpkin spice — a noticeably more complex overall flavor, and a presentation that reads as considerably more elevated for a dinner party or holiday table.
How to Store
Room Temperature
Pumpkin cheesecake contains dairy and eggs — it should not sit at room temperature for more than 2 hours during serving. This is a food-safety limit, not just a quality guideline. At a buffet or holiday table, plan to return the cheesecake to the refrigerator between servings rather than leaving it out for extended periods.
Refrigerator
Store in the springform pan with plastic wrap stretched tightly over the top, or transfer to an airtight container. Best quality for up to 5 days. After day 3, the crust begins to soften as it absorbs moisture from the filling — the flavor is unaffected, but the texture changes. If you want to preserve the crust texture as long as possible, store the cheesecake uncovered for the first 24 hours to let the surface set and the crust stay firm, then cover loosely from day 2 onward. When eating refrigerator-cold slices, let them sit at room temperature for 10 minutes first — the texture and spice notes are noticeably better at slightly above fridge temperature.
Freezer — Complete Guide
Yes — pumpkin cheesecake freezes well. To freeze whole: let the cheesecake chill completely in the refrigerator first, then remove from the springform pan. Wrap tightly in two layers of plastic wrap, then one layer of aluminum foil. Best quality for up to 2 months. Safe beyond this window, but flavor and texture will begin to decline noticeably after 2 months. To freeze individual slices: cut into portions, wrap each slice separately in plastic wrap, then place in a labeled zip-lock freezer bag. To thaw: transfer from the freezer to the refrigerator and thaw overnight — typically 8 to 10 hours. Do not thaw at room temperature. The filling texture holds well after freezing. The crust may become slightly softer — this is normal and does not affect the overall experience significantly. Use your judgment on quality — if the flavor seems off after thawing, discard it.
If batch baking is something you enjoy, our make-ahead holiday desserts guide fits perfectly into that routine.
How to Serve
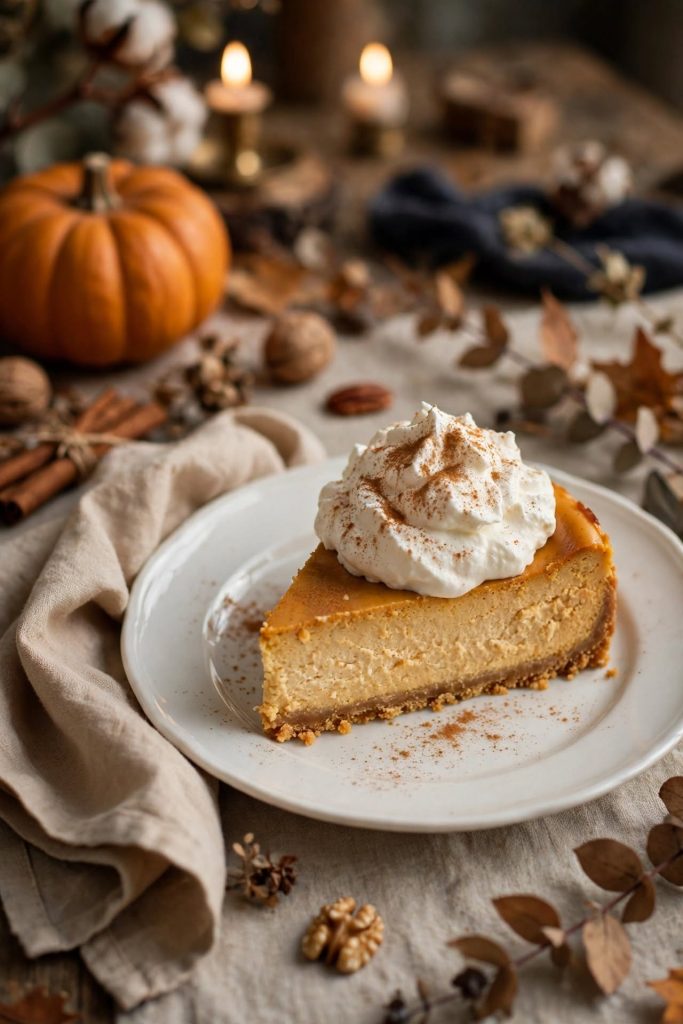
Classic Ways to Serve
- Sliced straight from the refrigerator, dusted lightly with ground cinnamon
- Topped with a firm dollop of freshly whipped cream and a small pinch of nutmeg
- Served alongside a cup of black coffee, spiced chai, or hot apple cider
Upgraded and Occasion-Worthy
- Pour 3 to 4 tablespoons of warm salted caramel sauce over the surface just before slicing — it sets slightly against the cold filling and creates a clean, glossy layer
- For a Thanksgiving table: press toasted pecans around the entire outer edge of the chilled cheesecake and pile sweetened whipped cream at the center — impressive with very little extra effort
- For gifting or take-along: slice into individual portions, wrap each one in parchment, and pack in a box or tin — the cheesecake travels well refrigerated and holds its shape cleanly
- Pair with a scoop of vanilla bean ice cream for a warm-cold contrast that works particularly well in the first few weeks of autumn
Frequently Asked Questions
Can I make pumpkin cheesecake without a water bath?
You can bake it without one, but cracking is significantly more likely. The water bath keeps the oven temperature around the pan steady, which prevents the outer edges from overbaking while the center is still liquid. If you skip it, reduce the oven temperature to 300°F (149°C) and place a pan of hot water on the rack below the cheesecake. This is not as effective as a full water bath, but it reduces the risk. Expect a longer bake time — check at the 70-minute mark.
Why did my pumpkin cheesecake crack on top?
Cracks are almost always caused by one of three things: overmixing the batter after the eggs went in (introducing air that then collapses), overbaking the filling past the ideal internal temperature, or skipping the water bath. The most common cause is overmixing after the eggs go in. If you can see bubbles on the surface of your batter before baking, air has been incorporated — and it will cause the cheesecake to puff and then crack as it cools down. Next time, switch to low speed for the eggs and stop the moment each one disappears.
How do I know when pumpkin cheesecake is done baking?
Pumpkin cheesecake is done when the outer 2 to 3 inches look fully set and do not move when you nudge the pan, but the center — roughly the size of a tennis ball — still jiggles gently, like a just-set gelatin. It should not look liquid, but it should not look completely firm either. An instant-read thermometer reading of 150°F (66°C) at the center is also a reliable indicator. The center finishes setting in the refrigerator.
Can I make pumpkin cheesecake ahead of time?
Yes — and it genuinely improves if you do. The spices deepen overnight as they infuse through the filling, and the texture firms to the ideal slicing consistency after 12 or more hours in the refrigerator. You can make pumpkin cheesecake up to 2 full days ahead without any quality loss. Store it covered in the refrigerator and add any toppings — caramel, whipped cream, pecans — just before serving so they look fresh.
How long does pumpkin cheesecake last?
Best quality for up to 5 days in the refrigerator when stored tightly wrapped in plastic wrap or in an airtight container. After 5 days the flavor remains good, but the crust softens considerably as it absorbs moisture from the filling. If you made this dessert for a gathering, no-bake desserts for the holidays is worth making next to keep your refrigerator stocked through the season.
Can I freeze pumpkin cheesecake?
Yes. Freeze it whole or in individual slices wrapped tightly in two layers of plastic wrap, then aluminum foil. Best quality for up to 2 months. Thaw overnight in the refrigerator — never at room temperature, which makes the filling watery. The filling texture holds up well after freezing; the crust may be slightly softer, which is normal.
What can I substitute for sour cream?
Plain full-fat Greek yogurt is the closest substitute — use it in the exact same quantity. It adds a similar tang and keeps the texture silky, though very slightly less rich than sour cream. Avoid low-fat yogurt, as it adds excess water to the batter. Crème fraîche is another option that works well and is slightly richer than sour cream.
Can I double this recipe?
Yes, but divide the batter between two springform pans rather than trying to bake a doubled recipe in one pan — the baking time and water bath setup both change significantly with a deeper fill. Baking time remains essentially the same for two standard-sized cheesecakes baked side by side. If you only have one mixer bowl, make the batters one at a time and refrigerate the first while you prepare the second.
Why did my cheesecake sink in the middle?
Sinking is caused by too much air in the batter (from overmixing during the egg stage) or by a sudden temperature drop from opening the oven door too early. The batter puffs in the oven as the trapped air expands, then collapses when the heat source is removed or interrupted. Follow the low-speed egg rule and resist opening the oven before the 55-minute mark.
What size springform pan works best?
A 9-inch springform pan is ideal for this recipe and gives you a filling depth of about 1.5 inches — the sweet spot for even baking. A 10-inch pan produces a thinner filling and requires slightly less baking time (start checking at the 50-minute mark). An 8-inch pan produces a thicker filling and may need 10 to 15 extra minutes — monitor the wobble test carefully and don’t rely solely on time.
Can I use pumpkin pie spice instead of individual spices?
Yes. Replace the cinnamon, ginger, nutmeg, and cloves with 2 teaspoons of pumpkin pie spice. Taste the filling after mixing but before adding the eggs — if you want more warmth or depth, stir in an extra ¼ teaspoon. Pumpkin pie spice blends vary by brand, so tasting at this stage lets you adjust to your preference.
Can I make this without a springform pan?
A springform pan is strongly recommended because it allows you to release the sides cleanly and present the whole cheesecake. Without one, removing the finished cheesecake from a regular pan is very difficult and the slices will not hold their shape properly. If you must use a regular 9-inch deep-dish pan, line the bottom and sides completely with parchment paper, leaving an overhang to lift it out, and plan to serve directly from the pan or in the pan.

Pumpkin Cheesecake
Ingredients
Method
- Preheat & prepare. Preheat the oven to 325°F (163°C). Wrap the outside of a 9-inch springform pan in a double layer of heavy-duty aluminum foil, covering all sides up to the rim.
- Make the crust. Combine crumbs, melted butter, sugar, and cinnamon. Stir until every crumb is coated. Press firmly into the pan base using the bottom of a glass. Bake for 10 minutes. Cool completely.
- Beat the cream cheese. Beat room-temperature cream cheese on medium speed for 2 to 3 minutes until completely smooth — zero lumps.
- Add pumpkin & spices. Add both sugars, all spices, and salt. Mix on medium-low until combined. Add pumpkin puree and sour cream. Mix until the batter is a uniform deep orange with no white streaks.
- Add the eggs. Switch to low speed. Add eggs one at a time, mixing just until each disappears — approximately 20 seconds each. Stop the mixer the moment the last egg is combined.
- Set up the water bath. Pour the filling over the cooled crust. Tap the pan gently 2 to 3 times. Place the foil-wrapped pan in a large roasting pan. Pour hot water in until it reaches halfway up the sides of the springform pan. Transfer carefully to the oven.
- Bake. Bake for 60 to 70 minutes — the edges should look set, the center should wobble slightly when nudged. Turn the oven off, prop the door open 1 inch, and leave the cheesecake inside for 1 full hour.
- Chill. Remove from the water bath. Run a thin knife around the edge between the filling and pan wall. Refrigerate uncovered for at least 6 hours, or overnight for the best texture and cleanest slices.
Notes
- Room-temperature dairy is non-negotiable — cold cream cheese or cold eggs cause lumps that cannot be fixed once the batter is assembled.
- Read your pumpkin label — it must say “100% pure pumpkin” with no added sugar or spices.
- Warm your knife in hot water and dry it between every slice for clean, even cuts.
- The cheesecake is at its best texture and flavor after 12+ hours of refrigerating — make it the day before serving when possible.
- Freeze individual slices for up to 2 months, wrapped tightly — thaw overnight in the refrigerator.
More Dessert Recipes You Will Love
- No-Bake Oreo Cheesecake — If you liked the cheesecake technique here, this no-oven version delivers the same clean slices with zero baking time — perfect for warm weather entertaining when you don’t want to run the oven.
- Classic Pumpkin Pie — The traditional spiced custard in an all-butter crust, for when you want the Thanksgiving staple done with reliable, consistent results.
- Brown Butter Apple Crumble Bars — The same warm fall spices as this cheesecake, but in a portable, sliceable bar format that works at a potluck or packed into a tin for gifting.
- Salted Caramel Pecan Tart — A buttery tart shell with a rich caramel-pecan filling that fits every autumn menu and handles a crowd with ease.
- Maple Cream Cheese Frosted Carrot Cake — Uses the same cream cheese base technique as this recipe’s filling, plus a moist, spiced cake that keeps well for four days after baking.
Did you make this pumpkin cheesecake? Leave a ⭐⭐⭐⭐⭐ rating below and let me know in the comments how it turned out. I read every comment and would love to know what worked for you.