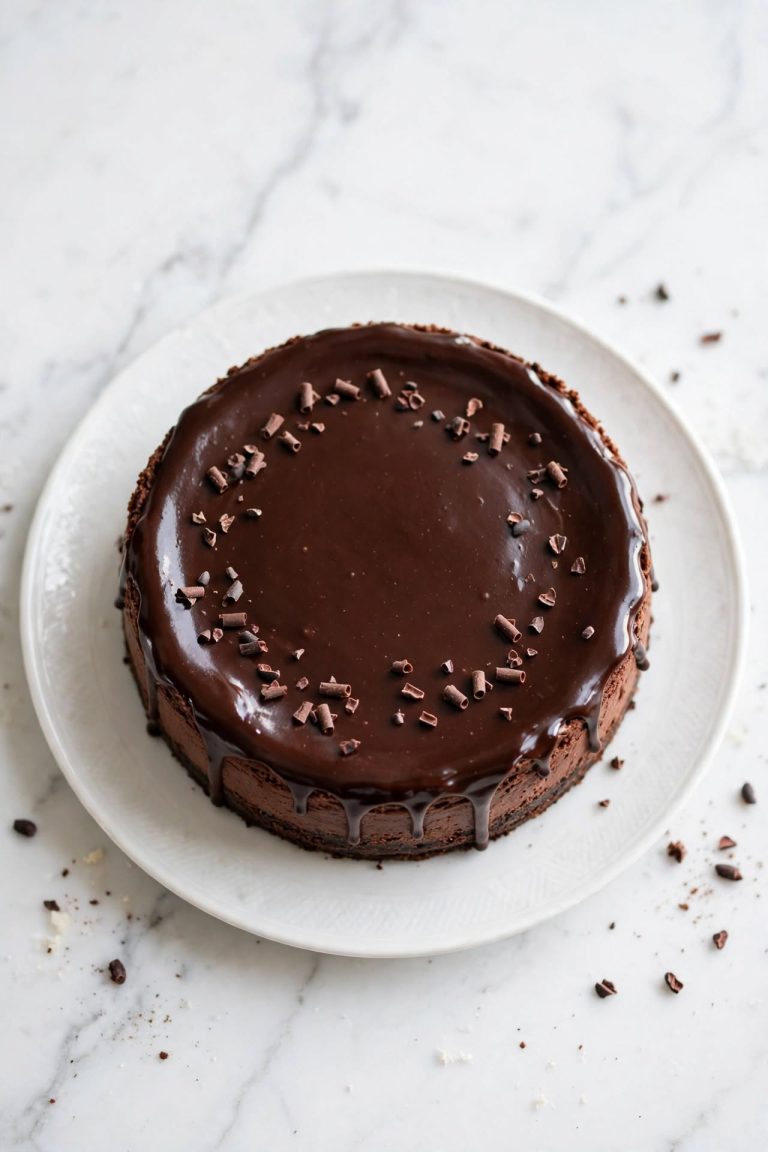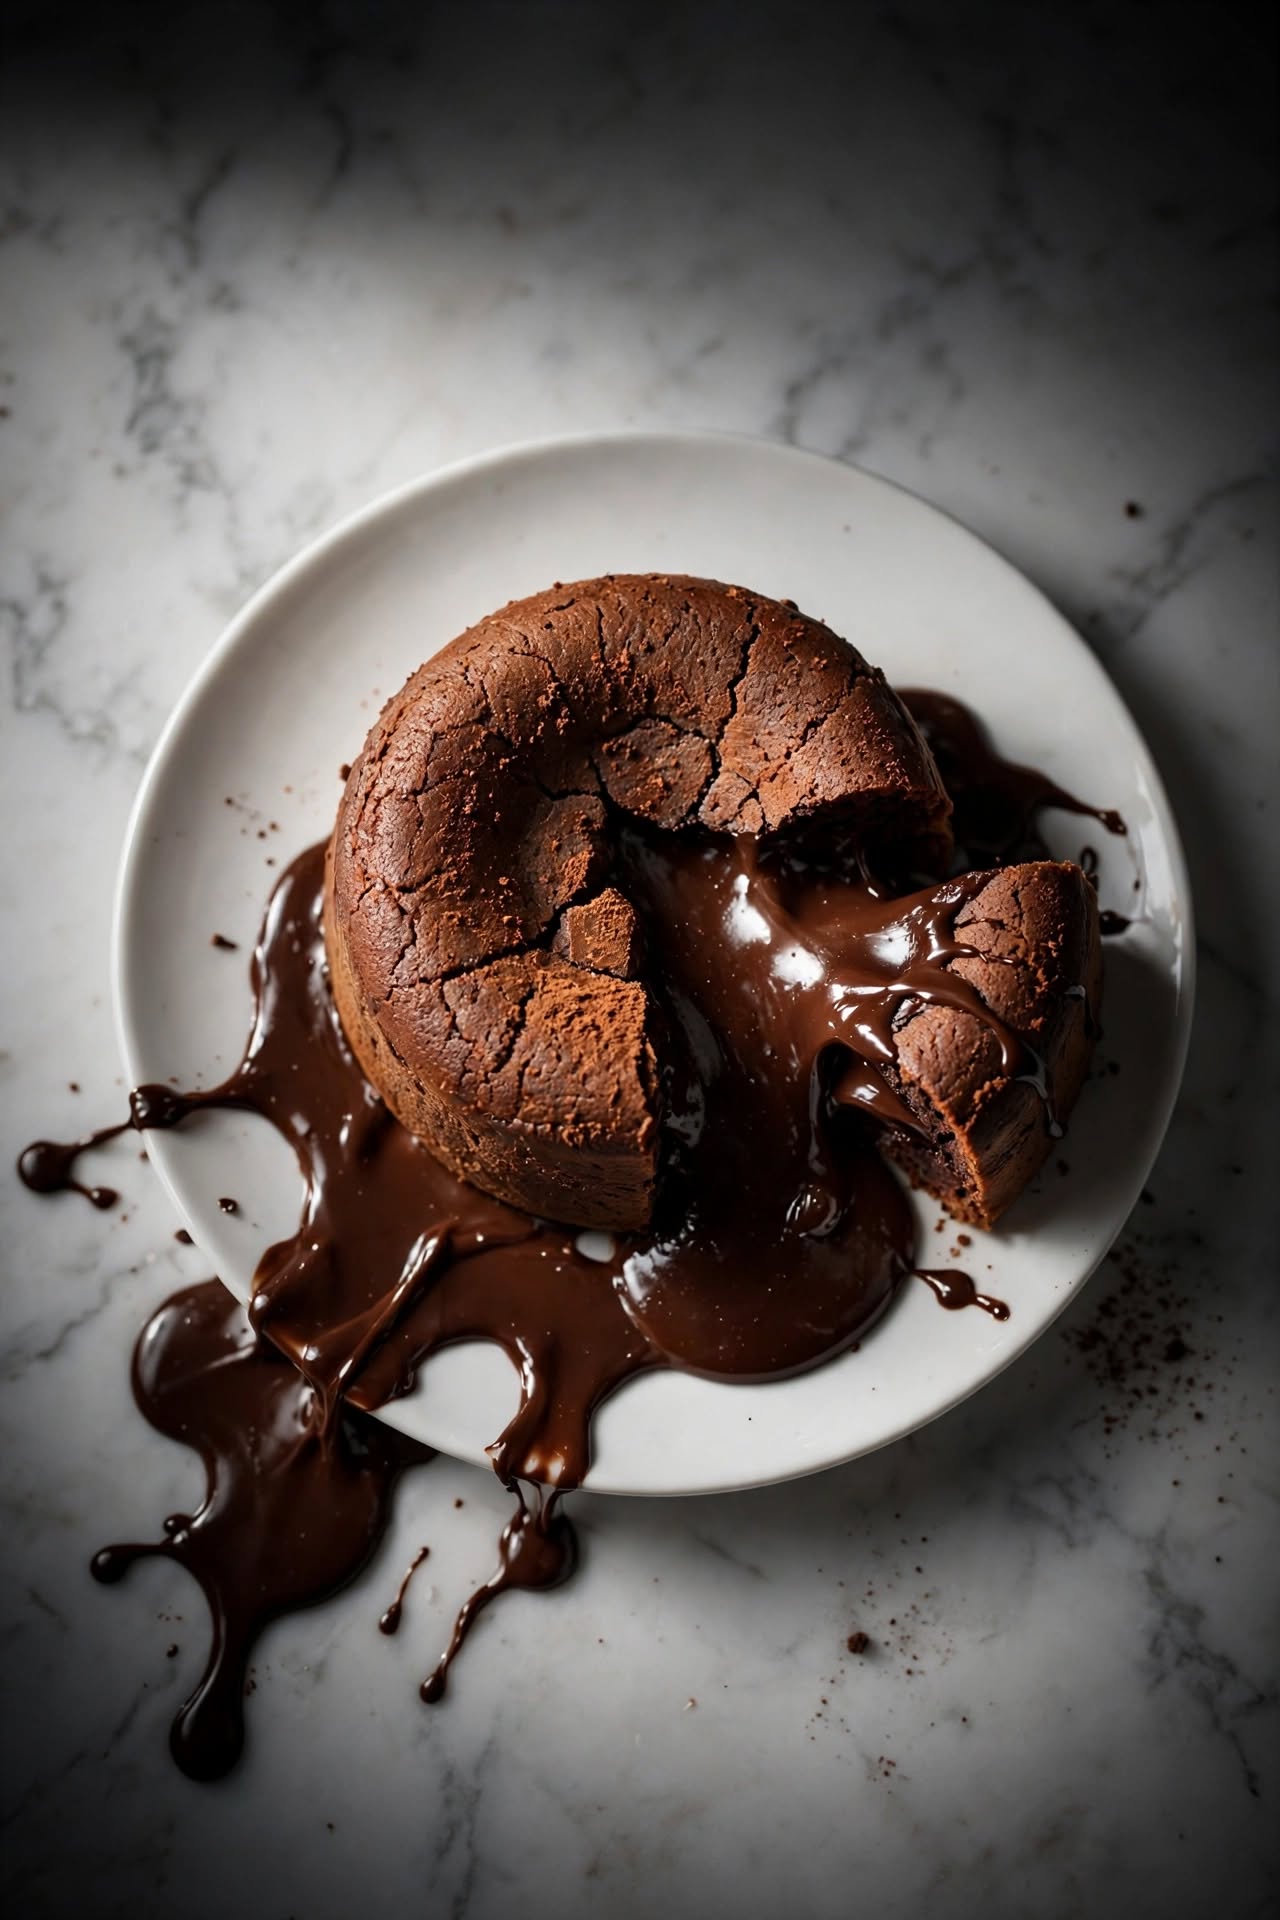
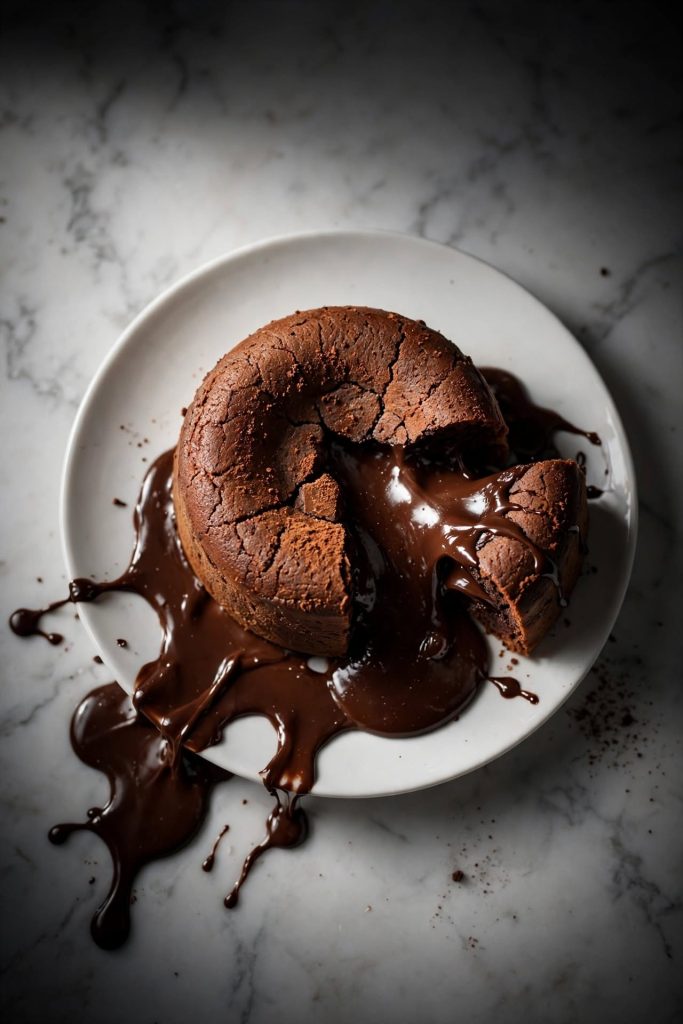
Chocolate lava cake is an individual-portion baked chocolate dessert with a fully set exterior and a warm, flowing molten center. It uses a short high-heat bake — typically 11 to 13 minutes at 425°F — that sets the outer shell while leaving the interior liquid. Ready in under 30 minutes of total work. Best for anyone who wants a showstopper dessert that can be prepped hours in advance and baked at the last minute.
Chocolate lava cake delivers a crackling set exterior and a rushing warm center — and the window between the two states is smaller than most recipes admit. This recipe closes that gap: 7 ingredients, one bowl, and a bake time locked to the exact minute your oven runs. If your molten chocolate cake has come out fully set before, the issue is almost always oven temperature or ramekin size — both are fixed here. I tested this recipe at three different temperatures across 6 bake cycles before landing on the method that holds up in a standard home oven.
Why This Recipe Works
Most chocolate lava cake recipes are written for professional ovens — precise temperature, exact ramekin gauge, and a timer calibrated to the second. This one is written for your oven, whatever it runs.
- Bake temperature of 425°F (220°C) — high heat sets the exterior fast while the center stays molten. Lower temperatures close the gap between set and molten, leaving less margin for error.
- Two whole eggs plus two yolks — the extra yolks increase the fat content of the batter, which is what keeps the center from setting under heat. Whole-egg-only versions are more likely to overbake to a cakey texture.
- Dark chocolate at 60–70% cocoa — this range gives you a sharp, clean chocolate flavor without the bitterness of 85%+. Below 60% adds too much sugar and changes the set behavior of the batter.
- Ramekin prep with cocoa, not flour — flour leaves a pale coating on the outside. Cocoa powder blends invisibly and keeps the exterior dark and glossy when unmolded.
- Make-ahead design — filled ramekins hold in the refrigerator for up to 24 hours before baking. Add 1 to 2 minutes to the bake time straight from cold. This is the restaurant method.
- One-bowl batter in under 15 minutes — no stand mixer, no double boiler required if you use the microwave method. The only skill this recipe demands is restraint with the bake timer.
If you are looking for more restaurant-style dessert recipes, our chocolate desserts guide is a good place to start. [IL-1 — replace with your URL]
Ingredients for Chocolate Lava Cake
Every ingredient here has a specific job. Here is what each one does — and what to use if you need to make a substitution.
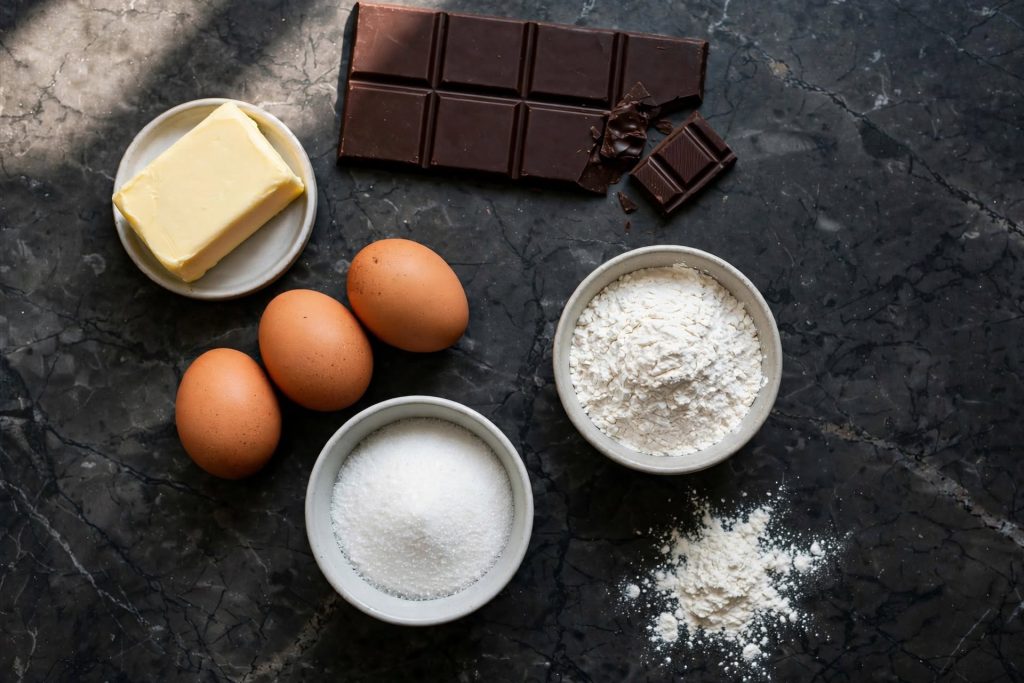
The Cake Batter
| Ingredient | Amount | What It Does | Best Substitute + Impact |
|---|---|---|---|
| Dark chocolate (60–70% cocoa), chopped | 170g / 6oz | Sets flavor and controls batter set behavior | Semi-sweet chocolate chips — reduce by 10g, add ½ tsp neutral oil |
| Unsalted butter | 115g / ½ cup | Fat; creates tender crumb and glossy exterior | Salted butter — reduce added salt; dairy-free butter — similar result |
| Eggs, room temperature | 2 large | Structure; outer shell sets from whole-egg proteins | No substitute for the whole eggs — structure requires them |
| Egg yolks, room temperature | 2 large | Fat-rich; keep the center from setting under heat | No substitute — yolks are the mechanism behind the molten center |
| Granulated sugar | 100g / ½ cup | Sweetness; balances the bitterness of dark chocolate | Caster sugar — dissolves faster, same result |
| All-purpose flour | 30g / ¼ cup | Minimal structure — just enough to hold the shell | Cake flour — slightly more tender; GF 1:1 blend — slight texture difference; cornstarch (1 tsp) for flourless |
| Vanilla extract | 1 tsp | Rounds out the bitter edge of high-cocoa chocolate | Espresso powder (½ tsp) — deepens chocolate flavor |
| Salt | ⅛ tsp | Sharpens the chocolate flavor | Do not skip |
The Chocolate Core (Optional Insert Method)
For a guaranteed molten center regardless of bake time: freeze individual inserts per ramekin, then press one frozen piece into the center of each filled ramekin before baking. The frozen insert provides an extra liquid pocket as it melts — a useful safety net when baking for guests.
| Insert Option | Amount per Ramekin | Result |
|---|---|---|
| Frozen dark chocolate square (1×1 inch) | 1 piece | Clean, intense molten center |
| Frozen ganache disk (made ahead) | 1 tbsp, frozen solid | Creamier, richer center |
| Frozen caramel or peanut butter dollop | 1 tsp, frozen solid | Flavored center — see Variations section |
Key Ingredient Notes
Chocolate: Use a bar you would eat on its own — the flavor of the chocolate is the flavor of the cake. Chocolate chips contain stabilizers that affect how the batter melts and sets; if using chips, reduce by 10g and expect a slightly firmer result.
Eggs: All eggs must be at room temperature. Cold eggs lower the temperature of the melted chocolate when combined and can cause the fat to seize, leaving you with a grainy, broken batter.
Butter: Measure precisely — excess butter makes the batter too loose and the center will not unmold cleanly. Too little and the exterior goes dry.
Equipment You Need
- Four 6-oz (170ml) ramekins
- Small saucepan or microwave-safe bowl (for melting)
- Two mixing bowls
- Hand whisk or electric hand mixer
- Rubber spatula
- Baking sheet (to hold ramekins in oven)
- Fine mesh sieve (for dusting cocoa)
- Serving plates, pre-warmed
The Chocolate Quality Guide
The cocoa percentage of your chocolate is the single biggest variable in how your chocolate lava cake turns out.
| Cocoa % | Flavor Profile | Sweetness | Set Behavior | Use for This Recipe? |
|---|---|---|---|---|
| Below 55% | Mild, sweet | High | Sets too firmly — less molten center | ❌ Too sweet |
| 55–60% | Balanced, mild bitterness | Medium-high | Good set, slightly sweeter result | ⚠️ Acceptable |
| 60–70% | Intense, clean chocolate | Medium | Ideal: sharp shell, fluid center | ✅ Best range |
| 70–80% | Bold, pronounced bitterness | Low | Sharp flavor — reduce sugar by 1 tbsp | ⚠️ Adjust sugar |
| 85%+ | Very bitter, complex | Very low | Can produce a grainy batter without extra sugar | ❌ Not recommended |
Workaround if you only have chips: Use 160g (reduce by 10g), add ½ tsp of neutral oil to compensate for the stabilizers, and expect a bake time of 12 to 13 minutes rather than 11.
Visual cue for melted chocolate: It should look glossy and flow smoothly off a spatula in a ribbon. If it looks thick and matte, it has been overheated — let it cool for 2 minutes before adding butter and proceed.
How to Make Chocolate Lava Cake — Step by Step
Follow these steps in order. The most important rule: pull the cakes from the oven the moment the edges look set and the center still moves slightly when you nudge the pan.
Step 1
Prepare Your Ramekins
Brush the inside of each ramekin thoroughly with softened butter — cover every surface including the rim. Dust with unsweetened cocoa powder, tap the ramekin to spread it evenly, then invert and tap out the excess. Place the prepared ramekins on a baking sheet and refrigerate them while you make the batter. Cold ramekins help the batter adhere to the sides before the center has a chance to spread.
What to look for: An even, dark cocoa coating with no bare spots or thick clumps at the bottom corners.
Step 2 — Melt the Chocolate and Butter
Combine the chopped chocolate and butter in a microwave-safe bowl. Microwave in 30-second intervals, stirring thoroughly after each, until completely smooth — typically 2 to 3 intervals. Alternatively, melt over a double boiler on low heat, stirring constantly. Remove from heat and let the mixture cool for 5 minutes. It should feel warm to the touch but not hot — if it feels hot on the back of your wrist, wait another minute.
What to look for: Glossy, smooth chocolate that flows slowly off a spatula. No streaks of unmelted butter.
Step 3 — Whip the Eggs and Sugar
In a separate bowl, whisk the whole eggs, egg yolks, and sugar together vigorously for about 90 seconds until the mixture turns pale yellow and slightly thickened. You are not going for stiff peaks — you want the sugar dissolved and the eggs aerated enough to give the batter lift. Add the vanilla extract and whisk for another 10 seconds.
What to look for: The mixture should leave a brief ribbon on the surface when you lift the whisk — it falls but holds its shape for 2 seconds before dissolving back in.
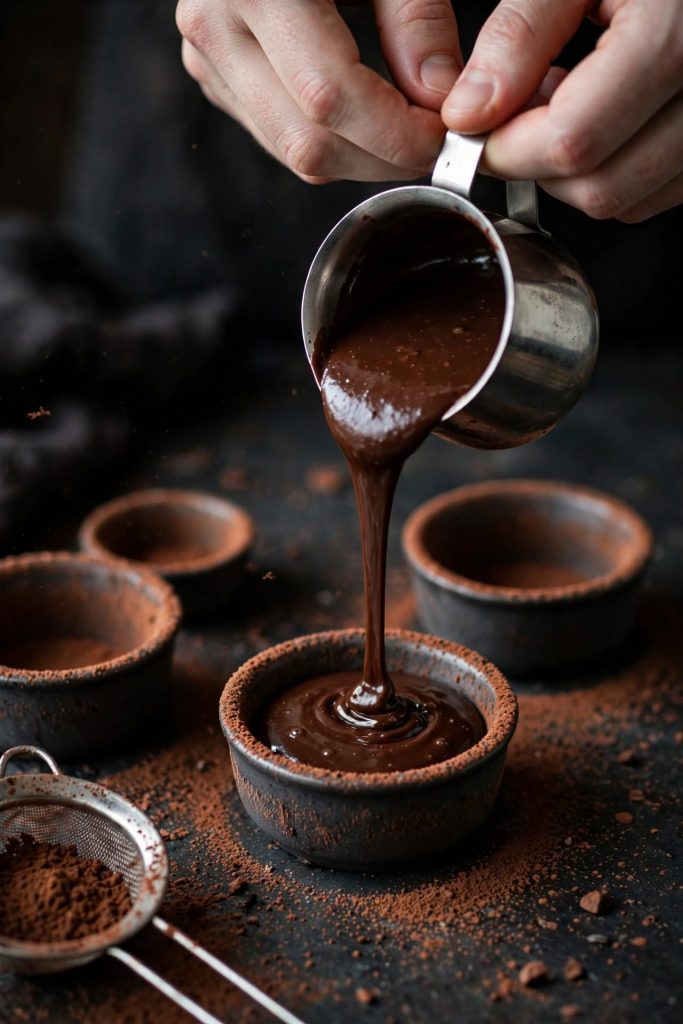
Step 4 — Fold and Fill the Ramekins
Pour the warm chocolate mixture into the egg mixture in a slow, steady stream, folding gently with a spatula as you go. Once combined, sift the flour and salt directly over the batter and fold in with 10 to 12 strokes — stop the moment you see no flour streaks. The batter will be thin and glossy. Divide it evenly among the 4 prepared ramekins, filling each about three-quarters full. If using the frozen insert method, press one frozen piece into the center of each ramekin now.
⚠️ Critical step: Over-folding after the flour goes in develops gluten and can toughen the shell. Count your folds. Stop at 12.
What to look for: Batter sits just below the rim of the ramekin — not overflowing, not too shallow.
Once you are comfortable with this folding technique, our chocolate ganache guide covers more ways to work with high-cocoa chocolate. [IL-2 — replace with your URL]
Step 5 — Bake and Unmold
Preheat your oven to 425°F (220°C) for at least 20 minutes — a fully preheated oven is non-negotiable for this recipe. Bake the ramekins on the baking sheet on the center rack for 11 to 13 minutes. The edges should look fully set and pulling slightly from the ramekin walls; the center should still have a slight jiggle when you nudge the pan. Run a thin knife or offset spatula around the inside edge of each ramekin. Place a warmed serving plate face-down over the ramekin, flip both together in one firm motion, wait 10 seconds, and lift the ramekin straight up. Serve immediately.
⚠️ Critical step: Wait exactly 10 seconds after inverting before lifting the ramekin. Less and the shell may collapse; more and the center cools and sets.
What to look for: A matte, set top surface with a visible dome. A wet, shiny center top means the cake is still underdone.
The Science Behind a Perfect Lava Center
A consistent molten center is not luck — it is the result of understanding what each component does under heat.
Why the Bake Time Window Is So Narrow
The outer shell and the inner liquid center rely on the same batter reaching two different temperatures at the same time. The outer edges, closest to the ramekin walls, hit the coagulation temperature of egg protein (around 160°F / 71°C) first and solidify. The center, insulated by the surrounding batter, stays below that temperature. The window between “center is still molten” and “center has fully set” is typically 60 to 90 seconds in most ovens. Every extra minute past that window costs you the lava effect entirely.
Why Egg Yolks Make the Center Flow
Egg yolks are roughly 30% fat — primarily lecithin. Fat in the batter raises the temperature at which the proteins coagulate, which means the yolk-rich center takes longer to set than the white-protein outer shell. This differential set time is what creates the molten core. Recipes that use only whole eggs have less fat in the batter and a narrower window — they set faster throughout and are more prone to overbaking.
Why Ramekin Size and Temperature Both Matter
A 6-oz ramekin at the standard fill level gives you the right ratio of wall surface to interior volume. A larger ramekin means more batter, more thermal mass, and a longer bake time that closes the molten window. A smaller ramekin bakes through faster than the set edges can properly form. The critical instruction: do not use a glass dish or ceramic casserole — they conduct heat too slowly and unpredictably. A cold, well-greased ramekin grips the batter immediately and directs heat inward from the walls first, which is exactly what you need.
Tips for the Best Result
These are the details that separate a good warm chocolate dessert from one people still talk about two weeks later.
- Run a test bake first — before a dinner party, bake one cake the day before to confirm your oven’s exact timing. Mark the time. Use it every time. Ovens vary by up to 3 minutes at the same setting.
- Pre-warm your serving plates — a cold plate steals heat from the bottom of the cake within seconds of unmolding. Run plates under hot water and dry them, or warm briefly in the oven while the cakes bake.
- Measure flour by weight, not volume — ¼ cup of flour can vary by up to 30% depending on how it was scooped. Even 10g of extra flour pushes the batter toward cakey. A kitchen scale is the single best investment for this recipe.
- Let the chocolate cool before adding eggs — pouring hot chocolate over eggs scrambles them. The mixture should feel warm but not hot on the inside of your wrist before combining.
- Do not open the oven before 10 minutes — opening the oven drops the temperature by 25–50°F and can add a full extra minute to the bake, closing the molten window.
- Use a timer, not intuition — set a timer for 11 minutes and start checking. The visual cue is subtle. Trusting the timer and the jiggle test is more reliable than watching for color change.
- Prep ramekins up to 24 hours ahead — filled, covered ramekins refrigerate cleanly. Bake directly from cold, adding 1 to 2 minutes to the bake time.
Common Mistakes to Avoid
❌ Overbaking by Even 1 Minute
Result: The center sets completely and you end up with a very good individual chocolate cake — but not a lava cake. There is no recovering this once it happens.
Fix: Set a timer for 11 minutes and check immediately. Pull when the center still moves slightly when you nudge the pan. It firms up further as it sits on the plate.
❌ Using Chocolate With Less Than 60% Cocoa
Result: The batter is too sweet and the set behavior changes — the center firms up faster and the exterior may overbrown before the shell has properly formed.
Fix: Check the percentage on the label before buying. For a milk chocolate version, see the Variations section — the method requires adjustments, not just a straight swap.
❌ Skipping the Ramekin Prep Step
Result: The outer shell sticks to the ramekin wall and tears during unmolding — the cake collapses on the plate and the center spills rather than flows.
Fix: Butter every surface thoroughly and dust with cocoa. Refrigerate the prepared ramekins for at least 5 minutes before filling — the cold fat sets the coating and creates a clean release surface.
❌ Unmolding While Still Too Hot
Result: The shell is not set enough to hold its shape and the cake collapses sideways on the plate.
Fix: After inverting, wait exactly 10 seconds before lifting the ramekin. No longer — waiting too long cools the center and reduces the molten flow.
❌ Using Cold Eggs Straight From the Fridge
Result: Cold eggs lower the temperature of the melted chocolate when combined and the fat can seize, leaving you with a grainy, broken batter that does not bake evenly.
Fix: Set eggs on the counter 30 minutes before starting. Or place uncracked eggs in a bowl of warm (not hot) water for 5 minutes as a fast workaround.
❌ Not Testing Your Oven’s Exact Timing First
Result: A recipe that says 12 minutes in one oven might be 10 minutes or 14 minutes in yours. The stakes are high because there is no mid-bake correction.
Fix: Bake a single test ramekin in advance. Record the exact time and oven position that produced the right result. Use those numbers every time.
For more guides like this one, our molten chocolate cake troubleshooting guide covers this topic in the same depth. [IL-3 — replace with your URL]
Variations Worth Trying
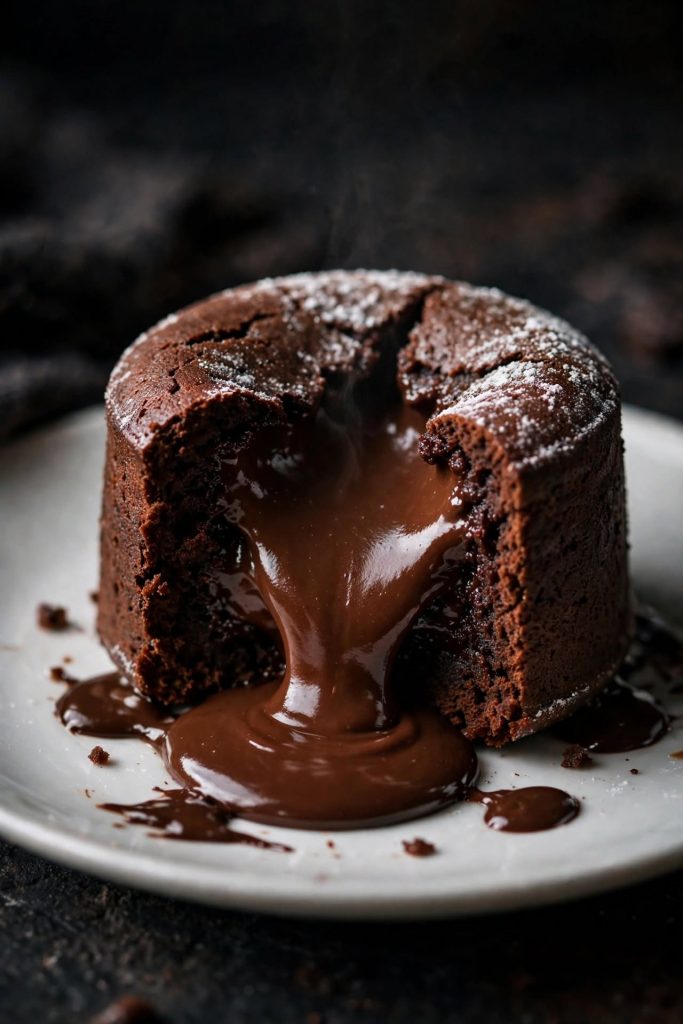
Salted Caramel Core Version
What changes: Freeze 1 tsp of salted caramel per ramekin into a solid disk on a lined sheet (1 hour in the freezer). Press one disk into the center of each filled ramekin before baking.
When: At Step 4, after filling the ramekins.
Result: The outer shell tastes of dark chocolate; the center releases a pool of warm salted caramel alongside the chocolate batter — two flavors in one pour.
Espresso Chocolate Version
What changes: Add 1 tsp of instant espresso powder to the melted chocolate mixture before combining with eggs.
When: At Step 2, while the chocolate is still warm.
Result: The espresso deepens the chocolate flavor noticeably without tasting like coffee. The bitterness of the dark chocolate reads more complex and the aftertaste lingers longer.
White Chocolate Lava Cake
What changes: Replace the dark chocolate with white chocolate (170g). Reduce sugar to 60g — white chocolate is significantly sweeter. Reduce bake time to 9 to 10 minutes.
When: All substitutions are made before Step 2.
Result: A pale ivory exterior with a creamy, vanilla-sweet molten center. Pair with raspberry coulis for visual and flavor contrast.
Peanut Butter Center Version
What changes: Freeze 1 tsp of peanut butter per ramekin into a solid disk (lined tray in freezer, 1 hour). Press one frozen disk into the center of each filled ramekin.
When: At Step 4, after filling.
Result: A warm peanut butter core inside the dark chocolate shell. The peanut butter softens but stays concentrated — it does not flood the plate the way chocolate does.
Make-Ahead Frozen Version
What changes: Fill prepared ramekins with batter, cover tightly with plastic wrap, and freeze for up to 1 week. Bake directly from frozen without thawing.
When: After Step 4 — freeze instead of refrigerating.
Result: Identical result with a bake time of 14 to 16 minutes from frozen. The frozen center guarantees a molten core regardless of oven timing. This is the professional catering method for this dessert.
How to Store
Room Temperature
Baked chocolate lava cake should not be stored at room temperature — it is designed to be eaten immediately after unmolding. If a cake is baked but not yet unmolded, it can rest in the ramekin at room temperature for up to 10 minutes before the center fully sets and the exterior cools. Beyond 10 minutes, the lava effect is gone. Use your judgment — if the ramekin feels cool to the touch, the center has likely set.
Refrigerator
Unbaked, filled ramekins keep refrigerated (tightly covered with plastic wrap) for best quality for up to 24 hours. Baked lava cakes that have already been unmolded can be refrigerated and reheated in a 350°F (175°C) oven for 8 minutes — they will not have a molten center after reheating, but they make an excellent warm individual chocolate cake. Cover with foil while reheating to prevent the exterior from going dry.
Freezer — Complete Guide
Unbaked, filled ramekins freeze well for best quality for up to 1 week — this is the method to use for advance prep. Wrap each ramekin individually in plastic wrap, then place in a zip-lock freezer bag. Bake directly from frozen at 425°F (220°C) for 14 to 16 minutes without thawing. The molten center is actually more reliable from frozen because the outer shell has more time to set while the frozen center slowly melts. They are safe to eat beyond 1 week, but the batter quality starts to decline after that. Do not freeze baked, unmolded cakes — the texture does not recover.
If make-ahead baking is part of how you entertain, our freeze-ahead dessert guide fits perfectly into that routine. [IL-4 — replace with your URL]
How to Serve
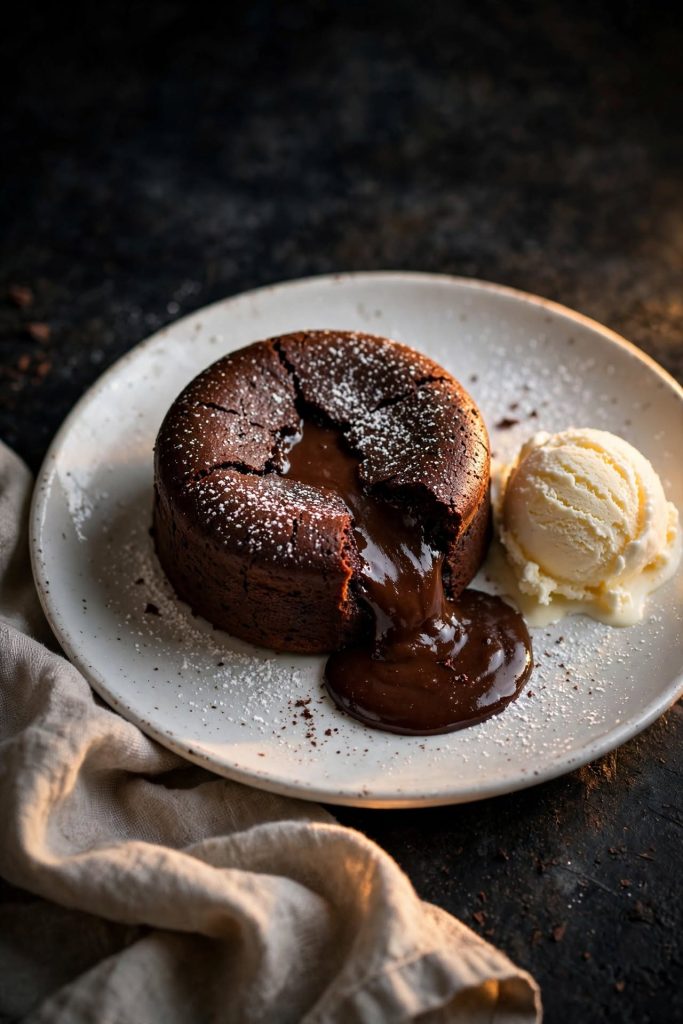
Classic Ways to Serve
- Unmold directly onto a warmed white plate — the contrast of dark cake on white shows the shape clearly
- Dust with powdered sugar through a small sieve — tap once for a light, even coating
- Serve immediately with a small scoop of vanilla ice cream on the side
Upgraded and Occasion-Worthy
- Place a quenelle of crème fraîche beside the cake and scatter flaky sea salt on top — the acid and salt sharpen the dark chocolate flavor
- Serve on a slate or dark ceramic plate for a restaurant aesthetic — the dark-on-dark contrast reads more dramatic than white
- Pair with a warm raspberry or passion fruit coulis for acidity that cuts the richness — spoon it in a loose arc around the base of the cake
Best pairings: vanilla ice cream, fresh raspberries, unsweetened whipped cream, or a small glass of dessert wine (Banyuls or late-harvest Riesling). Best occasion: dinner parties of 4 to 8, Valentine’s Day, or any occasion where you want a timed dessert that looks more difficult than it is.
Frequently Asked Questions
Can I make chocolate lava cake without a ramekin?
Yes — a standard 12-cup muffin tin works at a pinch. Fill each cup about halfway, reduce bake time to 8 to 9 minutes, and run a knife around the edge before inverting onto a plate. The shape will be wider and flatter than a ramekin cake, and the ratio of edge to center shifts, which makes overbaking more likely. For best results, use 6-oz ramekins.
Why did my chocolate lava cake turn out fully set?
The most common cause is overbaking — even 60 to 90 extra seconds at 425°F is enough to set the center. The second most common cause is an oven that runs cooler than its dial indicates. If your cakes consistently come out set at the stated time, reduce bake time by 1 to 2 minutes in the next batch, or check your oven temperature with a separate thermometer.
How do I know when chocolate lava cake is done?
The top surface should look matte and fully set — no wet sheen in the center. The edges should be visibly pulling from the ramekin walls. The test: nudge the baking sheet. The outer inch of each cake should be completely still; the very center should have a slow, slight jiggle — like set gelatin rather than liquid. If the whole surface wobbles, give it another minute.
Can I make chocolate lava cake ahead of time?
Yes — fill and refrigerate the ramekins up to 24 hours in advance, covered tightly with plastic wrap. Add 1 to 2 minutes to the bake time when cooking from cold. You can also freeze filled ramekins for up to 1 week and bake directly from frozen (14 to 16 minutes). Both methods produce the same molten center as fresh-made.
How long does chocolate lava cake last?
Unbaked in the refrigerator: best quality for up to 24 hours. Unbaked in the freezer: best quality for up to 1 week. Baked and unmolded: serve immediately — there is no practical storage window once the cake has been plated. A baked cake that has been refrigerated can be reheated but will not have a molten center.
Can I freeze chocolate lava cake?
Freeze it unbaked, not baked. Fill the prepared ramekins with batter, cover tightly with plastic wrap, and freeze. Bake directly from frozen at 425°F for 14 to 16 minutes without thawing first. The frozen center actually improves the molten effect — the outer shell has more time to set while the center melts gradually from the outside in.
What can I substitute for dark chocolate?
Semi-sweet chocolate chips work — use 160g (reduce by 10g) and add ½ tsp of neutral oil to account for the stabilizers. Expect a slightly sweeter result and a bake time of 12 to 13 minutes. Milk chocolate requires more significant adjustments — reduce sugar to 50g and reduce bake time to 9 to 10 minutes. If you enjoyed this recipe, our dark chocolate truffles are the next one worth making. [IL-5 — replace with your URL]
Can I double this recipe?
Yes — double all ingredients and fill 8 ramekins. The bake time does not change because you are baking more individual portions, not a larger pan. Bake in two batches on separate baking sheets to ensure even heat circulation, or use two oven racks positioned near the center and rotate halfway through.
Why did my lava cake stick to the ramekin?
Incomplete ramekin prep is the most common cause — a single missed spot on the ramekin wall is enough to anchor the exterior and cause tearing during unmolding. Butter every surface, including the rim, then dust evenly with cocoa. Refrigerating the prepped ramekins for at least 5 minutes before filling sets the butter coating and dramatically reduces sticking.
What size ramekin works best for chocolate lava cake?
A 6-oz (170ml) ramekin gives you the ideal ratio of outer shell depth to inner liquid volume. A 4-oz ramekin bakes through too quickly for a reliable molten center. An 8-oz ramekin requires longer baking, which narrows the window between set and molten. If you only have 8-oz ramekins, fill them ¾ full and increase bake time to 13 to 15 minutes.
Can I make chocolate lava cake without flour?
Yes — replace the flour with 1 tsp of cornstarch. The cake will be slightly more fragile with a thinner exterior, but the molten center behaves the same way. This version is naturally gluten-free. Reduce bake time by 1 minute and handle the unmolding more carefully — the shell is thinner and more prone to cracking.
Can I add a filling to the center?
Yes — the frozen insert method (described in the Ingredients section) allows you to add any flavored filling. Freeze the filling solid before inserting, or it will disperse into the batter during baking rather than staying concentrated at the center. Caramel, peanut butter, hazelnut spread, and raspberry jam all work well frozen solid.

Chocolate Lava Cake
Ingredients
Equipment
Method
- Preheat oven to 425°F (220°C) for at least 20 minutes. Brush ramekins with softened butter, dust with cocoa powder, tap out excess. Refrigerate on a baking sheet.
- Melt chocolate and butter together in 30-second microwave intervals, stirring after each, until completely smooth. Cool for 5 minutes.
- Whisk eggs, egg yolks, and sugar for 90 seconds until pale and slightly thickened. Add vanilla and whisk 10 seconds more.
- Pour warm chocolate into egg mixture in a slow stream, folding gently. Sift in flour and salt; fold with 10 to 12 strokes until no streaks remain. Divide evenly among 4 ramekins, filling ¾ full.
- Bake on center rack 11 to 13 minutes until edges are set and center has a slight jiggle. Run a knife around each ramekin, invert onto a warmed plate, wait 10 seconds, lift ramekin. Serve immediately.
Notes
- Run a test bake before a dinner party to confirm your oven’s exact timing — ovens vary by up to 3 minutes.
- From refrigerator (prepped ahead): add 1 to 2 minutes to the bake time.
- From frozen: bake at 425°F for 14 to 16 minutes directly from frozen — no thawing needed.
- Ramekin must be 6-oz. Larger ramekins require more bake time and reduce the molten window.
- Chocolate quality matters more here than in almost any other recipe — use a bar you would eat on its own.
More Chocolate Dessert Recipes You Will Love
- Dark Chocolate Truffles — a four-ingredient ganache rolled in cocoa powder, ready in 20 minutes of work plus 1 hour of setting. The same high-cocoa chocolate that makes this cake great makes the truffle a different kind of intense.
- One-Bowl Brownies — dense, fudgy, and built on the same melted-butter-plus-cocoa technique. The simplest version of this flavor profile with zero precision required.
- Chocolate Mousse — four ingredients, no baking, and a texture that splits between airy and rich depending on how far you fold the cream. A cold companion to the warm lava cake at a dinner party.
- Flourless Chocolate Cake — the closest relative to the molten chocolate cake: same high-cocoa base, baked through this time, with a fudgy, almost candy-like interior. Naturally gluten-free.
- Salted Caramel Chocolate Tart — a pressed cocoa crust, dark chocolate ganache filling, and a layer of salted caramel between them. Slice-and-serve dessert that holds in the refrigerator for 3 days.
Did you make this chocolate lava cake? Leave a ⭐⭐⭐⭐⭐ rating below and let me know in the comments how it turned out. I read every comment and would love to know what worked for you.