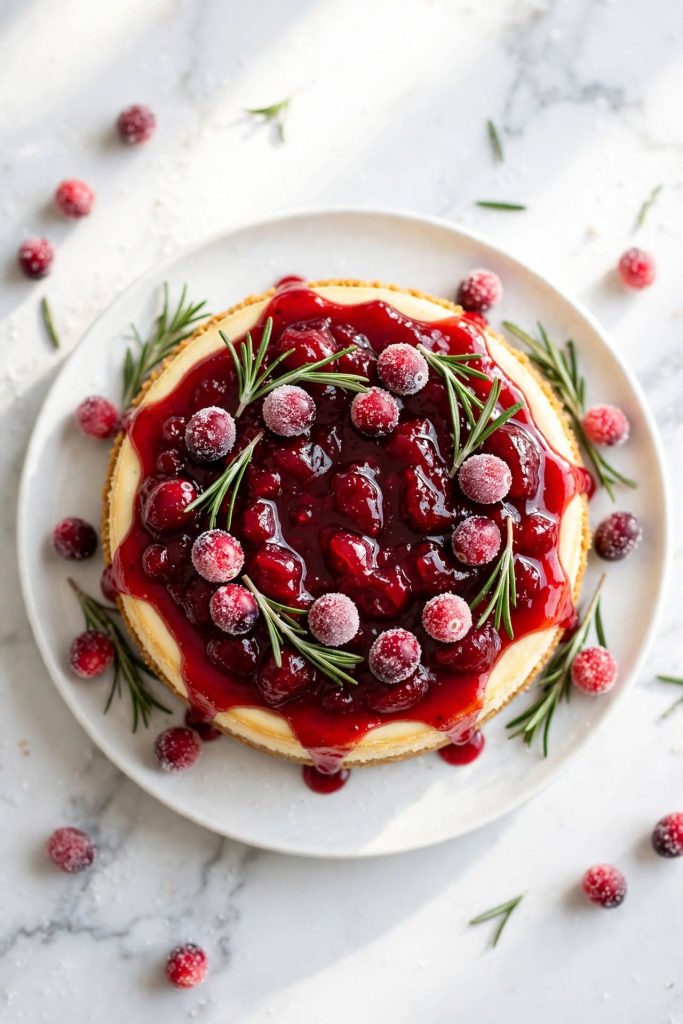
Christmas cheesecake is a baked cream cheese dessert with a buttery graham cracker crust, silky vanilla-spiced filling, and a vivid cranberry or berry topping. It sets in the refrigerator overnight and slices cleanly into neat, even portions. Prep takes about 30 minutes of hands-on work. Best for anyone who needs a make-ahead holiday dessert that looks professionally made with a reliable method.
This Christmas cheesecake gives you a smooth, lightly spiced cream cheese filling on a buttery cinnamon-graham cracker crust — finished with a ruby-red cranberry topping that holds its shape beautifully on the serving table. The method takes about 30 minutes of active work, and the rest is handled by your oven and refrigerator. If your concern is a cracked surface or a center that never sets properly, this recipe addresses both directly with a water bath and a slow-cool method. I tested this recipe four times before publishing — working through different chill times and topping combinations to make sure the method is consistent every time.
Why This Recipe Works
Most cheesecake recipes leave too much room for error — vague oven times, no water bath instructions, and no explanation of why things go wrong. This festive cheesecake recipe closes every one of those gaps.
- Full-fat cream cheese at room temperature — gives you a silky-smooth filling with no lumps. Cold cream cheese never fully incorporates and leaves a grainy texture that no amount of mixing fixes.
- A water bath throughout the bake — creates a humid oven environment that prevents the surface from drying out and cracking. No water bath, no guarantee of a smooth top.
- Slow cooling in the oven — the temperature drop from 325°F to room temperature happens over 2 hours, not 20 minutes. A rapid cool is the single most common cause of surface cracks in an otherwise perfect cheesecake.
- Overnight chilling — not 4 hours — after a full 8-hour chill, the filling firms completely and slices into clean, even portions. Cut at 4 hours and the center can drag.
- Cranberry topping made separately — cooked on the stovetop and added cold after chilling. This keeps the filling intact and the topping visually vibrant rather than sunken or discolored.
- Make-ahead by design — the whole cheesecake — base, filling, and topping — can be prepared a full day before your holiday gathering. Nothing to rush on the day.
- A tablespoon of flour in the filling — adds just enough structure to help the center hold its shape when sliced, without making the texture stiff or dense.
If you are looking to build your holiday baking skills further, our holiday baking guides are a good place to start.
Ingredients for Christmas Cheesecake
Every ingredient here has a specific job. Here is what each one does — and what to use if you need to make a substitution.
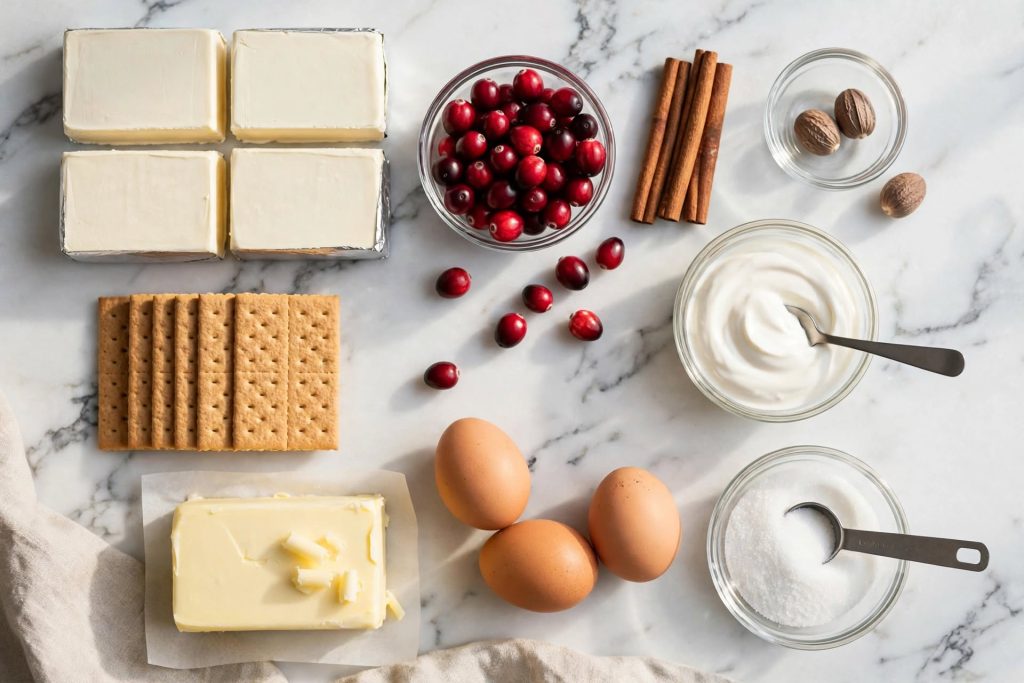
The Crust
| Ingredient | Amount | What It Does | Best Substitute + Impact |
|---|---|---|---|
| Graham cracker crumbs | 2 cups (200g) | Forms the base; absorbs butter to hold shape | Digestive biscuits — slightly less sweet, same texture |
| Granulated sugar | 2 tablespoons | Adds sweetness and helps crust firm up when baked | Brown sugar — adds a molasses note to the base |
| Ground cinnamon | ½ teaspoon | Adds warmth; bridges crust flavor to the spiced filling | Mixed spice — adds clove and nutmeg notes |
| Unsalted butter, melted | ½ cup (113g) | Binds the crumbs; creates a solid, sliceable crust | Coconut oil — slightly different flavor, works structurally |
The Filling
| Ingredient | Amount | What It Does | Best Substitute + Impact |
|---|---|---|---|
| Full-fat cream cheese, room temp | 4 packages (900g) | The structural base of the filling; provides tang and richness | No substitute — reduced-fat versions produce a loose, unstable filling |
| Granulated sugar | 1¼ cups (250g) | Sweetens and helps the filling set at the right consistency | Caster sugar — dissolves faster, same result |
| Eggs, room temperature | 4 large | Bind the filling and create structure when baked | No direct substitute in baked cheesecake |
| Full-fat sour cream, room temp | ½ cup (120g) | Adds moisture and tang; keeps the filling from becoming dense | Full-fat Greek yogurt — nearly identical result |
| Pure vanilla extract | 2 teaspoons | Background flavor that rounds out the cream cheese tang | Vanilla bean paste — stronger flavor, visible specks |
| Ground cinnamon | 1 teaspoon | Adds the warm spice note that makes this feel festive | Pumpkin pie spice — adds more complexity |
| Ground nutmeg | ¼ teaspoon | A subtle background warmth — nutmeg amplifies cinnamon | Allspice — similar warming effect, slightly different profile |
| All-purpose flour | 1 tablespoon | Adds just enough structure to help the center hold its shape | Cornstarch — use 2 teaspoons; gives a slightly silkier finish |
The Cranberry Topping
| Ingredient | Amount | What It Does | Best Substitute + Impact |
|---|---|---|---|
| Fresh or frozen cranberries | 2 cups (200g) | Provides the vivid red color and tart flavor contrast | Frozen cherries or raspberries — sweeter, less tart |
| Granulated sugar | ½ cup (100g) | Balances the tartness; helps the topping set to a glossy consistency | Maple syrup — use ⅓ cup; adds a subtle caramel note |
| Water | ¼ cup (60ml) | Prevents the cranberries from scorching and helps form a pourable sauce | Orange juice — adds brightness |
| Orange zest | 1 teaspoon | Brightens the cranberry flavor without adding extra liquid | Lemon zest — more tart, slightly sharper |
| Ground cinnamon | ½ teaspoon | Ties the topping flavor to the spiced filling beneath it | Can be omitted without affecting the structure |
Key Ingredient Notes
Cream cheese: Use full-fat block cream cheese — not whipped, spreadable, or reduced-fat versions. Spreadable cream cheese contains stabilizers and extra moisture that prevent the filling from setting properly. Pull it from the refrigerator at least 2 hours before mixing — cream cheese that is still cold in the center will leave lumps in your filling no matter how long you beat it.
Eggs: Room-temperature eggs incorporate more smoothly and reduce the risk of the batter breaking. Cold eggs can cause the cream cheese to seize, leaving small white chunks in the finished filling. Set them out with the cream cheese, at least 30 minutes before you start.
Cranberries: Frozen cranberries work exactly as well as fresh — add them to the saucepan straight from frozen. Do not thaw first, as thawed cranberries release extra liquid and can make the topping watery.
Equipment You Need
- 9-inch springform pan — non-negotiable; the release mechanism is how you unmold cleanly
- Large roasting pan — must be large enough for the springform pan to sit inside for the water bath
- Stand mixer or hand mixer — needed for smooth, lump-free cream cheese
- Heavy-duty aluminum foil — two layers, to prevent water from seeping into the crust during the water bath
- Rubber spatula — for folding and scraping; no whisk after the eggs go in
- Small saucepan — for the cranberry topping
- Instant-read thermometer (optional) — confirms doneness without guesswork
The Cream Cheese Temperature Guide
Cream cheese temperature is the single biggest factor in how your Christmas cheesecake filling turns out. It affects smoothness, lump formation, and how well the other ingredients blend.
| Stage | What It Looks and Feels Like | Use for This Recipe? |
|---|---|---|
| Straight from fridge (38°F/3°C) | Very firm, holds its shape, cold to touch at center | ❌ No — will leave lumps; filling becomes grainy |
| Slightly softened (50°F/10°C) | Pliable edges, still firm at center | ⚠️ Marginal — risk of small lumps remaining |
| Room temperature (65–70°F/18–21°C) | Easily dents when pressed, smooth throughout, no cold center | ✅ Ideal — blends completely smooth in 2 minutes of mixing |
| Warm (80°F+/27°C+) | Very soft, slightly greasy surface, may start separating | ⚠️ Avoid — can produce a greasy, loose filling |
No time to wait? Cut each block of cream cheese into 8 pieces and spread them on a plate. At room temperature, small pieces soften in 30 to 40 minutes instead of 2 hours. Do not use the microwave — heat spots create partially melted areas that mix unevenly.
How to Make Christmas Cheesecake — Step by Step
Follow these steps in order. The most critical steps are marked with ⚠️.
Step 1: Make the Graham Cracker Crust
Preheat your oven to 325°F (163°C). In a medium bowl, stir together the graham cracker crumbs, sugar, and cinnamon. Pour in the melted butter and mix until every crumb is evenly coated — the mixture should hold together when you press a small amount between your fingers. Tip it into your 9-inch springform pan and press firmly into an even layer across the bottom and about 1 inch up the sides — use the flat base of a measuring cup to compact it tightly. Bake for 10 minutes, until lightly golden around the edges and fragrant. Set aside to cool while you make the filling.
What to look for: The crust edges should appear set and lightly toasted. It should not look wet or loose after 10 minutes.
Step 2: Prepare the Cream Cheese Filling
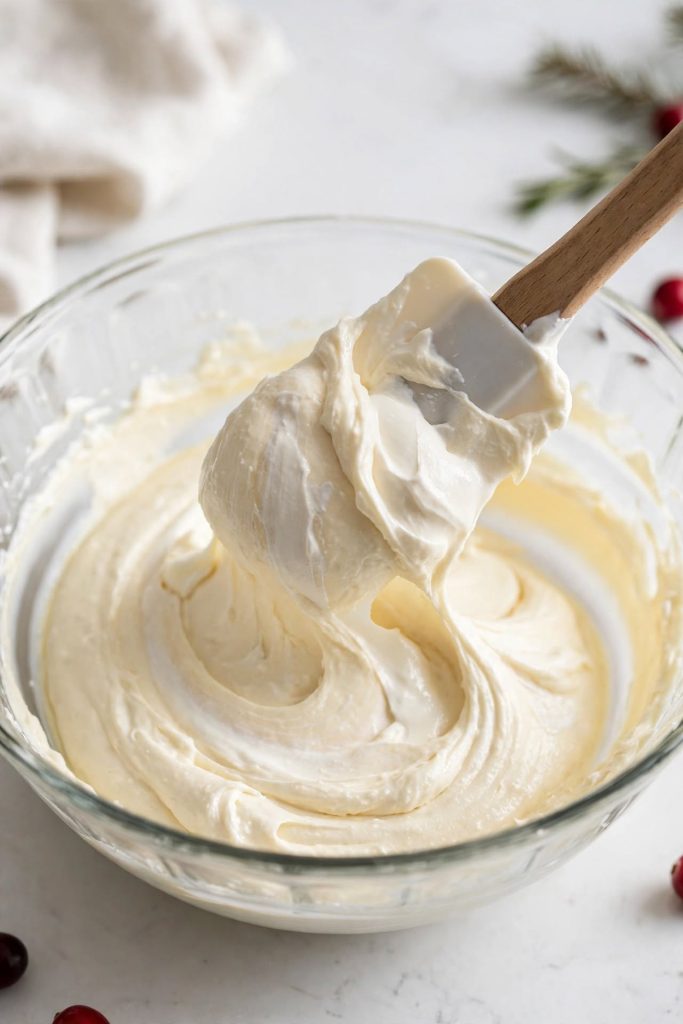
Beat the room-temperature cream cheese in a stand mixer (or with a hand mixer) on medium speed for 2 full minutes — not 30 seconds, not 1 minute — until it is completely smooth and no lumps remain. Scrape down the bowl and the beater. Add the sugar and beat for 1 additional minute. Now switch to low speed. Add the eggs one at a time, waiting until each egg just disappears into the batter before adding the next. Stop mixing the moment the last egg is incorporated — you should see no streaks of yolk remaining. Add the sour cream, vanilla, cinnamon, nutmeg, and flour. Fold them in gently with a rubber spatula until just combined — 8 to 10 folds maximum. The batter should look smooth, pale, and uniform. If you can still see unmixed streaks of sour cream, give it 2 more folds. Do not return to the mixer at this stage — every extra beat adds air, and excess air causes the filling to puff in the oven and collapse as it cools, pulling the surface into cracks.
What to look for: A smooth, pale batter with no visible lumps, streaks, or foam on the surface. It should pour like thick cream.
Step 3: Pour and Smooth
Tear off two large sheets of heavy-duty aluminum foil. Wrap them around the outside of the springform pan, pressing them up the sides and creasing them at the base to form a waterproof seal. This is your water barrier — a single layer often lets water seep through the base seam and into your crust, making it soggy. Pour the filling over the cooled crust. Tap the pan gently on the counter 3 to 4 times to release any large air bubbles trapped near the surface. Smooth the top with an offset spatula or the back of a spoon.
What to look for: A flat, even surface. Any visible air bubbles should be popped with a toothpick before baking.
Step 4: Bake the Cheesecake
Place the wrapped springform pan in a large roasting pan. Set the roasting pan on the oven rack, then pour boiling water from a kettle into the roasting pan — aim for about 1 inch of water up the side of the springform pan. Do not pour the water before placing the pan in the oven; you risk spilling hot water as you carry it. Close the oven door and do not open it for the first 50 minutes. Bake for 60 to 70 minutes total. After 60 minutes, check for doneness using the jiggle method: gently nudge the pan. The outer 2 inches should be set and firm. The inner 2 to 3 inches should jiggle gently as one unified mass — like firm gelatin — not ripple or slosh like liquid. If the center looks liquid and moves independently, give it another 10 minutes and check again. An instant-read thermometer inserted in the center reads 150°F to 155°F when done.
What to look for: A set perimeter with a gently wobbly center. The surface should have no visible liquid sheen across the full width of the pan.
Step 5: Cool and Chill Overnight
Turn the oven off. Crack the oven door open by about 1 inch — prop it with a wooden spoon if needed. Leave the cheesecake inside for 1 hour. This gradual temperature drop is what prevents the surface from cracking as the filling contracts during cooling. After 1 hour, remove the cheesecake from the roasting pan, peel off the foil, and set it on a wire rack. Cool at room temperature for another 1 hour until it reaches room temperature. Cover the surface loosely with plastic wrap — do not let it touch the filling — and refrigerate for at least 6 hours, or overnight. The longer it chills, the cleaner it slices. Once fully chilled, run a thin knife around the inside edge of the pan before releasing the springform clasp.
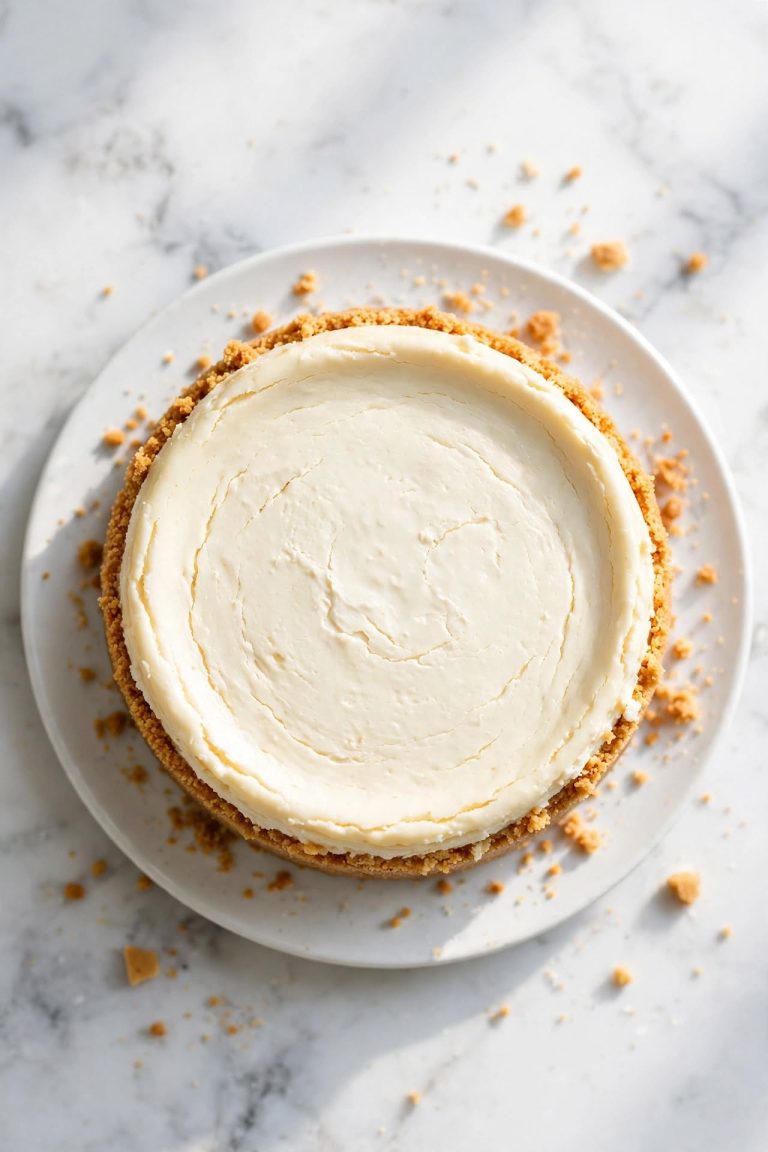
What to look for: After chilling, the surface should be smooth and firm to the touch. It should hold its shape when you release the springform ring.
Step 6: Make the Cranberry Topping
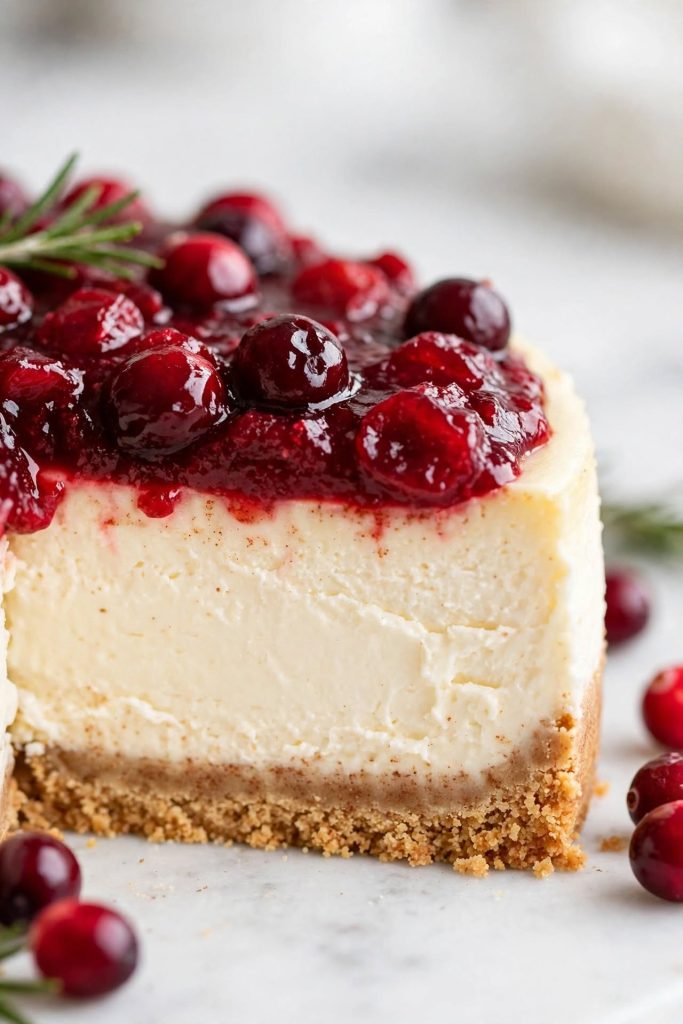
Combine the cranberries, sugar, water, orange zest, and cinnamon in a small saucepan over medium heat. Stir to combine. Cook for 8 to 10 minutes, stirring occasionally — the cranberries will burst open and the mixture will thicken to a glossy, jam-like consistency. You want it thick enough to spoon and hold its shape on the cheesecake, not runny enough to slide off. Remove from heat and cool completely to room temperature before spooning over the chilled cheesecake. Spread it evenly, leaving a small border of filling visible around the edge for a clean presentation. Refrigerate the assembled cheesecake for at least 30 minutes before slicing.
What to look for: The topping should be glossy, dark ruby-red, and thick enough to hold when the spoon is lifted. If it seems thin after cooking, return to the heat for 2 more minutes.
Once you are comfortable with the stovetop reduction method, fruit compote techniques for baked desserts are worth exploring next.
The Science Behind a Crack-Free Cheesecake
Understanding what is happening inside your cheesecake while it bakes gives you control over every variable that affects the result.
Why Room-Temperature Ingredients Matter
Cream cheese is an emulsion — fat and water held in suspension. When you add cold eggs to warm cream cheese, or cold cream cheese to warm eggs, the fat in the cream cheese can seize and break the emulsion — leaving white specks that look like lumps and never fully blend, regardless of how long you mix. Room-temperature ingredients stay in a compatible temperature range that allows the emulsion to remain stable. The same principle applies to the sour cream: cold sour cream added to a beaten cream cheese batter can cause the mixture to tighten and become grainy.
Why a Water Bath Prevents Cracks
Water can only reach a maximum temperature of 212°F (100°C) at sea level — it cannot get hotter because it evaporates. Placing your cheesecake in a water bath means the pan is surrounded by an environment that stays below 212°F for the entire bake, no matter what temperature the oven is set to. This prevents the edges from cooking significantly faster than the center — the difference in cooking speed between edge and center is the mechanical cause of surface cracking. The steam generated by the water bath also keeps the oven air humid, which prevents the cheesecake surface from drying out and forming a skin that cracks as the filling beneath it moves.
Why Slow Cooling Is Non-Negotiable
Cheesecake filling is mostly water and protein. As it cools, the proteins contract. If cooling happens rapidly — moving from 325°F to 70°F room temperature in under an hour — the proteins on the surface contract faster than the interior can follow, and the surface literally tears apart. The one-hour rest in the turned-off oven brings the temperature down gradually from 325°F to roughly 160°F to 180°F before the cheesecake sees room-temperature air. That 2-hour slow transition from hot oven to room temperature gives the filling time to cool evenly from edge to center, with no surface-splitting stress.
Tips for the Best Christmas Cheesecake
These are the details that separate a clean, professional result from one that works but looks rough around the edges.
Use a Springform Pan — Not a Regular Cake Pan
The springform mechanism releases the side ring without requiring you to invert the cheesecake — and inverting a cheesecake will crack the surface and throw off the topping. A 9-inch springform pan is the standard for this recipe. Latch the base correctly before you add the crust; a latched base sits flush and prevents batter from seeping underneath.
Room-Temperature Cream Cheese Is Non-Negotiable
Cold cream cheese will not beat smooth — it will leave fine lumps throughout the batter that stay visible in the finished filling. Two hours on the counter is ideal. If you forget, see the Cream Cheese Temperature Guide above for a faster method using sliced pieces. Do not use the microwave — you will melt parts of it while the center stays cold.
Do Not Overmix After Adding the Eggs
Once the eggs go in, the goal is to incorporate them — not to add air to the batter. Switch to low speed and stop the moment each egg disappears. After all the eggs are in, switch from the mixer to a rubber spatula for the sour cream and flour. Every unnecessary beat after the eggs are in incorporates air bubbles — those bubbles expand during baking and collapse on cooling, pulling the surface into cracks.
Let It Cool in the Oven With the Door Cracked
The one hour in the turned-off oven is not optional — it is the step that prevents the most visible surface cracking. Skipping this and moving the cheesecake straight from a hot oven to a room-temperature counter causes the outer surface to cool faster than the interior, and the tension between the two temperatures creates surface splits. Set a timer and leave it.
Chill for a Minimum of 6 Hours — Overnight Is Better
At the 4-hour mark, the center of the cheesecake is still slightly soft — slicing pulls the filling rather than cutting through it cleanly. After 8 hours, the entire filling is firm from edge to center and slices in clean, even pieces. This makes Christmas cheesecake a natural make-ahead dessert: bake it on Christmas Eve, slice it on Christmas Day.
Test for Doneness With the Jiggle Method
Do not test cheesecake with a toothpick — a cheesecake that is fully cooked will still come back with a wet toothpick because the filling never dries out the way a cake does. The jiggle test is your real signal: gently nudge the pan. If the center wobbles as one solid mass — like thick gelatin — it is done. If it ripples in waves like a liquid, it needs more time. The center will look underdone when you pull it out; it finishes cooking from residual heat during the slow cool, then firms fully in the refrigerator.
Common Mistakes to Avoid
Every one of these mistakes causes a problem that is visible in the finished dessert. Each one is preventable.
❌ Using Cold Cream Cheese
Cold cream cheese leaves lumps in the batter — white specks that remain in the finished filling and create an uneven, grainy texture. Two hours on the counter solves this completely. There is no technique fix once cold cream cheese has been beaten into a lumpy batter.
❌ Overmixing the Batter After Adding Eggs
Air bubbles incorporated after the eggs go in expand during baking and create a puffed center that collapses on cooling — taking the surface with it and leaving cracks. Once the eggs are in, switch to a spatula and use only folding motions. The batter needs to be combined, not aerated.
❌ Skipping the Water Bath
Without a water bath, the edges of your cheesecake bake significantly faster than the center — a difference that causes the filling to crack and pull as it sets unevenly. The water bath is 5 minutes of extra setup for a dramatically better result. If water bath setup feels complicated, see Step 3 for the exact foil-wrapping method that makes it straightforward.
❌ Opening the Oven Door Too Early
Opening the oven before the 50-minute mark drops the temperature abruptly and can cause the surface to set unevenly. A sudden drop in oven temperature while the filling is still liquid can also prevent the cheesecake from completing its set. Set a timer and leave the oven closed until you are ready to check for doneness.
❌ Slicing Before Full Chilling
Slicing a cheesecake that has only chilled for 2 or 3 hours gives you a soft, smeared cut face — the filling drags rather than slices. After 8 hours, the cut edge is clean and the slice holds its shape on the plate. Patience here is what makes this look like a bakery-made holiday cream cheese dessert.
❌ Not Wrapping the Springform Pan Before the Water Bath
Springform pans are not watertight — water will seep through the base seam during a 70-minute bake and make the crust soggy and crumbly. Two layers of heavy-duty foil pressed firmly up the sides creates an effective seal. Regular foil can tear; use heavy-duty. For extra protection, some bakers place the springform in a slow cooker liner bag before wrapping — this is optional but effective.
For more guides like this one, our complete cheesecake troubleshooting guide covers every common problem in the same level of detail.
Variations Worth Trying
The base recipe above is the classic starting point. Each variation below changes one or two elements while keeping the structure and method identical.
Gingerbread Christmas Cheesecake
What changes: Replace the graham crackers in the crust with crushed gingerbread cookies. Add 1 teaspoon of ground ginger, ½ teaspoon of ground cloves, and ½ teaspoon of allspice to the filling along with the cinnamon. When: Swap the crust ingredients before pressing and baking; add the extra spices to the filling in Step 2. Result: A warm, deeply spiced base with a filling that tastes of classic Christmas spice cake — pairs well with the cranberry topping or a simple caramel drizzle.
White Chocolate Peppermint Christmas Cheesecake
What changes: Melt 170g of good-quality white chocolate and fold it into the filling after the eggs are incorporated. Add ½ teaspoon of peppermint extract to the filling and omit the cinnamon and nutmeg. Top with whipped cream and crushed candy cane rather than cranberries. When: Fold the melted white chocolate and peppermint extract in at the end of Step 2. Result: A sweet, cool, candy-cane cheesecake with a white and red presentation — one of the most visually striking Christmas dessert ideas for a holiday table.
No-Bake Christmas Cheesecake
What changes: Skip the oven entirely. Beat 900g room-temperature cream cheese with 1¼ cups powdered sugar, 2 teaspoons vanilla, and 1 teaspoon cinnamon. Fold in 2 cups of whipped heavy cream until just combined. Pour over the unbaked crust and refrigerate for a minimum of 6 hours. When: The entire process happens without any oven use. Result: A lighter, mousse-like texture that is slightly less dense than the baked version — a good option if oven space is fully committed during the holiday season.
Mini Christmas Cheesecakes
What changes: Divide the crust and filling between a 12-cup muffin tin lined with paper liners. Press 2 tablespoons of crust mixture into each cup and add filling to fill ¾ full. Bake at 325°F for 20 to 22 minutes without a water bath. When: Follow Steps 1 and 2 exactly, then divide into the lined muffin tin. Result: Individual cheesecakes that are easy to plate and serve at a party — each guest gets their own and there is no slicing required. Chill for at least 4 hours.
Eggnog Christmas Cheesecake
What changes: Replace the sour cream with ½ cup of store-bought eggnog. Add ½ teaspoon of freshly grated nutmeg in addition to the ground nutmeg already in the recipe, and a pinch of ground cloves. Omit the cinnamon in the filling. When: Substitute the eggnog for sour cream at the point in Step 2 where sour cream is folded in. Result: A richly flavored filling with the unmistakable flavor of holiday eggnog — the nutmeg-forward profile works particularly well with a simple whipped cream topping and a light dusting of freshly grated nutmeg.
How to Store
Refrigerator
Store the cheesecake in an airtight container or cover the springform base with plastic wrap, pressing it lightly against the cut faces of any sliced portions. Christmas cheesecake is best quality for up to 5 days in the refrigerator. After day 3, the crust begins to soften as it absorbs moisture from the filling — this is a quality change, not a safety concern. Store the cranberry topping separately if you have not yet added it, and spoon it over no more than 24 hours before serving, as it can release moisture into the filling surface if left on for longer. If it smells off or shows any discoloration, discard it — use your judgment.
Freezer — Complete Guide
Christmas cheesecake freezes well — freeze the base without the cranberry topping for the best result. After the cheesecake has chilled overnight and been released from the springform pan, place it on a cardboard round or the base of the springform pan. Wrap tightly in two layers of plastic wrap, pressing out any air pockets at the sides. Add a layer of heavy-duty aluminum foil over the plastic wrap. Freeze for up to 2 months — it remains safe beyond this window, but texture quality declines after the 2-month mark.
To freeze individual slices: Slice the fully chilled cheesecake first. Place slices on a parchment-lined baking sheet and freeze uncovered for 1 hour until solid. Wrap each slice individually in plastic wrap, then place in a zip-lock freezer bag. This method lets you thaw one slice at a time.
To thaw: Move the wrapped cheesecake (whole or individual slices) to the refrigerator the night before serving. Allow 8 hours for a whole cheesecake, 2 to 3 hours for individual slices. Do not thaw at room temperature — condensation will form on the surface. Add the cranberry topping after thawing and just before serving.
Texture note: The filling holds up very well through freezing. The graham cracker crust may become slightly softer than fresh, but returns to close-to-original texture once thawed slowly in the refrigerator.
If batch-baking for the holiday season is something you enjoy, our make-ahead holiday dessert planning guide fits perfectly into that routine.
How to Serve
This make-ahead holiday dessert is at its best served cold, straight from the refrigerator.
Classic Ways to Serve
- Straight from the refrigerator, sliced with a warm dry knife (run the blade under hot water and dry it between each cut)
- With a spoonful of additional cranberry topping added to each plate
- With a small dollop of lightly sweetened whipped cream on the side
Upgraded and Occasion-Worthy
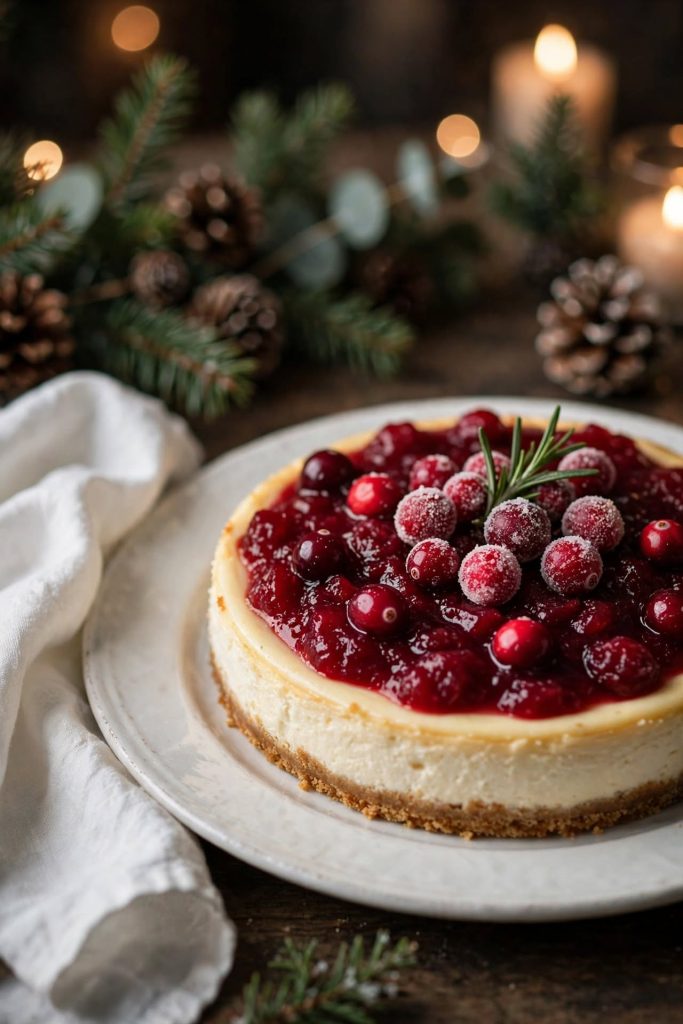
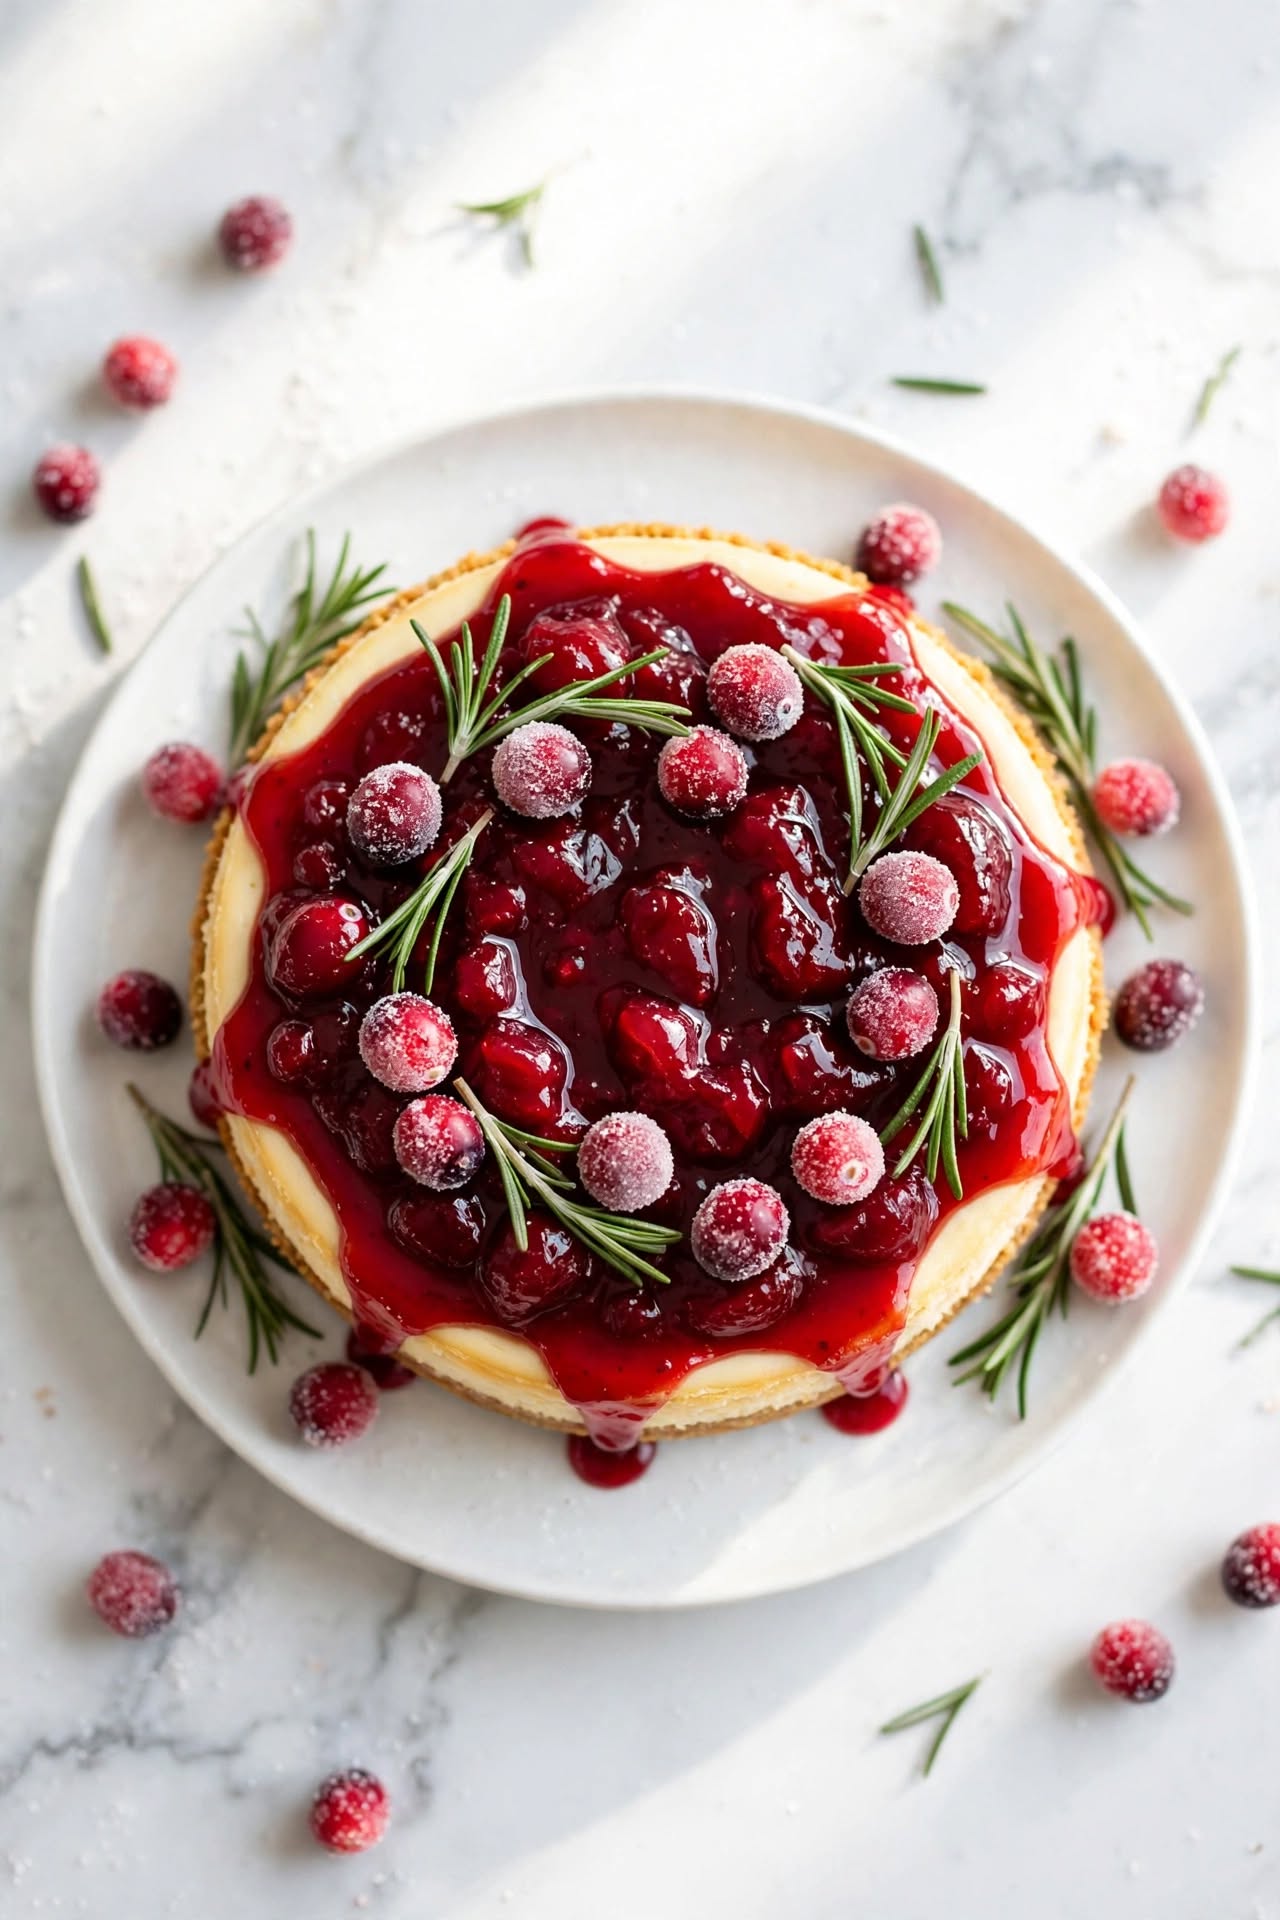
- Sugared cranberries garnish: Roll fresh cranberries in simple syrup, then in granulated sugar, and scatter them over the top for a frosted, jewel-like presentation that looks striking on a holiday table
- Rosemary sprig and powdered sugar: Dust lightly with powdered sugar and tuck a small rosemary sprig in the center — minimal effort, very high visual impact
- Chocolate drizzle finish: Drizzle dark chocolate over the cranberry topping just before serving for an elevated, patisserie-style result
What it pairs well with: Hot coffee or spiced chai tea balance the richness of the cream cheese. A glass of prosecco or a light dessert wine also pairs well at a Christmas dinner table.
Best occasion for this recipe: Christmas Eve dinner, Christmas Day dessert, holiday potlucks, New Year’s Eve parties, and any gathering where a make-ahead option is essential.
Frequently Asked Questions
These are the questions most readers ask before and after making this recipe. Each answer is self-contained.
Can I make Christmas cheesecake without a water bath?
You can, but your risk of cracking increases significantly. A water bath keeps the oven environment humid and regulates the temperature around the pan — both of which help the filling set without forming a dry, cracked surface. If you skip it, bake at 300°F instead of 325°F, and cool the cheesecake slowly in the oven with the door cracked. The result may still crack, but the cranberry topping will cover most surface imperfections.
Why did my Christmas cheesecake crack on top?
Cracks form when the filling is overbaked, overmixed, or cooled too quickly. The most common cause is opening the oven door during baking, which drops the temperature suddenly and causes the surface to split. Overmixing after adding eggs incorporates too much air, which expands in the oven and collapses as it cools — pulling the surface apart. A cranberry or berry topping covers most cracks completely, so a cracked cheesecake is still fully servable.
How do I know when my Christmas cheesecake is done?
Your cheesecake is done when the outer 2 inches are set but the center 2 to 3 inches jiggle like firm gelatin when you gently shake the pan. The center should not look wet or liquid — it should wobble as one unified mass, not ripple. An instant-read thermometer inserted in the center reads 150°F to 155°F when done. It will firm up completely during chilling.
Can I make this ahead of time?
Yes — this Christmas cheesecake is specifically designed to be made ahead. Bake it the day before and chill it overnight; it actually slices cleaner after a full 8 hours in the refrigerator than after just 4. The cranberry topping can be made up to 3 days ahead and stored separately in a covered container in the refrigerator. Add the topping the morning you plan to serve, or directly before presenting.
How long does Christmas cheesecake last?
Christmas cheesecake is best quality for up to 5 days stored in the refrigerator in an airtight container. After day 5, the crust may soften and the texture can become looser. For best results, add the cranberry topping no more than 24 hours before serving — it can release moisture into the filling if left on too long. Use your judgment: if it smells off or shows any discoloration, discard it.
Can I freeze Christmas cheesecake?
Yes. Freeze the cheesecake base without the topping for best results. After chilling overnight, remove from the springform pan, wrap tightly in two layers of plastic wrap, then a layer of foil. Freeze for up to 2 months. To thaw, move to the refrigerator overnight — do not thaw at room temperature, as condensation can make the surface wet and affect the texture. Add the cranberry topping after thawing and just before serving. If you enjoyed this recipe, our holiday cream cheese dessert collection is the next place worth exploring.
What can I substitute for sour cream?
Full-fat Greek yogurt is the best substitute for sour cream in this recipe — it has a similar fat content and tang, and the texture of the filling will be nearly identical. Crème fraîche also works and gives a slightly richer result. Do not substitute low-fat or fat-free dairy products; the lower fat content produces a looser, less stable filling that may not set cleanly.
Can I double this recipe?
You can double the recipe, but you will need two 9-inch springform pans rather than one larger pan — a deeper, wider single pan changes the baking time unpredictably. Keep all other quantities and baking times the same; both pans can go in the oven simultaneously if your oven has room to fit both without touching. Switch rack positions halfway through baking for even heat distribution.
Why did my Christmas cheesecake sink in the middle?
Sinking typically means the center was underbaked — it was removed from the oven before the filling had enough structure to hold itself up as it cooled. A slight dip in the center is normal and is usually hidden by the topping. A significant collapse usually means the oven temperature was too high and the filling puffed rapidly then fell, or that the cheesecake cooled too fast. Use an oven thermometer to verify your oven is calibrated accurately.
What size springform pan works best?
A 9-inch springform pan is the standard for this recipe and yields 12 clean slices. A 10-inch pan works with the same quantities but gives a slightly thinner filling layer and may reduce baking time by 8 to 10 minutes — check for doneness earlier. Do not use a pan smaller than 9 inches with the full recipe, as the filling can overflow during baking.
Can I use a different topping instead of cranberry?
Yes. The filling works with any fruit topping you prefer. Cherry compote, raspberry sauce, or a simple strawberry topping all pair well with the lightly spiced vanilla filling. For a purely white Christmas presentation, whipped cream rosettes with crushed candy cane make a striking alternative. The filling also stands on its own with just a light dusting of cinnamon and powdered sugar if you prefer a simpler finish.
Can I make this Christmas cheesecake gluten-free?
Yes. Replace the graham crackers in the crust with certified gluten-free graham crackers or gluten-free digestive biscuits. The filling itself contains only 1 tablespoon of flour — substitute a certified gluten-free all-purpose flour blend or cornstarch at the same quantity. The taste and texture remain close to the original. Check that all other packaged ingredients are certified gluten-free if you are baking for someone with celiac disease.

Christmas Cheesecake with Cranberry Topping
Ingredients
Equipment
Method
- Preheat your oven to 325°F (163°C). Mix graham cracker crumbs, sugar, cinnamon, and melted butter until evenly coated. Press firmly into the bottom and 1 inch up the sides of a 9-inch springform pan. Bake for 10 minutes until lightly golden. Set aside to cool.
- Beat the cream cheese on medium speed for 2 minutes until completely smooth. Scrape the bowl. Add sugar; beat 1 more minute. Switch to low speed and add eggs one at a time, mixing just until each disappears. Stop the moment the last egg is incorporated.
- Fold in the sour cream, vanilla, cinnamon, nutmeg, and flour with a rubber spatula — 8 to 10 gentle folds until just combined. Do not return to the mixer.
- Wrap the outside of the springform pan in two layers of heavy-duty foil. Pour the filling over the crust and smooth the top. Tap gently on the counter 3 to 4 times to release air bubbles.
- Set in a roasting pan. Pour boiling water around the springform pan to reach 1 inch up its sides. Bake 60 to 70 minutes — the edges should be set and the center should jiggle gently as one mass.
- Turn off the oven. Crack the door 1 inch and leave the cheesecake inside for 1 hour. Then cool to room temperature on a wire rack. Cover loosely and refrigerate overnight (minimum 6 hours).
- Make the cranberry topping: Combine cranberries, sugar, water, orange zest, and cinnamon in a saucepan over medium heat. Cook 8 to 10 minutes, stirring occasionally, until cranberries burst and the mixture thickens to a glossy consistency. Cool completely.
- Assemble: Run a knife around the inside edge of the springform pan and release the clasp. Spoon the cooled topping over the chilled cheesecake. Refrigerate 30 minutes before slicing. Slice with a warm, dry knife.
Notes
- Cream cheese must be room temperature — cold cream cheese will not beat smooth. Allow 2 hours on the counter before starting.
- Do not skip the water bath — it is the single biggest factor in preventing surface cracks.
- The cranberry topping can be made 3 days ahead and stored in a covered container in the refrigerator.
- The jiggle test is your doneness signal — the center should wobble as one solid mass, not ripple like liquid. Do not use the toothpick test.
- For individual slices of frozen cheesecake, freeze slices on a parchment-lined tray for 1 hour before wrapping individually.
Nutrition Per Serving (approximate)
More Dessert Recipes You Will Love
- No-Bake Peppermint Oreo Pie — a crowd-pleasing no-oven dessert with a crisp chocolate crust and cool peppermint filling — a natural next step if you want a Christmas dessert that requires zero baking.
- Spiced Cranberry Cake — uses the same cranberry-spice flavor profile as the topping in this recipe, in a moist, single-layer cake that works well as an alternative holiday dessert when a cheesecake feels too rich.
- Gingerbread Trifle — layers of spiced gingerbread, cream cheese filling, and cranberry compote in a glass bowl — if you liked the flavors here, this trifle uses almost the same pantry ingredients in a completely different format.
- Classic Baked New York Cheesecake — the unflavored, untopped version of this recipe — plain, dense, and tangy. Worth knowing if you want to understand the base recipe before adding holiday flavors.
- White Chocolate Raspberry Cheesecake Bars — all the richness of a baked cheesecake in a pan that cuts into neat squares — an easier option for a large crowd or for holiday gifting.
Did you make this Christmas cheesecake? Leave a ⭐⭐⭐⭐⭐ rating below and let me know in the comments how it turned out. I read every comment and would love to know what worked for you — especially which topping variation you chose.