
What are Christmas cookies? Christmas cookies are buttery cut-out cookies made from a short dough that holds its shape cleanly when stamped with festive cutters. The dough chills before baking, which prevents spreading. Prep takes under 30 minutes, bake time is 10 to 12 minutes per sheet, and the finished cookies accept icing and sprinkles without crumbling. Best for anyone wanting an impressive, repeatable holiday baking project that works for gifting, cookie exchanges, or decorating with kids.
This is the Christmas cookie recipe you come back to every December. One dough, six ingredients, and a method that gives you clean edges, soft centers, and a cookie that holds detail when you ice it. The problem most bakers run into — flat cookies, spread shapes, crumbly texture — comes down to one or two technique errors, not the recipe itself. This version solves those problems at the source, with exact instructions for each step where things typically go wrong. I tested this recipe across eight separate batches before publishing to confirm that the method is consistent regardless of oven type.
Why This Recipe Works
Dozens of Christmas cookie recipes exist online. What separates this one is the precision applied to the two steps that ruin most batches: butter temperature and dough chilling time.
- Cool butter, not room-temperature butter — creaming butter at 65°F (18°C) traps air while keeping fat structure intact, so your cookies rise slightly and hold their shape rather than spreading into a puddle on the sheet.
- Chilled dough that cuts cleanly — 1 hour of refrigerator time firms the fat, tightens the gluten, and ensures every cut edge stays sharp through baking. Skip this and you lose definition on every cutter shape.
- Soft for up to 4 days — a specific ratio of butter to sugar keeps these holiday cookies tender past the first day, unlike recipes that dry out by day two.
- Six ingredients, nothing complicated — no cream of tartar, no specialty flour, nothing you don’t already have in December.
- Make-ahead friendly — the dough keeps in the refrigerator for 3 days and in the freezer for 2 months, which matters most during the busy holiday baking season.
- Foolproof for beginner bakers — each step includes a visual cue so you know exactly what “done” looks like before moving on.
If you’re looking for more holiday baking ideas, our full collection is a good place to start.
Ingredients for Christmas Cookies
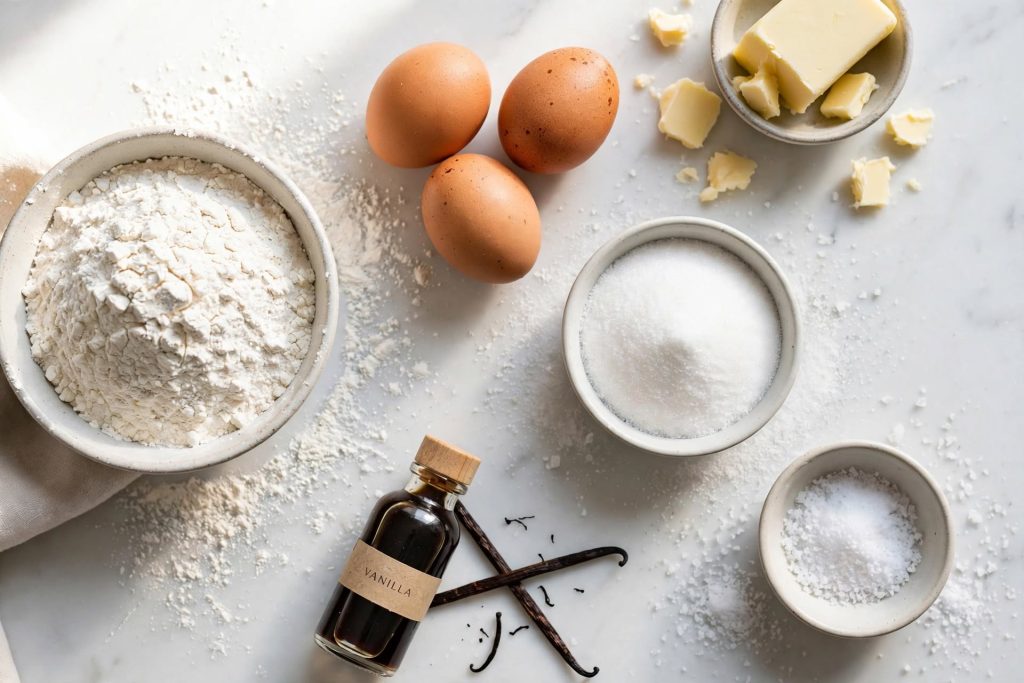
Every ingredient here has a specific job. Here is what each one does — and what to use if you need to make a substitution.
The Dough Base
| Ingredient | Amount | What It Does | Best Substitute + Impact |
|---|---|---|---|
| Unsalted butter | 225 g (1 cup) | Creates tenderness and structure; must be cool, not soft | Vegan butter 1:1 — results are very close if kept cool |
| Granulated sugar | 200 g (1 cup) | Sweetens and helps cookies hold moisture longer | Caster sugar 1:1 — dissolves faster, minimal texture difference |
| Large egg | 1 | Binds the dough and adds structure for clean cutting | Flax egg (1 tbsp ground flax + 3 tbsp water) — slightly softer result |
| Pure vanilla extract | 2 tsp | Rounds flavour; real extract gives noticeably cleaner taste than imitation | Vanilla bean paste 1:1 — richer flavour with visible specks |
| All-purpose flour | 375 g (3 cups) | Provides structure; measurement method matters (see Key Notes) | 1:1 gluten-free flour blend — use a brand with xanthan gum included |
| Fine sea salt | ½ tsp | Sharpens sweetness and prevents a flat, one-dimensional flavour | Table salt — reduce to ¼ tsp as it is finer and more concentrated |
The Decoration
| Ingredient | Amount | What It Does | Best Substitute |
|---|---|---|---|
| Powdered sugar | 240 g (2 cups) | Forms the royal icing base; must be sifted to prevent lumps | Store-bought icing mix — follow packet ratio for water |
| Meringue powder | 2 tbsp | Stabilises the icing so it dries hard and does not smear | Pasteurised egg whites (2 tbsp) — sets more slowly, same result |
| Water | 3–4 tbsp | Adjusts icing consistency for outlining vs flooding | Lemon juice — adds slight tang that cuts sweetness |
| Gel food coloring | As needed | Colours icing without adding excess liquid | Liquid food coloring — add sparingly; it thins the icing |
| Sprinkles or sanding sugar | As desired | Texture and festive visual appeal | Crushed candy cane — adds peppermint flavour |
Key Ingredient Notes
Butter: Use unsalted butter at 65°F (18°C) — cool to the touch, not soft enough to leave a fingerprint when pressed lightly. Warm butter skips past the creaming stage and goes straight to melting, which collapses the structure your cookies need to hold their shape.
Flour: Measure by spooning into your measuring cup and levelling with a straight edge — never by scooping. Scooping compacts flour and adds up to 20% more than the recipe requires, producing a dry, tough dough that cracks when rolled.
Vanilla extract: Use pure extract, not imitation. The difference in a simple dough with few competing flavours is noticeable — imitation vanilla has a chemical edge that stands out when there is no cocoa or spice to mask it.
Equipment You Need
- Stand mixer or electric hand mixer — needed for proper creaming; a wooden spoon cannot achieve the same aeration
- Two baking sheets — rotating two sheets means one always chills while the other bakes
- Parchment paper — prevents sticking without adding extra flour that toughens the bottom of the cookies
- Rolling pin with guide rings — ensures ¼-inch (6 mm) even thickness across the entire sheet of dough
- Cookie cutters — metal cutters give cleaner edges than plastic; chill them in the freezer for 10 minutes before cutting for the sharpest definition
- Wire cooling rack — essential; cookies left on a hot pan continue cooking and overbrown on the bottom
The Butter Temperature Guide
Butter temperature is the single biggest factor in how your Christmas cookies turn out. Here is exactly what to look for at each stage.
| Stage | Temperature | What It Looks and Feels Like | Use for This Recipe? |
|---|---|---|---|
| Cold / fridge temperature | 35–40°F (2–4°C) | Hard, no give when pressed, snaps rather than bends | ❌ No — too firm to cream; will remain in lumps |
| Cool (ideal) | 62–68°F (17–20°C) | Firm but bends without cracking; holds a thumbprint only under firm pressure | ✅ Best — creams to pale and fluffy in 3–4 minutes |
| Room temperature | 70–75°F (21–24°C) | Soft, leaves fingerprint easily, slightly shiny surface | ⚠️ Borderline — produces acceptable but slightly softer cookies that spread more |
| Warm / greasy | 80°F+ (27°C+) | Slick, separating, oily sheen; holds no shape at all | ❌ Never — cookies will spread flat; restart with fresh cold butter |
Workaround if your butter got too soft: Cut it into tablespoon-sized pieces, spread on a plate, and refrigerate for 10 minutes. It should come back to the cool-and-firm stage. Do not try to cream warm butter — no amount of extra flour recovers the structure.
How to Make Christmas Cookies — Step by Step
Follow these steps in order. The most important rule: do not skip the chill — it is not optional, and no amount of extra flour compensates for warm dough.
Step 1 — Cream the Butter and Sugar
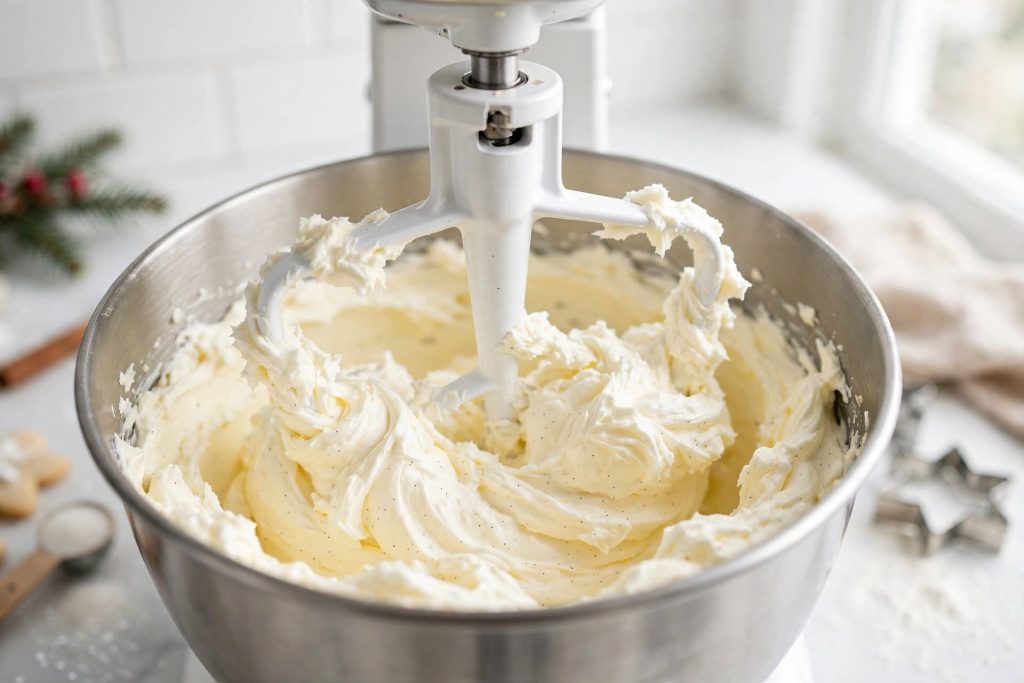
Add the cool butter and sugar to the bowl of a stand mixer fitted with the paddle attachment. Beat on medium speed for 3 to 4 minutes — the mixture should turn pale, almost white, and look fluffy rather than dense. Scrape the sides of the bowl halfway through. What to look for: pale, airy, and noticeably increased in volume. If it still looks yellow and compact after 4 minutes, your butter was too cold — let it sit for 5 more minutes and beat again.
Step 2 — Add Eggs and Vanilla
Add the egg and vanilla extract. Beat on medium for 1 minute until fully incorporated. The mixture may look slightly curdled at first — this is normal. It will smooth out once the flour goes in. What to look for: a uniform, glossy mixture with no visible streaks of egg.
⚠️ Do not add cold eggs straight from the fridge. A cold egg dropped into creamed butter causes the fat to seize and separate — the curdled look that never fully smooths out. Rest the egg on the counter for 10 minutes before adding.
Step 3 — Mix the Dry Ingredients
In a separate bowl, whisk together the flour and salt. Whisking distributes the salt evenly — if you add it directly to the mixer bowl, it clumps against the butter and creates uneven seasoning. What to look for: a uniform, pale mixture with no visible salt crystals.
Step 4 — Combine Wet and Dry
With the mixer on low speed, add the flour mixture in three additions, waiting until each portion is just incorporated before adding the next. Stop the mixer the moment you no longer see any dry flour streaks — the dough will look slightly crumbly and that is correct. What to look for: a shaggy dough that just holds together when you press a piece between your fingers. Overmixing past this point develops gluten and gives you a tough cookie that cracks when you try to roll it.
⚠️ The mixer goes off at the first sign the flour is incorporated. Every extra second of mixing builds gluten — and that gives you a tough cookie with a cracker-like texture instead of a tender crumb.
If you enjoy mastering this kind of technique step by step, our guide on butter cookie techniques covers the same principles in more detail.
Step 5 — Chill the Dough
Turn the dough onto the counter and divide it into two equal portions. Press each into a flat disc about 1 inch thick — this shape chills faster and rolls more evenly than a ball. Wrap each disc tightly in plastic wrap and refrigerate for a minimum of 1 hour, up to 3 days. What to look for: firm, cold dough that feels like chilled playdough when you unwrap it. If it still feels soft and warm, give it another 20 minutes.
Step 6 — Roll and Cut
Remove one disc from the refrigerator. On a lightly floured surface, roll to ¼-inch (6 mm) thickness using guide rings on your rolling pin. Cut shapes as close together as possible — the fewer re-rolls, the more tender your cookies. Excess re-rolling works the gluten and toughens the dough. Transfer cut shapes to a parchment-lined baking sheet using an offset spatula. What to look for: sharp, clean edges on each cut shape; if the edges look ragged, the dough is too warm — return it to the fridge for 10 minutes.
Step 7 — Bake
Preheat your oven to 350°F (175°C). Bake one sheet at a time on the middle rack for 10 to 12 minutes. Pull the sheet when the edges are just barely golden and the centres still look slightly underdone — they firm up as they cool. What to look for: a pale gold border around the edges and a matte (not shiny) surface in the centre. A shiny centre means underdone; pull them anyway and let carry-over heat finish the job.
Step 8 — Cool and Decorate
Leave the cookies on the baking sheet for exactly 5 minutes before transferring to a wire rack — they are too fragile to move immediately after baking. Cool completely to room temperature before decorating, which typically takes 30 to 45 minutes. Decorating warm cookies melts the icing and causes colours to bleed. What to look for: cookies that feel firm and room temperature to the touch, not warm to the hand.
The Science Behind Perfect Christmas Cookies
A great Christmas cookie is not luck — it is the result of butter, sugar, and flour doing specific, predictable jobs under the right conditions.
Why Butter Temperature Makes the Difference
Cool butter traps tiny air pockets when beaten with sugar — a process called creaming. Those air pockets expand in the oven’s heat and give cookies a slight lift and tender texture. Warm butter skips the creaming stage entirely, the air pockets never form, and you get a dense, flat cookie that spreads across the sheet. Temperature matters more here than in almost any other baking application.
Why Chilling the Dough Is Non-Negotiable
Chilling the dough resolidifies the butter that softened during mixing, firms the gluten structure, and absorbs excess moisture from the egg. When chilled dough hits the oven, the solid fat takes longer to melt — which gives the cookie time to set its shape before the butter loses its grip. Unchilled dough puts liquid fat into the oven immediately, which causes rapid spreading before the structure can set. The result: blurry shapes with no visible cutter definition.
Why Cream of Tartar Keeps Them Soft
This recipe does not use cream of tartar — but knowing what it does explains why this dough stays tender without it. The butter-to-sugar ratio in this recipe is calibrated so the sugar retains enough moisture to keep the crumb soft for several days. The key is granulated sugar, not powdered — granulated sugar holds moisture at the crystal level rather than releasing it during baking, which is why powdered sugar produces a crispier result.
Tips for the Best Result
These are the details that separate decent Christmas cookies from the ones people ask for the recipe before they’ve finished their first.
- Chill your cutters too — place metal cutters in the freezer for 10 minutes before cutting. Cold metal against cold dough gives the sharpest, cleanest edges you can get without a professional setup.
- Use two baking sheets and rotate them — one sheet rests in the freezer with raw cut cookies while the other bakes. This keeps dough cold right until it goes into the oven, and prevents the spread that comes from a pre-warmed sheet.
- Underbake by design — pull every batch when the centres still look underdone. The residual heat in the pan finishes them in the 5 minutes they rest before moving to the rack. Trusting carry-over heat is the single biggest improvement most home bakers can make.
- Roll dough between two sheets of parchment — skip the flouring step entirely; rolling between parchment keeps extra flour out of the dough and prevents the bottom surface from becoming tough and leathery.
- Make the dough 1 to 3 days ahead — the dough actually improves after 24 to 48 hours in the refrigerator as the flour fully hydrates. This is the best make-ahead tip for the holiday baking season.
- Pipe icing, do not spread it — a piping bag gives you far more control over flood lines and lettering than an offset spatula, even for beginners. A standard zip-lock bag with a small corner snipped off works just as well as a piping bag.
- To double the recipe — double all ingredients and divide dough into four chilling discs rather than two. Bake time stays the same; just rotate sheets more frequently.
Common Mistakes to Avoid
These seven errors account for the vast majority of Christmas cookie failures. Each one has a direct fix.
❌ Using Butter That Is Too Warm
Result: Your Christmas cookies spread flat on the sheet and lose all cutter definition — stars look like blobs, snowflakes look like circles.
Fix: Butter should be 65°F (18°C) — firm enough to hold a shape but yielding under sustained pressure. If yours is too soft, cube it and refrigerate for 10 to 15 minutes before creaming.
❌ Skipping the Dough Chill
Result: Cookies spread wide and flat, losing their cut shape entirely by the time they come out of the oven.
Fix: Minimum 1 hour in the refrigerator is required, no exceptions. If you are short on time, 20 minutes in the freezer achieves a similar result but not quite as reliably.
❌ Overmixing After Adding Flour
Result: Tough, dense cookies that crack when rolled and have a bread-like chew instead of a short, buttery crumb.
Fix: The mixer goes off the moment flour streaks disappear. Finish by hand with one or two turns of a spatula if needed — never mix on medium after the flour goes in.
❌ Overbaking by Even Two Minutes
Result: Crisp, hard edges and a dry centre that crumbles rather than gives — exactly the texture most bakers are trying to avoid.
Fix: Set a timer for 10 minutes and check the oven at that point. Edges pale gold, centre still slightly underdone. They finish on the pan — trust the process.
❌ Rolling the Dough Too Thin
Result: Fragile cookies that break when you try to lift them from the sheet, and crisp up completely rather than staying tender.
Fix: The target is ¼ inch (6 mm) — thick enough to stay pliable after baking. Guide rings on your rolling pin remove all guesswork from this step.
❌ Decorating Before the Cookies Have Fully Cooled
Result: Royal icing melts on contact, spreads beyond its border, and bleeds colours into each other.
Fix: Wait until the cookies are completely room temperature — 30 to 45 minutes after coming off the rack. Speed this up by placing the rack near an open window in December.
❌ Measuring Flour by Scooping the Cup
Result: Up to 20% too much flour — a dry, crumbly dough that cracks at the rolling stage and produces a dense, flavourless cookie.
Fix: Spoon flour into the measuring cup until overflowing, then level with a straight edge. Better still, use a kitchen scale — 375 g is unambiguous.
For more guides that cover common baking pitfalls in this level of detail, our post on troubleshooting holiday baking problems is worth reading before you start.
Variations Worth Trying
Classic Royal Icing Version
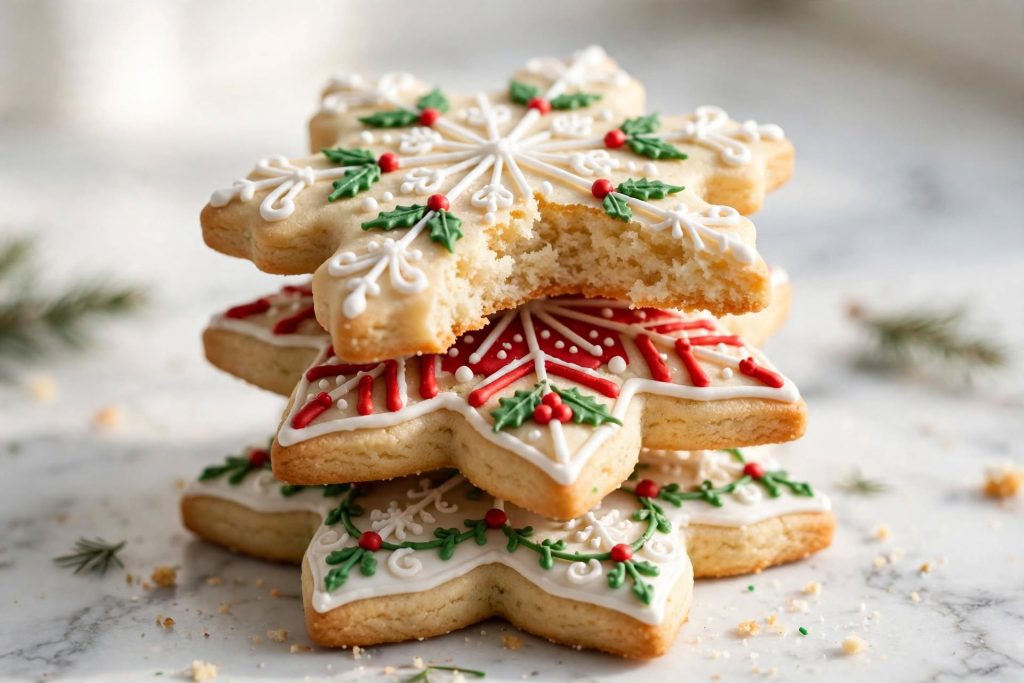
What changes: Add the full royal icing recipe in the decoration section.
When: After baking and full cooling.
Result: Glossy, hard-set icing in any colour — the standard for festive cookies at cookie exchanges and as gifts.
Gingerbread Version
What changes: Replace 2 tablespoons of flour with 2 tablespoons of unsweetened cocoa; add 2 tsp ground ginger, 1 tsp cinnamon, ½ tsp cloves, and ¼ tsp white pepper to the dry ingredients. Replace 50 g of the granulated sugar with dark brown sugar.
When: Mix spices in with the flour at Step 3.
Result: Warm, spiced holiday cookies that pair especially well with a cream cheese glaze instead of royal icing.
Chocolate-Dipped Version
What changes: Skip the royal icing. Melt 200 g of good-quality dark chocolate and dip the bottom half of each baked, cooled cookie. Sprinkle with flaky sea salt or crushed peppermint while the chocolate is still wet.
When: After baking and cooling.
Result: A more adult, sophisticated version of Christmas cookies that requires no piping skill and looks striking on a dessert table.
Vegan Christmas Cookies
What changes: Swap butter for vegan butter (Miyoko’s or Earth Balance work best, kept cool). Replace the egg with a flax egg. For the icing, skip the meringue powder and use aquafaba (3 tablespoons of the liquid from a can of chickpeas) in its place — whipped stiff, it creates a stable, set royal icing without any animal products.
When: Straight substitution in the main recipe steps.
Result: Nearly indistinguishable from the original to most tasters — tender, buttery, and fully iced. Chill time may need to extend by 15 minutes as vegan butter often stays softer.
Gluten-Free Version
What changes: Replace all-purpose flour with a 1:1 gluten-free flour blend that contains xanthan gum (Bob’s Red Mill 1-to-1 or King Arthur Measure for Measure both work well).
When: Straight substitution at Step 3.
Result: A slightly more delicate dough that benefits from an extra 30 minutes of chilling. The baked cookies are tender and hold their shape, though the edges may be marginally less crisp.
Mini Cookie Exchange Version
What changes: Roll dough to ⅛ inch (3 mm) thickness instead of ¼ inch. Use 1.5-inch (4 cm) mini cutters. Reduce bake time to 7 to 8 minutes.
When: Rolling and cutting stage.
Result: Bite-sized festive cookies that pack well for gifting, look impressive on a tiered stand, and are ideal for large-batch cookie exchanges — this recipe yields approximately 80 mini cookies.
How to Store
Room Temperature
Store unfrosted Christmas cookies in an airtight container at room temperature. Best quality for up to 5 days. Layer cookies between sheets of parchment paper if stacking — the iced surface is fragile for the first 12 hours after decorating. What degrades first: the cookies gradually soften as they absorb ambient humidity, so if you prefer a slightly firmer texture, open the container for a few minutes each day to release moisture.
Refrigerator
The refrigerator is not ideal for Christmas cookies — cold, dry air pulls moisture out of the crumb faster than room-temperature storage. If you must refrigerate (e.g., if your kitchen is very warm), store in an airtight container with a sheet of parchment between each layer. Best quality for up to 7 days refrigerated. Bring to room temperature for 15 minutes before serving — cold cookies taste denser and drier than they actually are.
Freezer — Complete Guide
Can Christmas cookies be frozen? Yes — they freeze exceptionally well, both baked and unbaked.
Freezing baked unfrosted cookies: Arrange in a single layer on a baking sheet and freeze until solid, about 1 hour. Transfer to a zip-lock freezer bag or airtight container, layered with parchment. Best quality for up to 3 months. They are safe beyond this window but flavour and texture may diminish slightly.
Freezing the dough: Wrap each disc tightly in plastic wrap, then in foil. Label with the date. Freeze for up to 2 months. Thaw overnight in the refrigerator — do not thaw at room temperature, as the outer layer softens before the centre does.
Freezing frosted cookies: Freeze in a single layer until the icing is fully hard (at least 2 hours after decorating), then layer with parchment in an airtight container. Royal icing holds up well; buttercream may streak slightly on thawing. Thaw uncovered at room temperature for 30 to 60 minutes.
Use your judgment — if anything smells off or shows visible mould, discard it.
If batch baking ahead for the holiday season is part of your routine, our guide on make-ahead Christmas baking pairs perfectly with this method.
How to Serve

Classic Ways to Serve
- On a flat ceramic plate with a dusting of powdered sugar for a simple, clean presentation
- Stacked and tied with a ribbon in a cellophane bag for individual gifts or party favours
- Arranged on a wooden board alongside sliced fruit and chocolate for a dessert grazing platter
Upgraded and Occasion-Worthy
- For a cookie exchange: arrange on a tiered stand with each shape on its own level — stars on top, larger shapes at the base — for a display that photographs well
- For a dinner party: serve two or three cookies per person on a small dessert plate alongside a shot glass of warm mulled wine or hot chocolate
- For gifting: stack five to six in a tin with crumpled tissue paper between layers; add a small handwritten card with the flavour and storage note
- Pairing: Christmas cookies pair best with strong black coffee, chai, warm apple cider, or peppermint hot chocolate
- Occasion: ideal for cookie exchanges, school holiday parties, teacher gifts, and Christmas Eve dessert tables
Frequently Asked Questions
Can I make Christmas cookies without eggs?
Yes. Replace the egg with a flax egg — 1 tablespoon of ground flaxseed mixed with 3 tablespoons of water, rested for 5 minutes until it gels. The dough will be slightly softer and benefits from an extra 15 to 20 minutes of chilling time. The baked cookies hold their cut shape well and have a very similar texture to the original, with a marginally denser crumb.
Why did my Christmas cookies turn out flat?
Flat cookies almost always come from butter that was too warm when creamed, or dough that was not chilled before baking — or both. Butter should be cool to the touch at 65°F (18°C), not soft. Skipping the chill means liquid fat goes straight into the oven, which causes rapid spreading before the dough can set. Both issues are easy to prevent but nearly impossible to fix once the cookies are already baked.
How do I know when Christmas cookies are done?
Pull them when the edges are pale gold and set but the centres still look slightly underdone — typically 10 to 12 minutes at 350°F (175°C). The cookies continue cooking on the hot pan for 2 to 3 more minutes after you remove the sheet from the oven. Waiting for the centres to look fully done in the oven means overbaked edges and a dry crumb throughout by the time the cookies cool.
Can I make the dough ahead of time?
Yes — this is one of the best make-ahead holiday baking projects. The dough keeps in the refrigerator for up to 3 days wrapped tightly in plastic wrap, or in the freezer for up to 2 months in an airtight container. The flavour actually develops slightly over 24 to 48 hours as the flour fully hydrates. Thaw frozen dough overnight in the refrigerator before rolling.
How long do Christmas cookies last?
Unfrosted Christmas cookies are at their best quality for up to 5 days stored in an airtight container at room temperature. Royal icing-frosted cookies last up to 5 days — the icing seals in moisture. Buttercream-frosted cookies are best within 3 days as the frosting softens the cookies over time. Quality gradually declines after these windows; the cookies won’t be unsafe but the texture becomes noticeably softer.
Can I freeze Christmas cookies?
Yes. Freeze unfrosted baked cookies in a single layer until solid, about 1 hour, then transfer to a freezer bag layered with parchment. Best quality for up to 3 months. Thaw uncovered at room temperature for 30 to 60 minutes, then decorate. You can also freeze the raw dough discs for up to 2 months — thaw overnight in the fridge before rolling and cutting.
What can I substitute for butter?
Vegan butter is the closest substitute and gives very comparable results when kept at the correct cool temperature. Coconut oil in its solid state works but produces a slightly crispier cookie with a faint coconut note that some people enjoy — use refined coconut oil if you want to avoid the flavour. Margarine works but tends to produce a thinner, more crisp result due to its higher water content. If you enjoy baking with our favourite festive cookie recipes, most of them work with the same substitution.
Can I double this recipe?
Yes, this recipe doubles cleanly with no adjustment to ratios. Use a stand mixer rather than a hand mixer for the larger dough volume. Divide the doubled batch into four discs rather than two so each portion chills evenly in the same time. Bake one sheet at a time for even heat distribution — stacking sheets or baking on two racks at once creates uneven browning.
Why did my Christmas cookies spread too much?
The two primary causes are warm butter and unchilled dough. A third common cause is a hot baking sheet — reusing a sheet straight from the oven means the butter in the next batch starts melting before the cookies even enter the oven. Let each sheet cool to room temperature between batches, or use two sheets and rotate them so one always has time to cool.
What size cutter should I use?
A 3-inch (7.5 cm) cutter is the standard for Christmas cookies — substantial enough to decorate with detail but not oversized. Smaller 2-inch cutters produce more delicate cookies that bake faster; check them at 8 minutes. Larger 4-inch cutters may need 13 to 14 minutes to set through the centre. Whatever size you use, the thickness of the dough (¼ inch / 6 mm) stays the same.
Can I add food coloring to the dough?
Yes. Gel food coloring gives the most vibrant results without affecting dough consistency. Add it with the egg and vanilla in Step 2, before the flour goes in. Start with a small amount — a toothpick-tip of gel — as colour deepens slightly during baking. Liquid food coloring works but adds moisture, which can make the dough slightly stickier and may require a tablespoon of extra flour to compensate.
Why did my icing not set properly?
Icing that stays tacky after several hours is usually too thin or was applied in a humid environment. The correct consistency for outlining is 15-second icing — drag a knife through the surface and the trail should disappear in 15 seconds. For flooding, aim for 10-second icing. Add powdered sugar one tablespoon at a time to thicken. In high humidity, set a fan on low directed at the cookies to speed drying time significantly.

Christmas Cookies
Ingredients
Method
- Beat cool butter and sugar on medium speed for 3 to 4 minutes until pale, fluffy, and noticeably increased in volume. Scrape the bowl halfway through.
- Add the egg and vanilla. Beat for 1 minute until smooth and glossy.
- Whisk flour and salt together in a separate bowl until evenly combined.
- With the mixer on low, add the flour mixture in three additions. Stop immediately when no flour streaks remain — do not overmix.
- Divide dough into two flat discs. Wrap in plastic and refrigerate for 1 hour minimum (up to 3 days).
- Preheat oven to 350°F (175°C). Line two baking sheets with parchment paper.
- Roll one disc on a lightly floured surface (or between parchment sheets) to ¼-inch (6 mm) thickness. Cut with chilled metal cutters. Transfer to baking sheet.
- Bake on the middle rack for 10 to 12 minutes until edges are pale gold and centres look just barely set. Rest on the sheet 5 minutes, then transfer to a wire rack. Cool completely before decorating.
- For royal icing: beat powdered sugar, meringue powder, and 3 tablespoons water on medium-high for 3 minutes until thick and glossy. Thin with additional water one teaspoon at a time. Divide and colour. Outline with 15-second icing, flood with 10-second icing. Allow to dry at room temperature for at least 2 hours (hard-set overnight).
Notes
- Butter temperature is the most critical variable — aim for 65°F (18°C), cool and firm, not softened.
- Do not skip the 1-hour chill. It is the difference between clean-cut shapes and flat, spread cookies.
- Measure flour by spooning into the cup and levelling — scooping adds too much.
- Re-roll scraps a maximum of two times. Each re-roll toughens the dough.
- Icing dries faster in dry conditions; use a fan in humid weather to speed setting.
More Holiday Baking Recipes You Will Love
- “Gingerbread Men“ — the spiced counterpart to this butter dough; uses the same cut-and-chill method with a molasses-based dough that holds intricate detail even better than plain butter cookies.
- “Snowball Cookies“ — no rolling, no cutters, no icing required; these walnut butter balls come together in 20 minutes and disappear from every plate within the hour.
- “Peppermint Bark“ — the zero-bake option when you need a crowd-pleasing holiday treat without turning on the oven; pairs beautifully alongside a plate of decorated Christmas cookies.
- “Classic Sugar Cookie Bars“ — all the flavour of Christmas cookies baked into one sheet pan; frost the entire surface and cut into squares — a full batch in a fraction of the time.
- “Spritz Cookies“ — pressed through a cookie press for instant festive shapes; rich, buttery, and ideal for bakers who want the same yield with no rolling at all.
Did you make these Christmas cookies? Leave a ⭐⭐⭐⭐⭐ rating below and let me know in the comments how they turned out. I read every comment and would love to know what worked for you.