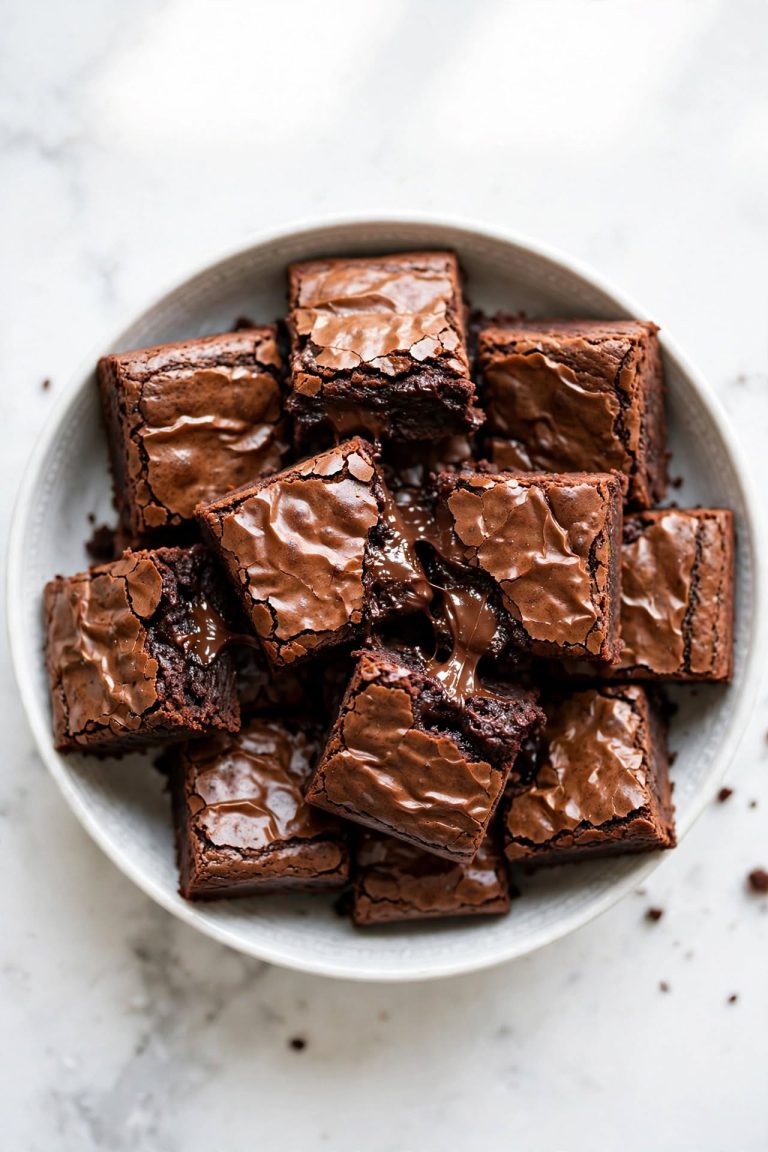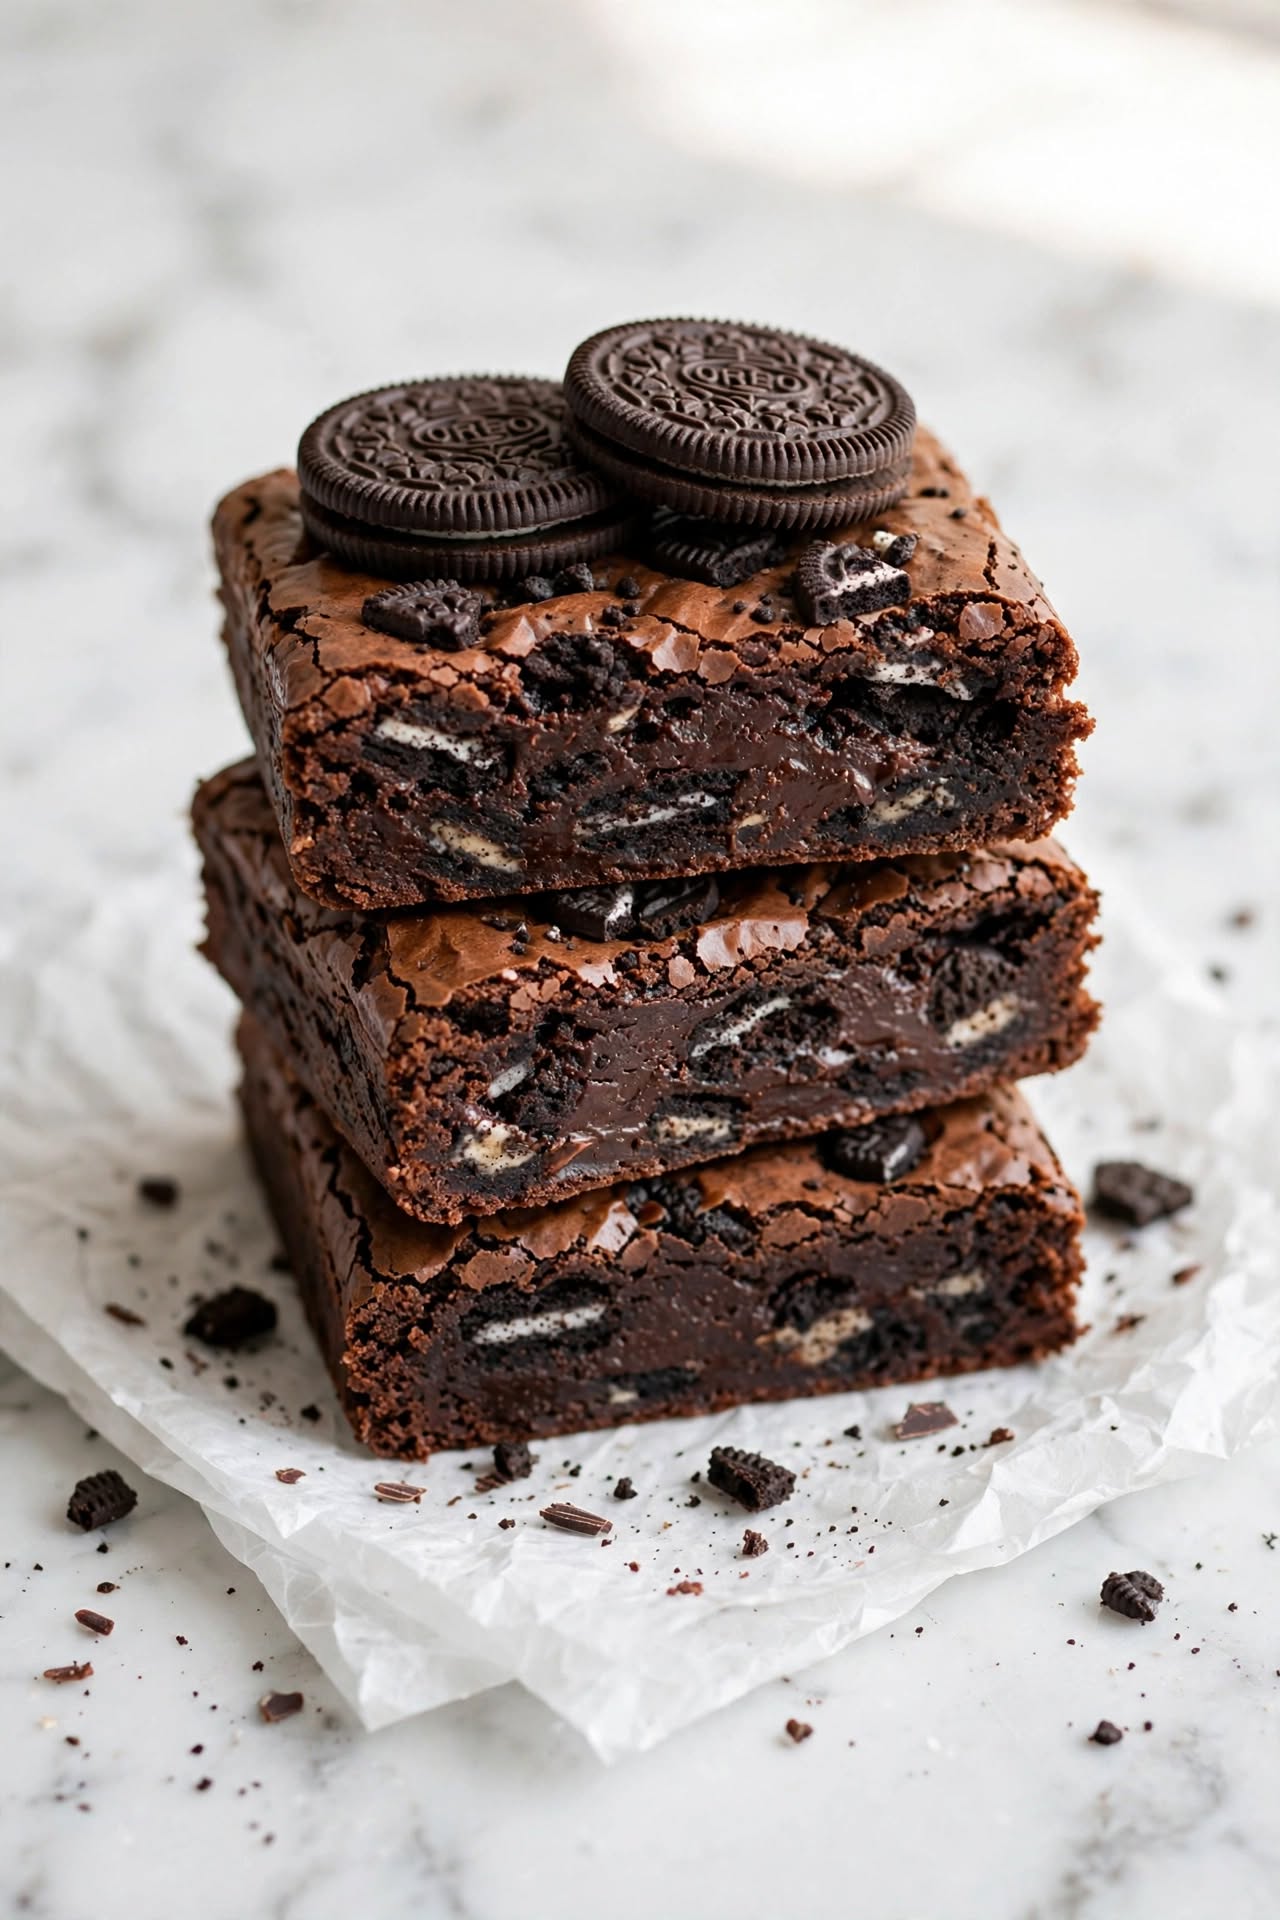
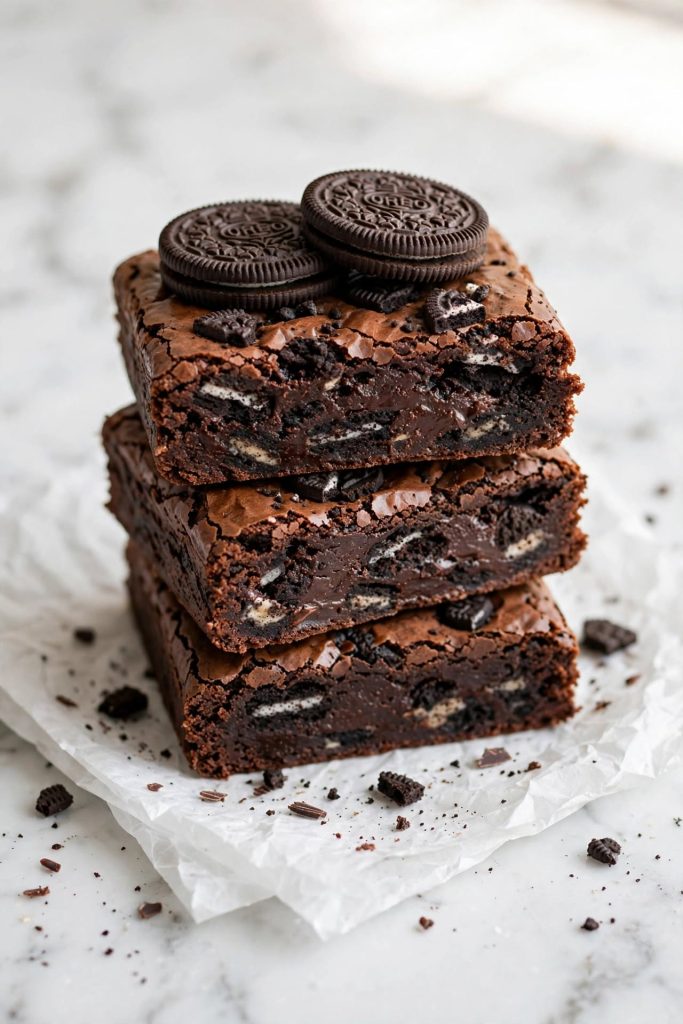
What are Oreo brownies? Oreo brownies are fudgy, dense chocolate brownies made with melted butter and cocoa powder, with Oreo cookies folded into the batter and pressed onto the top before baking. They bake in 25 to 28 minutes in an 8×8 inch pan and yield 16 squares. The cookies-and-cream combination produces a chocolate brownie with pockets of Oreo flavour throughout the crumb and a visually striking top with whole Oreo cookies embedded in the surface.
These Oreo brownies are exactly what the name promises: an intensely chocolatey, fudgy brownie base packed with Oreo cookies — half chopped and folded into the batter for cookies-and-cream flavour throughout, half pressed on top before baking for a bold visual and extra texture. The recipe uses one bowl, melted butter instead of creamed, and Dutch-processed cocoa for the deepest possible chocolate flavour. If your concern is brownies that come out cakey or dry, or Oreos that go completely soggy inside, the method here addresses both directly. I tested this recipe multiple times to confirm the batter ratio, Oreo placement, and bake time produce the same result across different ovens.
Why These Oreo Brownies Work
Brownie recipes are everywhere — Oreo brownie recipes even more so. Most of them produce the same average result: a slightly cakey brownie with Oreos that either disappear into the batter or sit awkwardly on top. The six decisions below produce a different outcome.
- Melted butter, not creamed — creamed butter traps air, which creates a cakier crumb. Melted butter produces a denser, fudgier crumb with that characteristic shiny, crinkled top.
- Dutch-processed cocoa, not natural — Dutch-processed cocoa has been alkalized to neutralise its natural acidity. The result is a smoother, deeper, less harsh chocolate flavour that makes the brownie taste like a quality chocolate bar, not a dry chocolate cake.
- Two-stage Oreo placement — half the Oreos are chopped and folded into the batter so the cookies-and-cream flavour is distributed throughout every bite. The other half are pressed whole or halved onto the top just before baking for a visual that makes the brownies instantly recognisable.
- No mixer required — a spatula and a bowl is all you need. Using an electric mixer at the egg stage overbeats the batter, incorporates too much air, and produces a cakey rather than fudgy result.
- Pulled before the toothpick is clean — the toothpick test for brownies is the opposite of the rule for cakes. Moist crumbs on the toothpick = correct. Clean toothpick = overbaked.
- Cooled completely before cutting — fudgy brownies set as they cool. Cutting warm brownies produces crumbly, misshapen squares. Refrigerating for 30 minutes after cooling at room temperature gives the cleanest possible slices.
🔗 IL-1: “For more [chocolate dessert recipes] that use the same one-bowl technique, our chocolate baking guide is a good place to start.” — Replace anchor text and URL before publishing.
Ingredients for Oreo Brownies
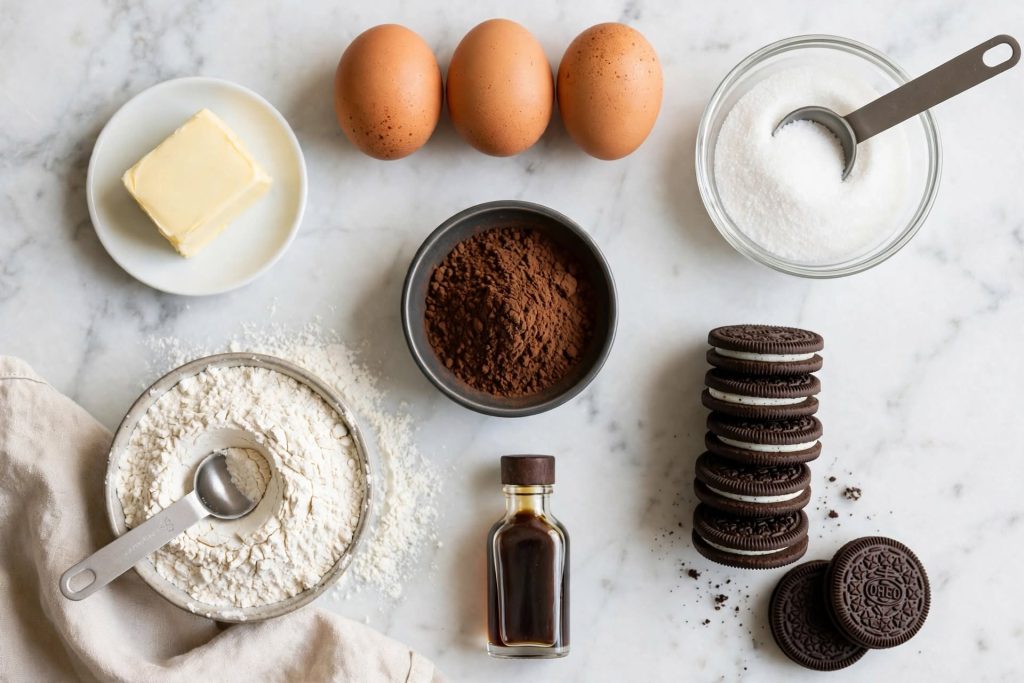
Every ingredient here has a specific job. Here is what each one does — and what to use if you need to make a substitution.
The Brownie Batter
| Ingredient | Amount | What It Does | Best Substitute + Impact |
|---|---|---|---|
| Unsalted butter | 115g / ½ cup | Fat base — melted for fudgy texture; provides richness and moisture | Salted butter — omit added salt; coconut oil — produces a slightly denser result |
| Granulated white sugar | 200g / 1 cup | Sweetness and the shiny, crinkled top — sugar dissolves in the hot butter and helps form the classic brownie crust | Do not reduce — sugar controls moisture and the characteristic top |
| Eggs, room temperature | 2 large | Binds the batter and adds structure; beaten by hand for a fudgy, not cakey, result | Flax eggs — possible but texture becomes slightly gummy; reduce bake time by 2 min |
| Vanilla extract | 1 tsp | Rounds out and deepens the chocolate flavour | Vanilla bean paste — same quantity; espresso powder (½ tsp) — intensifies chocolate flavour |
| Dutch-processed cocoa powder, sifted | 75g / ¾ cup | Primary chocolate flavour — alkalized for a smooth, deep, non-bitter taste | Natural cocoa — works but is sharper and more acidic; adds ¼ tsp baking soda to the recipe |
| All-purpose flour | 90g / ¾ cup | Structure — less than most brownie recipes for a fudgier, denser crumb | Measure by weight — extra flour is the most common cause of cakey brownies |
| Salt | ¼ tsp | Balances sweetness and amplifies chocolate depth | N/A — do not skip |
| Baking powder | ¼ tsp | Minimal lift — just enough to prevent a completely dense, gummy result | No substitute |
The Oreo Layer
| Component | Amount | How Used | What It Produces |
|---|---|---|---|
| Oreo cookies, roughly chopped | 10 cookies | Folded into the batter before baking | Cookies-and-cream flavour throughout every bite; pieces soften into the crumb |
| Oreo cookies, whole or halved | 6 cookies | Pressed onto the surface of the batter just before baking | Bold visual; slightly more textured than interior pieces; recognisable as Oreo brownies at a glance |
Key Ingredient Notes
Dutch-processed cocoa: Look for brands labelled “Dutch-process”, “alkalized”, or “European-style”. Droste, Valrhona, and Cacao Barry are premium options; most supermarket own-brand “dark” cocoa powders are also Dutch-processed. Hershey’s standard cocoa is natural — their Special Dark is Dutch-processed and works well in this recipe.
Oreos: Standard size Oreos are used in this recipe. Do not use Mini Oreos in the batter — they are too small to contribute texture. Double Stuf Oreos work well on top as the extra filling creates a more visible cream layer in the finished brownie.
Butter: The butter is melted, not softened. Melt it gently — either in a small saucepan over low heat or in a microwave in 30-second bursts. Let it cool for 5 minutes before adding the sugar so the heat does not scramble the eggs when they are added.
Flour: Measure by weight (90g) or by the spoon-and-level method. The brownie batter uses less flour than most recipes — a small amount of extra flour tips the result from fudgy to cakey.
Equipment You Need
- 8×8 inch square baking pan (metal preferred over glass — more even heat distribution)
- Parchment paper or foil with overhang for easy lifting
- Medium saucepan or microwave-safe bowl for melting butter
- Large mixing bowl and a sturdy spatula
- Wire cooling rack
- Sharp knife for cutting — a warm knife wiped clean between cuts gives the cleanest slices
- Kitchen scales for accurate flour and cocoa measurement
The Oreo Placement Guide
Where and how you place the Oreos changes the visual, the texture, and the flavour distribution of the finished brownie. Here are the five main methods and what each produces.
🍪 Five Ways to Place Oreos in Brownies — and What Each Produces
| Method | How | Visual Result | Texture & Flavour | Best For |
|---|---|---|---|---|
| Stirred in (chopped) | Roughly chop and fold into batter before pouring into pan | Oreo pieces visible in the cut face of the brownie | Cookies-and-cream flavour throughout; pieces soften fully during baking | Maximising flavour distribution |
| Top press (whole) | Press whole Oreos onto the surface of the batter before baking | Full Oreo cookies visible on top — bold and immediately recognisable | Slightly firmer than interior pieces; cream filling stays visible | Maximum visual impact and photography |
| Bottom layer | Line whole Oreos across the base of the lined pan, then pour batter over them | Oreos hidden inside — a surprise layer revealed when cut | Oreo base creates a distinct layer; filling softens but cookie stays slightly firmer than stirred-in pieces | Oreo stuffed brownies and gifting |
| Middle layer | Pour half the batter, press Oreos flat on top, pour remaining batter over | Oreo layer visible as a horizontal stripe in each cut brownie | Clean flavour separation — distinct brownie / Oreo / brownie layers | Dramatic cross-section and plating |
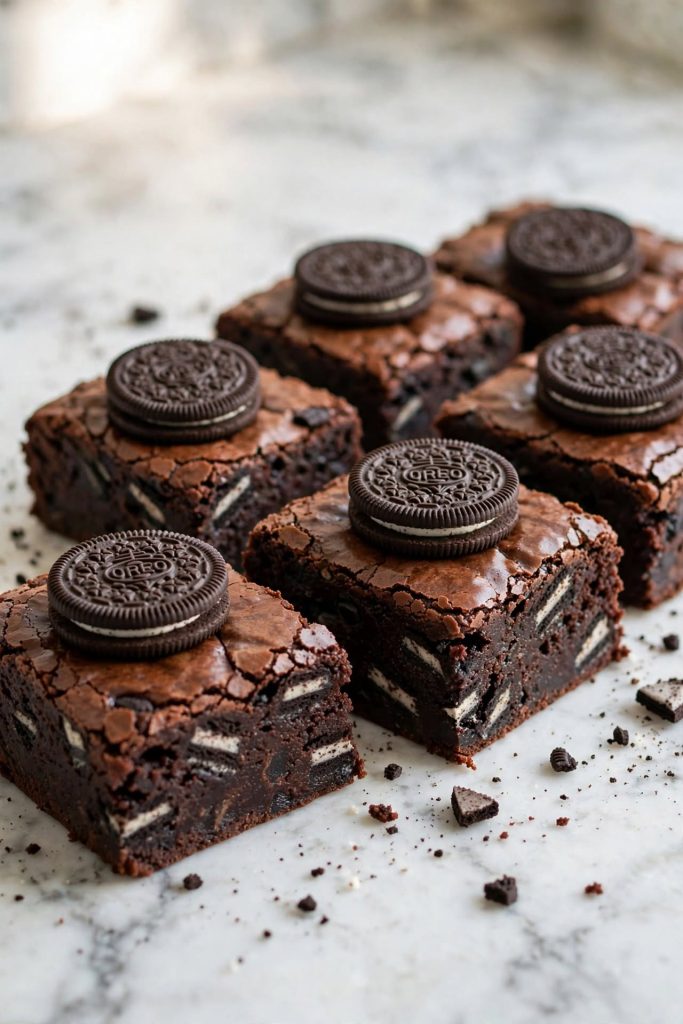
| Combination (this recipe) | Chop half into batter + press whole Oreos on top | Oreos visible throughout the crumb AND on the surface | Best of both — flavour throughout the brownie and visual impact on top | All-round best result for everyday baking and photography |
How to Make Oreo Brownies — Step by Step
These Oreo brownies come together in one bowl with no mixer. The most important rule applies at the end: pull them from the oven before they look done.
Step 1: Prepare Your Pan and Preheat the Oven
Preheat your oven to 175°C / 350°F (160°C fan). Line an 8×8 inch baking pan with parchment paper or foil, pressing it into the corners and leaving at least 5cm / 2 inches of overhang on two opposite sides. The overhang acts as handles for lifting the entire slab out of the pan after baking — this is the cleanest way to cut a full batch of brownies.
What to look for: the lining should sit flat against the base and sides with no air gaps — air gaps cause the brownie edges to bake unevenly.
Step 2: Melt the Butter and Mix the Sugar
Melt the butter in a medium saucepan over low heat, or in a large microwave-safe bowl in 30-second bursts. Remove from heat and whisk in the granulated sugar until fully combined. The mixture will look grainy at first and will smooth out as you whisk. Allow to cool for 5 minutes before the next step — the mixture should feel warm but not hot to the touch.
What to look for: the sugar-butter mixture should look glossy and slightly grainy — not completely smooth. That is correct at this stage.
Step 3: Add Eggs and Vanilla
⚠️ Critical step: Add the eggs one at a time and whisk vigorously by hand for a full 30 seconds after each one — this is the only stage where you want to work the mixture. Beating the eggs in by hand (not with an electric mixer) incorporates just enough air for a shiny top without making the crumb cakey. Add the vanilla extract with the second egg. The mixture should look glossy and slightly thickened after this step.
What to look for: after both eggs and vanilla are whisked in, the batter should look visibly thicker and more uniform than it did at the butter-sugar stage — glossy and ribbon-like when you lift the whisk.
Step 4: Fold in the Dry Ingredients
⚠️ Critical step: Sift the cocoa powder directly into the bowl, then add the flour, salt, and baking powder. Switch to a spatula and fold until just combined — stop the moment you no longer see dry streaks. Every additional fold develops gluten and drives the result toward cakey. The batter will look very thick and dark — that is correct. Once you have this method down, [our fudgy brownie base guide] covers how to adapt it for different mix-ins. [IL-2 — replace before publishing]
What to look for: a thick, dark, glossy batter with no dry patches of flour or cocoa. It should fall slowly from the spatula in thick ribbons.
Step 5: Add the Oreos to the Batter
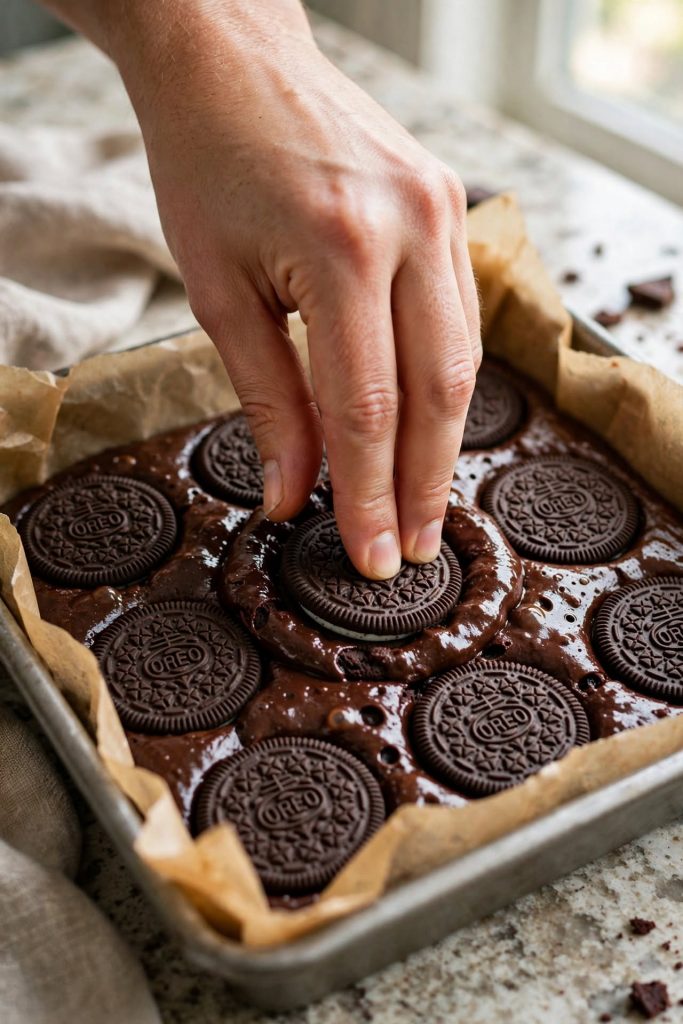
Roughly chop 10 Oreo cookies into quarters or halves — you want visible pieces, not fine crumbs. Fold the chopped pieces into the batter with 3 to 4 gentle strokes of the spatula. Pour the batter into the prepared pan and spread level with the spatula. Press the remaining 6 whole or halved Oreos onto the surface of the batter, pushing gently so they are partially embedded but the top of each cookie remains visible above the batter line.
What to look for: the surface Oreos should be sitting visibly proud of the batter, not sinking below the surface. They will settle slightly during baking — if they sink too deep, they will be covered by the batter and lose their visual impact.
Step 6: Bake
Bake on the centre rack for 25 to 28 minutes. Do not open the oven door in the first 20 minutes — the batter is still setting and temperature fluctuation causes sinking in the centre. Start checking at 23 minutes by inserting a toothpick into the centre of the pan between two Oreo cookies (not through an Oreo, which will give a false wet reading). The toothpick should come out with a few moist, fudgy crumbs — not wet batter, and absolutely not clean.
What to look for: the edges should look set and slightly pulled away from the sides of the pan. The centre should look very slightly underdone compared to the edges — a faint, barely perceptible wobble when you gently shake the pan confirms it is at the right point.
Step 7: Cool and Cut
Place the pan on a wire rack and allow to cool completely at room temperature — at least 1 hour. Do not cut warm. For the cleanest possible slices, once the brownies are at room temperature, transfer the whole pan to the refrigerator for 30 minutes. Lift the slab out using the parchment overhang, place on a cutting board, and cut into 16 squares using a sharp knife. Wipe the knife clean between each cut for edges that show the fudgy interior and Oreo pieces cleanly.
What to look for: a fully cooled, slightly firm slab that holds its shape when lifted. The top Oreos should be firmly embedded — if they lift when you pull the parchment, press them back gently before refrigerating.
The Science Behind Fudgy Brownies
The difference between a fudgy brownie and a cakey brownie is almost entirely determined by the fat type, mixing method, and bake time. Here is what drives each of those results.
Why Melted Butter Makes Fudgier Brownies Than Creamed Butter
When butter is creamed with sugar, the paddle aerates the fat and traps tiny air bubbles — those bubbles expand in the oven and create a lighter, more cake-like crumb. Melted butter contains no trapped air. When you mix it with sugar, the mixture is dense and slightly grainy — that density carries through into the finished brownie as a heavier, tighter, fudgier crumb. Melted butter also allows the gluten in the flour to hydrate more fully before mixing, which contributes to the characteristic chewy edges that are part of what makes a brownie a brownie rather than a chocolate cake square.
Why Dutch-Processed Cocoa Beats Natural Cocoa
Natural cocoa powder is acidic — the same acidity that makes a natural-cocoa chocolate cake rise when paired with baking soda. In a brownie, that acidity produces a slightly sharp, astringent chocolate flavour, a lighter colour, and a drier crumb. Dutch-processed cocoa has been treated with an alkalising agent (potassium carbonate) that neutralises the acidity. The resulting flavour is smoother, darker, and noticeably deeper — similar to the flavour you get from eating a good-quality dark chocolate bar rather than drinking hot cocoa. For a recipe where chocolate is the primary flavour, that difference is significant.
Why the Toothpick Should Not Come Out Clean
The toothpick test for cakes says: clean toothpick = done. For fudgy brownies, that rule is inverted. A clean toothpick means the starch has fully gelatinised and all the moisture has been driven out of the centre — you have overbaked it and the crumb will be dry and tight by the time it cools. Moist crumbs on the toothpick mean there is still enough residual moisture to produce the fudgy, slightly underdone texture that defines a great brownie. The carry-over heat in the pan continues to cook the centre for 10 to 15 minutes after the pan comes out of the oven.
Tips for the Best Results
Use Room-Temperature Eggs
Cold eggs added to warm melted butter cause the butter to resolidify in small clumps around the cold egg — the mixture looks broken and lumpy. Room-temperature eggs (pulled from the fridge 30 minutes before baking) incorporate smoothly into the warm butter-sugar mixture and produce a more uniform, glossy batter. If you forgot to take them out, place the eggs in a bowl of warm (not hot) water for 5 minutes.
Do Not Overmix After Adding the Flour
Flour in brownie batter needs only enough mixing to eliminate visible dry streaks. Every fold beyond that develops the gluten network — a stronger gluten network gives you a tougher, cakier crumb. Use a spatula (not a whisk) after the flour goes in and count your folds: 10 to 15 is usually enough. If you can still see a faint streak of flour, fold two more times. If not, stop.
Line Your Pan Correctly
Press the parchment or foil lining firmly into the corners of the pan and ensure the overhang is long enough on both sides to serve as a handle. A lining that lifts away from the corners creates an air gap where the brownie batter will flow and bake thinner than the centre. Grease the pan lightly before pressing in the lining — the grease holds the lining in place so it does not shift when you pour in the batter.
Press Oreos Into the Top Just Before Baking
Do not add the top Oreos before the batter goes into the pan — they will sink. Pour and spread the batter first, then press the Oreos on. Press each cookie firmly enough that it is embedded about halfway into the batter — if it just rests on the surface, it will lift away from the brownie as the batter rises around it and you will lose the visual impact.
Underbake by One to Two Minutes
The single most reliable way to improve any brownie recipe is to pull the pan from the oven one to two minutes before you think it is ready. The centre will still look slightly underdone, the toothpick will come out with moist crumbs, and you will feel the urge to put it back in. Resist that urge. The carry-over heat in the pan will cook the centre to exactly the right point as it cools, and the result will be a fudgier, more satisfying brownie than if you had left it in.
Refrigerate Before Cutting for Clean Slices
Warm brownies are soft and the crumb tears when you try to cut through it — the slices come out ragged, the Oreo pieces fall out of the sides, and the squares look messy. Once the brownies are fully cooled at room temperature, place the whole pan in the refrigerator for 30 minutes. The cold firms the crumb enough that a sharp knife cuts through cleanly. Wipe the blade clean between each cut — cocoa batter on the knife transfers to the next cut edge and makes it look muddy.
Common Mistakes to Avoid
These are the six errors that consistently produce brownies that are dry, crumbly, or visually disappointing despite following the rest of the recipe correctly.
❌ Overbaking
Overbaked brownies are the most common brownie problem, and also the most fixable — the solution is simply to pull the pan earlier. A brownie that looks done in the oven is already overdone. Watch for set edges and a very slightly underdone centre, check the toothpick for moist crumbs (not wetness, not cleanness), and pull the pan. You will have better brownies every single time.
❌ Cutting the Brownies While Warm
Fudgy brownies are only fully set once they are completely cool — the crumb is still soft and slightly molten while warm. Cutting into the pan before it has cooled fully produces rough, crumbling slices with torn edges. If you are in a hurry, place the pan in the refrigerator for 30 to 45 minutes after 15 minutes of room-temperature cooling — this accelerates the setting process significantly. For more techniques like this, [our brownie baking guide] covers every variable in detail. [IL-3 — replace before publishing]
❌ Using Natural Cocoa Instead of Dutch-Processed
Natural cocoa and Dutch-processed cocoa are not interchangeable in this recipe without adjustment. Natural cocoa is acidic and reacts with baking soda — this recipe uses baking powder (which has its own acid) and does not account for natural cocoa’s additional acidity. The result with natural cocoa is a lighter-coloured brownie with a slightly sharper chocolate flavour. If natural cocoa is all you have, add ¼ tsp of baking soda alongside the baking powder and expect a slightly different flavour profile.
❌ Stirring All the Oreos Into the Batter
If all the Oreos go into the batter, the top of the brownie looks plain — just a dark chocolate surface with no visual interest. The Oreos stirred into the batter soften completely during baking, so the top has nothing to indicate what is inside. Reserving half for the surface press is what makes Oreo brownies look like Oreo brownies rather than a standard chocolate brownie.
❌ Skipping the Pan Lining
An unlined brownie pan is almost impossible to cut cleanly — the first few squares come out easily and every one after that is a wrestling match. The parchment overhang is not optional: it lets you lift the entire slab onto a cutting board where you can apply even pressure with a sharp knife across the full length of each cut. Without the overhang, you are cutting down into a pan with raised edges, which forces the knife to angle and produces uneven slices.
❌ Using Cold Eggs
Cold eggs added to warm melted butter cause the butter fat to solidify around the cold surface of the egg — the mixture looks curdled and grainy. While it typically bakes out, a broken emulsion at the egg stage produces a less glossy top and a slightly less uniform crumb than a properly incorporated batter. Pull the eggs from the refrigerator at least 20 minutes before you start, or use the warm water method described in the Tips section.
Variations Worth Trying
Oreo Cheesecake Brownies
What changes: Make a cheesecake swirl: beat 225g / 8oz softened cream cheese + 50g / ¼ cup sugar + 1 egg yolk + ½ tsp vanilla until smooth. Pour the brownie batter into the pan, dollop the cheesecake mixture over the top, and swirl with a knife. Press the top Oreos in after swirling.
When: After the brownie batter is in the pan — swirl before adding the top Oreos.
Result: Tangy cream cheese against rich chocolate and sweet Oreo — one of the most popular Oreo brownie variations. Bake time increases to 30 to 33 minutes. Refrigerate before cutting — essential for clean swirl definition in the slices.
Double Stuffed Oreo Brownies
What changes: Use Double Stuf Oreos throughout — both in the batter and on top. The extra filling creates a more pronounced cream layer in both the interior pieces and the surface cookies.
When: Swap at the Oreo measurement stage — no other change needed.
Result: Noticeably richer, sweeter, and more cookies-and-cream forward than the standard version. The extra filling in the surface cookies becomes slightly caramelised during baking, adding a faint butterscotch note to the top layer.
Oreo Stuffed Brownies (Oreo on the Bottom Layer)
What changes: Line the base of the pan with a single layer of whole Oreos before pouring in the batter — no need to fold any into the batter. Pour the full batter over the Oreo layer and press 4 to 6 more whole Oreos on top.
When: Before pouring any batter — line the Oreos in the pan first, then pour the batter over them.
Result: A distinct, hidden Oreo layer at the base of each brownie square that is revealed only when you flip the brownie over or bite into it. Particularly impressive for gifting — the surprise layer adds a premium feel.
White Chocolate Oreo Brownies (Blondies)
What changes: Replace the entire brownie batter with a blondie base: melt 115g / ½ cup butter + 200g / 1 cup packed brown sugar together. Add 1 egg + 1 tsp vanilla. Fold in 150g / 1¼ cups flour + ¼ tsp salt. Fold in 100g / ½ cup white chocolate chips + chopped Oreos. Press remaining Oreos on top.
When: This is a full batter swap — use the blondie base instead of the chocolate base.
Result: A pale golden bar with white chocolate richness and the cookies-and-cream Oreo flavour. The contrast between the pale blondie and the dark Oreos is visually striking — particularly effective when cut and presented on a platter.
Peanut Butter Oreo Brownies
What changes: Swirl 3 tablespoons of creamy peanut butter into the top of the batter before pressing in the Oreos. Alternatively, use Peanut Butter Oreos in place of standard Oreos throughout.
When: After the batter is spread in the pan — swirl the peanut butter, then press in the Oreos.
Result: The peanut butter swirl adds a salty, nutty contrast to the rich chocolate base. The visual swirl pattern adds interest to the surface. Use Peanut Butter Oreos for a stronger peanut butter note, or standard Oreos for a more balanced result.
How to Store
Room Temperature
Oreo brownies keep for best quality for up to 4 days at room temperature in an airtight container. Store in a single layer or with parchment paper between layers — stacking without separation causes the top Oreos to compress into the brownie below and become gummy. Keep the container away from direct sunlight and heat sources, which accelerate the Oreo pieces softening.
The Oreo pieces inside the brownie soften over time as they absorb moisture from the brownie crumb. Many people prefer the texture on day 2 or 3 when the Oreo pieces have fully melded into the crumb — it produces a more uniform, cookies-and-cream fudge-like texture throughout.
Refrigerator
Oreo brownies keep for best quality for up to 7 days refrigerated in an airtight container. Cold temperatures firm the fudgy crumb noticeably — bring to room temperature for 20 to 30 minutes before serving, or microwave individual squares for 10 to 12 seconds to restore the soft, warm texture.
Refrigerating also slows the softening of the Oreo pieces, which extends the window where the cookie texture is distinguishable from the brownie crumb. If you prefer more textural contrast from the Oreos, refrigerated storage is the better choice.
Freezer — Complete Guide
Can you freeze Oreo brownies? Yes — fudgy brownies freeze exceptionally well. The dense crumb holds moisture through the freeze-thaw cycle better than cakey brownies do.
To freeze: cool completely and cut into squares. Wrap each square individually in cling film, then place in a zip-lock freezer bag or airtight container. Best quality for up to 3 months. The top Oreos may lose some crispness after thawing but the flavour is unaffected.
To thaw: move to the counter and thaw at room temperature for 1 to 2 hours. Or thaw overnight in the refrigerator. For a warm brownie, microwave an individual thawed square for 10 to 15 seconds.
To freeze uncut: cool the entire slab completely, wrap the uncut slab tightly in cling film then foil, and freeze. Thaw overnight in the refrigerator, then cut cold for the cleanest slices.
Use your judgment — if any brownie smells rancid (the fat in the Oreo filling can go off faster than the brownie crumb) after extended storage, discard it.
🔗 IL-4: “If you enjoy making dessert bars in batches to freeze, [our freezer-friendly dessert bar guide] covers the full lineup.” — Replace before publishing.
How to Serve
Classic Ways to Serve
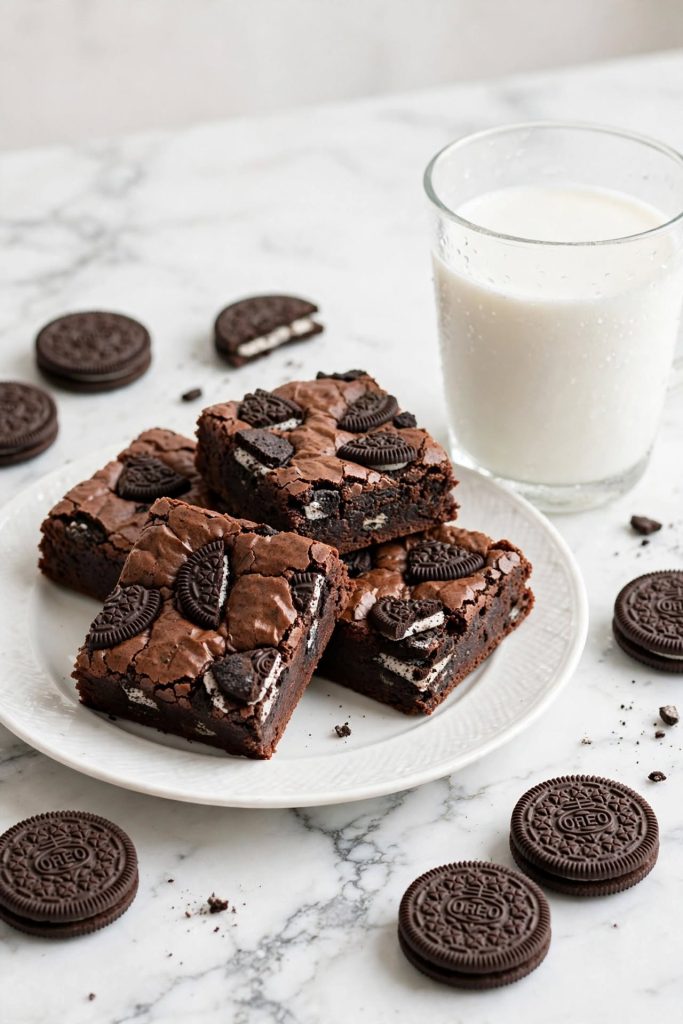
- At room temperature with a cold glass of milk — the contrast of room-temperature fudgy brownie against cold milk is the definitive serving method for any brownie
- Warm from a 10-second microwave blast with a scoop of vanilla ice cream on top — the brownie warms just enough to contrast with the cold ice cream without becoming liquid
- Stacked in a small tower of three squares on individual plates for a dinner party dessert — the cross-section showing the Oreo pieces and embedded top cookies needs no additional decoration
Upgraded and Occasion-Worthy
- Press a whole Oreo upright into a scoop of vanilla ice cream on top of a warm brownie square — a plated dessert that photographs dramatically and requires no piping or additional skill
- Drizzle with warm white chocolate sauce immediately before serving — the white against the dark brownie and black Oreo creates a striking colour contrast
- Cut into small 4cm squares and arrange on a dessert platter alongside other brownie varieties — the Oreo topping makes each piece immediately identifiable without labelling
Pairs well with: cold milk, vanilla ice cream, coffee ice cream, espresso, cold brew coffee, or a hot chocolate with no added sweetener to balance the richness.
Best occasions: bake sales, birthday parties, potlucks, gift boxes, after-school treats, holiday dessert spreads, and any occasion where a crowd-pleasing, visually bold dessert bar is needed.
Frequently Asked Questions
Can I use a different flavour of Oreo?
Yes — almost any Oreo flavour works. Double Stuf Oreos add extra filling richness. Golden Oreos produce a butterscotch-vanilla note that contrasts well with the chocolate batter. Mint Oreos create a chocolate-mint brownie without adding any extract. Peanut butter Oreos work particularly well layered on top. Reduce the batter sugar by 2 tablespoons if using a very sweet variety (birthday cake, red velvet) to prevent the overall brownie from being too sweet.
Why did my Oreo brownies turn out cakey?
Cakey brownies are almost always caused by too much flour, overmixing after adding the flour, or using an electric mixer at the egg stage. Measure flour by weight (90g) or spoon-and-level. Fold the dry ingredients by hand with a spatula and stop the moment dry streaks disappear. Whisk the eggs in by hand, not with a mixer — a hand whisk for 30 seconds per egg is all you need.
How do I know when Oreo brownies are done?
Insert a toothpick into the centre between two Oreo cookies. It should come out with a few moist, fudgy crumbs — not wet batter and not completely clean. The edges should look set and the centre should still have a very faint wobble when you gently shake the pan. Start checking at 23 minutes. The brownies continue to set as they cool in the pan.
Can I make Oreo brownies ahead of time?
Yes — Oreo brownies are actually better the day after baking. The fudgy texture firms up slightly overnight and the flavours deepen. Bake, cool completely in the pan, then wrap the uncut pan tightly in cling film and store at room temperature for up to 2 days or refrigerated for up to 5 days. Cut just before serving for the cleanest slices.
How long do Oreo brownies last?
Oreo brownies keep for best quality for up to 4 days at room temperature or up to 7 days refrigerated. The Oreo pieces inside the brownie soften over the first 1 to 2 days — after that they become part of the brownie crumb rather than a distinct cookie texture. If you enjoyed these, [our cookies and cream fudge recipe] uses the same flavour combination in a no-bake format. [IL-5 — replace before publishing]
Can I freeze Oreo brownies?
Yes. Cool completely, cut into squares, and wrap each one individually in cling film. Place in a zip-lock freezer bag. Best quality for up to 3 months. Thaw at room temperature for 1 to 2 hours, or microwave individual squares for 10 to 15 seconds. Fudgy brownies freeze better than cakey ones because the dense crumb holds moisture through the freeze-thaw cycle.
Can I use a box mix instead of making from scratch?
Yes. Prepare your favourite box brownie mix according to its instructions, then fold in roughly chopped Oreo cookies and press whole Oreos onto the top before baking. The scratch recipe produces a richer, more chocolate-forward result, but a box mix Oreo brownie is still excellent and cuts prep time in half. Use the same two-stage placement method — half in, half on top.
Can I double this recipe?
Yes. Double every ingredient and use a 9×13 inch pan. The bake time increases to approximately 30 to 35 minutes — start checking at 28 minutes with a toothpick. Do not stack two 8×8 pans in the oven simultaneously — the lower pan will overbake on the bottom before the top is set.
Why did my brownies sink in the middle?
Sinking in the centre is most often caused by opening the oven door in the first 20 minutes while the batter is still setting, or by overbeating the eggs which incorporates too much air. Mix the eggs in by hand with a whisk rather than an electric mixer, and resist the urge to check the oven early. If the brownies also taste underdone, they needed more bake time — sinking plus underdone centre usually means the oven was not hot enough.
Do the Oreos get soggy inside the brownies?
The Oreo pieces stirred into the batter soften completely during baking and become part of the brownie crumb — this is expected and produces the cookies-and-cream flavour throughout. They are not crunchy inside a fully baked brownie. The Oreos pressed onto the top before baking stay slightly more textured. If you want a noticeable crunch throughout, press a second layer of roughly crushed Oreos onto the top immediately after the brownies come out of the oven while still warm.
Can I add chocolate chips to this recipe?
Yes. Fold 100g / ½ cup of semi-sweet or dark chocolate chips into the batter along with the chopped Oreos in Step 5. The chips melt partially during baking and create pockets of extra fudgy melted chocolate throughout. White chocolate chips create a visual and flavour contrast against the dark batter and work particularly well in this recipe.
What size pan should I use?
An 8×8 inch square baking pan gives the thickest, fudgiest result — roughly 3 to 4cm tall brownies with a good edge-to-centre ratio. A 9×9 inch pan produces thinner brownies with slightly crispier edges and a 2 to 3 minute shorter bake time. For a doubled recipe, use a 9×13 inch pan. Metal pans heat more evenly than glass — if using glass, reduce the oven temperature by 5°C / 10°F and add 2 to 3 minutes to the bake time.

Oreo Brownies
Ingredients
Equipment
Method
- Preheat oven to 175°C / 350°F (160°C fan). Line an 8×8 inch baking pan with parchment paper, leaving an overhang on two sides.
- Melt the butter in a saucepan over low heat or in a microwave-safe bowl. Whisk in the sugar until combined. Cool for 5 minutes.
- Add the eggs one at a time, whisking vigorously by hand for 30 seconds after each. Add the vanilla extract.
- Sift in the cocoa powder, then add the flour, salt, and baking powder. Fold with a spatula until just combined — stop the moment you no longer see dry streaks.
- Fold in the 10 roughly chopped Oreos. Pour into the prepared pan and spread level.
- Press the 6 whole or halved Oreos onto the surface of the batter, partially embedding them.
- Bake on the centre rack for 25 to 28 minutes. Start checking at 23 minutes — a toothpick inserted between Oreos should come out with a few moist crumbs, not wet batter and not clean.
- Cool completely in the pan on a wire rack — at least 1 hour. Refrigerate for 30 minutes for cleaner slices. Lift out using the parchment overhang and cut into 16 squares.
Notes
- Cocoa powder: Dutch-processed (alkalized) cocoa is essential for the deepest chocolate flavour. Hershey’s Special Dark or Valrhona work well.
- Flour measurement: Measure by weight (90g) or spoon-and-level. Extra flour is the most common cause of cakey brownies.
- Do not use a mixer: Fold the dry ingredients by spatula only. Electric mixing at this stage produces a cakey crumb.
- Cakey result? Check flour measurement, ensure you stopped mixing as soon as dry streaks disappeared, and check you used melted (not creamed) butter.
- For a doubled batch: Use a 9×13 inch pan and increase bake time to 30 to 35 minutes.
- Add-ins: Fold 100g of chocolate chips in with the Oreos for extra fudginess.
More Brownie and Bar Recipes You Will Love
- Classic Fudgy Brownies — the base recipe this Oreo version is built on; the same melted butter and Dutch-process cocoa method with no mix-ins for a pure chocolate result.
- Brookies (Brownie Cookies) — a hybrid of the brownie batter and a chocolate chip cookie dough baked together in one pan; two textures, one extraordinary result.
- Cheesecake Bars — a vanilla cheesecake layer over a graham cracker base; the same cold-slice technique produces clean, photographable bars every time.
- Cookies and Cream Fudge — all the Oreo flavour of these brownies in a no-bake, no-oven-required format that sets in the refrigerator in under two hours.
Did you make these Oreo brownies? Leave a ⭐⭐⭐⭐⭐ rating below and tell me in the comments which Oreo flavour you used and how they turned out. I read every comment and would love to know which placement method you chose.