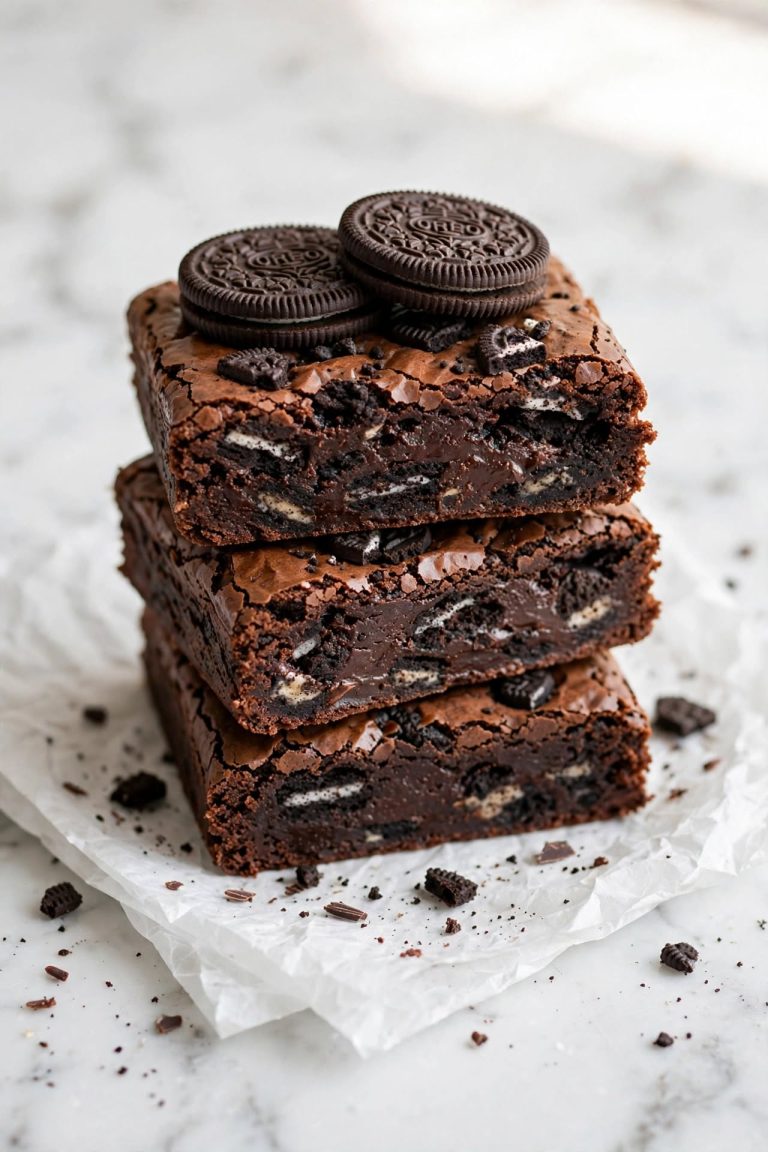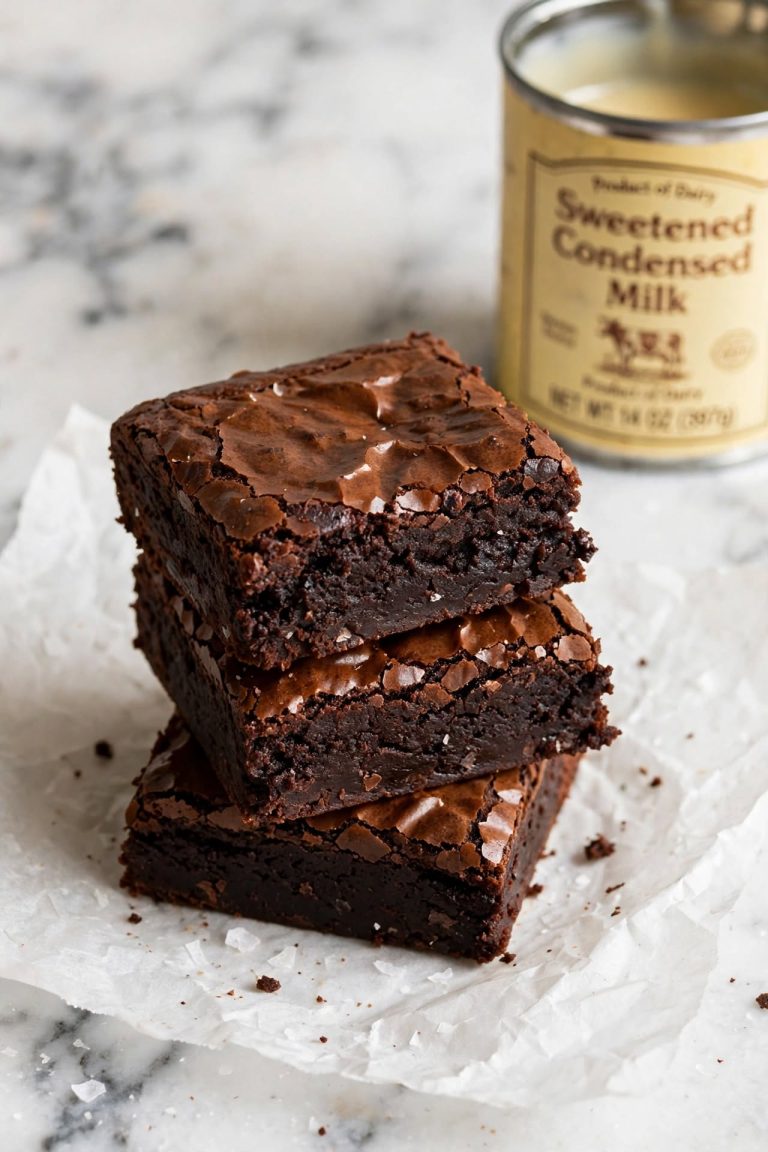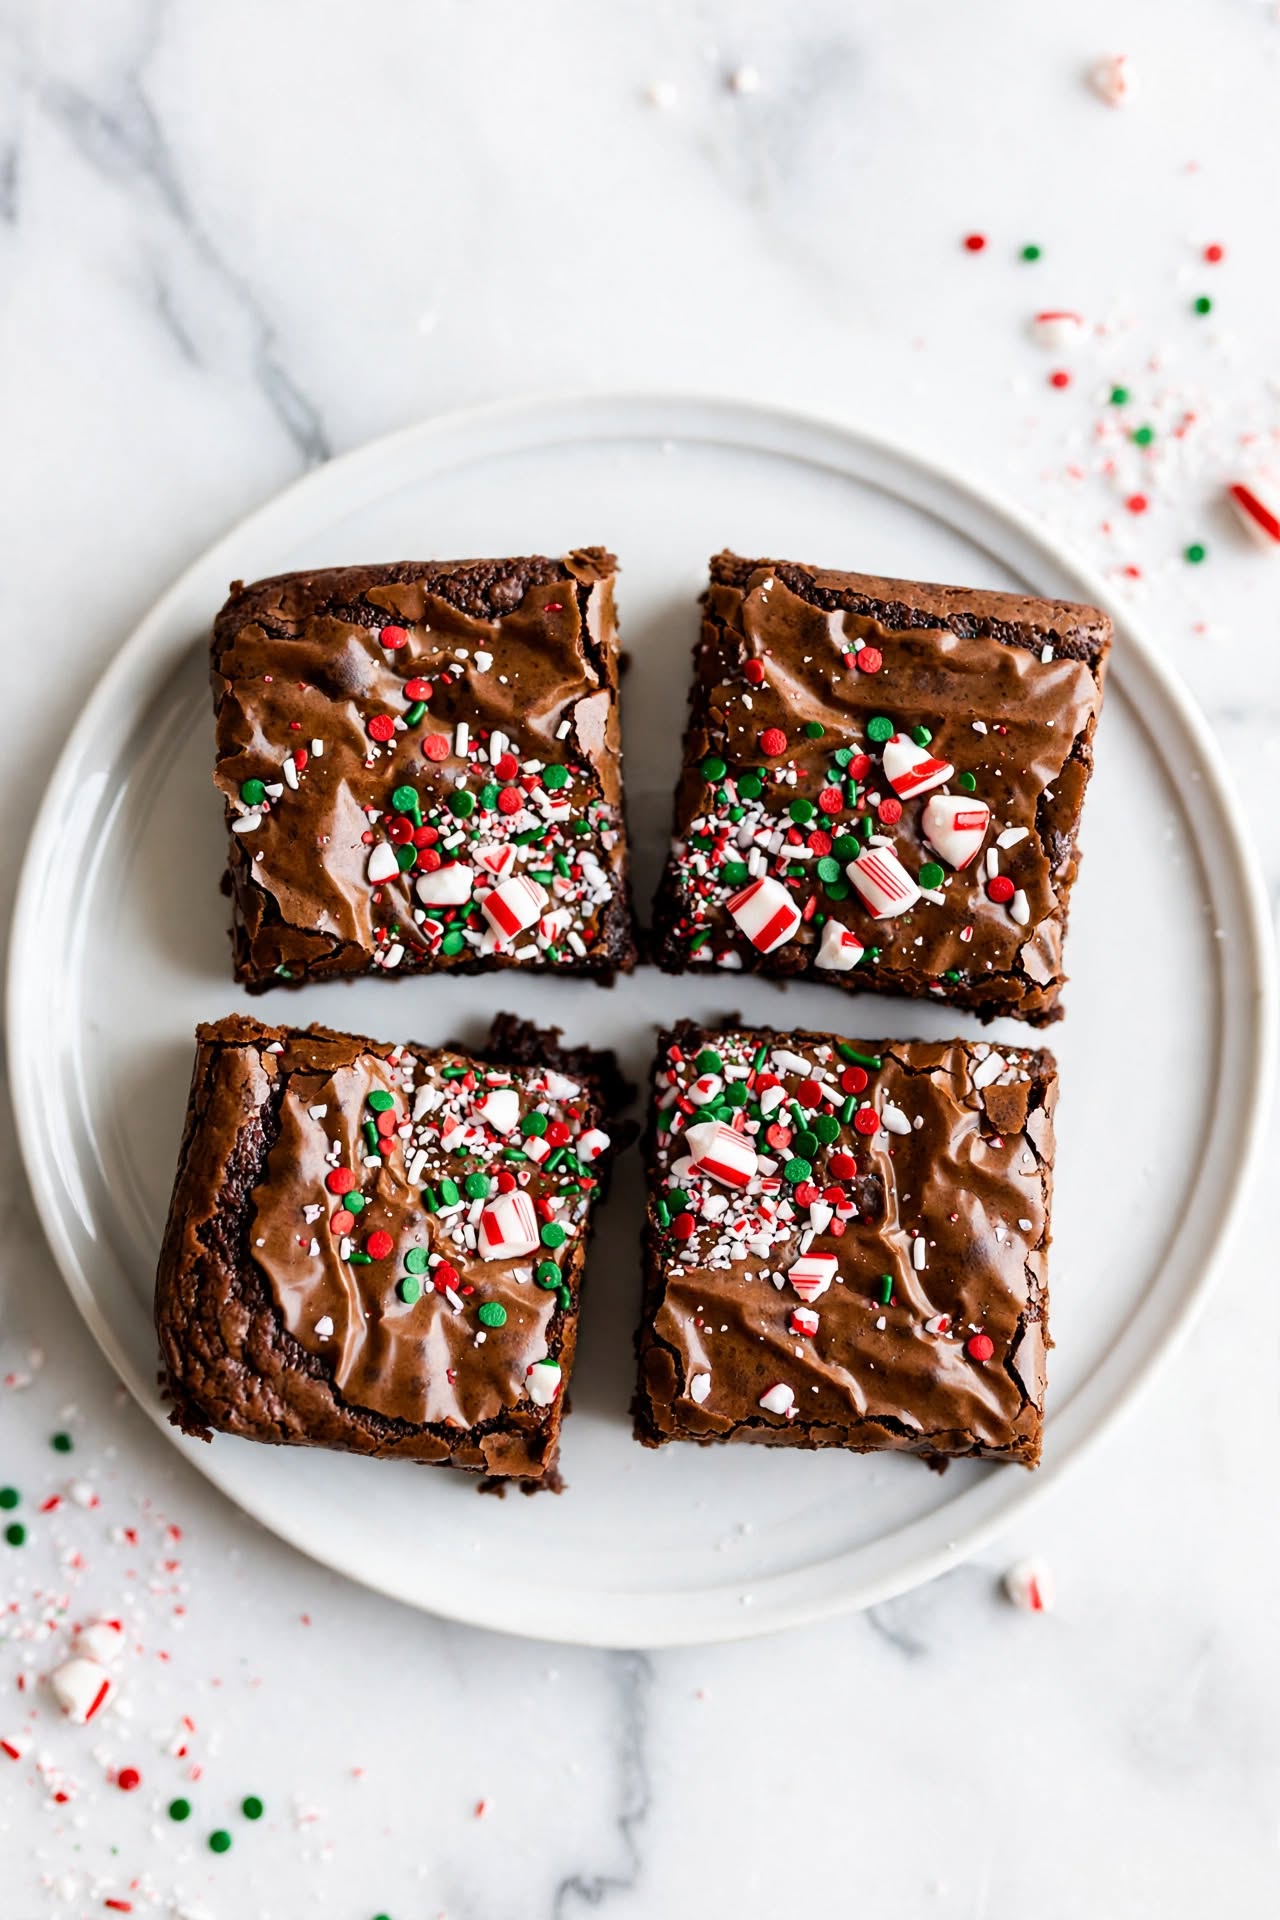
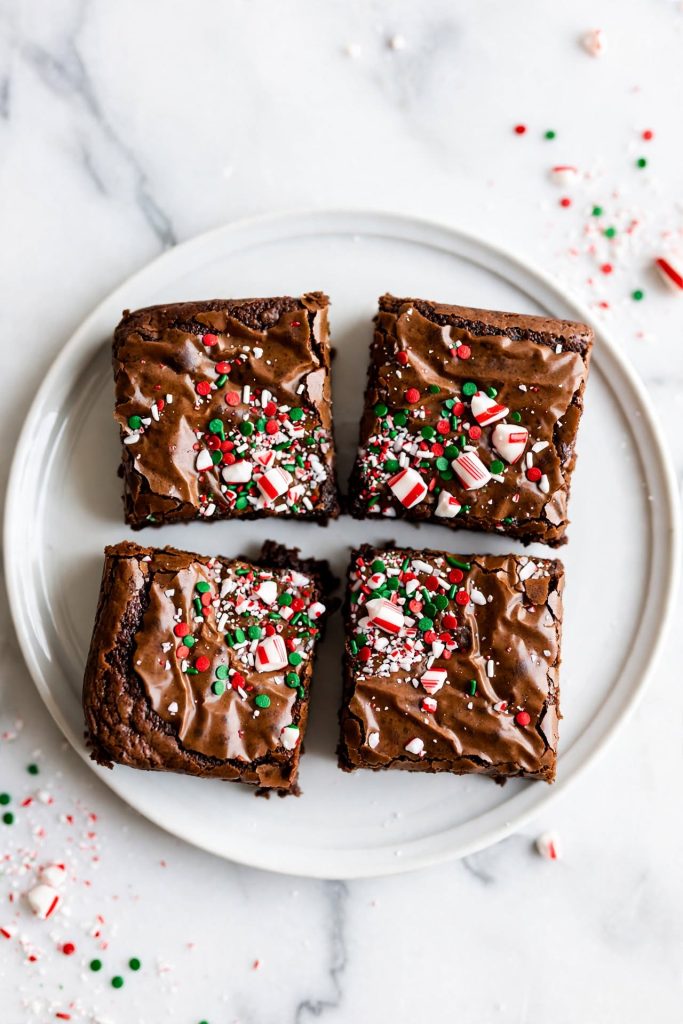
What are Christmas brownies? Christmas brownies are rich, fudgy chocolate bars decorated with holiday toppings — think red and green sprinkles, crushed candy cane, and festive chocolate chips. They bake in a single pan in about 30 minutes and yield 16 generous squares. They are best for anyone who wants a crowd-pleasing holiday dessert that takes minimal effort and delivers maximum visual impact at a cookie swap, party spread, or gift box.
Christmas brownies give you everything a holiday dessert should be: deep chocolate flavor, a dense fudgy center, and a festive finish that looks bakery-level. This recipe uses six pantry staples and one pan — no mixer required and no special equipment. If your previous brownies came out dry, cakey, or overcooked, the method here solves each of those problems at the source. I made this recipe eight times before publishing — adjusting chocolate ratios, sugar levels, and bake times until the texture was consistent every time.
Why This Recipe Works
Most holiday brownie recipes are standard brownie batter with sprinkles pressed on top — this one is built differently from the ratio up, so the result holds its fudgy structure even after refrigerating for days.
- Dual chocolate base — Real dark chocolate melted into the batter plus cocoa powder in the dry ingredients. The result is a layered depth of chocolate flavor that single-source recipes cannot match.
- One extra egg yolk — Adding a third yolk increases fat and emulsifiers in the batter, pushing the texture firmly into fudgy territory and away from cakey.
- Both sugars together — Brown sugar brings moisture-retaining molasses; granulated sugar creates the signature crinkle top. Using only one or the other loses half the texture benefit.
- No mixer required — Everything is done in one bowl with a spatula. This means less cleanup and, more importantly, less risk of overmixing once the flour goes in.
- Make-ahead friendly — These are genuinely better on day two. Bake them the night before any holiday event and they firm up, deepen in flavor, and slice cleanly the next day.
- Foolproof topping window — The sprinkles and candy cane go on immediately after the batter is poured — before baking — so they embed slightly into the surface and stay put when you slice.
If you are looking for more holiday chocolate desserts, that section has a good range of options at every skill level.
Ingredients for Christmas Brownies
Every ingredient here has a specific job. Here is what each one does — and what to use if you need to make a substitution.
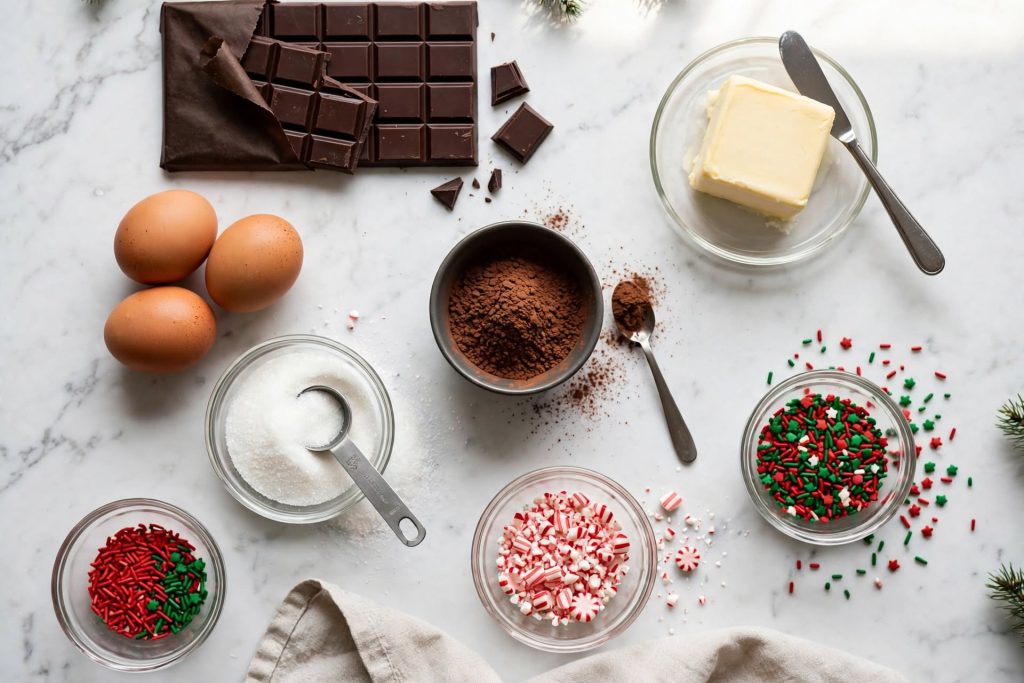
The Brownie Base
| Ingredient | Amount | What It Does | Best Substitute + Impact |
|---|---|---|---|
| Unsalted butter | 115g / ½ cup | Adds fat, richness, and moisture; creates the fudgy pull | Coconut oil (same amount, melted) — flavor shifts slightly, texture holds well |
| Dark chocolate (70% cocoa) | 170g / 6 oz | The primary chocolate flavor base; melted fat adds density | Semi-sweet chocolate chips — reduce sugar by 2 tablespoons to compensate for sweetness |
| Granulated sugar | 200g / 1 cup | Creates the glossy crinkle top and structure | Not recommended to substitute — it changes the top crust significantly |
| Light brown sugar | 100g / ½ cup packed | Molasses content retains moisture for days after baking | Dark brown sugar — deeper molasses flavor, slightly stickier center |
| Eggs (whole) | 2 large | Provide structure, emulsification, and lift | Flax eggs (1 tbsp ground flax + 3 tbsp water each) — texture becomes denser |
| Extra egg yolk | 1 yolk | Fat-rich — pushes texture toward fudgy rather than cakey | Can omit, but brownies will be slightly less rich |
| Pure vanilla extract | 1 teaspoon | Amplifies and rounds out chocolate flavor | Vanilla bean paste (same amount) — stronger, more visible flecks |
| All-purpose flour | 90g / ¾ cup | Provides structure — less flour = fudgier result | 1:1 gluten-free flour blend — see Variations section |
| Unsweetened cocoa powder | 30g / ¼ cup | Second layer of chocolate flavor; absorbs excess moisture | Dutch-process cocoa — richer color, slightly less acidic |
| Fine salt | ½ teaspoon | Balances sweetness and intensifies chocolate perception | Flaked sea salt (¼ tsp) — adds a subtle crunch on the surface |
| Chocolate chips | 50g / ⅓ cup | Pockets of melted chocolate throughout the interior | Chopped dark chocolate bar — melts more completely for a smoother result |
The Festive Toppings
| Topping | Amount | What It Does | Swap Option |
|---|---|---|---|
| Christmas sprinkles (red, green, gold) | 3 tablespoons | Visual holiday marker; embeds into the top during baking | Any festive nonpareils or holiday jimmies |
| Crushed candy cane | 2 tablespoons | Peppermint pop and visual contrast; softens slightly in the oven | Crushed peppermint hard candy — identical result |
Key Ingredient Notes
Dark chocolate: Use a bar-style chocolate at 70% cocoa, not baking chips for this component. Chips contain stabilizers that prevent smooth melting — you will end up with a grainy batter that bakes unevenly.
Eggs: Room temperature is non-negotiable here. Cold eggs shock the melted chocolate and can cause it to seize into lumps. Set your eggs on the counter 30 minutes before you start — or submerge them in warm (not hot) water for 5 minutes.
Butter: Unsalted only. Salted butter varies in sodium content by brand, and the recipe already has ½ teaspoon of measured salt — adding an unknown amount from salted butter can make the final result taste sharp rather than balanced.
Equipment You Need
- 8×8-inch metal baking pan — Metal conducts heat more evenly than glass; the standard size for this yield
- Heatproof bowl — For the double-boiler chocolate melt
- Medium saucepan — To hold water for the double boiler
- Rubber spatula — Essential for folding; a whisk will overmix the batter after flour is added
- Parchment paper — Leave a 2-inch overhang on two sides so you can lift the slab out cleanly
- Sharp chef’s knife — For clean cuts after cooling
The Chocolate Guide — Choosing the Right Cocoa and Chocolate
Your chocolate choices are the single biggest factor in how your festive brownies turn out. This section is worth reading before you shop.
Dark Chocolate vs. Cocoa Powder
| Source | What It Contributes | Use For This Recipe? |
|---|---|---|
| Dark chocolate bar (70%) | Fat, flavor complexity, dense texture | ✅ Yes — melted into batter (primary) |
| Semi-sweet chocolate (50–55%) | Sweeter, less complex, less fat | ✅ Acceptable — reduce sugar by 2 tbsp |
| Milk chocolate | High sugar, low cocoa — thin flavor | ❌ Not recommended for base |
| Natural cocoa powder | Sharp, acidic chocolate flavor; thickens batter | ✅ Yes — in dry ingredients (secondary) |
| Dutch-process cocoa powder | Richer color, smoother flavor, less acidic | ✅ Direct swap — results in a deeper-colored brownie |
| Raw cacao powder | More bitter, more intense, slightly grainy | ⚠️ Use sparingly — can overpower the flavor |
What Ratio Works Best for Fudgy Brownies
Fudgy brownies need a fat-to-flour ratio that skews heavy toward fat. This recipe sits at roughly 2:1 fat-to-flour by weight — which means the chocolate and butter together significantly outweigh the flour. Increasing the flour pulls you toward cakey. Decreasing it too far produces a brownie that cannot hold its shape when sliced. The 90g of flour in this recipe is a tested floor for this yield and pan size — it produces a square that holds a clean edge at room temperature without being gummy.
How to Make Christmas Brownies — Step by Step
Follow these steps in order. The most important rule: once the flour is in, switch from whisk to spatula and count your folds.
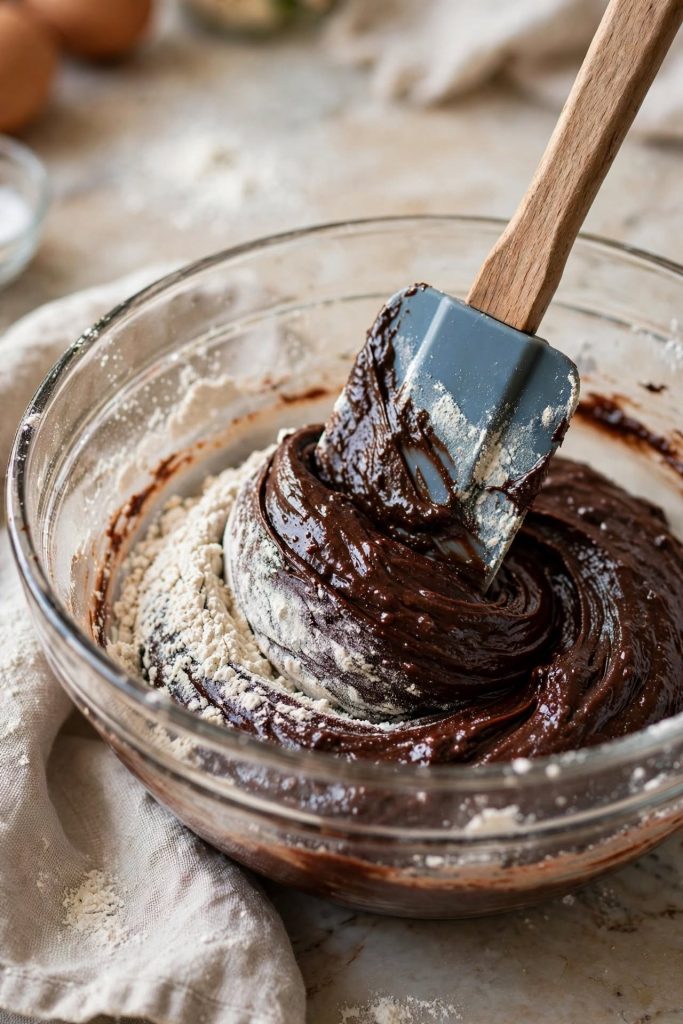
Step 1 — Preheat the Oven and Prepare Your Pan
Set your oven to 350°F (175°C) and allow it to fully preheat — at least 15 minutes. Line your 8×8-inch metal pan with parchment paper, pressing it into the corners and leaving a 2-inch overhang on two opposite sides. Lightly butter or spray any exposed pan surfaces.
What to look for: The parchment should lie flat in the corners with no air gaps — gaps cause the batter to seep underneath and stick.
Step 2 — Melt the Butter and Chocolate Together
Add the butter and chopped dark chocolate to a heatproof bowl. Set it over a saucepan of barely simmering water — the bowl should not touch the water. Stir slowly with a spatula until both are fully melted and the mixture is smooth and glossy. Remove from heat and rest for 5 full minutes.
⚠️ Do not rush the cooling step. Adding sugar and eggs to hot chocolate will begin cooking the eggs — you will end up with scrambled bits in your batter. If the bowl feels warm to the back of your hand after 5 minutes, wait another 2 minutes before continuing.
What to look for: The mixture should look like a smooth, pourable dark ganache with no visible butter separation.
Step 3 — Whisk in Sugar and Eggs
Add both sugars to the cooled chocolate and whisk until fully incorporated — about 30 seconds. Add the eggs and extra yolk one at a time, whisking for 10 seconds between each addition. Add the vanilla extract and whisk the entire mixture vigorously for 60 seconds. You are aerating the batter here, which creates the signature crinkle top.
What to look for: The batter should change from grainy-looking to smooth and slightly lighter in color. It should fall off the whisk in a thick, ribbon-like stream rather than dropping in chunks.
Step 4 — Fold in the Dry Ingredients
Sift the flour, cocoa powder, and salt directly into the bowl — sifting prevents flour pockets. Switch to a rubber spatula. Fold using large, slow strokes that go around the edges and across the bottom of the bowl. Count your folds — stop at the exact moment you no longer see any dry flour streaks. For most people, this takes 10 to 12 folds.
⚠️ This is the most critical step in the recipe. Every fold after the flour is fully incorporated develops gluten — and gluten turns fudgy brownies into dense, chewy bars with a tough crumb. If you are unsure, stop one fold early rather than one too late. A single streak of flour is better than an overmixed batter.
Once comfortable with this technique, our guide to chocolate baking fundamentals covers the same approach applied to other recipes.
What to look for: A thick, scoopable batter with no visible dry patches. It should look uniform in color — dark chocolate brown throughout.
Step 5 — Pour, Top, and Bake
Fold in the chocolate chips, then pour the batter into your prepared pan. Use the spatula to spread it evenly into the corners — the batter is thick and may need a few passes. Immediately scatter the Christmas sprinkles and crushed candy cane evenly over the surface and gently press them down with your fingertips so they adhere.
What to look for: An even batter surface with no raised center or dipped corners. The sprinkles should be distributed across the whole surface, not clustered in the middle.
Step 6 — Cool Completely Before Cutting
Place the pan on a wire rack and allow to cool at room temperature for a minimum of 2 hours. The brownies will look underdone when you pull them — this is correct. They continue to set as they cool, and cutting early will give you crumbling, gooey squares that cannot hold a clean edge. For even cleaner cuts, refrigerate the cooled slab for 30 minutes before slicing.
What to look for: The surface should feel set and no longer warm to the touch. The edges will have pulled slightly from the pan sides.
The Science Behind Fudgy Brownies
Great fudgy brownies are not luck — they are the result of three ingredients doing specific, predictable jobs when combined in the right ratios.
Why Melted Butter Creates a Denser Texture
Melted butter → does not aerate the batter the way creamed butter does. When butter is creamed with sugar (the cake method), air pockets form and the result is a lighter, crumbier texture. When butter is melted and combined with chocolate, those air pockets never form — the fat coats the flour proteins directly and inhibits gluten development. You observe this as a dense, pull-apart interior rather than a cake-like crumb.
Why Extra Egg Yolks Matter
Egg yolks → are high in fat and lecithin, a natural emulsifier that binds water and fat together. Adding an extra yolk increases the fat-to-protein ratio in the batter, which keeps the center moist and pliable after baking. You observe this as a texture that yields slightly when you press the surface — it springs back, but slowly — rather than springing back the way a cake does.
Why You Pull Them Out Early
Residual heat → continues cooking the center of the brownie for 15 to 20 minutes after it leaves the oven. This is called carryover cooking, and it is the reason a toothpick with moist crumbs is the correct signal — not a clean toothpick. A clean toothpick at the oven door means the center is already set beyond the fudgy range. You observe this as a brownie that firms up significantly during the cooling window, arriving at the ideal texture without further oven time.
Tips for the Best Result
These are the details that separate a good holiday brownie from one people ask you to make again.
- Use room-temperature eggs — Cold eggs emulsify poorly into warm melted chocolate. Cold eggs can also cause the melted chocolate to seize. Take them out 30 minutes before you start, or use the warm water bath method described in the ingredients section.
- Use a metal pan, not glass — Glass retains heat and causes the edges to overbake before the center sets. Metal conducts heat more evenly and gives you a level bake from edge to center. If glass is your only option, reduce oven temperature by 25°F and check 3 to 4 minutes earlier than the recipe states.
- Spoon and level your flour — Do not scoop directly with the measuring cup. Spooning flour into the cup and leveling with a straight edge prevents over-packing, which is the most common cause of cakey brownies. Even 15g of extra flour can shift the texture noticeably.
- Let the chocolate cool before adding eggs — The 5-minute rest after melting is built into the recipe for a reason. Too-hot chocolate will begin to cook the eggs before they fully incorporate, and you will see small cooked egg bits in your finished brownie.
- Bake in the center rack position — The top rack runs hotter and can overbake the surface while the interior stays underdone. Center rack gives the most even heat distribution in most ovens.
- Add toppings before baking — Press sprinkles and crushed candy cane onto the raw batter. They embed during baking and stay secure. Added after baking, they sit on top of the set surface and fall off when you slice.
- To double the recipe — Use a 9×13-inch pan and increase bake time by 5 to 8 minutes. Check at the 33-minute mark. Do not use two 8×8 pans side by side — the heat distribution changes and results become inconsistent.
Common Mistakes to Avoid
Each of these produces a specific, identifiable problem. Read through before you start so you recognize them before they happen.
❌ Overbaking by Even Two Minutes
Result: Your brownies will come out dry, crumbly, and with a hard rather than fudgy interior. The fudgy window for chocolate brownies is narrow — roughly 4 minutes wide — and it closes quickly.
Fix: Check at 28 minutes with a toothpick. Pull the pan the moment the toothpick comes out with moist crumbs. Trust the carryover cooking to finish the center during the cooling window.
❌ Using Margarine Instead of Butter
Result: Margarine has a higher water content than butter — typically 15 to 20% water vs. butter’s 15% or less. That extra water steams off in the oven and can make the texture greasy and loosely structured rather than dense and fudgy.
Fix: Use unsalted butter only. If dairy-free is required, refined coconut oil is the closest substitute for texture and fat content.
❌ Mixing After the Flour Goes In
Result: Overmixed batter develops gluten — and gluten turns fudgy brownies into dense, chewy bars with a tough, bread-like crumb.
Fix: Switch to a spatula the moment the flour goes in. Fold — do not stir — and stop the moment you can no longer see dry flour streaks. Count your strokes if it helps; most batches take 10 to 12 folds to fully combine.
❌ Cutting Before They Are Fully Cool
Result: Warm brownies are structurally unstable — the center has not finished setting. Cutting early gives you crumbling edges, gooey interiors that stick to the knife, and squares that cannot hold their shape.
Fix: Allow a full 2 hours at room temperature. For the cleanest cuts, refrigerate the cooled slab for 30 additional minutes before slicing.
❌ Using the Wrong Pan Size
Result: A larger pan means thinner batter — which bakes faster and can overbake before the surface looks done. A smaller pan means thicker batter — which can look set on the surface while the center stays raw.
Fix: Use an 8×8-inch pan for this recipe as written. If you only have a 9×9, reduce bake time by 3 to 4 minutes and start checking at 24 minutes.
❌ Skipping the Parchment Lining
Result: Brownies will bond to the pan during baking — especially at the corners. Removing them intact becomes nearly impossible without breaking the slab.
Fix: Line the pan with parchment before adding batter, with a 2-inch overhang on two sides. This gives you handles to lift the entire slab out after cooling, making clean slicing straightforward.
For more guides on fixing common baking problems, our chocolate baking troubleshooting guide covers each of these scenarios in even more detail.
Variations Worth Trying
The base recipe holds up well to modifications. Each variation below changes only what is necessary and keeps the core method intact.
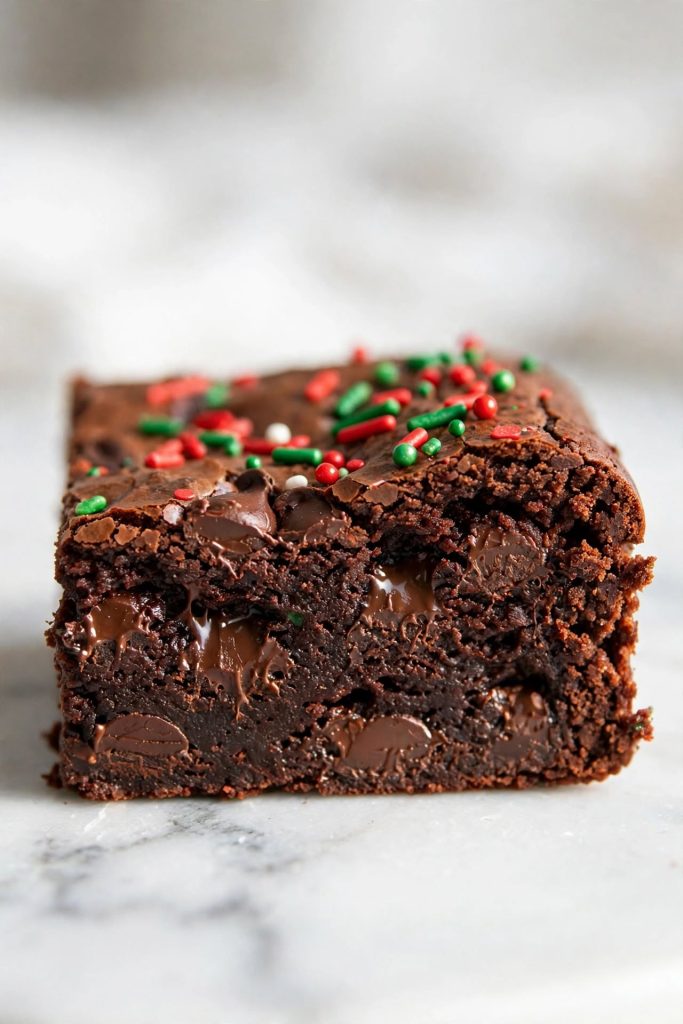
Peppermint Christmas Brownies
What changes: Add ½ teaspoon peppermint extract with the vanilla in Step 3. Double the crushed candy cane on top and drizzle with white chocolate after baking.
When: Add extract in Step 3 with the vanilla; drizzle white chocolate after the brownies have cooled for 30 minutes.
Result: The peppermint flavor is present but not overwhelming — it cuts through the richness of the chocolate and gives you a classic candy cane brownie without the mint taking over.
White Chocolate Cranberry Brownies
What changes: Swap the dark chocolate chips for white chocolate chips and add 50g dried cranberries (roughly ¼ cup) to the batter in Step 5. Replace red and green sprinkles with a scatter of additional dried cranberries pressed into the top.
When: Fold both in with Step 5 before pouring.
Result: The tartness of the cranberry cuts through the richness of the brownie base. The white chocolate pockets melt into the interior and add a cream note against the dark chocolate base.
Gluten-Free Christmas Brownies
What changes: Replace the all-purpose flour with an equal weight (90g) of a 1:1 gluten-free flour blend that contains xanthan gum. Do not increase the amount — gluten-free flour absorbs liquid differently and more will make the texture gummy.
When: Direct substitution in Step 4.
Result: Very close to the original texture — dense, fudgy, and sliceable. The xanthan gum in the blend does the structural work that gluten would otherwise provide. Allow an extra 30 minutes of cooling time before cutting.
Salted Caramel Christmas Brownies
What changes: Pour half the batter into the pan, drizzle 3 tablespoons of store-bought or homemade salted caramel sauce over it, then pour the remaining batter on top. Swirl once with a skewer. Skip the candy cane topping and scatter flaked sea salt instead of table salt over the surface before baking.
When: Layer after Step 5, before baking.
Result: A gooey, caramel-veined interior with a salty-sweet contrast on every bite. The caramel creates a visible swirl pattern when sliced.
Christmas Brownie Bites (Mini Version)
What changes: Use a standard 12-cup muffin tin lined with paper cases. Fill each cup two-thirds full and reduce bake time to 16 to 18 minutes.
When: Pour in Step 5, then press toppings onto each individual cup before baking.
Result: Perfectly portioned, self-contained chocolate holiday treats that work well in a gift box or on a cookie tray. They set faster than a full-pan batch, so check at 14 minutes and watch closely.
How to Store
Room Temperature
Store cut or uncut Christmas brownies in an airtight container at room temperature. Best quality lasts for up to 4 days — after that, the texture begins to dry and the crinkle top softens. Place a sheet of parchment or wax paper between layers if stacking to prevent the tops from sticking. A paper towel in the bottom of the container absorbs any excess moisture and keeps the base from going damp.
Refrigerator
Refrigeration extends best quality to up to 7 days in an airtight container. The cold temperature firms the interior significantly — they will feel denser and harder straight from the fridge. Allow them to come to room temperature for 20 to 25 minutes before serving, or microwave individual squares for 10 to 12 seconds to restore the soft, fudgy center. Refrigeration can cause the crinkle top to lose some of its shine, but the flavor and interior texture are unaffected.
Freezer — Complete Guide
Fudgy chocolate brownies freeze exceptionally well. Here is the full process:
- Allow brownies to cool completely — refrigerate for 30 minutes after room temperature cooling for the cleanest cuts
- Slice into individual squares before freezing — this lets you defrost only what you need
- Wrap each square tightly in plastic wrap, pressing out any air
- Place wrapped squares in a sealed freezer bag or airtight container and press out remaining air
- Label with the date — best quality for up to 3 months
- To thaw: transfer to the refrigerator overnight, or leave wrapped at room temperature for 2 to 3 hours
- Do not microwave from frozen — thaw first for the most even result
Texture note: The fudgy interior holds up very well from frozen. The festive sprinkle topping may soften slightly after thawing — this is a cosmetic change only and does not affect flavor. Use your judgment when eating stored brownies: if they smell off or show any signs of mold, discard them.
If batch baking for the holidays is part of your routine, our holiday make-ahead baking guide fits perfectly into that approach.
How to Serve
These work as well on a casual holiday table as they do in a gifted tin — the presentation changes, but the brownie stays the same.
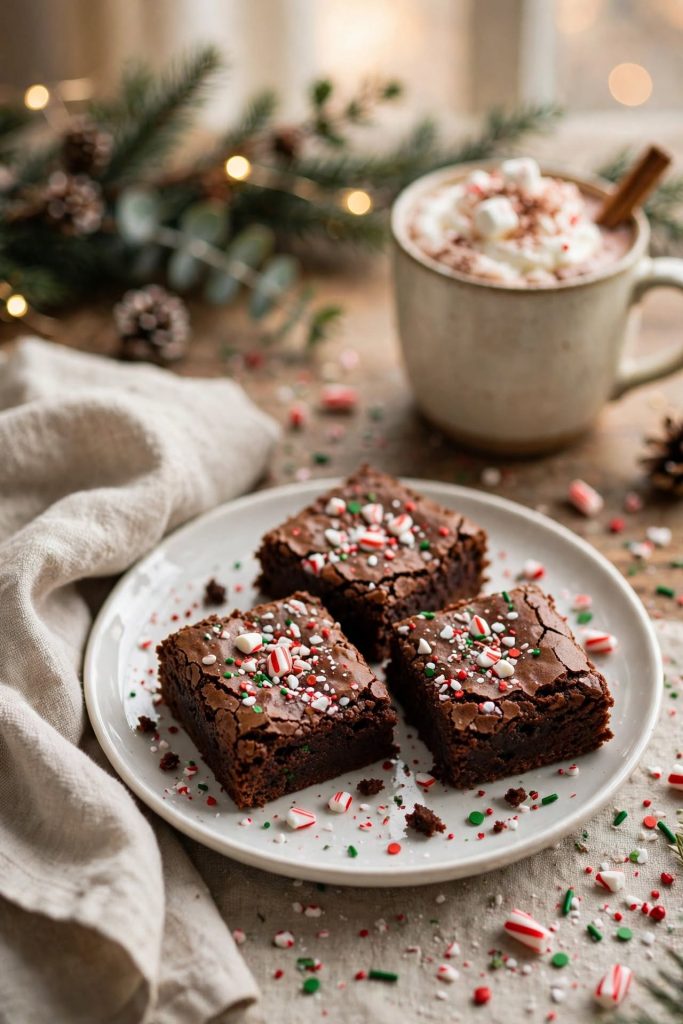
Classic Ways to Serve
- At room temperature on a white ceramic plate with a light dusting of powdered sugar
- Warm (10 seconds in the microwave) with a small scoop of vanilla ice cream alongside
- On a holiday cookie tray alongside shortbread, gingerbread, and peppermint bark
Upgraded and Occasion-Worthy
- Drizzle with melted white or dark chocolate and allow to set before plating — adds a professional finish
- Layer in a clear holiday tin between parchment sheets — these travel well and hold their shape without crumbling
- Stack 3 squares into a tower, dust with cocoa powder, and serve with a side of warm salted caramel sauce for a plated dessert option
Best pairings: Hot cocoa, strong coffee, or a glass of cold milk. For an occasion spread, they sit well alongside fresh raspberries or clementine slices — the acidity cuts the richness.
Best occasions: Cookie swaps, school holiday parties, gift boxes, Christmas potlucks, and Christmas Eve dessert spreads.
Frequently Asked Questions
Can I make Christmas brownies without eggs?
Yes, you can make Christmas brownies without eggs by substituting each egg with a flax egg (1 tablespoon ground flaxseed mixed with 3 tablespoons water, rested for 5 minutes). The texture will be slightly denser and less glossy on top. For the best result with a flax substitution, reduce the bake time by 2 to 3 minutes and allow them to cool completely before cutting — they firm up significantly as they set.
Why did my Christmas brownies turn out cakey?
Cakey brownies are almost always caused by one of three things: too much flour, too many whole eggs, or overbaking. Measure your flour by spooning it into the cup and leveling off — packing the cup can add 20 to 30% more flour than the recipe calls for. This recipe uses two whole eggs plus one extra yolk: the yolk adds fat and richness that steers the texture toward fudgy rather than cakey. If you omitted the extra yolk, add it back.
How do I know when Christmas brownies are done?
Insert a toothpick into the center at the 28-minute mark. A clean toothpick means they are overbaked. What you are looking for is a toothpick that comes out with a few moist crumbs — not wet batter, but not completely dry. The edges will look set and slightly pulled from the pan sides. The center may look underdone through a glass pan — this is correct. They continue to set as they cool.
Can I make these ahead of time?
Yes — these are genuinely better on day two. Bake them the night before, allow them to cool completely in the pan, then cover tightly with plastic wrap and leave at room temperature. The sugar redistributes overnight and the chocolate flavor deepens. If you are adding peppermint or sprinkle toppings, press these on immediately after baking while the surface is still warm so they fully adhere.
How long do Christmas brownies last?
Best quality lasts up to 4 days at room temperature in an airtight container, and up to 7 days in the refrigerator. Bring refrigerated brownies to room temperature for 20 minutes before serving, as the cold firms the texture significantly. Use your judgment: if they smell off or show any signs of mold, discard them.
Can I freeze Christmas brownies?
Yes — they freeze well for up to 3 months. Wrap each square individually in plastic wrap, then place in a sealed freezer bag. To thaw, transfer to the refrigerator overnight or leave at room temperature for 2 to 3 hours. The fudgy texture holds up well from frozen. The festive sprinkle toppings may soften slightly after thawing but the brownie itself will be unchanged.
What can I substitute for butter?
Refined coconut oil is the closest substitute — use the same amount, melted. The flavor shifts slightly toward coconut, which pairs well with dark chocolate. Vegetable oil also works at 75% of the butter weight (roughly 85ml for this recipe), but the result will be slightly less rich. Margarine is not recommended — its higher water content can make the texture greasy and loosely structured.
Can I double this recipe?
Yes — this recipe doubles cleanly. Use a 9×13-inch pan and increase the bake time by 5 to 8 minutes. Check at the 33-minute mark with a toothpick and look for moist crumbs. Do not use two 8×8 pans side by side in the same oven — heat distribution changes and one pan will typically overbake. If you enjoyed making this, our peppermint bark recipe is the next holiday treat worth making.
Why did my brownies sink or crack in the middle?
A slight sink in the center is normal — it happens as the center sets more slowly than the edges during cooling. A dramatic sink usually means the oven temperature ran too high, causing the edges to set before the center had time to catch up. A surface crack is actually a good sign — it means the top set properly while the interior stayed moist. An oven thermometer is the most reliable way to confirm your actual oven temperature.
What size pan should I use?
An 8×8-inch square metal pan is standard for this recipe and gives you 16 generous squares. A 9×9-inch pan produces slightly thinner brownies with a shorter bake time of around 24 to 26 minutes. If you only have a glass pan, reduce your oven temperature by 25°F and check 3 to 4 minutes earlier than the recipe states — glass holds heat differently and can cause edges to overbake.
Can I use a boxed brownie mix as the base?
Yes — prepare the box mix as directed and use the festive toppings from this recipe to give it a Christmas finish. Pour the batter into the pan and immediately press in your Christmas sprinkles and crushed candy cane before baking. The result will depend on the brand, but the holiday decoration approach works exactly the same way. Adding ½ teaspoon of peppermint extract to a standard box mix is a popular quick upgrade.
How do I get clean slices?
Wait until the brownies are fully cool — ideally refrigerated for 30 minutes. Use a sharp chef’s knife and wipe it clean with a damp cloth between every single cut. Lift the entire slab out of the pan using the parchment overhang and place it on a cutting board before slicing. Score all cut lines lightly first, then go through fully — this prevents dragging and keeps your edges clean.

Christmas Brownies
Ingredients
Equipment
Method
- Preheat oven to 170°C / 340°F (150°C fan) — note: lower than standard brownies. Line an 8×8 inch baking pan with parchment paper, leaving overhang on two sides.
- Melt the butter gently and allow to cool 3 to 4 minutes. Pour the condensed milk into a large bowl. Add the warm melted butter and whisk until smooth and combined.
- Add the eggs one at a time, whisking for 20 to 30 seconds after each. Add the vanilla extract with the second egg. Do not overwhisk.
- Sift in the cocoa powder, then add the flour, salt, and baking powder. Fold with a spatula until just combined — 12 to 15 folds. Stop the moment you no longer see dry streaks. The batter will be very thick.
- Fold in the chocolate chips if using, reserving a handful for the surface. Pour the batter into the prepared pan — spread with the spatula as it is too thick to self-level. Press reserved chips onto the surface.
- Bake on the centre rack for 25 to 30 minutes. The edges should be set, the surface dry and matte, and a toothpick between chips should come out with moist crumbs. The pan will still wobble slightly — this is correct.
- Cool at room temperature for at least 1 to 2 hours. Refrigerate for a minimum of 1 hour (overnight is best). Lift out using the parchment overhang. Cut into 16 squares with a warm, dry knife wiped clean between each cut.
Notes
- Condensed milk: Must be sweetened condensed milk — not evaporated milk. Full-fat only. The labels look similar — check for “sweetened”.
- Bake temperature: 170°C / 340°F — slightly lower than standard to prevent the surface overbrowning before the centre sets.
- Too gooey? Return to the oven for 2 to 3 more minutes. Refrigerate for at least 2 hours before cutting.
- Too sweet? Increase salt to ½ tsp, use 70% cocoa chocolate chips, and serve cold.
- Best served: cold from the refrigerator. Better on day 2 than day 1.
- For a doubled batch: Use a 9×13 inch pan; bake time increases to 32 to 38 minutes.
More Holiday Dessert Recipes You Will Love
- Peppermint Bark — Two-ingredient layers of dark and white chocolate with crushed candy cane; makes an impressive gift and takes 20 minutes of active time.
- Gingerbread Blondies — Same fudgy one-bowl method as this recipe with warm gingerbread spice through the batter and a cream cheese swirl on top.
- No-Bake Chocolate Peppermint Bites — Four ingredients, rolled and chilled — the fastest option on any holiday tray.
- White Chocolate Cranberry Cookies — Chewy centers, crisp edges, and tart cranberry against white chocolate — a natural follow-on from these holiday chocolate bars.
- Salted Caramel Cookie Bars — The same sheet-pan format with a buttery shortbread base and caramel center — a natural next step after you have made these Christmas brownies.
Did you make these Christmas brownies? Leave a ⭐⭐⭐⭐⭐ rating below and let me know in the comments how it turned out. I read every comment and would love to know what worked for you.