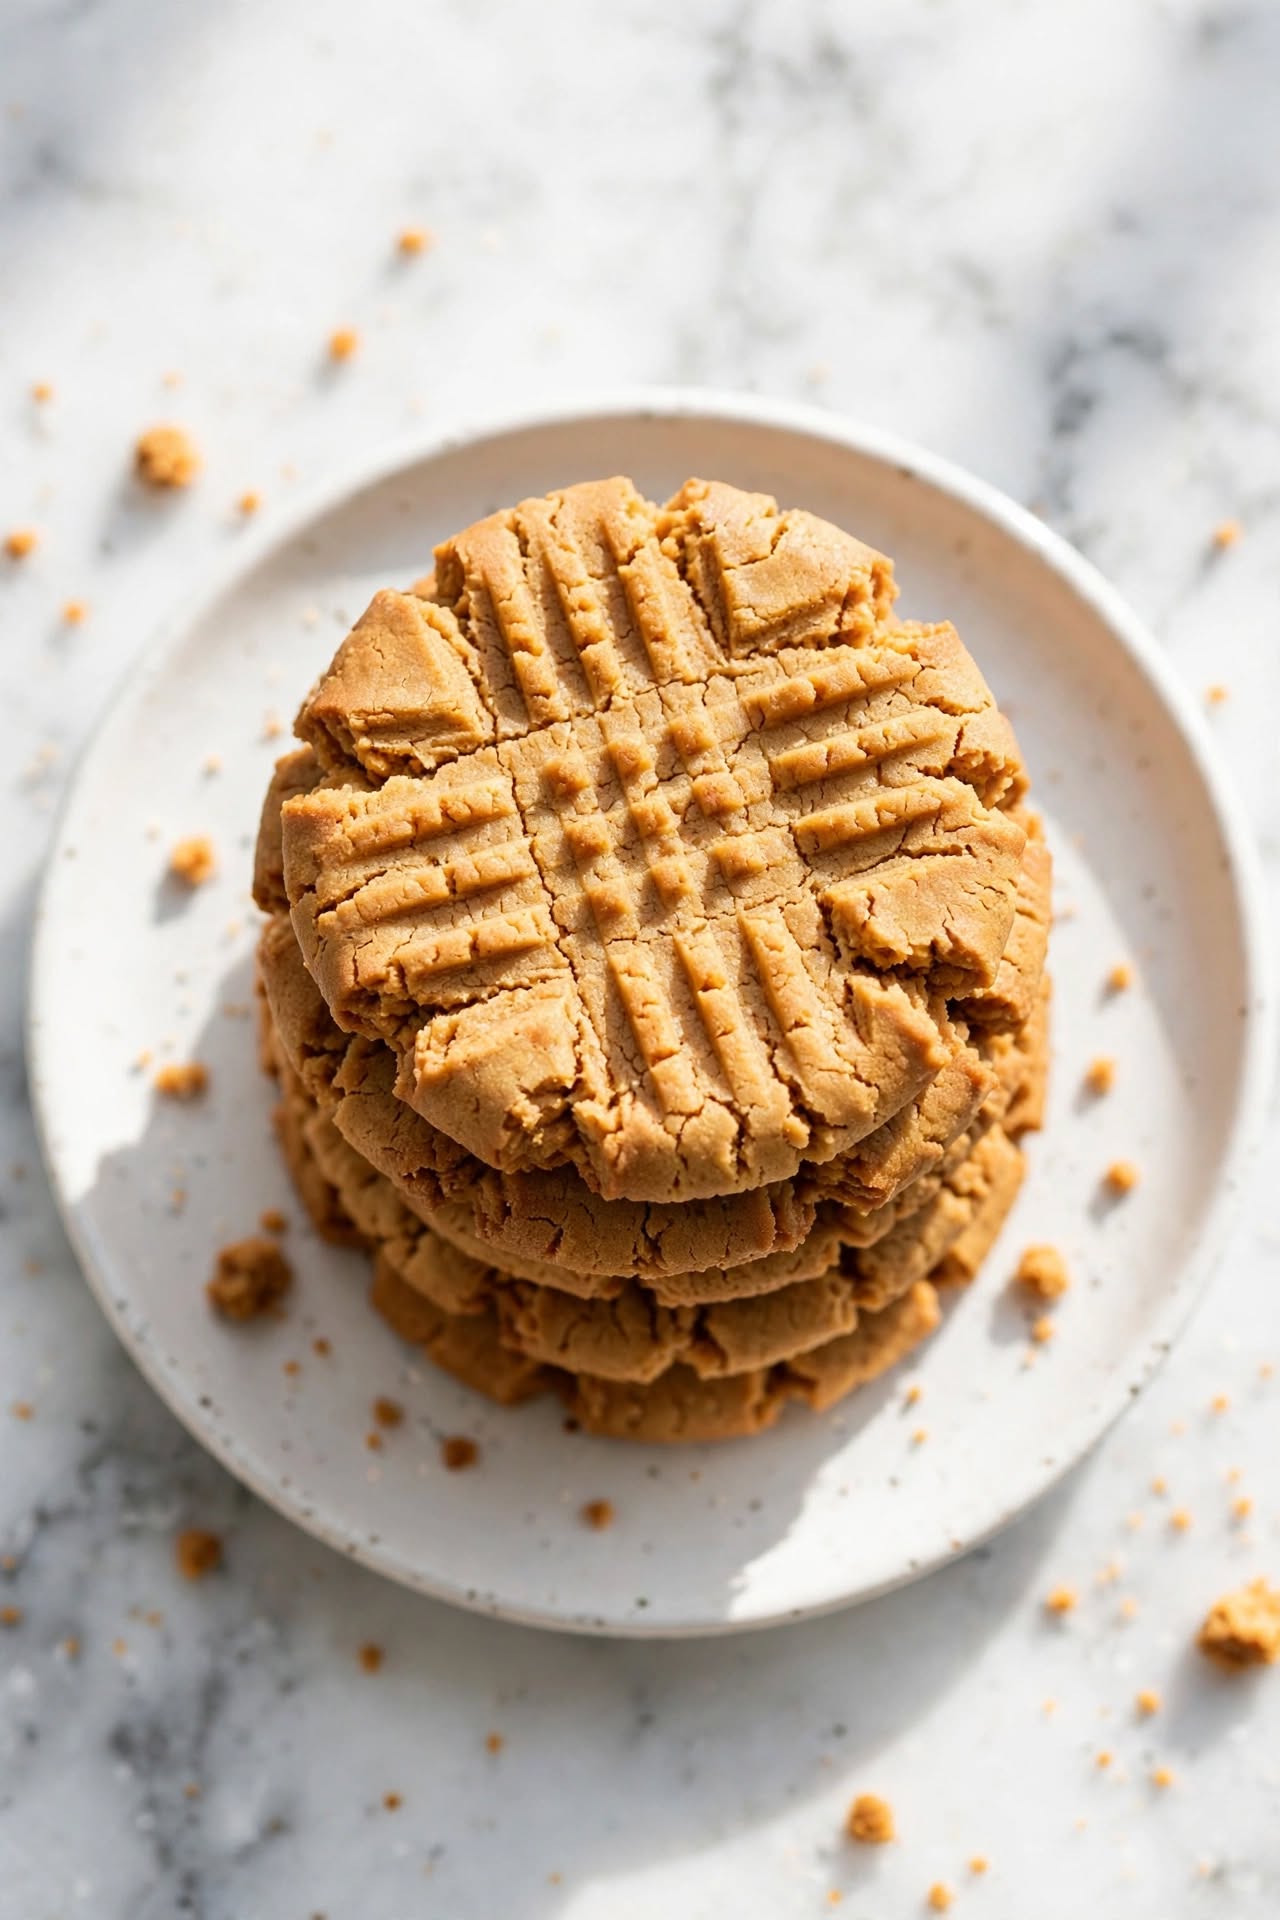
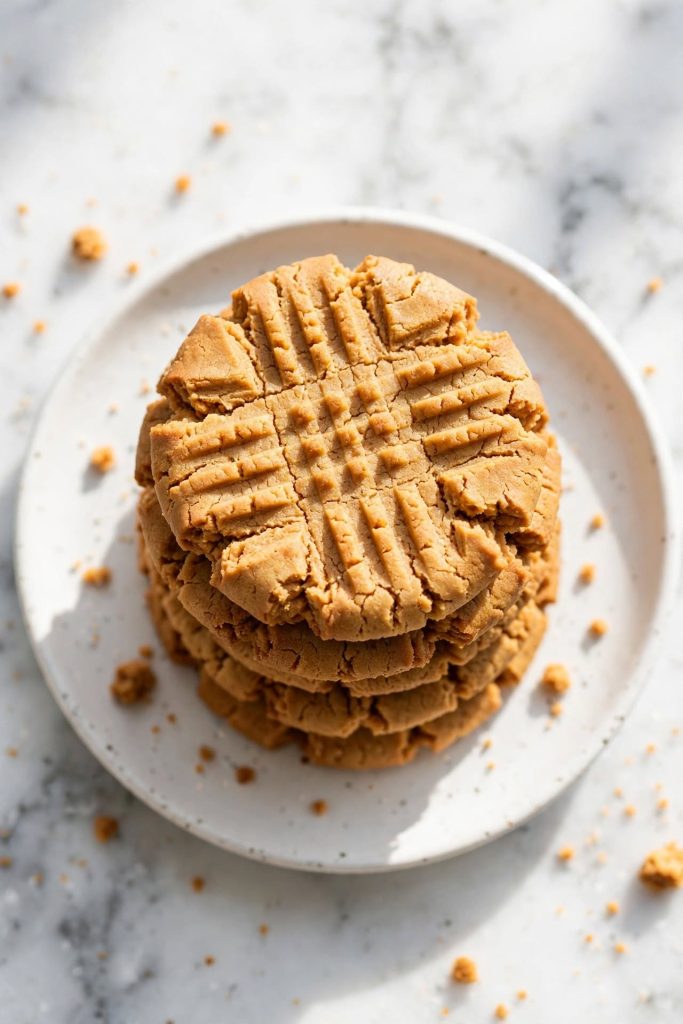
What are peanut butter cookies? Peanut butter cookies are a classic American cookie made with creamy peanut butter, butter, and a combination of white and brown sugar that produces a soft, chewy centre with lightly crisp edges. They come together in one bowl, require no chill time, and bake in 10 to 12 minutes. Best for anyone who wants a reliable, straightforward cookie with a pronounced peanut butter flavour in every bite.
These peanut butter cookies deliver a chewy centre, lightly crisp edges, and a deep peanut butter flavour that comes through in every bite. The recipe uses one bowl, 15 minutes of prep, and no chilling — you can have a full batch on the table in under 30 minutes from start to finish. If your biggest concern is cookies that go flat, turn out dry, or crumble when you pick them up, the method here addresses all three. I tested this recipe multiple times before publishing to make sure the ratios hold across different ovens and peanut butter brands.
Why These Peanut Butter Cookies Work
There are hundreds of peanut butter cookie recipes online. Most of them produce the same unremarkable result. This version is built on five specific decisions that change what comes out of the oven.
- Half butter, half peanut butter — the fat ratio keeps the cookie moist without making it greasy. Too much peanut butter and the cookie becomes dense and dry; too much butter and it spreads flat.
- Brown sugar alongside white — brown sugar contains molasses, which draws moisture from the air and keeps the crumb tender for up to five days. White sugar alone produces a crispier, drier cookie that hardens overnight.
- Baking soda plus baking powder — the combination gives you lift and spread in exactly the right amounts. Baking soda alone produces a flatter cookie; baking powder alone leaves it too thick and cakey.
- No chill time required — the fat ratio is calibrated so the dough is workable at room temperature. You can have a full batch baked and cooling within 30 minutes of starting.
- Baked at 175°C / 350°F — a moderate temperature lets the centres cook through without the edges going dark before the middle is set. Higher temperatures produce dry, crumbly cookies instead of the chewy centre you are after.
- Pulled out while they look underdone — the most important rule in this recipe. The cookies finish setting on the hot tray for 4 to 5 minutes after coming out of the oven.
🔗 IL-1 INTERNAL LINK: “If you are looking for more [easy cookie recipes], our cookie baking guide is a good place to start.” — Replace anchor text and URL before publishing.
Ingredients for Peanut Butter Cookies
Every ingredient here has a specific job. Here is what each one does — and what to use if you need to make a substitution.
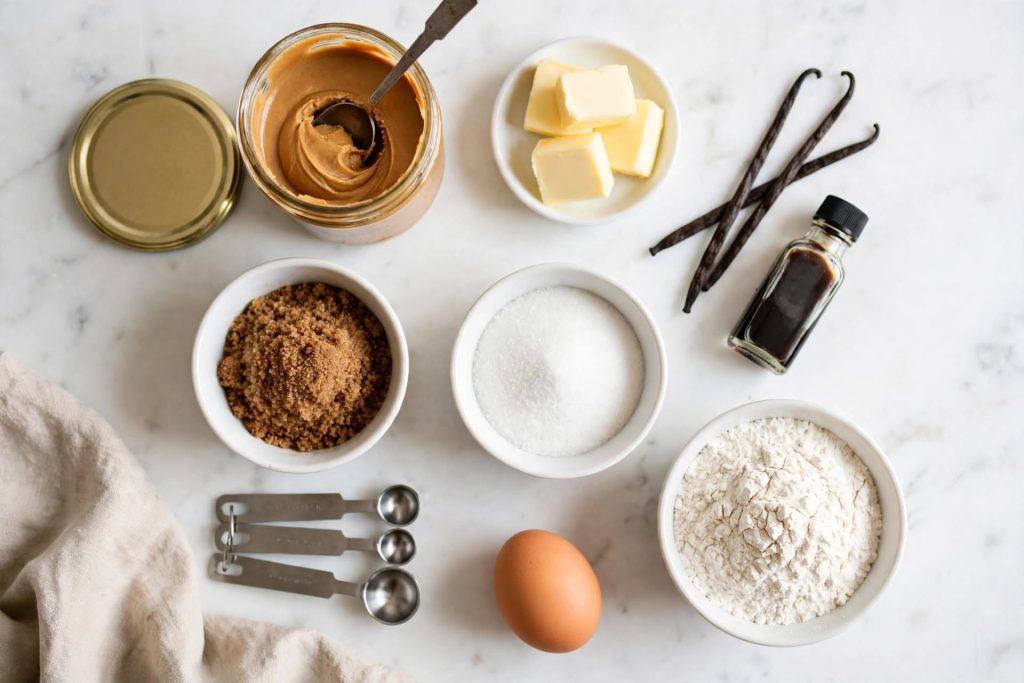
The Cookie Dough
| Ingredient | Amount | What It Does | Best Substitute + Impact |
|---|---|---|---|
| Unsalted butter, softened | 115g / ½ cup | Fat base for moisture, structure, and flavour | Salted butter — omit the added salt; result is slightly saltier |
| Creamy peanut butter | 130g / ½ cup | Primary flavour and fat source; binds the cookie | Crunchy peanut butter — works, but dough is slightly stiffer; add 1 tsp milk if needed |
| Granulated white sugar | 100g / ½ cup | Sweetens and promotes spread and crisp edges | No direct substitute in this ratio — white sugar controls spread |
| Packed light brown sugar | 100g / ½ cup | Adds moisture retention, chew, and a caramel note | Dark brown sugar — slightly stronger molasses flavour, same texture outcome |
| Egg, room temperature | 1 large | Binds the dough and adds structure to the crumb | Flax egg (1 tbsp ground flaxseed + 3 tbsp water, rested 5 min) — slightly denser |
| Vanilla extract | 1 tsp | Rounds out the peanut butter flavour; adds background warmth | Vanilla bean paste — same quantity, slightly stronger |
| All-purpose flour | 125g / 1 cup | Structure and crumb — holds the cookie together | 1:1 gluten-free flour blend — texture is slightly more crumbly |
| Baking soda | ½ tsp | Promotes spread and browning at the edges | No substitute — do not skip |
| Baking powder | ¼ tsp | Adds a small amount of lift to prevent a completely flat cookie | No substitute — do not skip |
| Salt | ¼ tsp | Balances sweetness and intensifies peanut butter flavour | N/A |
Optional Add-Ins
| Add-In | Amount | When to Add | What It Changes |
|---|---|---|---|
| Chocolate chips | 100g / ½ cup | Fold in after flour is incorporated | Adds sweetness and richness; the classic combination |
| Chopped roasted peanuts | 60g / ¼ cup | Fold in after flour is incorporated | Adds crunch and intensifies the peanut flavour |
| Granulated sugar for rolling | As needed | Roll dough balls before placing on tray | Creates a lightly sparkly, slightly crisp outer edge |
| Flaky sea salt | Pinch per cookie | Press onto top after fork pressing | Adds a salty-sweet finish that balances the peanut butter richness |
Key Ingredient Notes
Peanut butter: Use a commercial creamy brand — Jif, Skippy, or a store-brand equivalent. Natural peanut butter where the oil separates produces a greasy, inconsistent cookie that spreads unevenly. The oil in commercial brands is fully incorporated and produces a predictable result every time.
Butter: It must be soft enough to leave an indent when pressed — not melted, not cold. Cold butter does not cream properly with the sugars and you end up with a dense, poorly-risen cookie. Melted butter causes excessive spreading and a thin, flat result.
Brown sugar: Pack it into the measuring cup — don’t scoop loosely. Loosely measured brown sugar gives you significantly less moisture than the recipe requires and the cookies will be drier than expected.
Equipment You Need
- Stand mixer or electric hand mixer
- Two baking sheets lined with parchment paper
- 1½-tablespoon cookie scoop (or a tablespoon measure) for even portions
- Wire cooling rack
- Kitchen scales for accurate measurements
- A fork for the crosshatch pattern
The Peanut Butter Guide
The peanut butter you choose is the single biggest factor in how your peanut butter cookies turn out — texture, spread, flavour, and shelf life all depend on it.
| Type | Description | Use for This Recipe? |
|---|---|---|
| Commercial creamy (Jif, Skippy) | Smooth, fully emulsified, no oil separation | ✅ Best — consistent results every time |
| Commercial crunchy | Same formula as creamy but with peanut pieces | ✅ Works — adds texture; see Key Notes |
| Natural peanut butter (oil separates) | Ground peanuts only, oil rises to the top | ⚠️ Not recommended — inconsistent spread and greasy texture |
| Honey-roasted peanut butter | Sweeter, often slightly thinner | ⚠️ Use with caution — reduce white sugar by 2 tbsp to compensate |
| Powdered peanut butter (PB2) | Defatted peanut flour mixed with water | ❌ Not suitable — too dry, produces crumbly cookies |
Visual cue for the right peanut butter consistency: when you scoop it, it should hold its shape for a second before slowly spreading. If it pours off the spoon like liquid (oil not fully stirred in), stir thoroughly and rest for 5 minutes before using.
Workaround if natural peanut butter is all you have: stir the jar very thoroughly until no oil is visible at the top. Refrigerate the jar for 30 minutes before measuring — this temporarily firms the oil and makes the texture closer to commercial brands. Expect slightly more spread and a greasier surface on the finished cookie.
How to Make Peanut Butter Cookies — Step by Step
Preheat your oven before mixing — the dough is ready to bake the moment it comes together.
Step 1: Preheat Your Oven and Prepare Your Baking Sheets
Preheat your oven to 175°C / 350°F (160°C fan). Line two baking sheets with parchment paper. Do not grease the sheets — the fat in the dough is sufficient and greased sheets cause excessive spreading.
What to look for: the oven light should go off before you start mixing, confirming it has reached temperature.
Step 2: Mix the Dry Ingredients
Whisk together the flour, baking soda, baking powder, and salt in a medium bowl. Set aside. Whisking distributes the leavening agents evenly so every cookie in the batch rises the same amount.
What to look for: a pale, uniform mixture with no visible clumps of any one ingredient.
Step 3: Cream the Butter, Peanut Butter, and Sugars
Beat the softened butter and peanut butter together on medium speed for 1 minute before adding the sugars. Add both sugars and beat for a full 3 minutes — not 1, not 2. The mixture should become paler and slightly fluffy.
What to look for: the mixture should look lighter in colour than the raw peanut butter and feel slightly airy when you rub a small amount between your fingers.
Step 4: Add the Egg and Vanilla
⚠️ Critical step: Add the egg and vanilla extract together and beat for 30 seconds — no longer. Overbeating at this stage incorporates too much air and can cause the cookies to puff up and then collapse in the centre during baking.
What to look for: a smooth, glossy batter with the egg fully incorporated and no visible streaks of yolk.
Step 5: Combine Wet and Dry Ingredients
⚠️ Critical step: Add the flour mixture all at once and mix on low speed until just combined — stop the moment you no longer see dry streaks. Overmixing develops gluten and turns a soft cookie into a tough, biscuit-like one. Once you are comfortable with this dough, [our chocolate chip cookie guide] is worth trying next. [IL-2 — replace before publishing]
What to look for: a firm, slightly tacky dough that holds its shape when pressed. It should not be sticky enough to cling to your hands but should feel slightly soft to the touch.
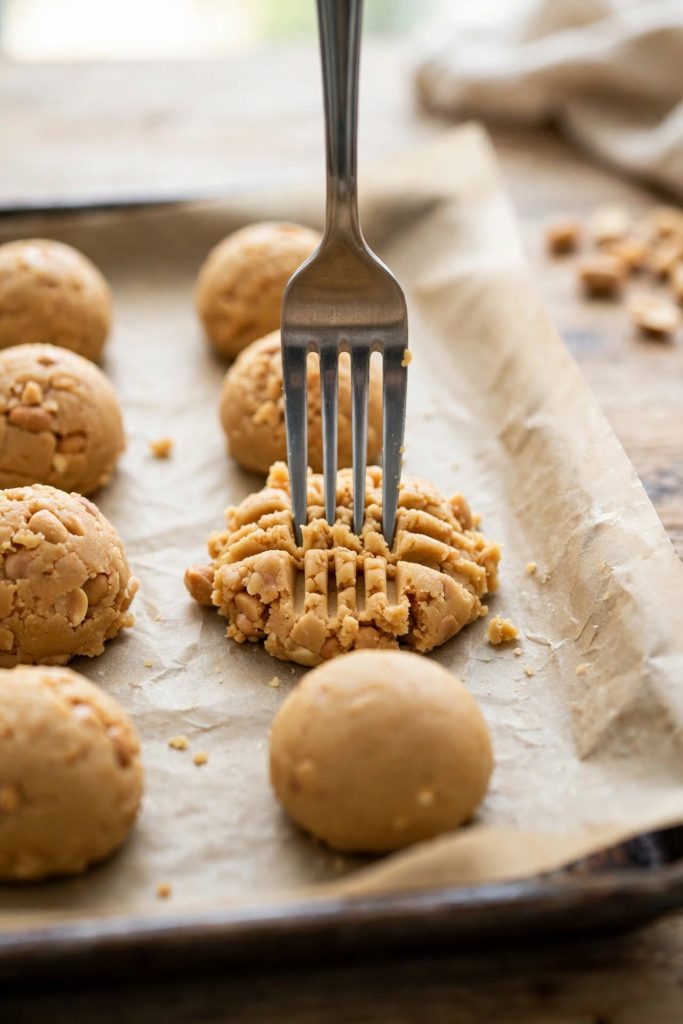
Step 6: Shape, Score, and Bake
Scoop the dough into 1½-tablespoon portions. Roll each one between your palms into a smooth ball — roll in granulated sugar if using. Place 5cm / 2 inches apart on the prepared trays. Press down with a fork in a crosshatch pattern, flattening each ball to about 1cm / ½ inch thick. Bake one tray at a time on the centre rack for 10 to 12 minutes.
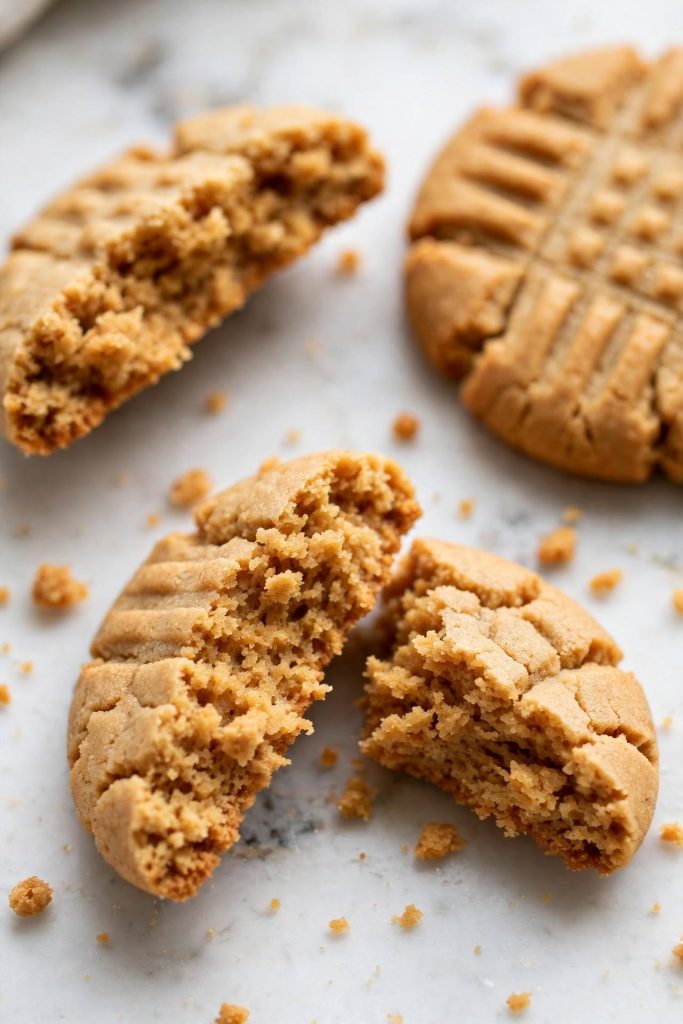
What to look for: the edges should look set and slightly golden. The centres should still look soft and slightly underdone — this is correct. Do not wait for them to look fully baked in the oven.
Step 7: Cool on the Tray
Leave the cookies on the hot baking sheet for 5 minutes after pulling them from the oven — this is where they finish setting. Transferring them to a wire rack too soon causes them to break apart. After 5 minutes, the edges will have firmed enough to move them safely.
What to look for: after 5 minutes on the tray, the cookies should feel set at the edges and the centre should still feel slightly soft when pressed very gently. That softness firms up as they cool fully on the rack — roughly 15 more minutes.
The Science Behind a Chewy, Tender Cookie
Each ingredient decision in this recipe has a specific mechanical reason. Understanding the why makes it easier to troubleshoot — and to adjust confidently when you want a different result.
Why Brown Sugar Over White Sugar
Brown sugar contains molasses — a hygroscopic substance, meaning it actively draws moisture from the surrounding air. When you add brown sugar to a cookie, the baked result retains more moisture over time than a white-sugar-only cookie would. That retained moisture is what keeps a chewy peanut butter cookie soft on day three instead of dry and crumbly. The 50/50 ratio in this recipe gives you the chew from brown sugar while the white sugar promotes the spread and the lightly crisp edge that defines a well-baked peanut butter cookie.
Why Creamy Peanut Butter Works Better Than Natural
Commercial peanut butter contains fully hydrogenated vegetable oils that keep the fat and solids permanently emulsified — meaning the oil stays mixed in regardless of temperature. Natural peanut butter does not have those stabilisers, so when you cream it with butter and sugar, the oil can separate from the solids during baking and pool at the edges of the cookie. The result is a greasy, unevenly-spread cookie with a different texture in the centre than at the edge. For a consistent batch where every cookie looks and tastes the same, commercial creamy is the right choice.
Why the Fork Pattern Matters More Than You Think
Pressing the dough balls flat with a fork does two things. First, it controls the spread — a dough ball baked without pressing will spread unpredictably and unevenly as the fat melts. Pressing to a consistent 1cm thickness gives every cookie the same surface area and the same bake time. Second, the tine marks increase the surface area of the cookie slightly, which gives you more of the lightly browned edge that creates the subtle crispness against the chewy centre. It is not decorative — it is functional.
Tips for the Best Results
Do Not Skip the Fork Press
Baking the dough as a ball produces a thick, cakey cookie that does not brown evenly at the edges. The fork press flattens the dough to the right thickness and creates the crosshatch pattern that is as functional as it is traditional. Press firmly enough that the tines leave clear marks — a light press that barely touches the surface is not enough to flatten the dough properly.
Bake on the Centre Rack Only
The centre rack is the sweet spot where heat circulates evenly from both the top and bottom elements. The bottom rack places cookies too close to the lower element — the bases brown and dry out before the centres are set. The top rack pushes them too close to the upper element, which can cause the tops to colour too quickly. Centre rack, one tray at a time, every time.
Pull Them Out While They Look Underdone
This is the single most important tip in the entire recipe. A peanut butter cookie that looks perfectly baked when you open the oven door will be dry and slightly hard by the time it has cooled. Pull them when the edges look set and golden and the centres still look soft and pale — the residual heat from the tray finishes the job. You will have perfectly chewy peanut butter cookies every time.
Use a Cookie Scoop for Even Baking
Hand-rolled portions are rarely identical — a difference of even 5g per cookie changes the bake time enough to produce unevenly baked batches where some cookies are perfect and others are overdone. A 1½-tablespoon cookie scoop (also called a #40 scoop) portions the dough consistently every time and makes the rolling process significantly faster.
Space Them Far Enough Apart
Place cookie dough balls at least 5cm / 2 inches apart on the tray. Even though peanut butter cookie dough is firmer than most, the fat still melts during baking and the cookies spread by roughly 2 to 3cm / 1 inch in each direction. Spacing them too close together causes them to merge at the edges — you end up with connected cookies that are difficult to separate cleanly.
Let Them Cool Completely Before Moving
Five minutes on the hot tray, then transfer to a wire rack. But do not rush the rack stage either — a warm peanut butter cookie is significantly softer and more fragile than a cooled one. Allow at least 15 minutes on the rack before stacking or storing them. Stacking warm cookies causes them to compress and stick together, and the bottoms become damp from trapped steam.
Common Mistakes to Avoid
These are the six errors that consistently produce disappointing peanut butter cookies even when the rest of the recipe is followed correctly.
❌ Using Natural Peanut Butter
Natural peanut butter where the oil separates produces a greasy, inconsistently-spread cookie that often looks oily on the surface after baking. The unstabilised oil seeps out of the cookie during baking and pools at the edges — a visual and textural problem that commercial brands avoid entirely. For more guides like this one, [our baking ingredient guide] covers every substitution in the same detail. [IL-3 — replace before publishing]
❌ Overmixing After Adding the Flour
Once the flour goes in, every additional second of mixing develops more gluten — and more gluten means a tougher, denser cookie. Mix on low speed and stop the moment the flour disappears. The dough should look just combined — if you can see any streaks of flour still, give it three or four more folds with a spatula rather than turning the mixer back on.
❌ Baking Until They Look Done in the Oven
A cookie that looks perfectly baked when you open the oven at the 12-minute mark has already overbaked. The internal temperature continues to rise on the hot tray after you pull them — this is called carry-over baking. A cookie pulled at the right moment looks underdone in the centre but emerges from those 5 minutes on the tray with a soft, chewy interior.
❌ Skipping Room-Temperature Butter
Cold butter does not cream properly with peanut butter and sugar — the mixture stays lumpy and dense rather than becoming smooth and aerated. Melted butter goes to the opposite extreme: it produces a flat, greasy cookie with no structure. The ideal butter is soft enough to leave a clear fingerprint when pressed but holds its shape — roughly 20°C / 68°F.
❌ Using Only White Sugar
White-sugar-only peanut butter cookies are crispier and drier than the soft, chewy result most people are looking for. White sugar also lacks the caramel depth that brown sugar adds to the flavour. The 50/50 ratio in this recipe is the balance point — enough white sugar for spread and edge crispness, enough brown sugar for chew and moisture retention.
❌ Making Them Too Thick or Too Thin
Pressing to 1cm / ½ inch thickness is the target. Too thick and the outside overbakes before the centre reaches the right temperature — you end up with dark edges and a raw-feeling centre. Too thin and the cookie dries out entirely during baking with nothing left to be chewy. Use the fork press consistently for every cookie in the batch.
Variations Worth Trying
Chocolate Chip Peanut Butter Cookies
What changes: Fold 100g / ½ cup of semi-sweet chocolate chips into the dough after the flour is fully incorporated.
When: After Step 5, before shaping.
Result: The classic combination — the bittersweet chocolate against the sweet, salty peanut butter is one of the most well-balanced flavour pairings in baking. Press an extra chip onto the top of each ball before baking for a bakery-style finish.
Peanut Butter Blossoms
What changes: Roll dough balls in granulated sugar before baking. As soon as they come out of the oven, press a Hershey’s Kiss or chocolate truffle into the centre of each cookie.
When: At the shaping stage, and immediately after pulling from the oven.
Result: One of the most recognisable holiday cookies — the warm cookie softens slightly around the chocolate centre as it cools, creating a cratered look and a fudgy centre point.
Flourless Peanut Butter Cookies
What changes: Replace the entire recipe with: 250g / 1 cup creamy peanut butter, 200g / 1 cup granulated sugar, 1 large egg, and 1 tsp vanilla extract. No butter, no flour, no leavening.
When: This is a different recipe entirely — not a modification of the base recipe.
Result: A denser, fudgier cookie with a firmer texture that is naturally gluten-free. Bake at 175°C / 350°F for 8 to 10 minutes. The edges crisp up quickly — do not overbake.
Double Peanut Butter Cookies
What changes: Increase the peanut butter to 200g / ¾ cup and fold in 60g / ¼ cup of chopped roasted peanuts with the flour. Reduce butter by 30g / 2 tbsp to compensate for the extra fat.
When: At the creaming stage (extra PB) and after the flour stage (chopped peanuts).
Result: A more intensely peanut-flavoured cookie with textural crunch from the peanut pieces. The flavour is noticeably stronger and nuttier — ideal for true peanut butter enthusiasts.
Chunky Peanut Butter Cookies
What changes: Use crunchy peanut butter instead of creamy in the same quantity. If the dough seems dry or stiff, add 1 teaspoon of whole milk and mix briefly.
When: Swap at the peanut butter measurement stage — no other change needed.
Result: Identical to the base recipe in shape and bake time, but with visible peanut pieces throughout the crumb. The texture is slightly coarser and the peanut flavour reads as more rustic and less smooth.
How to Store
Room Temperature
Peanut butter cookies keep for best quality for up to 5 days at room temperature in an airtight container. Store in a single layer or separate layers with parchment paper between them — stacking cookies without separation causes them to stick together and the crosshatch pattern to compress.
A slice of white bread placed in the container absorbs excess moisture and keeps the cookies from drying out — replace the bread daily if storing for more than two days.
Refrigerator
Baked cookies keep for best quality for up to 10 days in the refrigerator in an airtight container. The cold environment slightly firms the texture — bring to room temperature for 15 to 20 minutes before serving for the best chew.
Unbaked dough keeps for up to 3 days refrigerated, tightly wrapped in cling film. Chilling the dough actually improves the flavour — the peanut butter intensifies overnight. Bake straight from the fridge, adding 1 to 2 minutes to the bake time.
Freezer — Complete Guide
Can you freeze peanut butter cookies? Yes — both baked cookies and unbaked dough freeze exceptionally well.
To freeze baked cookies: cool completely, then arrange in a single layer in a zip-lock bag or airtight container. Best quality for up to 3 months. Safe beyond this window but texture and flavour begin to decline.
To freeze unbaked dough: portion the dough into balls using your cookie scoop, place on a parchment-lined tray, and freeze uncovered for 1 hour until firm. Transfer to a zip-lock bag. Best quality for up to 3 months.
To bake from frozen: place frozen dough balls directly onto a prepared baking sheet — no thawing required. Add 2 to 3 minutes to the bake time. Press with a fork immediately before baking — frozen dough is firm enough to handle.
To thaw baked cookies: move to the counter for 15 to 20 minutes at room temperature. Do not microwave — it makes the texture uneven and can make the edges tough.
Use your judgment — if cookies smell rancid (peanut oil can go off in the freezer after extended storage) or show freezer burn, discard them.
🔗 IL-4 INTERNAL LINK: “If batch baking and freezing ahead is something you enjoy, [our make-ahead baking guide] fits perfectly into that routine.” — Replace before publishing.
How to Serve
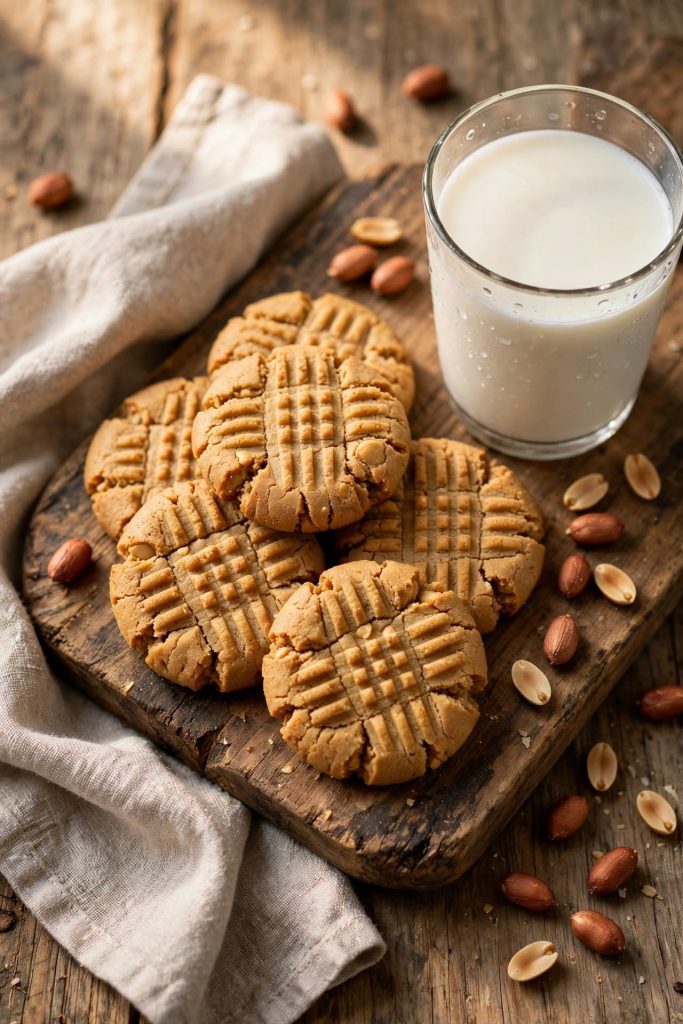
Classic Ways to Serve
- Warm from the tray with a cold glass of whole milk — the contrast of warm, soft cookie against cold milk is the benchmark serving method
- At room temperature on a cookie platter for parties — they hold their shape at room temperature for hours without becoming stiff or crumbling
- Packed individually in cellophane bags tied with ribbon for gifting — the classic crosshatch pattern makes them recognisable without any labelling
Upgraded and Occasion-Worthy
- Sandwich two cookies with a scoop of vanilla ice cream — the soft texture means the cookie does not shatter when you bite into the sandwich
- Crumble over vanilla yoghurt or ice cream as a topping in place of granola — the peanut butter flavour pairs well with both
- Press a chocolate square or truffle onto the top of a warm cookie straight from the oven and allow it to partially melt — a simplified version of a peanut butter blossom that works with any chocolate you have on hand
Pairs well with: cold milk, black coffee, hot chocolate, vanilla ice cream, or a drizzle of melted dark chocolate.
Best occasions: school bake sales, holiday cookie exchanges, gifting, potlucks, after-school snacks, and any event where a crowd-pleasing, recognisable cookie is the right call.
Frequently Asked Questions
Can I make peanut butter cookies without flour?
Yes. A flourless version uses just 1 cup creamy peanut butter, 1 cup sugar, and 1 egg — no flour, no butter. The texture is denser and more fudgy than a traditional cookie and the edges crisp up more quickly during baking. Bake at 175°C / 350°F for 8 to 10 minutes and do not overbake — they firm up significantly as they cool on the tray.
Why did my peanut butter cookies turn out dry?
Dry peanut butter cookies are almost always the result of overbaking or too much flour. Pull the cookies from the oven while they still look slightly underdone at the centre — they continue to bake on the tray for 3 to 4 minutes after coming out of the oven. If your cookies are consistently dry, reduce your bake time by 1 to 2 minutes next time and check that your flour is measured by weight rather than cup.
How do I know when peanut butter cookies are done?
Pull them when the edges look set and slightly golden and the centres still look soft — not raw, but not fully dry either. They should feel soft when pressed very gently at the centre. The cookies firm up as they cool on the hot tray. Start checking at 10 minutes regardless of your oven’s stated temperature, as all ovens vary.
Can I make the dough ahead of time?
Yes. The dough keeps in the refrigerator for up to 3 days or in the freezer for up to 3 months, wrapped tightly in cling film. Chilling actually improves the flavour — the peanut butter intensifies overnight. Bake straight from the fridge, adding 1 to 2 extra minutes to the bake time. The fork press is easier to do on cold dough because it holds its shape better.
How long do peanut butter cookies last?
Peanut butter cookies keep for best quality for up to 5 days at room temperature in an airtight container, or up to 10 days refrigerated. The soft, chewy centre holds well for the first 3 days at room temperature — after that the cookies dry out slightly. If you enjoyed these, [our oatmeal raisin cookies] are the next ones worth making. [IL-5 — replace before publishing]
Can I freeze peanut butter cookies?
Yes — both baked cookies and unbaked dough balls freeze well for up to 3 months. Baked cookies should be fully cooled before freezing. Unbaked dough balls go straight from the freezer to the oven — add 2 to 3 minutes to the bake time and press with a fork immediately before baking.
What can I substitute for eggs?
Replace the egg with a flax egg: 1 tablespoon of ground flaxseed combined with 3 tablespoons of water, rested for 5 minutes until it forms a gel. The cookies will be slightly denser and a little less chewy but still hold their shape and flavour well. A mashed banana (about 60g / ¼ cup) also works and adds a subtle fruity note.
Can I double this recipe?
Yes. Double every ingredient and bake in batches — one tray at a time on the centre rack gives the most even results. Do not bake two trays at once unless your oven is large and well-calibrated, as the heat distribution shifts and one tray will overbake before the other is ready. Doubled dough keeps in the refrigerator for 3 days if you want to spread the baking across two sessions.
Why did my peanut butter cookies go flat?
Flat cookies are most often caused by butter that was too warm or melted, a baking sheet that was still hot from a previous batch, or too much sugar relative to flour. Make sure your butter is soft but not melted, let your baking sheet cool completely between batches, and if your kitchen is warm (above 24°C / 75°F), chill the dough for 20 minutes before baking.
What is the best peanut butter to use?
Use a commercial creamy peanut butter such as Jif, Skippy, or a comparable store brand. These contain stabilisers that keep the oil and solids permanently mixed, which produces a consistent cookie texture every time. Natural peanut butter where the oil separates produces a greasier, less structured cookie that spreads unevenly and can look oily on the surface after baking.
Do I need to chill the dough?
No — this recipe does not require chilling. The dough is firm enough to scoop and roll immediately at room temperature. However, chilling for 30 minutes to 1 hour intensifies the peanut butter flavour and helps the cookies spread slightly less if you prefer a thicker result. It is a useful option, not a requirement.
Can I use crunchy peanut butter?
Yes, with one small adjustment. Use the same quantity of crunchy peanut butter. The dough may feel marginally stiffer — if it seems dry, add 1 teaspoon of milk and mix again. The finished cookies will have visible peanut pieces throughout the crumb and a coarser texture overall. The flavour is more intensely nutty, which many people prefer.

Peanut Butter Cookies
Ingredients
Method
- Preheat oven to 175°C / 350°F (160°C fan). Line two baking sheets with parchment paper. Do not grease.
- Whisk flour, baking soda, baking powder, and salt together in a medium bowl. Set aside.
- Beat softened butter and peanut butter together on medium speed for 1 minute. Add both sugars and beat for a full 3 minutes until the mixture is pale and slightly fluffy.
- Add the egg and vanilla extract together. Beat for 30 seconds until fully incorporated.
- Add the flour mixture all at once. Mix on low speed until just combined — stop the moment you no longer see dry streaks.
- Scoop dough into 1½-tablespoon balls. Roll between palms until smooth, then roll in granulated sugar if using. Place 5cm / 2 inches apart on the prepared trays. Press each ball flat with a fork in a crosshatch pattern to about 1cm / ½ inch thick.
- Bake one tray at a time on the centre rack for 10 to 12 minutes. The edges should look set and the centres should still look slightly underdone.
- Cool on the baking sheet for 5 minutes, then transfer to a wire rack to cool completely.
Notes
- Peanut butter: Use a commercial creamy brand — not natural/oil-separation type. See The Peanut Butter Guide above for full details.
- Flour measurement: Measure by weight for best results. If using cups, spoon flour into the cup and level off — do not scoop directly.
- Flat cookies? Your butter was likely too warm. Chill the dough for 20 minutes and try again.
- Dry cookies? Reduce bake time by 1 to 2 minutes — they finish setting on the hot tray.
- Make ahead: Dough keeps refrigerated for 3 days or frozen for 3 months. Bake frozen dough balls directly — add 2 to 3 minutes.
More Cookie Recipes You Will Love
- Classic Chocolate Chip Cookies — the same brown-butter technique and 50/50 sugar ratio that makes these soft, chewy, and bakery-quality every time.
- Oatmeal Raisin Cookies — thick, chewy, and loaded with cinnamon spice; a crowd-pleaser at bake sales and cookie exchanges.
- Snickerdoodles — cinnamon-sugar coated cookies with the same soft, pillowy centre; one of the quickest cookies to make from scratch.
- No-Bake Peanut Butter Bars — for when you want the peanut butter flavour without turning the oven on; they set in the fridge in under an hour.
Did you make these peanut butter cookies? Leave a ⭐⭐⭐⭐⭐ rating below and let me know in the comments how they turned out. I read every comment and would love to know what worked for you.