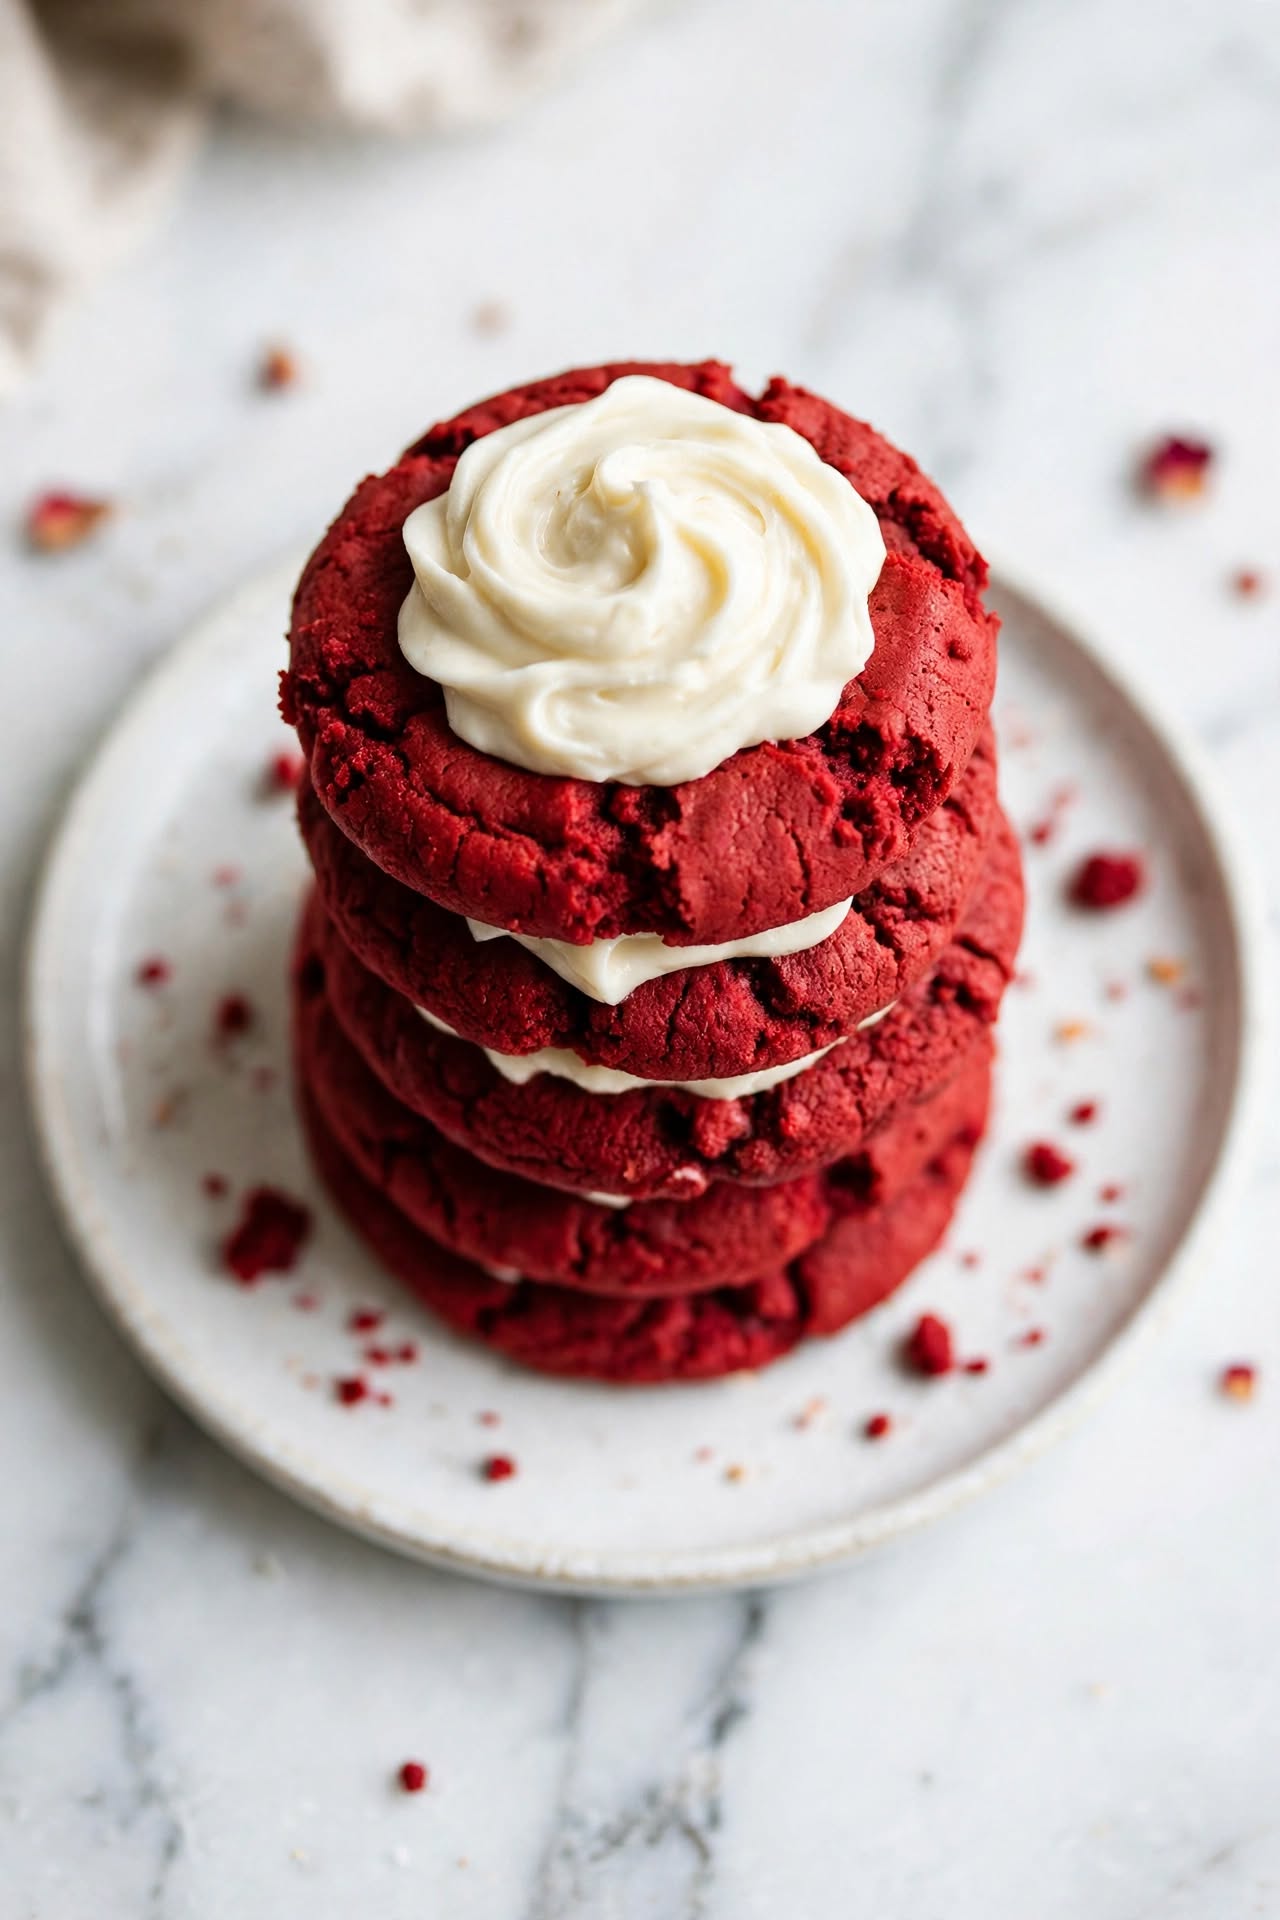
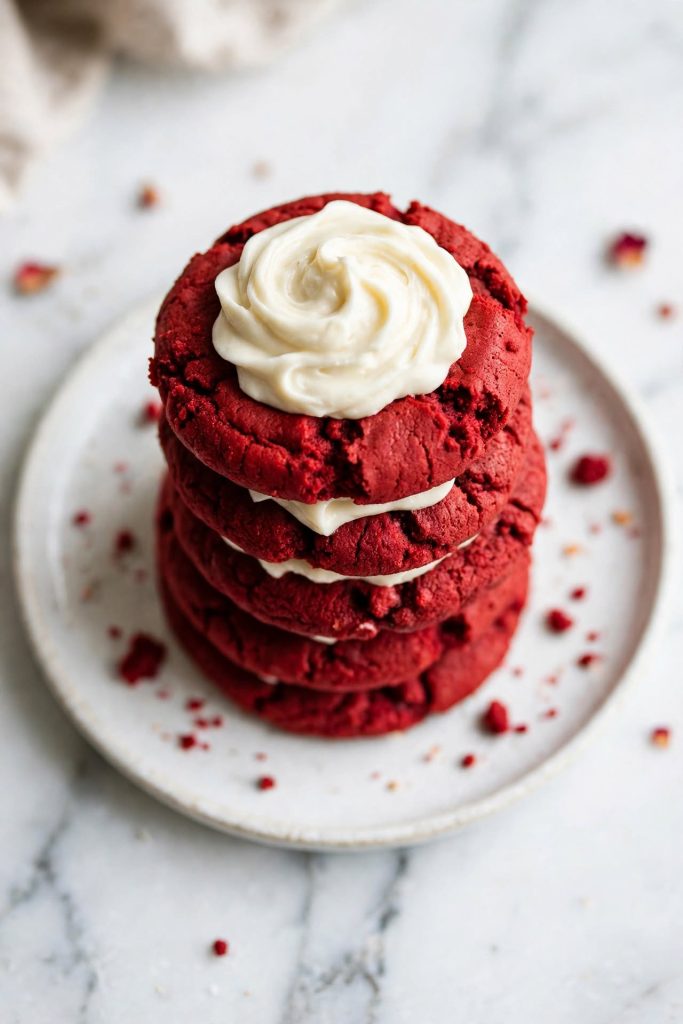
Red velvet cookies are thick, fudgy drop cookies made with a small amount of cocoa powder, red food colouring, and a touch of white wine vinegar that gives the batter its characteristic tang. They bake in 10 to 11 minutes at moderate heat and are typically finished with a cream cheese frosting swirl. Total prep is under 20 minutes. Best for anyone who wants the visual drama of red velvet in a handheld cookie format that travels and gifts well.
This red velvet cookies recipe gives you thick, fudgy cookies with a brilliant crimson colour, a soft chewy centre, and just enough cocoa flavour to taste distinctly red velvet rather than chocolate. One bowl, 20 minutes of prep, and a 30-minute chill that prevents flat spread. The most common problem with red velvet cookies is either a cakey, dry result or a cookie that bakes brown instead of red — and this recipe addresses both, with the right cocoa ratio and gel colouring technique. I tested this recipe 5 times with different flour and fat ratios before publishing — the version here is the one that gave me consistent thickness and a vivid red colour every single time.
Why This Recipe Works
Most red velvet cookie recipes either bake brown instead of red, come out cakey and dry, or spread flat and lose that thick fudgy quality. This one is built around the three variables that control all three problems — and here is exactly why it holds up:
- Dutch-process cocoa, not natural cocoa. — Dutch-process cocoa is alkaline-treated, which reduces its acidity. Less acidity means the red food colouring stays vivid through the bake. Natural cocoa is acidic and competes with the colouring, turning the cookie a brownish-purple rather than a clean red.
- Gel food colouring, not liquid. — Gel colouring delivers the same vivid red at one teaspoon that liquid colouring struggles to achieve at three to four teaspoons. Less liquid in the dough means better structure and a fudgier, denser result.
- Egg plus egg yolk, not two whole eggs. — One whole egg provides structure; the extra yolk adds fat and richness without the extra white, which creates lift and pushes the texture toward cakey. The result is a dense, fudgy interior rather than a soft sponge.
- White wine vinegar for authenticity. — A teaspoon of white wine vinegar reacts with the bicarbonate of soda to give a subtle tang — the defining flavour note of red velvet that separates it from a plain chocolate cookie.
- 30-minute dough chill. — Chilling firms the butter after creaming and prevents the dough from spreading flat before the edges have a chance to set. This is the single biggest factor in getting a thick, tall cookie.
- Make ahead in batches. — The dough keeps refrigerated for up to 3 days and frozen as balls for up to 3 months — you can bake a fresh tray whenever you need them.
If you are building a cookie repertoire, classic American cookie recipes are a strong starting point once you have this one down.
Ingredients for Red Velvet Cookies
Every ingredient here has a specific job. Here is what each one does — and what to use if you need to make a substitution.
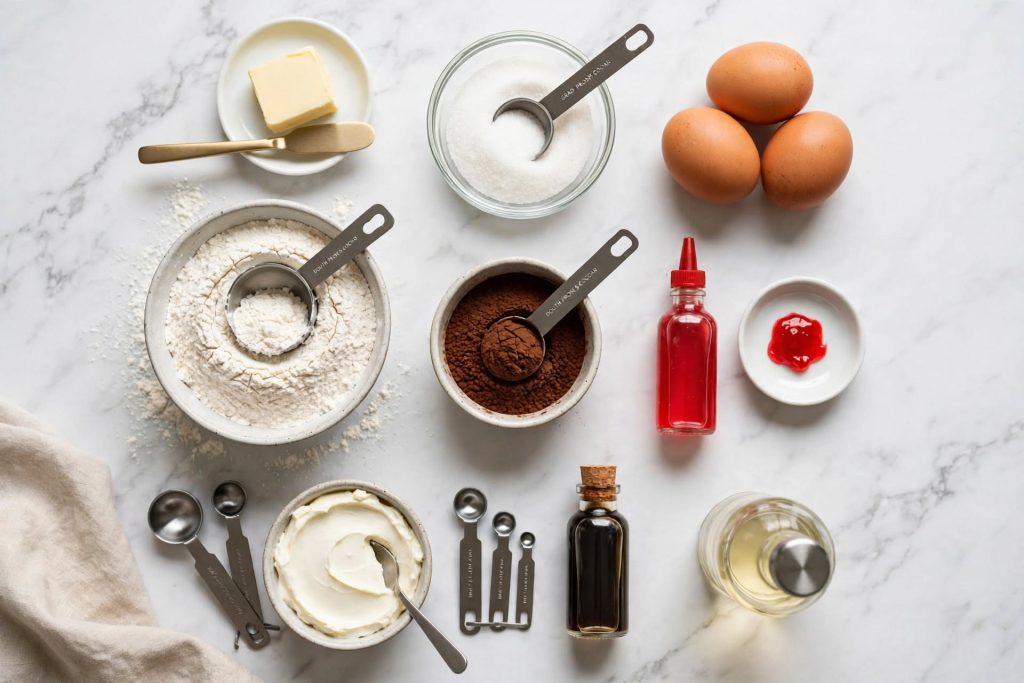
The Cookie Dough Base
| Ingredient | Amount | What It Does | Best Substitute + Impact |
|---|---|---|---|
| Unsalted butter, room temperature | 225g | Creamed to incorporate air and provide the fat base for spread control and flavour | Salted butter — omit added salt; vegan butter block — works at 1:1, chill dough 45 mins |
| White granulated sugar | 200g | Creates crisp edges and helps the cookies spread to the right diameter | Caster sugar at 1:1 — finer grain, slightly crispier edges |
| Light brown sugar, packed | 100g | Molasses adds chew and moisture retention; keeps the crumb soft for days | Dark brown sugar at 1:1 — more molasses depth, slightly stickier crumb |
| Large egg plus 1 egg yolk | 1 + 1 yolk | Whole egg provides structure; extra yolk adds fat for fudgy interior without lift from extra white | 2 whole eggs — slightly cakier, more lift; flax egg for vegan (denser) |
| Pure vanilla extract | 2 tsp | Rounds the cocoa and red colouring flavour notes; essential for the classic red velvet taste | Vanilla bean paste at 1:1; imitation vanilla at 1.5x |
| Red gel food colouring | 1 tsp | Vivid red colour at low volume — does not add liquid or alter dough consistency | Liquid colouring at 3–4 tsp — thins the dough slightly; beetroot powder 1 tbsp for natural colour |
| White wine vinegar | 1 tsp | Reacts with bicarbonate of soda for tang; the defining flavour note of red velvet | Apple cider vinegar at 1:1 — slightly fruitier; lemon juice at 1:1 — works but less depth |
| Plain flour | 250g | Structure — keeps the cookie thick and cleanly shaped rather than crumbly or too dense | GF plain flour blend at 1:1 + ½ tsp xanthan gum — slightly more crumbly |
| Dutch-process cocoa powder | 15g (2 tbsp) | Subtle chocolate flavour and the reddish-brown base tone; alkaline-treated so it does not fight the red colouring | Natural cocoa at 1:1 — more acidic, will dull the red colour; add ¼ tsp extra bicarbonate |
| Baking powder | 1 tsp | Moderate lift — gives the cookies height without making them cakey | Bicarbonate of soda only at ½ tsp — less neutral lift, slightly denser |
| Bicarbonate of soda | ½ tsp | Reacts with the vinegar for tang and helps spread; creates a slightly chewier, crispier edge | Omit — cookies will be slightly puffier and less tangy |
| Fine sea salt | ½ tsp | Balances sweetness and amplifies every other flavour in the cookie | Table salt at ¼ tsp — smaller grain, more salty per measure |
| White chocolate chips (optional) | 150g | Visual contrast against the red base; creamy sweetness complements the cocoa tang | Dark chocolate chips — richer, less sweet contrast; omit entirely for a plain cookie |
The Cream Cheese Frosting
| Ingredient | Amount | What It Does | Best Substitute + Impact |
|---|---|---|---|
| Full-fat cream cheese, room temperature | 115g | The defining flavour note — tangy, rich, and dense enough to hold its shape when piped | Mascarpone at 1:1 — less tangy, creamier; vegan cream cheese at 1:1 — slightly softer |
| Icing sugar, sifted | 180g | Sweetness and structure — sifting prevents lumps in the finished frosting | Reduce to 150g for a less sweet frosting — slightly softer set |
| Pure vanilla extract | ½ tsp | Rounds the cream cheese tang and completes the classic red velvet flavour pairing | Omit — the frosting will taste more plainly tangy without it |
| Fine sea salt | Pinch | Balances the sweetness of the icing sugar against the tang of the cream cheese | Omit — frosting will taste slightly flat and uniformly sweet |
Key Ingredient Notes
Butter temperature: For creaming, butter must be at room temperature — not soft, not melted. Room-temperature butter holds air when creamed against sugar, which is what gives you a thick, structured cookie dough. If your butter is too cold it will not cream properly and the dough will look lumpy. If it is too warm it will melt into the sugar rather than trapping air. The correct temperature is around 18 to 20°C — the butter should indent easily when pressed but not feel greasy or slick.
Cream cheese temperature: For the frosting, cream cheese must also be at room temperature. Cold cream cheese lumps and will not beat smooth regardless of how long you mix it. Take it out of the refrigerator 30 minutes before making the frosting.
Dutch-process cocoa vs natural cocoa: This is not interchangeable. Natural cocoa is acidic (pH 5 to 6) and will react with the red food colouring to create a brownish-purple tint rather than a vivid red. Dutch-process cocoa is alkaline-treated (pH 7 to 8) and does not interfere with the colour. The difference is visible — and it is why most homemade red velvet recipes come out brown.
Equipment You Need
- Stand mixer or hand mixer — creaming butter and sugar properly requires 3 full minutes of beating; a hand whisk will not achieve the same result.
- 2-tablespoon cookie scoop — consistent sizing means consistent baking times and a uniform appearance across the tray.
- Two flat baking trays — lined with parchment paper; avoid dark non-stick pans, which absorb too much heat and overbrown the bottoms.
- Piping bag with a round tip — for the cream cheese frosting swirl; a zip-lock bag with the corner snipped works as a substitute.
- Wire cooling rack — essential for cooling the cookies completely before frosting; frosting warm cookies melts and runs.
The Red Velvet Colour Guide
The colour of your red velvet cookies is the single biggest visual factor — and the single most common point of failure. Here is what each colouring option produces and when to use it:
| Colouring Type | What It Produces | Use for This Recipe? |
|---|---|---|
| Red gel food colouring | Vivid, stable crimson red; does not thin the dough; 1 tsp is sufficient | ✅ Best — the standard choice for all red velvet baking |
| Red liquid food colouring | Paler red; requires 3–4 tsp to match gel intensity; slightly thins the dough | ⚠️ Works — reduce other liquids by 1 tsp to compensate |
| Beetroot powder | Earthy pink-red; muted, natural colour; flavour is barely detectable after baking | ⚠️ Works for a natural version — use 1 tbsp + 1 tsp water; expect a softer red |
| Natural cocoa powder (excess) | Brown-purple tint; fights the red colouring; loses the red velvet visual entirely | ❌ Avoid — use Dutch-process and keep cocoa at 2 tablespoons maximum |
| No colouring added | Brown cookie with subtle red undertone from the cocoa-vinegar reaction | ⚠️ Works if colour does not matter — same flavour, no visual drama |
Why gel colouring stays vivid after baking: Gel food colouring contains a higher concentration of colour pigment in a thickened base. Because there is less water in the colouring itself, the pigment does not dilute out during baking the way liquid colouring does. The result is a cookie that looks as red coming out of the oven as it did going in.
What over-coloured dough looks like: The raw dough should be a deep, vivid red — almost burgundy. If it looks pink, you need more colouring. If it smells strongly of artificial colouring, you have used too much — the flavour will be detectable. One teaspoon of a quality gel colouring should be the correct amount.
How to Make Red Velvet Cookies — Step by Step
Follow these steps in order. The one rule that matters most: do not skip the 30-minute chill — this is what keeps your cookies thick rather than flat.
Step 1 — Cream the Butter and Sugars
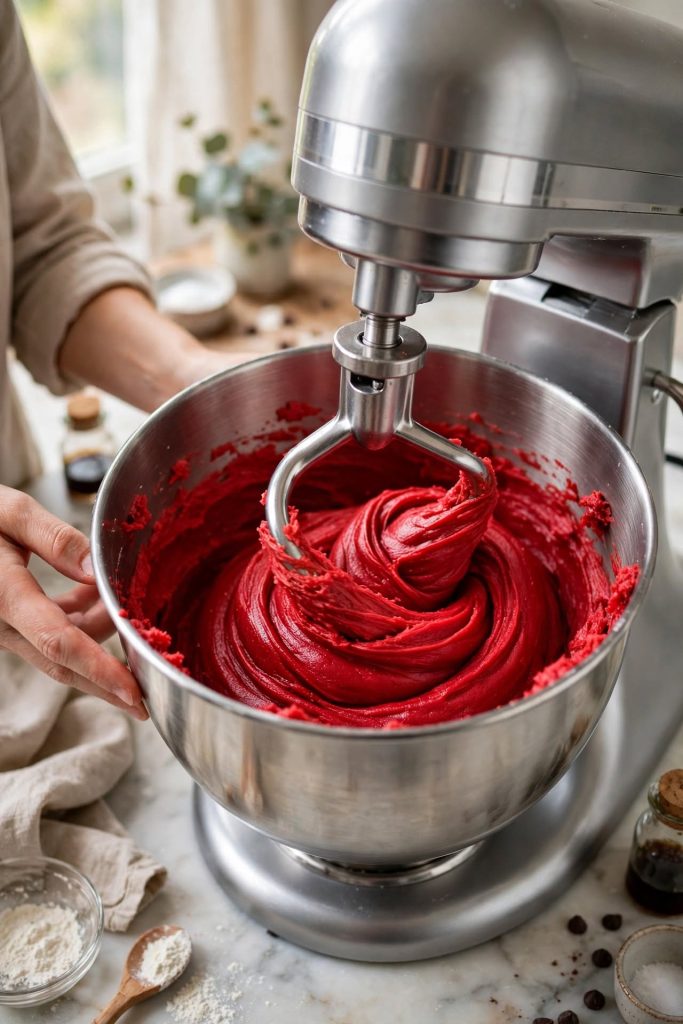
Place 225g of room-temperature butter, 200g of white sugar, and 100g of light brown sugar in the bowl of your stand mixer. Beat on medium-high speed for 3 full minutes — set a timer. The mixture will start pale yellow and transform into a light, fluffy, almost white paste by the end. Scrape the sides and base of the bowl at the 1.5-minute mark to ensure even creaming.
⚠️ Do not shortcut the creaming time. Three minutes of creaming is what gives you a thick, structured dough. Under-creamed butter and sugar produces a dense, greasy dough that bakes into a flat, heavy cookie. The pale, fluffy appearance at the 3-minute mark is visual confirmation that the butter has incorporated enough air.
What to look for: A pale, almost white, fluffy mixture that has increased in volume — it should look noticeably lighter than when you started.
Step 2 — Add the Eggs, Colour, and Vinegar
Add the whole egg, extra egg yolk, vanilla extract, red gel food colouring, and white wine vinegar to the creamed mixture. Beat on medium speed for 30 seconds until fully combined and the mixture looks uniformly red with no streaks of unincorporated butter visible.
⚠️ Add the colouring at this stage, not with the dry ingredients. Mixing the red gel into the wet ingredients ensures even distribution through the dough. Adding it to the flour first clumps the colour and creates uneven patches in the baked cookie.
What to look for: A uniformly deep-red wet mixture with a slightly glossy surface — no white streaks, no pink patches.
Once you understand how creaming works in a cookie dough, butter-based cookie techniques open up across brownies, bars, and shortbread as well.
Step 3 — Fold in the Dry Ingredients
Sift the plain flour, Dutch-process cocoa powder, baking powder, bicarbonate of soda, and salt directly into the bowl. Switch to a rubber spatula and fold from the base of the bowl up and over — do not use the mixer at this point. Stop folding the moment no dry flour streaks remain. If using white chocolate chips, fold them in now with the same gentle strokes.
Overmixing at this stage develops gluten in the flour and pushes the texture toward tough and dense rather than fudgy. Ten extra folds past the point where the flour is incorporated is all it takes to change the crumb texture.
What to look for: A uniform, thick, deep-red dough with no visible flour pockets and no dry sections at the base of the bowl.
Step 4 — Chill the Dough
Cover the bowl tightly with cling film and refrigerate for a minimum of 30 minutes. The chilling step firms the creamed butter back to a semi-solid state — this is what stops each dough ball from spreading flat as soon as it hits the hot oven surface. The dough can stay refrigerated for up to 3 days at this stage.
What to look for: After 30 minutes, the dough should be firm enough to scoop cleanly and hold its ball shape without immediately flattening when you roll it.
Step 5 — Scoop, Space, and Bake
Preheat your oven to 175°C (350°F / Gas Mark 4). Line two flat baking trays with parchment paper. Scoop 2-tablespoon balls (about 40g each) onto the trays, spacing them at least 5cm apart — the cookies will spread slightly as they bake. Bake on the middle rack for 10 to 11 minutes.
Pull the tray when the edges look set and matte but the centre still appears slightly glossy and underdone. Because of the deep red colour, browning is harder to see — rely on the edge texture rather than colour as your visual cue. Leave on the hot tray for 5 minutes, then transfer to a wire rack to cool completely before frosting.
What to look for: Matte, set edges with a slightly glossy, underdone-looking centre — this is correct. After 5 minutes of rest on the tray, press the centre gently — it should feel firm but give slightly.
Step 6 — Make the Cream Cheese Frosting
Once the cookies are fully cooled, beat 115g of room-temperature cream cheese with a hand mixer until completely smooth — about 1 minute. Add 180g of sifted icing sugar, ½ teaspoon of vanilla extract, and a pinch of salt. Beat on medium speed for 2 minutes until the frosting is fluffy, smooth, and holds a soft peak.
⚠️ The cookies must be fully cooled before frosting. A warm cookie will melt the cream cheese frosting on contact — the frosting will slide off and pool around the base of the cookie. If you are in a hurry, place the cookies in the refrigerator for 10 minutes after the 5-minute tray rest.
What to look for: A smooth, glossy white frosting that holds its shape when you lift the beaters — it should not run off a spoon when tilted.
Step 7 — Frost and Finish
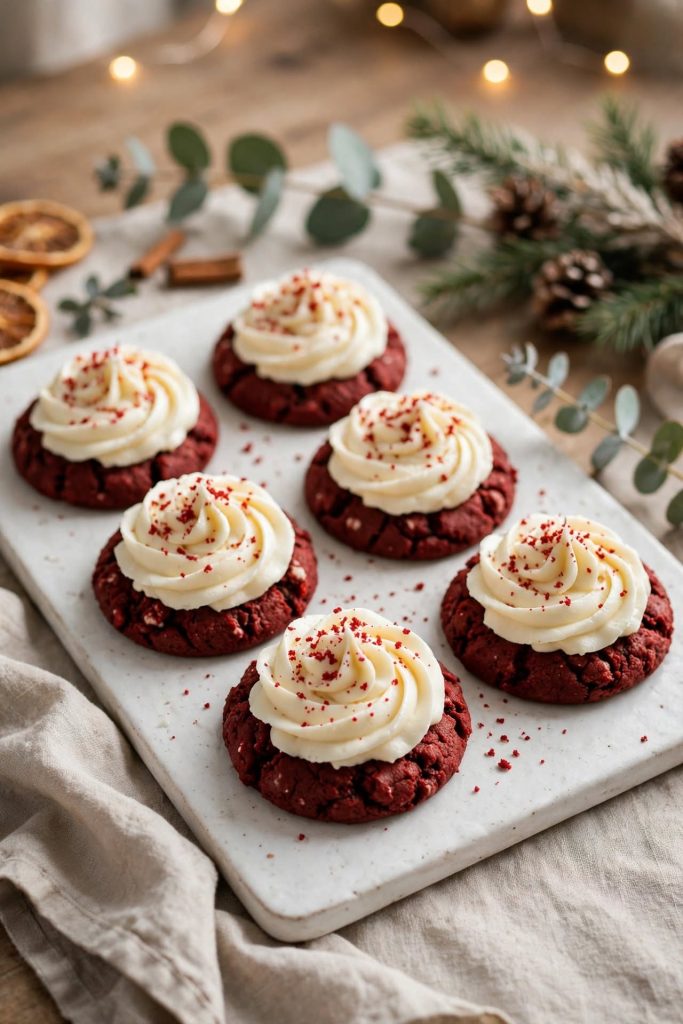
Transfer the frosting to a piping bag fitted with a round tip. Pipe a swirl onto each cooled cookie starting from the outside edge and spiralling in to the centre. For a more casual finish, use a small offset spatula or the back of a spoon to spread a rounded dollop on each cookie. For a visual finish, dust lightly with red sprinkles or a pinch of Dutch-process cocoa powder.
What to look for: A clean white swirl on a vivid red base — the colour contrast is the signature visual of red velvet cookies.
The Science Behind a Perfect Red Velvet Cookie
A perfect red velvet cookie result is not luck — it is three specific ingredient choices doing predictable, observable jobs.
Why the Colour Stays Vivid
Dutch-process cocoa → alkaline pH (7 to 8) → does not react acidically with red pigment → the red colouring remains stable through the heat of baking. Natural cocoa → acidic pH (5 to 6) → reacts with the red pigment in food colouring → the red shifts toward brown-purple. This is why recipes that use natural cocoa without adjusting pH produce a dark, muted result. Switching to Dutch-process is the single change that most improves the colour in a red velvet recipe.
What the White Wine Vinegar Actually Does
White wine vinegar → acidic → reacts with bicarbonate of soda → releases CO₂ bubbles for slight lift → also contributes a mild tang that is the flavour signature of red velvet. Historically, the acid in buttermilk-based red velvet cakes reacted with natural cocoa to produce a reddish tint before food colouring existed — the vinegar in this recipe preserves that flavour logic in a modern formula. You can detect the difference: a batch without the vinegar tastes like a plain cocoa-sugar cookie; a batch with it has a distinct tang that reads as authentically red velvet.
Why Chilling Gives You Thickness, Not Spread
Creamed butter → soft and air-filled after beating → needs to re-firm in the refrigerator before baking → cold fat resists melting immediately on contact with the hot oven surface → the dough ball holds its shape for the first 4 to 5 minutes → the edges set before the centre fully softens. An unchilled ball of creamed dough hits the oven surface when the fat is still soft — it spreads wide and thin before the flour proteins can form a structure. The single rule: if the dough has been sitting at room temperature for more than 20 minutes after chilling, chill it again for 10 minutes before baking.
Tips for the Best Result
These are the details that separate a good red velvet cookie from one people ask you to make again.
- Use a kitchen scale. — Flour measured by cup can vary by up to 50g depending on how packed the cup is. At 250g of flour, a packed cup adds nearly a quarter cup extra — enough to push the texture from fudgy to cakey.
- Add an extra yolk, not a whole egg. — If you want a richer, more fudgy interior, add a third egg yolk rather than a full third egg. The extra fat deepens the crumb without the lift from an extra white.
- Tap the tray mid-bake. — At the 7-minute mark, lift the tray 5cm and drop it firmly onto the oven shelf. This deflates any large air pockets and encourages the edges to spread evenly — producing a more uniform shape across all cookies on the tray.
- Bake one tray at a time. — Stacked trays create uneven airflow: pale undersides on the bottom tray, overbaked tops on the upper tray. One tray, middle rack, every single bake.
- Make the frosting the same day you serve. — Cream cheese frosting is best within 24 hours of making. After that it can weep slightly and the texture becomes denser. Make it fresh if you are gifting or presenting the cookies.
- For a crinkle finish. — Roll each dough ball in icing sugar before baking. As the cookie spreads, the icing sugar coating cracks and creates the signature crinkle pattern — white crackle on a deep red base.
- Doubling: — Doubles cleanly. Keep one portion of dough refrigerating while the other bakes — dough that warms up between bakes spreads more than chilled dough.
Common Mistakes to Avoid
These are the six errors that reliably ruin red velvet cookies — and the exact fix for each one.
❌ Using Natural Cocoa Instead of Dutch-Process
Result: Your cookies will bake brown-purple rather than red — the acidity of natural cocoa reacts with the red food colouring and dulls it significantly.
Fix: Use Dutch-process (alkalised) cocoa only. Check the packaging — it will say “Dutch-process”, “alkalized”, or “reduced fat”. If you can only get natural cocoa, add ¼ teaspoon of extra bicarbonate of soda and expect a slightly duller red.
❌ Adding Too Much Cocoa
Result: The cookie tastes and looks like a chocolate cookie, not a red velvet cookie — the colour goes brown and the flavour loses its subtlety.
Fix: Keep cocoa at exactly 15g (2 tablespoons). Red velvet is defined by a subtle chocolate undertone, not a dominant chocolate flavour. More than 3 tablespoons of cocoa in a standard cookie batch overwhelms the red colour regardless of how much food colouring you use.
❌ Using Liquid Food Colouring Instead of Gel
Result: A pale pink-red cookie that looks faded and washed out — and if you add enough liquid colouring to compensate, the dough becomes too thin and the cookies spread flat.
Fix: Use gel food colouring. One teaspoon of a quality gel delivers a vivid, stable red at a fraction of the volume of liquid colouring. If liquid is your only option, use 3 to 4 teaspoons and reduce another liquid ingredient (the vinegar or vanilla) by 1 teaspoon to compensate for the extra volume.
❌ Skipping the Dough Chill
Result: Flat, wide cookies that spread across the tray and lose their thickness before the edges can set — the creamed butter is still too soft when the dough hits the oven.
Fix: Chill for 30 minutes minimum. In a hurry, freeze the portioned balls on a tray for 12 minutes — this achieves the same result as 30 minutes in the refrigerator.
❌ Frosting Warm Cookies
Result: The cream cheese frosting melts on contact with the warm cookie surface, runs off the sides, and pools underneath — you lose the clean white swirl entirely.
Fix: Cool the cookies completely on a wire rack — at least 20 minutes at room temperature after the 5-minute tray rest. If impatient, refrigerate for 10 minutes after transferring from the tray.
❌ Overbaking Past Set Edges
Result: Dry, crumbly cookies that lose their fudgy quality within hours — the deep red colour also darkens toward brown when overbaked, which undermines the visual impact.
Fix: Pull the tray the moment the edges look matte and set. The centre should still look glossy and slightly underdone. The 5-minute rest on the hot tray finishes them — cookies that look done in the oven will be dry once cooled.
For more guides covering common cookie baking problems and fixes, that page covers spread, colour, and texture issues across all drop cookie types.
Variations Worth Trying
The base recipe is a reliable framework. Each of these variations requires a single change at one specific point in the process.
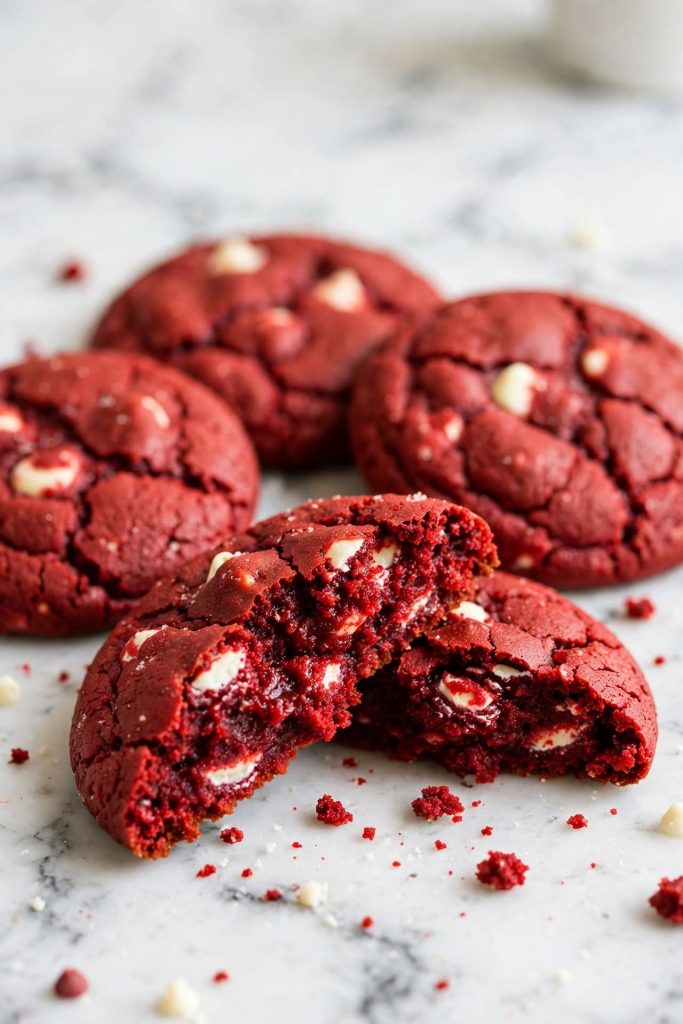
Red Velvet Crinkle Cookies
What changes: After chilling, roll each dough ball in granulated sugar first, then in a generous coating of icing sugar before placing on the tray.
When: Just before baking at Step 5.
Result: As the cookie bakes and spreads, the icing sugar coating cracks into a dramatic white crackle pattern over the red base — one of the most visually striking cookie variations possible.
Red Velvet Stuffed Cookies
What changes: Freeze small balls of cream cheese frosting (about 1 teaspoon each) for 30 minutes until firm. Wrap a 2-tablespoon ball of cookie dough around each frozen frosting ball, sealing the edges completely.
When: At Step 5 in place of plain scooping.
Result: A melted cream cheese pocket inside the baked cookie — the frosting stays slightly molten in the centre while the exterior bakes fully. Pull at 12 minutes rather than 11.
Vegan Red Velvet Cookies
What changes: Replace butter with a vegan butter block (not spread) at 1:1. Replace the whole egg and egg yolk with 2 flax eggs (1 tablespoon ground flaxseed + 3 tablespoons water per egg, rested 5 minutes). Use vegan cream cheese for the frosting.
When: At Step 1 and Step 2.
Result: A slightly denser, more uniform cookie with a modest colour. Increase the chill time to 45 minutes to compensate for the higher water content in vegan butter. The flavour is essentially the same.
Gluten-Free Version
What changes: Replace plain flour with a GF plain flour blend at 1:1. Add ½ teaspoon xanthan gum if your blend does not already contain it.
When: At Step 3.
Result: A slightly more crumbly cookie that benefits from a longer chill — 45 to 60 minutes — to hold its shape during baking. The colour and flavour are essentially identical. Tap the tray at the 7-minute mark to encourage even spread.
Red Velvet Cookie Sandwiches
What changes: Bake cookies slightly underdone (9 to 10 minutes) so they stay flat enough to sandwich cleanly. Once cooled, pipe a generous swirl of cream cheese frosting on the flat side of one cookie, then press a second cookie flat-side down to create the sandwich.
When: After fully cooling at Step 7.
Result: A bakery-style cookie sandwich with a cream filling-to-cookie ratio similar to a filled macaron — impressive as a gift or at an occasion table. The sandwiches keep refrigerated for up to 3 days.
How to Store
Room Temperature
Unfrosted red velvet cookies keep for best quality for up to 5 days at room temperature in an airtight container. Store them in a single layer, or separate layers with parchment paper — the cookies are fragile enough that stacking without separation can cause them to stick and break at their edges. What degrades first at room temperature is the fudgy interior texture — the cookies gradually firm up and become drier as the moisture evaporates. Keep away from direct heat and sunlight, which accelerate moisture loss and can dull the red colour over time.
Frosted cookies: Cookies with cream cheese frosting must be stored in the refrigerator — cream cheese is a dairy product and should not be left at room temperature for more than 2 hours. Layer frosted cookies in a single layer in an airtight container with parchment between layers.
Refrigerator
Unfrosted cookies can be refrigerated in an airtight container for best quality for up to 7 days, though the texture becomes slightly denser and drier than room-temperature storage. Bring to room temperature for 15 minutes before eating to allow the fat in the crumb to soften. Frosted red velvet cookies keep refrigerated for best quality for up to 4 days. Bring frosted cookies to room temperature for 15 to 20 minutes before serving — cold cream cheese frosting tastes denser and less creamy than it does at room temperature. Use your judgment — if they smell off or show mould, discard them.
Freezer — Complete Guide
Can it be frozen? Yes — unfrosted cookies freeze very well. Frosted cookies can be frozen but the cream cheese frosting may weep slightly on thawing — freeze unfrosted whenever possible.
Unfrosted baked cookies: Cool completely. Layer in an airtight container with parchment between layers. Freeze for best quality for up to 3 months. Thaw at room temperature for 30 minutes, then add cream cheese frosting fresh if using it. The texture after thawing is essentially identical to fresh-baked.
Unbaked dough balls: Scoop into balls and freeze on a lined tray until solid — about 2 hours. Transfer to a zip-lock freezer bag. Label with the date. Freeze for best quality for up to 3 months. Bake straight from frozen at the same temperature, adding 2 to 3 extra minutes. The vivid red colour bakes through correctly from frozen.
Texture note: Red velvet cookies hold up exceptionally well through freezing because of the relatively high fat and sugar content, which prevents ice crystal damage to the crumb. Use your judgment — if they smell off or show mould, discard them.
If batch baking and freezing cookie dough is a regular part of your routine, red velvet dough balls are one of the best candidates — the colour and texture are unchanged after months in the freezer.
How to Serve
Classic Ways to Serve
- Room temperature with a glass of cold whole milk — the fat in the milk cuts through the sweetness of the cream cheese frosting
- Slightly warm from the oven without frosting — reheat individually at 150°C for 3 minutes; the centre goes back to that just-baked gooey quality
- As a holiday cookie platter — the vivid red makes them a natural centrepiece on any Christmas or Valentine’s Day table
Upgraded and Occasion-Worthy
- Cookie gift box — arrange 6 to 8 frosted cookies in a clear gift box with parchment lining; include a card with the storage note (refrigerate within 2 hours)
- Dessert table for parties — the red velvet cookie sandwich variation (above) is bakery-quality and serves well as a standalone dessert at events
- Coffee pairing — the cocoa-vanilla-cream cheese combination pairs best with a strong espresso or an americano; the bitterness of the coffee balances the sweetness of the frosting
Red velvet cookies are one of the most visually transferable baked goods — the colour does most of the work before the first bite. Best served within 48 hours of baking for peak texture.
Frequently Asked Questions
Can I make red velvet cookies without red food colouring?
Yes — you can make red velvet cookies without red food colouring and still get a reddish-brown result. Replace the red gel food colouring with 1 tablespoon of beetroot powder mixed with 1 teaspoon of water, or simply leave the colouring out for a chocolate-brown cookie with the same flavour profile. The characteristic red colour is purely visual and does not affect the taste or texture of the finished cookie.
Why did my red velvet cookies turn out flat?
Flat red velvet cookies are almost always caused by butter that was too warm or soft before creaming, or by skipping the dough-chilling step. Soft butter spreads before the structure sets in the oven. Chill your dough for at least 30 minutes before baking — this firms the fat and keeps each ball tall and thick through the full bake time. Also verify your baking powder is fresh.
How do I know when red velvet cookies are done?
Red velvet cookies are done when the edges are set and matte, but the centre still looks slightly glossy and underdone. Because of the deep red colour it can be harder to judge browning visually, so rely on the edge texture instead — set edges, soft centre. They will firm up on the hot tray for 5 minutes after you remove them from the oven.
Can I make red velvet cookie dough ahead of time?
Yes — red velvet cookie dough keeps well in the refrigerator for up to 3 days, tightly covered, and can be frozen as portioned balls for up to 3 months. Resting the dough actually improves the result: the cocoa has more time to hydrate and the flavour deepens noticeably after 24 hours in the refrigerator. Bake straight from frozen, adding 2 to 3 minutes. If you enjoy other make-ahead cookie dough recipes, the same freezer method applies across most drop cookie doughs.
How long do red velvet cookies last?
Unfrosted red velvet cookies keep for best quality for up to 5 days at room temperature in an airtight container. Frosted cookies (with cream cheese frosting) must be refrigerated and keep for best quality for up to 4 days. Bring refrigerated frosted cookies to room temperature for 15 minutes before serving. Use your judgment — if they smell off or show mould, discard them.
Can I freeze red velvet cookies?
Yes — unfrosted red velvet cookies freeze well for best quality for up to 3 months. Cool completely, layer with parchment in an airtight container, and freeze. Thaw at room temperature for 30 minutes, then add cream cheese frosting fresh. Frosted cookies can be frozen but the cream cheese frosting may weep slightly on thawing — freeze unfrosted whenever possible.
What can I substitute for cream cheese in the frosting?
The best substitute for cream cheese in red velvet cookie frosting is mascarpone at a 1:1 ratio — it has a similar tangy richness and pipes cleanly. A simple vanilla buttercream works at a 1:1 volume swap and is more stable at room temperature. Vegan cream cheese works well at 1:1 but may be slightly softer — chill the frosted cookies for 15 minutes before serving.
Can I double this recipe?
Yes — this recipe doubles cleanly. Use a stand mixer or a large bowl to give the batter room to cream properly. Bake one tray at a time on the middle rack. The chilling and baking times stay the same. Doubled dough can be refrigerated in two separate batches for more consistent portioning.
Why did my red velvet cookies turn out cakey?
Cakey red velvet cookies are usually caused by too much flour, too much leavening, or adding two whole eggs instead of an egg plus a yolk. Cakey texture comes from excess structure — the cookies puff rather than spreading into a fudgy, dense result. Measure flour by spooning into the cup and levelling off rather than scooping directly from the bag, which packs in up to 25% more flour.
What size should red velvet cookies be?
For the thick, fudgy style in this recipe, use a 2-tablespoon scoop (about 40g per ball) — this produces a cookie roughly 6 to 7cm in diameter after baking. Smaller balls (1 tablespoon) bake in 8 to 9 minutes and produce a thinner, crispier result. Larger balls (3 tablespoons) need 14 to 15 minutes and give a bakery-style oversized cookie with a pronounced soft centre.
How much cocoa powder should I use in red velvet cookies?
Use 2 tablespoons (15g) of Dutch-process cocoa powder for this recipe — enough to give you the classic subtle chocolate flavour without overwhelming the colour or making the cookie taste like a chocolate cookie. More than 3 tablespoons will fight the red food colouring and produce a brown-tinted cookie. Dutch-process is preferred over natural cocoa because it is less acidic and does not dull the red colour.
Can I use liquid food colouring instead of gel?
You can use liquid food colouring in red velvet cookies but you will need significantly more of it — typically 3 to 4 teaspoons of liquid colouring to match the intensity of 1 teaspoon of gel colouring. The extra liquid can slightly thin the dough, so reduce another liquid ingredient by about 1 teaspoon. Gel food colouring is strongly preferred because it delivers a more vivid, stable colour with no impact on dough consistency.

Ingredients
Method
- Beat room-temperature butter and both sugars on medium-high for 3 full minutes until pale and fluffy. Scrape the bowl at the 1.5-minute mark.
- Add the whole egg, egg yolk, vanilla, red gel food colouring, and white wine vinegar. Beat 30 seconds until uniformly red and no white streaks remain.
- Sift in flour, cocoa powder, baking powder, bicarbonate of soda, and salt. Fold with a spatula until no dry streaks remain. Fold in white chocolate chips if using.
- Cover and refrigerate dough for 30 minutes minimum.
- Preheat oven to 175°C (350°F). Line two trays with parchment. Scoop 2-tablespoon balls, spacing 5cm apart. Bake on middle rack 10 to 11 minutes until edges are matte and set but centres look slightly glossy.
- Rest on tray 5 minutes, then transfer to wire rack to cool completely.
- For frosting: beat room-temperature cream cheese until smooth, add sifted icing sugar, vanilla, and salt. Beat 2 minutes until fluffy. Pipe or spread onto fully cooled cookies.
Notes
- Use Dutch-process cocoa, not natural cocoa — the colour depends on it.
- Butter and cream cheese must both be at room temperature before use.
- Do not skip the chill — it is the difference between thick and flat cookies.
- Cool cookies completely before frosting or the frosting will melt and run.
- Unfrosted cookies keep for 5 days at room temperature; frosted cookies refrigerate for up to 4 days.
Nutrition (per cookie with frosting, approx.)
Calories: 210 kcal | Carbs: 29g | Fat: 10g | Protein: 2g | Sugar: 21gMore Cookie Recipes You Will Love
- Chocolate Crinkle Cookies — the same icing sugar roll technique as the crinkle variation above, applied to a fudgy dark chocolate base; dramatic black-and-white visual with deep cocoa flavour.
- Cream Cheese Cookies — a soft, pillowy drop cookie that uses cream cheese directly in the dough rather than as a frosting; lighter and more delicate than a standard butter cookie.
- Lemon Crinkle Cookies — the same icing sugar crinkle technique applied to a bright, tangy lemon dough; sharp citrus flavour against the sweet icing sugar crust.
- Chocolate Chip Cookies — the foundational American drop cookie with brown butter and a 30-minute chill; the same technique as this recipe applied to the most versatile flavour combination.
- Snickerdoodles — a cinnamon-sugar coated cookie with the signature tang of cream of tartar; no chill required and ready in 20 minutes start to finish.
Did you make these red velvet cookies? Leave a ⭐⭐⭐⭐⭐ rating below and let me know in the comments how they turned out. I read every comment and would love to know whether you went with the crinkle version or the cream cheese swirl — and which mix-in you used.