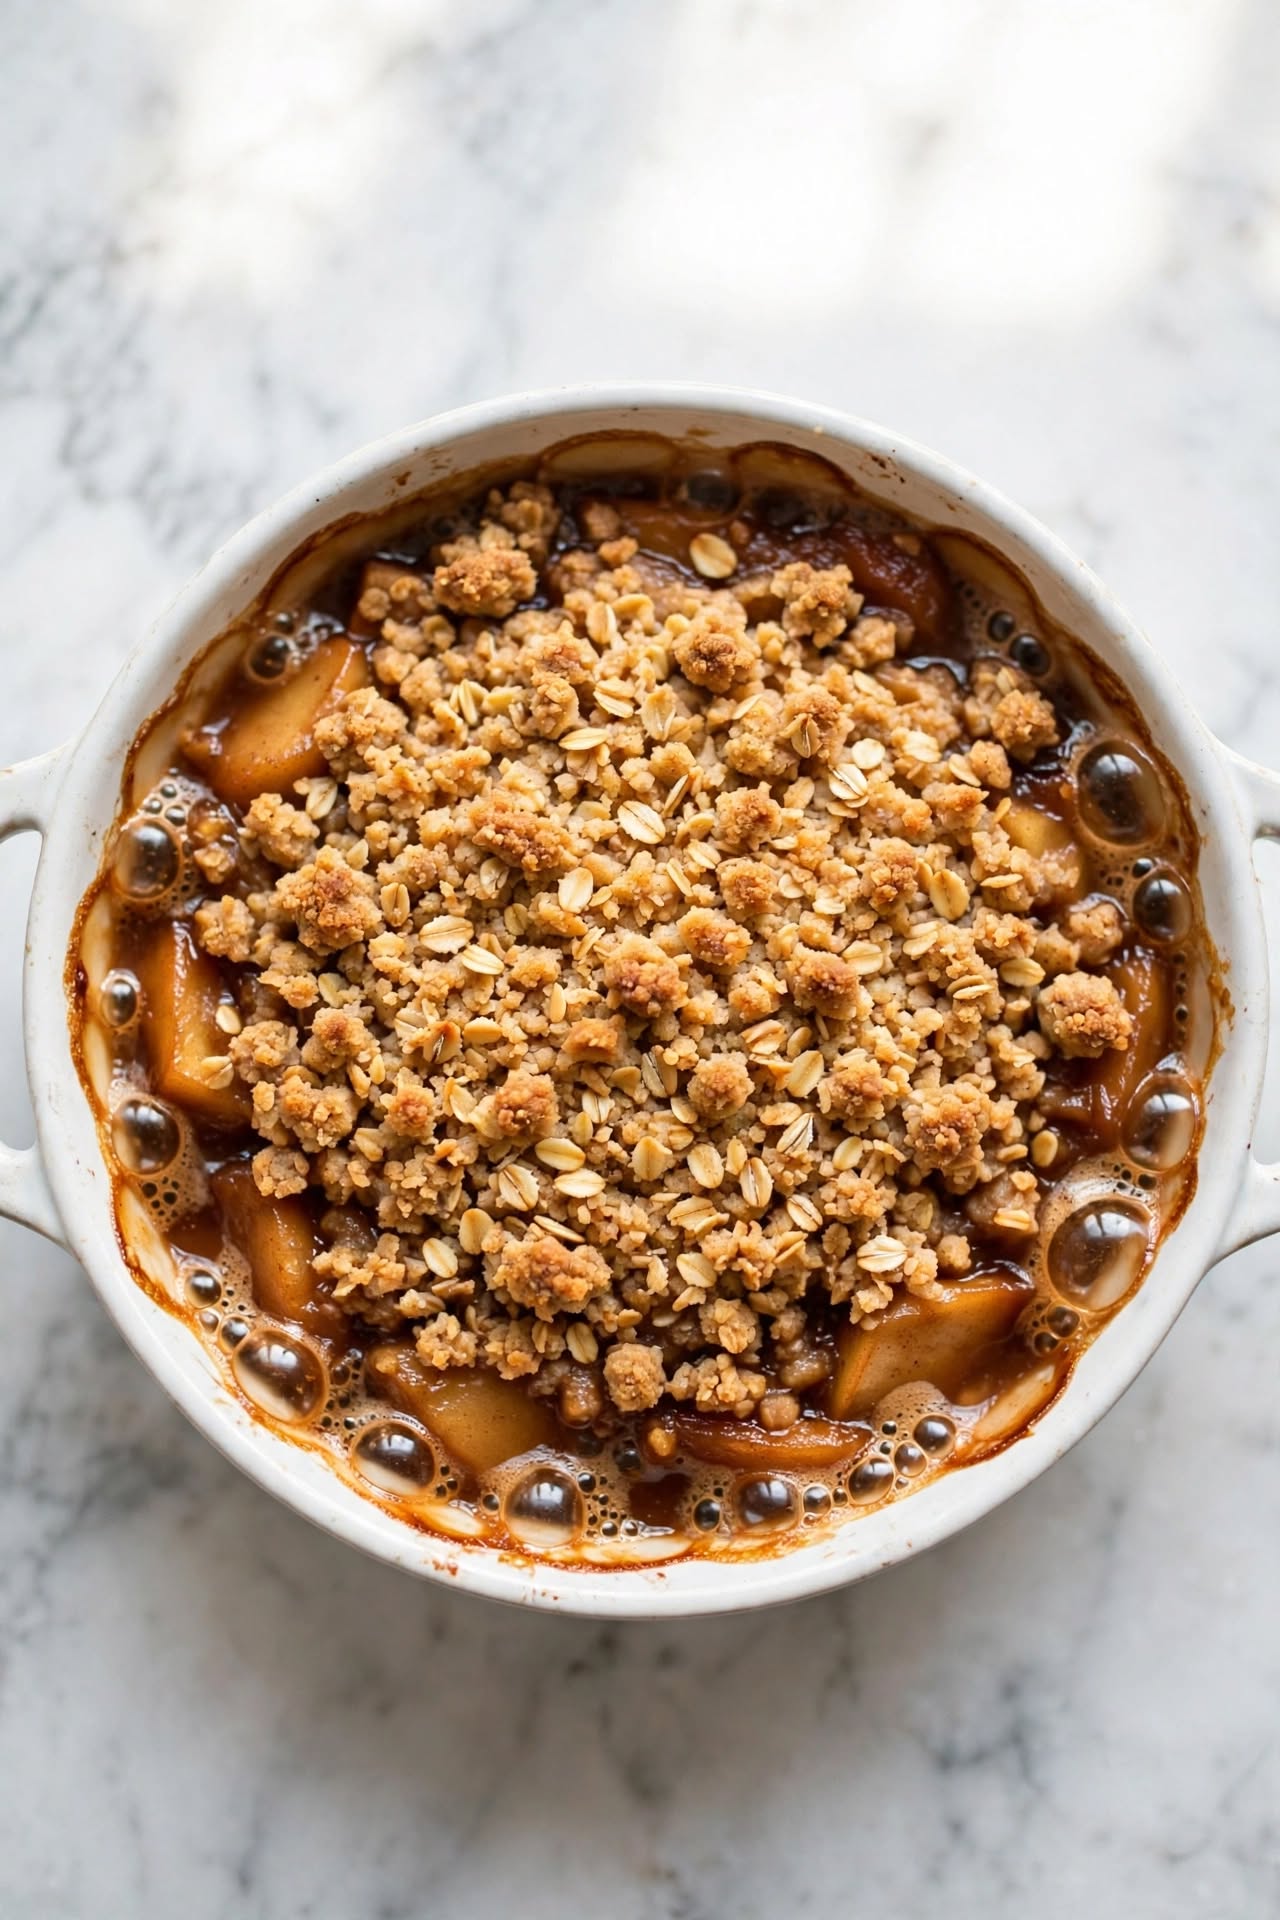
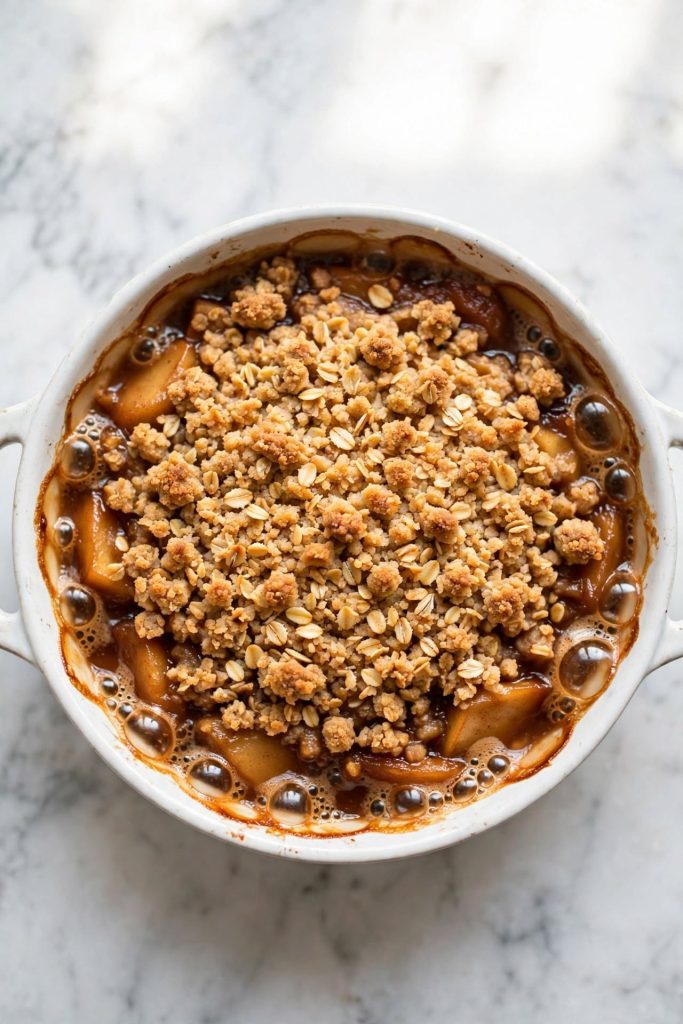
What is apple crumble? Apple crumble is a baked British dessert made with a layer of spiced apple filling topped with a loose, buttery mixture of flour, oats, and sugar that crisps in the oven. It uses cold butter rubbed into the dry ingredients — no pastry, no rolling, no specialist skills needed. Total time is under 65 minutes. Best for anyone who wants a classic baked apple dessert without the effort of making pastry.
This apple crumble gives you a topping that stays genuinely crunchy — not sandy, not soggy — and a filling that holds its texture rather than turning into apple soup. Both problems come down to two small technical decisions: the state of the butter and whether you thicken the filling. This recipe solves both.
The topping uses cold butter rubbed in by hand, which creates the irregular, craggy pieces that hold their crunch through baking. The filling gets tossed in flour before layering, so the apple juices thicken into a light sauce instead of pooling at the base. I tested this recipe multiple times — adjusting the butter ratio, apple variety, and flour amount until the topping stayed crunchy and the filling held its texture — before publishing this method.
Why This Apple Crumble Works
Most apple crumble recipes fail on one of two counts: the topping turns sandy and pale, or the filling sits in a pool of juice. This version fixes both — here is what makes the difference.
- Cold butter, always. Cold butter rubbed in by hand creates irregular, pea-sized clumps that hold their shape in the oven — producing a crunchy, uneven topping rather than a smooth, sandy one.
- Flour in the filling. Tossing the apple slices in plain flour thickens the released juice as it heats, turning it into a light sauce that coats the apples rather than pooling at the base of the dish.
- Brown sugar in the topping. Brown sugar adds a deeper, caramel-leaning flavour and holds slightly more moisture than white sugar — the topping stays cohesive without going dry.
- Rolled oats for texture. Oats add crunch that stays intact even after 40 minutes in the oven — without them, you get a biscuit-style topping that can turn brittle rather than crunchy.
- Lemon juice in the filling. A tablespoon of lemon juice brightens the apple flavour and keeps the slices from browning before they go in the oven.
- Ten-minute rest after baking. Letting the crumble rest allows the filling to thicken further as it cools slightly — serving it immediately means a runny filling every time.
If you are looking for more baked fruit dessert ideas, our seasonal collection is a good place to start.
Ingredients for Apple Crumble
Every ingredient here has a specific job. Here is what each one does — and what to use if you need to make a substitution.
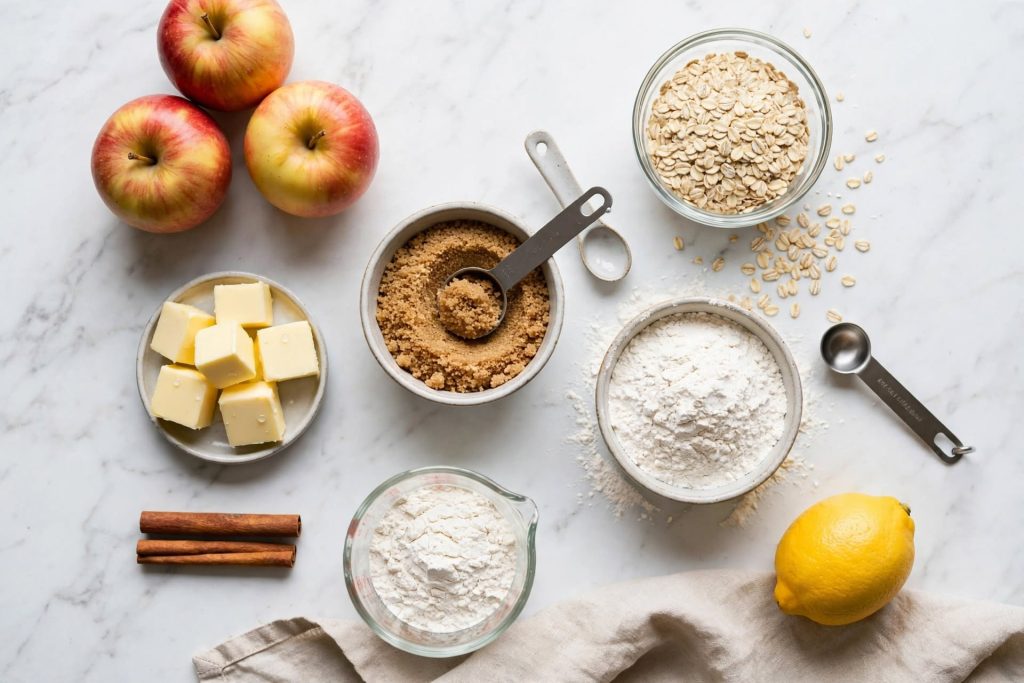
The Apple Filling
| Ingredient | Amount | What It Does | Best Substitute + Impact |
|---|---|---|---|
| Granny Smith or Braeburn apples | 6 medium (~900g / 2 lbs) | The main body of the dessert — holds shape and provides sharpness | Honeycrisp works but softens more; avoid Gala (too watery) |
| Caster sugar | 3 tablespoons | Sweetens the filling and draws juice from the apples | Light brown sugar adds depth; reduce by 1 tsp if using sweeter apples |
| Plain flour | 2 tablespoons | Thickens the released apple juice into a light sauce | Cornflour (cornstarch) works — use 1 tablespoon instead of 2 |
| Ground cinnamon | 1 teaspoon | Warm spice note that ties filling and topping together | Mixed spice works well; cardamom adds a floral note |
| Ground nutmeg | ¼ teaspoon | Adds warmth behind the cinnamon without dominating | Leave out entirely if unavailable — minor impact |
| Lemon juice | 1 tablespoon | Brightens the apple flavour and prevents browning | Apple cider vinegar works (use ½ tablespoon); or omit |
| Vanilla extract | ½ teaspoon | Rounds out the sweetness in the filling | Vanilla bean paste or omit if unavailable |
The Crumble Topping
| Ingredient | Amount | What It Does | Best Substitute + Impact |
|---|---|---|---|
| Plain flour | 150g (1¼ cups) | Forms the base structure of the crumble | Almond flour for a nuttier, gluten-free version (same quantity) |
| Cold unsalted butter, cubed | 100g (7 tablespoons) | Creates the crumbly texture when rubbed into the flour | Cold coconut oil works; avoid soft spreads (too watery) |
| Light brown sugar (packed) | 80g (⅓ cup) | Sweetens and adds caramel depth; helps the topping brown | White caster sugar works but gives less colour and flavour |
| Rolled oats | 80g (1 scant cup) | Adds crunch and texture that survives 40 minutes of baking | Omit for a finer, shortbread-style topping; use extra flour |
| Fine salt | ¼ teaspoon | Balances sweetness and sharpens the other flavours | Do not omit — the topping tastes flat without it |
| Ground cinnamon | ½ teaspoon | Connects the topping flavour to the filling | Mixed spice or cardamom work equally well here |
Key Ingredient Notes
Butter must be cold. Cut it into 1cm cubes and return it to the fridge for 10 minutes after cubing. Butter that starts to soften before it goes into the flour will produce a paste-like topping instead of the loose, crumbly texture you are aiming for.
Apple variety is not flexible. Granny Smith and Braeburn both hold their shape through 40 minutes of baking. Gala and Red Delicious collapse into mush and release far more water — the filling will be visibly wet and the topping will steam through from below.
Do not skip the flour in the filling. This is the single step most recipes omit — and it is responsible for the majority of watery crumble outcomes. The flour is not optional here.
The Apple Variety Guide
The apple variety is the single biggest factor in how your apple crumble filling turns out. Different varieties behave differently in the oven — some hold their shape, some collapse, some release far more water than others.
| Apple Variety | Texture After Baking | Sweetness | Use for This Recipe? |
|---|---|---|---|
| Granny Smith | Holds shape well — firm but tender slices | Tart | ✅ Best choice — sharpness balances the sweet topping |
| Braeburn | Softens slightly — holds shape with some give | Medium-sweet | ✅ Excellent — natural caramel notes complement brown sugar |
| Cox | Holds shape with a bit of softness | Sweet-tart | ✅ Good option — slightly less water than Granny Smith |
| Honeycrisp | Softens noticeably — edges break down | Very sweet | ⚠️ Acceptable — reduce sugar in the filling by half |
| Gala | Collapses — turns mushy | Sweet | ❌ Not recommended — releases too much juice |
| Red Delicious | Collapses completely | Mild | ❌ Avoid — flavour diminishes when baked |
If Granny Smith is not available, Braeburn is the best swap. If using a sweeter variety, reduce the caster sugar in the filling by 1 tablespoon and expect a slightly softer texture.
How to Make Apple Crumble — Step by Step
Follow these steps in order. The most important rule: the butter must stay cold until the moment it goes in the oven.
Step 1 — Prepare the Oven and Baking Dish
Heat your oven to 180°C / 350°F (fan 160°C / 320°F). Lightly butter an 8×8 inch (20×20cm) baking dish — use a pastry brush or your fingertip with a small knob of butter to coat the base and sides.
This prevents the apple filling from sticking to the dish during baking and makes serving and washing up noticeably easier.
What to look for: Oven at full temperature before anything goes in — a cold oven softens the butter in the topping before the top can crisp, which leads to a dense, pale layer rather than a crunchy golden crust.
Step 2 — Make the Apple Filling
Peel, core, and slice the apples to roughly 6mm (¼ inch) thick. Slices thinner than this will collapse; thicker slices may stay underdone in the centre.
Transfer to a large bowl. Add the caster sugar, plain flour, cinnamon, nutmeg, lemon juice, and vanilla. Toss until every apple slice is evenly coated — the flour should be distributed across all surfaces, not sitting in the bottom of the bowl.
Tip the coated apple slices into the prepared baking dish and spread into an even layer. Press lightly so there are no large air gaps between slices.
What to look for: The apple slices should be coated in a light, floury-cinnamon dusting with no dry patches of flour visible. The filling should sit roughly 4cm (1.5 inches) deep in the dish — not piled above the rim.
⚠️ If the apple mound is higher than the rim of your dish, remove a handful of slices. An overfilled dish creates so much steam during baking that the topping cannot crisp — it will be pale and soft, no matter how long you bake it.
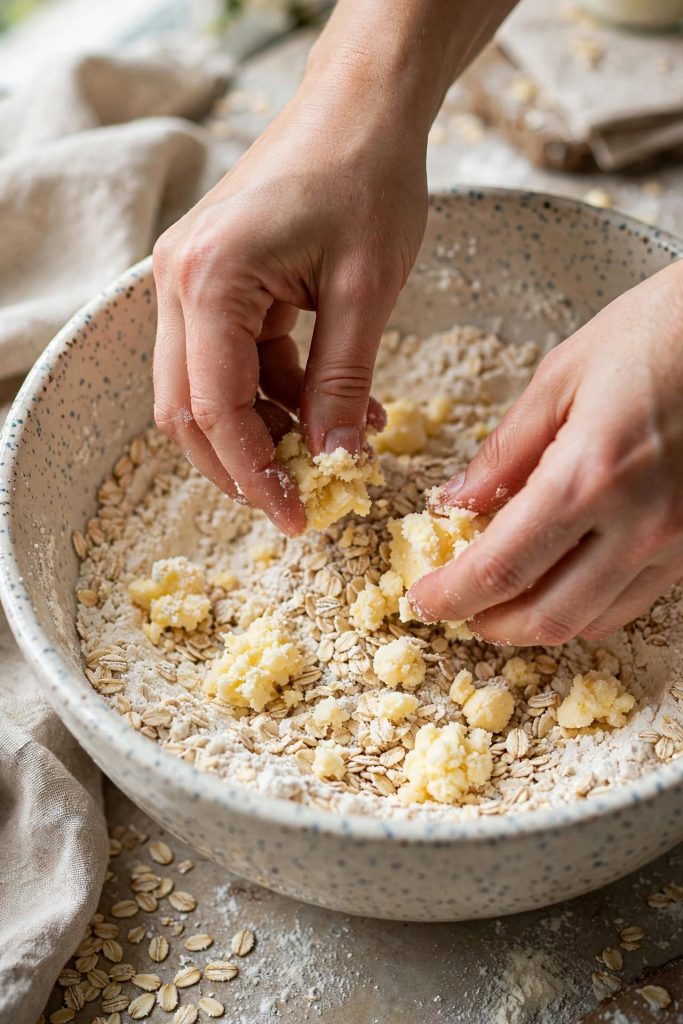
Step 3 — Make the Crumble Topping
Combine the plain flour, brown sugar, rolled oats, salt, and cinnamon in a large bowl. Add the cold butter cubes.
Using your fingertips only — not your palms — rub the butter into the flour mixture with a pressing, snapping motion. Work quickly. You are aiming for a mixture that looks like coarse, uneven breadcrumbs — some pea-sized clumps of butter are exactly what you want. Stop when you can no longer see large solid butter pieces.
What to look for: The mixture should clump together loosely when you squeeze a handful — but break apart again when you release it. If it feels smooth and paste-like, the butter has warmed too much; put the bowl in the fridge for 10 minutes before continuing.
⚠️ Do not rub past the point where pea-sized butter pieces remain. Over-rubbing fully incorporates the butter into the flour, producing a smooth, sandy mixture that bakes to a pale, crumbly crust rather than a golden, crunchy one. The irregular pieces are the texture.
Step 4 — Assemble and Bake
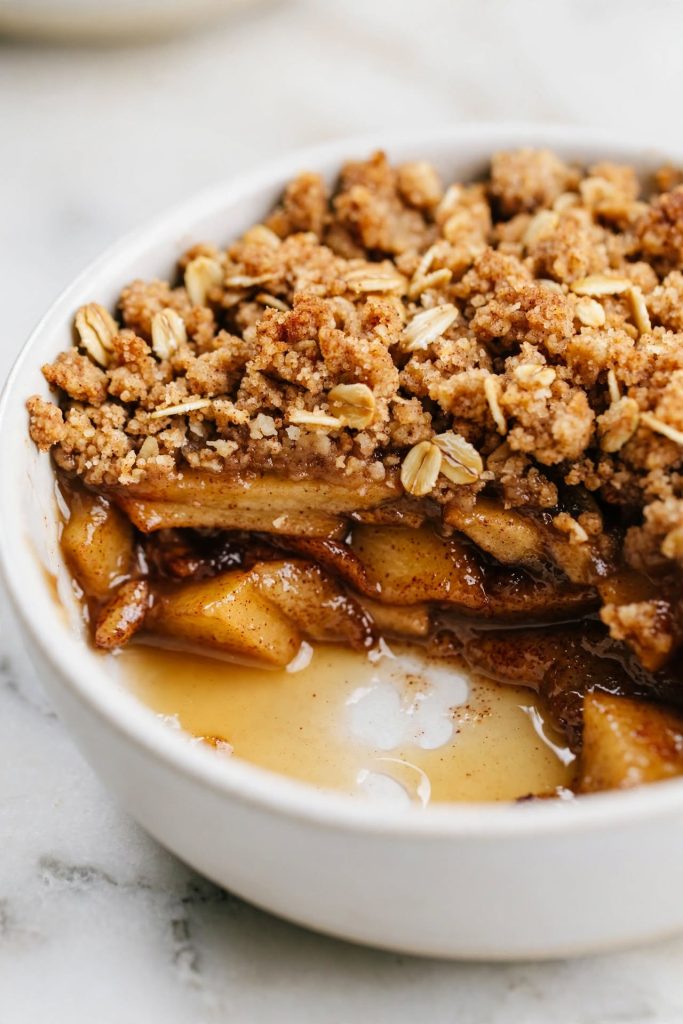
Scatter the crumble topping evenly over the apple filling. Do not press it down — leave it loose. Pressing compacts the topping and closes the gaps that allow steam to escape, which is what leads to a soggy result.
Bake on the middle rack for 40 to 45 minutes, until the topping is a deep golden-brown and you can see the apple filling bubbling visibly around the edges and through any gaps in the topping.
What to look for: Deep golden-brown topping (not pale gold — dark gold) and active bubbling at the edges. The bubbling tells you the filling has heated through completely. A lightly golden topping with no bubbling means the apples are not done yet — continue baking.
Once you are comfortable with this method, our fruit crumble variations guide is worth trying next — it covers the same technique applied to plums, pears, and rhubarb.
Step 5 — Rest Before Serving
Remove from the oven and leave to rest for at least 10 minutes before serving. Do not serve immediately — the filling is near-boiling when it comes out of the oven, and the juices need time to thicken slightly as the temperature drops.
A 10-minute rest also means the apple pieces hold their shape when you scoop them — fresh from the oven, the filling is too loose to serve cleanly.
What to look for: The bubbling should settle and slow after 5 minutes off the heat. The filling should look set enough to hold a spoonful’s shape — not soupy. If it still looks very liquid after 10 minutes, let it rest for a further 5.
The Science Behind a Crunchy Topping
A crunchy apple crumble topping is not luck — it is the result of four ingredients doing specific, predictable jobs in the oven.
Cold butter → steam pockets. When cold butter pieces hit the hot oven, they release steam rapidly before the fat fully incorporates into the flour. Those steam pockets are what create the open, craggy texture in a crunchy topping. Melted or soft butter incorporates before the oven can create those gaps, giving you a dense layer instead.
Rolled oats → structural crunch. Oats contain a different starch structure from wheat flour — they hold their shape at oven temperatures rather than softening and merging with the butter. They act as rigid scaffolding within the topping, maintaining crunch that plain flour alone cannot provide.
Brown sugar → caramelisation. The molasses content in brown sugar lowers its caramelisation point. This means the topping browns at a lower temperature and more evenly than white sugar, producing the deep golden colour you are aiming for without needing to over-bake.
Flour in the filling → thickening. Apple slices release juice as they heat. Without flour, that juice stays liquid throughout baking. The starch granules in flour absorb the juice as it heats and swell — converting a watery pool into a light sauce that coats the apples. This is exactly the same principle as a cornflour-thickened fruit pie filling.
The most critical rule: If you melt the butter before adding it to the topping, none of the above science applies. You will get a dense, pale layer regardless of anything else you do correctly.
Tips for the Best Result
These are the details that separate a good apple crumble from one people ask you to make again.
- Keep the butter cold — Cut it into cubes, then return it to the fridge for 10 minutes before using. If your kitchen is warm, do this step and put the whole bowl of dry ingredients in the fridge too. Cold butter is the single biggest factor in crumble texture.
- Use an 8×8 inch metal or ceramic dish — Glass baking dishes heat more slowly and unevenly, which can leave the filling undercooked while the topping over-browns. A metal or ceramic dish gives you more even heat distribution through the filling.
- Check at the 38-minute mark — Every oven varies. If the topping is very dark at 38 minutes but there is no bubbling, lay a loose sheet of foil over the top to protect the crumble while the filling finishes cooking. Remove the foil for the final 5 minutes to restore the crust.
- Slice the apples evenly — Inconsistent slicing means some pieces cook faster than others. Aim for 6mm (¼ inch) thick. A mandoline makes this effortless and consistent, but a sharp knife and attention to thickness works just as well.
- Assemble up to 24 hours ahead — The filled, uncooked dish can sit in the fridge overnight, covered with cling film. Bake straight from the fridge — add 5 to 8 extra minutes to the bake time. The filling will firm slightly in the fridge, which actually helps the topping stay loose on top rather than sinking in.
- Add a handful of flaked almonds to the top — Scatter a small handful over the assembled crumble before baking. They toast during baking and add a contrasting visual texture on the surface — the result looks significantly more finished than a topping without them.
- Double the topping for a deeper crumble layer — If you prefer a thick, generous topping ratio, 1.5× the topping recipe while keeping the filling the same gives you a noticeably more substantial crumble layer without changing the bake time.
Common Mistakes to Avoid
❌ Using Cold Apples Straight from the Fridge
Result: The centre of the apple filling will remain undercooked while the edges and topping are done — you end up with crunchy raw apple pieces in the middle of the dish.
Fix: Take the apples out of the fridge 30 minutes before using. Room-temperature apples cook through much more evenly and in less time.
❌ Melting the Butter for the Topping
Result: The topping bakes into a dense, cakey layer — golden on the very surface but soft and doughy underneath. No amount of extra baking time will fix this once the butter has been melted in.
Fix: The butter must be cold and solid when it goes into the flour. Cut, cube, and refrigerate it for 10 minutes before use if your kitchen is warm.
❌ Overfilling the Baking Dish
Result: An overfilled dish traps too much steam. The topping absorbs that steam from below, resulting in a pale, soggy layer even after a full 45-minute bake.
Fix: The apple filling should sit no higher than the rim of the dish — ideally about 5mm below it. If you have too many apple slices, hold some back rather than mounding the filling above the rim.
❌ Cutting the Crumble Too Fine
Result: Over-rubbing the butter into the flour creates a smooth, sandy paste that bakes flat and pale. The crunchy texture comes from the irregular pieces — not from fully-incorporated butter.
Fix: Stop rubbing the moment you can no longer see solid butter pieces. Pea-sized clumps throughout the mixture are the sign to stop. Err on the side of stopping too early rather than too late.
❌ Serving Straight Out of the Oven
Result: The filling is near-boiling when it leaves the oven. Serving immediately means liquid running across the plate and apple pieces that fall apart rather than hold their shape.
Fix: Rest for a minimum of 10 minutes. The filling thickens noticeably during this window as the temperature drops and the thickened juices set slightly.
❌ Skipping the Flour in the Filling
Result: The apple juice released during baking stays liquid throughout, pooling at the base of the dish. The topping sinks into this liquid from below and turns wet on the underside.
Fix: Toss the apple slices in 2 tablespoons of plain flour before adding them to the dish. This is the single most important step for preventing a watery filling.
For more guides like this one, our baking troubleshooting guide covers the same level of detail for other common baking problems.
Variations Worth Trying
Gluten-Free Apple Crumble
What changes: Replace the plain flour in both the topping and filling with a certified gluten-free plain flour blend (1:1 substitution). Replace the rolled oats with certified gluten-free oats.
When: Substitute at the same points in the recipe — no method changes needed.
Result: The texture is nearly identical to the original. The topping may be very slightly more crumbly and delicate — handle it gently when scattering over the filling.
Apple and Blackberry Crumble
What changes: Replace 200g (about 1½ cups) of the apple slices with fresh or frozen blackberries. Reduce the filling sugar by 1 tablespoon — blackberries add sweetness. No change to the topping.
When: Add the blackberries when tossing the apples with the flour and spices in Step 2.
Result: The filling turns a deep red-purple around the blackberries during baking, and the flavour becomes sharper and more complex. The classic autumn combination.
Caramel Apple Crumble
What changes: Add 3 tablespoons of store-bought or homemade caramel sauce drizzled directly over the apple filling before adding the topping. Increase the bake time by 5 minutes.
When: Apply the caramel after spreading the apple filling in the dish (end of Step 2) and before adding the topping (Step 3).
Result: The caramel melts into the apple filling during baking, adding a deep, toffee-like layer underneath the crumble. The filling sets slightly thicker due to the sugar content of the caramel.
Mini Individual Apple Crumbles
What changes: Divide the filling and topping between 6 individual ramekins (approximately 200ml / 7oz capacity each) instead of a single baking dish.
When: Assemble as individual portions at Step 4. Reduce bake time to 25 to 30 minutes.
Result: Each person gets their own crumble with a high topping-to-filling ratio. The individual portions cool faster, so you can serve them sooner. Best for dinner parties where you want a served-at-the-table dessert.
Sheet Pan Apple Crumble (for a Crowd)
What changes: Double the full recipe and spread across a rimmed 9×13 inch baking sheet. The filling layer will be shallower, which actually speeds up cooking.
When: Assemble the same way in Step 4. Reduce bake time to 32 to 38 minutes — watch for bubbling at the edges as the signal.
Result: Serves 14 to 16 portions. The shallower filling means a crispier topping-to-filling ratio throughout — every scoop has more crumble coverage than a deep dish version. Ideal for potlucks and larger gatherings.
How to Store
Room Temperature
Apple crumble is best quality for up to 2 days at room temperature. Cover the dish loosely with foil — not tightly sealed, which traps moisture and softens the topping. Leave a small gap on one side to allow airflow. After day one, the topping will have softened somewhat as it absorbs moisture from the filling. This is a quality window, not a food-safety deadline — use your judgment if it smells off or shows any growth.
Refrigerator
Store in an airtight container or cover the baking dish tightly and refrigerate for up to 4 days. The cold will firm the filling and soften the topping further. To restore crunch, reheat individual portions in an oven at 180°C / 350°F for 8 to 10 minutes — avoid the microwave, which steams the topping rather than crisping it. The microwave is acceptable for speed when texture is not a priority, but the oven gives a noticeably better result. Best quality for up to 4 days refrigerated.
Freezer — Complete Guide
Can it be frozen? Yes — apple crumble freezes well either baked or unbaked.
Unbaked (recommended): Assemble the full crumble in a freezer-safe dish, cover tightly with two layers of cling film and then foil, and freeze for up to 3 months. Bake directly from frozen at 180°C / 350°F for 55 to 60 minutes. No thawing required — add 10 to 15 minutes to the bake time and check for bubbling as the signal.
Baked: Portion into individual airtight containers or freezer bags. Freeze for up to 2 months. Thaw overnight in the fridge and reheat in the oven at 180°C / 350°F for 12 to 15 minutes. The topping will be slightly less crunchy after freezing and thawing than when freshly baked, but the flavour is unchanged.
Texture note: The apple filling holds up well through freezing. The topping softens slightly but still bakes to an acceptable crunch when reheated from frozen in the oven.
If batch baking is something you enjoy, our make-ahead baking guide fits perfectly into that routine — it covers batch-baking and freezer preparation for ten common recipes.
How to Serve
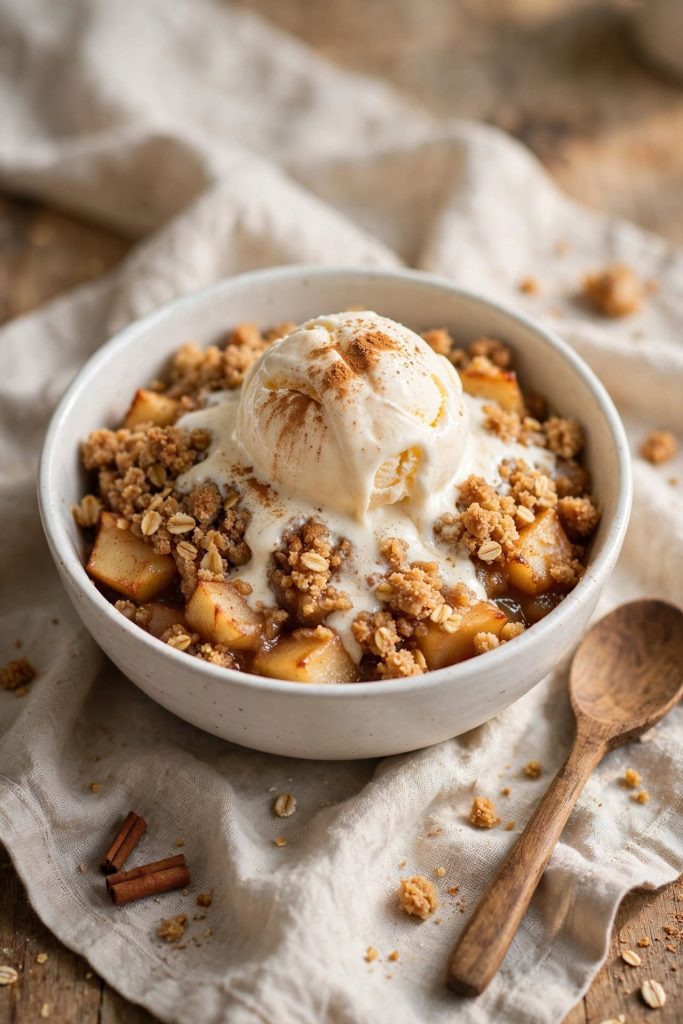
Apple crumble is best served warm — the filling is at peak flavour and texture 10 to 20 minutes out of the oven.
Classic ways to serve:
- Straight from the baking dish with a large spoon — let the filling and topping fall together naturally onto each plate
- With a generous scoop of vanilla ice cream on top — the cold ice cream against the warm filling is the classic contrast
- With cold pouring cream or crème fraîche — for a less sweet, more tangy pairing
Upgraded / occasion-worthy:
- In individual ramekins with a quenelle of clotted cream — elevated enough for a dinner party, still simple to execute
- With a drizzle of salted caramel sauce over the top just before serving — adds a visual element and a contrasting flavour
- Packed into individual containers with a lid for a gift or take-along — reheat in the oven at the recipient’s home for 15 minutes
Apple crumble pairs naturally with a strong cup of filter coffee or a pot of black tea — the bitterness of both cuts through the sweetness of the filling and topping. For occasions, serve it alongside a dessert wine or a cider with vanilla notes.
Frequently Asked Questions
Can I make apple crumble without oats?
Yes — apple crumble works without oats. Replace the rolled oats with an equal weight of plain flour for a finer, more shortbread-style topping. The texture will be denser and less chunky than an oat version, but it still bakes to a firm, golden crust. Some people prefer this version — it gives a closer result to a traditional British crumble before oats became widely used.
Why did my apple crumble topping turn out soggy?
A soggy topping is almost always caused by melted butter instead of cold butter, or too much apple juice steaming up into the topping during baking. Use cold butter cut into the flour by hand, and make sure your apple filling is not piled above the rim of the baking dish — too deep a filling creates too much steam. Also ensure the flour in the filling is evenly distributed so it can thicken the juices as they release.
How do I know when apple crumble is ready?
Apple crumble is ready when the topping is deep golden-brown and the apple filling is bubbling visibly at the edges of the dish. The bubbling is the reliable indicator — it tells you the filling has heated through and the apple juices have thickened. A topping that is golden but with no bubbling visible means the apples are still cooking — give it 5 to 8 more minutes.
Can I make apple crumble ahead of time?
Yes — you can assemble the full crumble up to 24 hours ahead and refrigerate it unbaked, covered loosely. Bake straight from the fridge — add 5 to 8 extra minutes to the bake time. Alternatively, bake the day before and reheat the whole dish at 180°C / 350°F for 15 minutes. Both methods work well. Pre-assembling and refrigerating is the better option if you want a freshly baked result on the day.
How long does apple crumble last?
Apple crumble is best quality for up to 2 days at room temperature and up to 4 days in the fridge. The crumble topping softens noticeably after the first day — reheat it in the oven at 180°C / 350°F for 8 to 10 minutes to restore crunch. This is a quality window — use your judgment if it smells off or shows any mould. Baked goods stale before they become unsafe, but always err on the side of caution.
Can I freeze apple crumble?
Yes — apple crumble freezes well both baked and unbaked. For unbaked: cover tightly and freeze for up to 3 months, then bake from frozen at 180°C / 350°F for 55 to 60 minutes. For baked: portion into airtight containers, freeze for up to 2 months, and reheat in the oven. The topping softens slightly after thawing but still crisps well when reheated from frozen — the oven gives a much better result than the microwave here.
What can I substitute for butter in the topping?
Cold coconut oil is the closest substitute for butter in an apple crumble topping — it behaves similarly when solid and produces a comparable crumbly texture when rubbed into the flour. Use the same weight as butter (100g). Avoid margarine or soft vegetable spreads — they contain too much water and will produce a paste rather than a crumble. For more guidance, our vegan baking substitutes guide covers cold-fat replacements in more detail.
Can I double this apple crumble recipe?
Yes — this recipe doubles well. Use a 9×13 inch baking dish and double every ingredient exactly. The bake time remains approximately the same — begin checking at 40 minutes for deep-golden topping and bubbling edges. Avoid tripling the recipe in one dish — a very deep filling creates too much steam and the topping will not crisp properly.
Why did my apple filling turn watery?
Watery filling comes from skipping the flour in the filling, using a high-juice variety like Gala, or slicing the apples too thin. The fix is to toss the apple slices in 2 tablespoons of plain flour before layering them in the dish — the flour absorbs the released juice and thickens it into a light sauce. If you have already baked without flour, mix 1 teaspoon of cornflour with 1 tablespoon of the juice in the dish, stir it in, and bake for a further 10 minutes.
What size baking dish works best for apple crumble?
An 8×8 inch (20×20cm) square baking dish is best for this recipe. It provides the right depth-to-surface-area ratio — deep enough to keep the filling moist during baking, but not so deep that excess steam prevents the topping from crisping. A 9×9 inch dish also works well. Avoid very deep dishes like casserole pots — they trap too much steam and produce a pale, soft topping regardless of bake time.
Which apples are best for apple crumble?
Granny Smith and Braeburn are the best varieties for apple crumble. Granny Smith holds its shape through 40 minutes of baking and its tartness balances the sweet crumble topping. Braeburn softens slightly more and brings natural caramel notes that work especially well with brown sugar. Avoid Red Delicious and Gala — both collapse during baking and release too much water, making the filling watery.
Can I use canned apples instead of fresh?
You can — but drain them very thoroughly first, as canned apples are packed in syrup and release significantly more liquid than fresh. Skip the sugar in the filling if using syrup-packed canned apples. The texture of the finished filling will be softer and the apple pieces will not hold their shape as distinctly as fresh slices. Fresh apples are strongly recommended for the best result, but canned works in a time-pressed situation.

Apple Crumble
Equipment
Method
- Granny Smith or Braeburn apples – 6 medium (∼900g / 2 lbs)
- Caster sugar – 3 tablespoons
- Plain flour – 2 tablespoons
- Ground cinnamon – 1 teaspoon
- Ground nutmeg – 1/4 teaspoon
- Lemon juice – 1 tablespoon
- Vanilla extract – 1/2 teaspoon
- Plain flour – 150g (1 1/4 cup)
- Cold unsalted butter, cubed – 100g (7 tablespoons)
- Light brown sugar (packed) – 80g (1/3 cup)
- Rolled oats – 80g (1 scant cup)
- Fine salt – 1/4 teaspoon
- Ground cinnamon – 1/2 teaspoon
Notes
- Cold butter is non-negotiable — return it to the fridge for 10 minutes after cubing if your kitchen is warm. This is what gives you the crunchy topping.
- Do not skip the flour in the filling — it thickens the apple juices into a light sauce. Without it, the filling turns watery and the topping steams rather than crisps from the underside.
- The bubbling is the doneness signal — pale topping with no bubbling means the apples are still cooking. Golden topping with active bubbling at the edges means it is done.
- Make ahead: Assemble up to 24 hours ahead, refrigerate, and bake straight from the fridge with 5 to 8 extra minutes added to the bake time.
- Storage: Room temperature up to 2 days (loosely covered). Refrigerator up to 4 days. Freezer up to 3 months unbaked or 2 months baked.Instructions Heat oven to 180°C / 350°F (fan 160°C). Lightly butter an 8×8 inch baking dish. Combine apple slices with sugar, flour, cinnamon, nutmeg, lemon juice, and vanilla in a large bowl. Toss until every slice is evenly coated. Spread into the prepared dish in an even layer. Combine flour, brown sugar, oats, salt, and cinnamon in a separate bowl. Add cold butter cubes. Rub with your fingertips until the mixture resembles coarse, uneven breadcrumbs with pea-sized butter pieces throughout. Do not over-rub. Scatter the topping loosely and evenly over the apple layer. Do not press it down. Bake for 40 to 45 minutes until the topping is deep golden-brown and the filling is bubbling at the edges. Rest for 10 minutes before serving.
More Baking Recipes You Will Love
- Apple Crisp — a no-flour version of this recipe with a pure oat-and-butter topping; if you want maximum crunch with fewer ingredients, this is the next recipe to try.
- Apple Pie Bars — the same spiced apple filling from this crumble, pressed into portable bars with a shortcrust base; the best option when you need to serve a large group without plates.
- Pear and Ginger Crumble — the same method applied to pears with fresh ginger in the filling; the technique is identical, the flavour profile is completely different.
- Rhubarb Crumble — this method translates directly to rhubarb; the filling needs more sugar and a longer bake, but the topping recipe is unchanged.
- Caramel Apple Cheesecake — for when you want the apple and caramel flavour combination in a more substantial, occasion-worthy format.
Did you make this apple crumble? Leave a ⭐⭐⭐⭐⭐ rating below and let me know in the comments how it turned out. I read every comment and would love to know what worked for you.