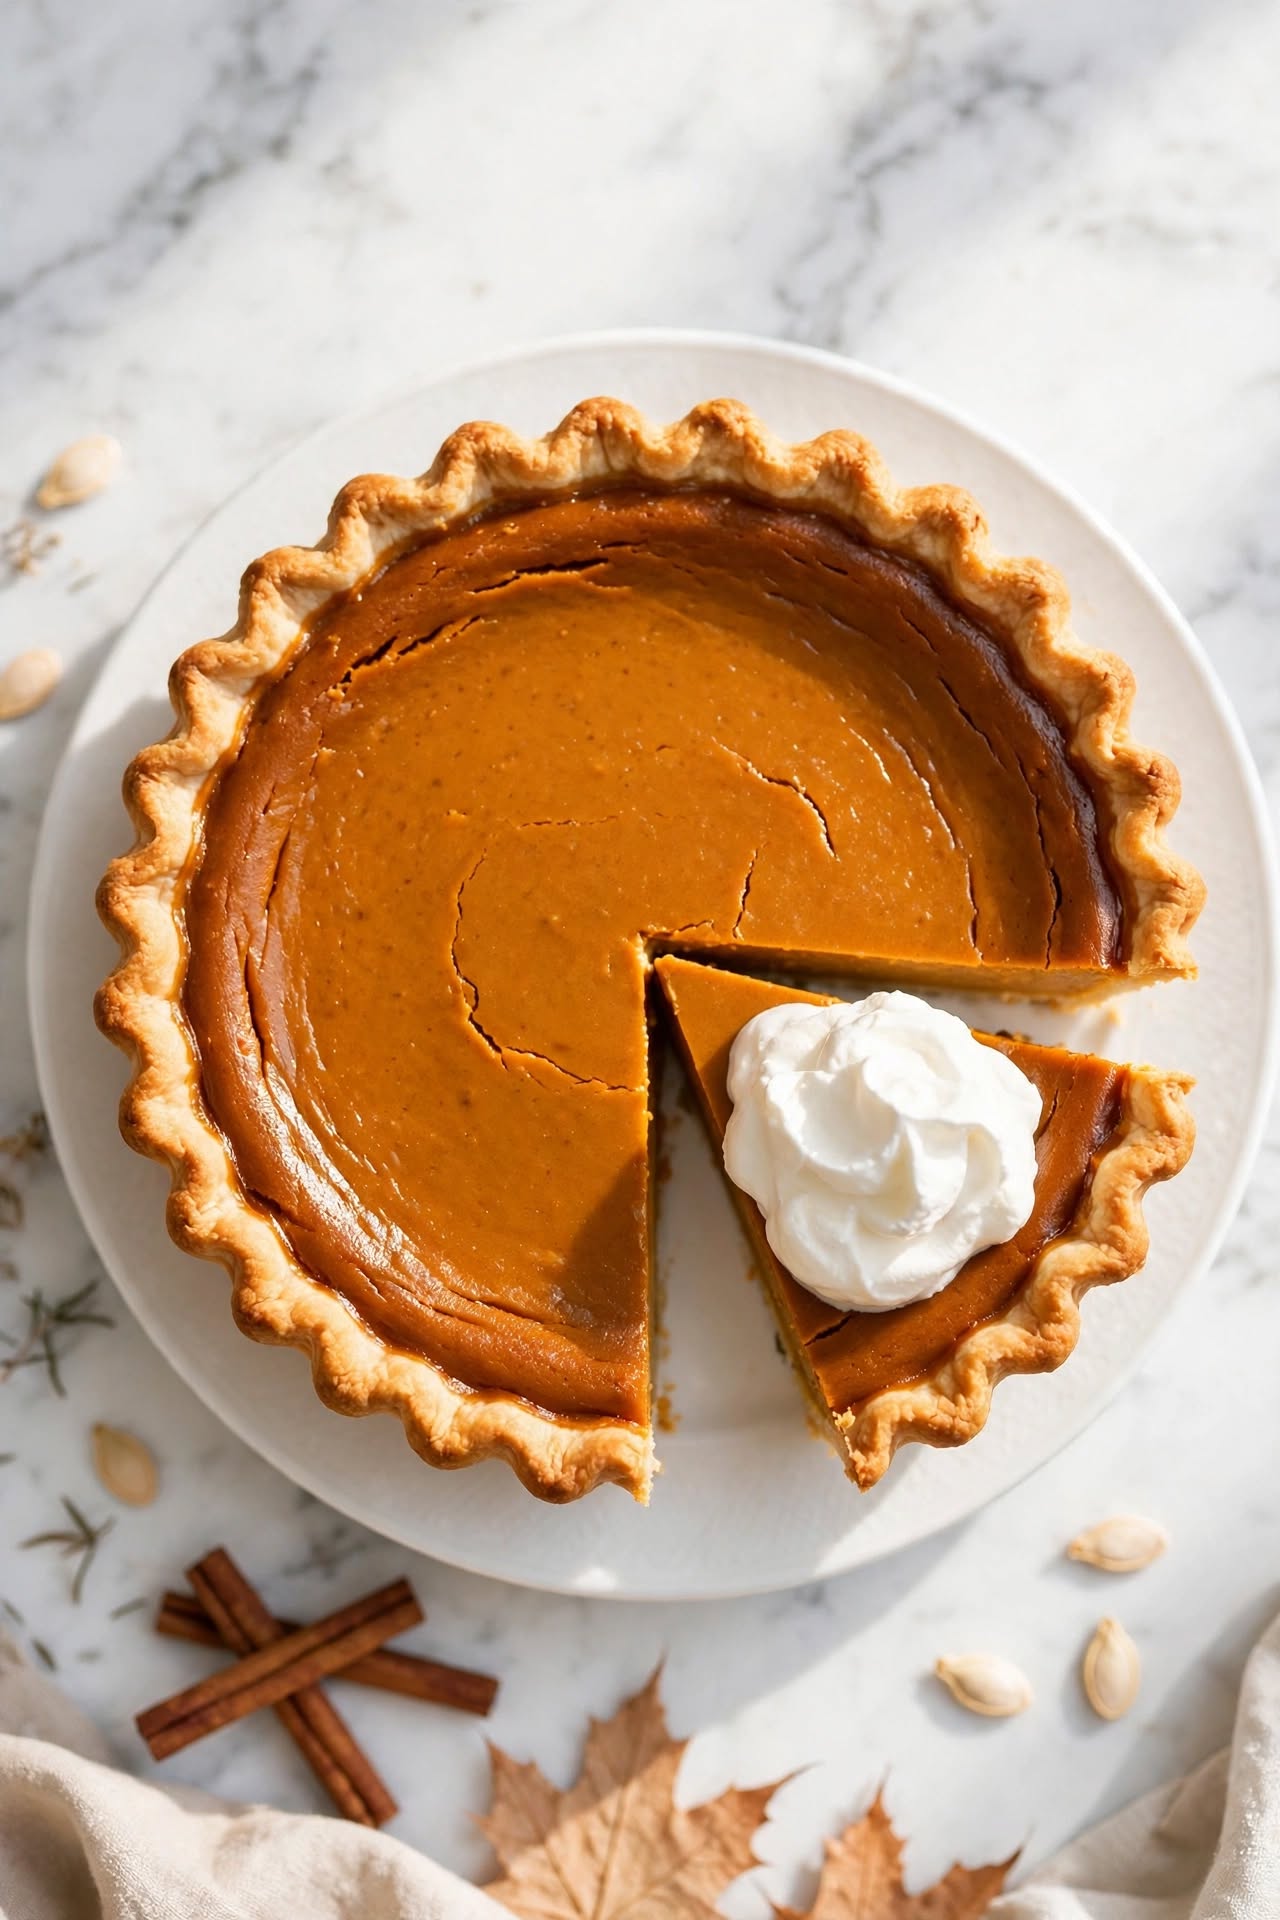
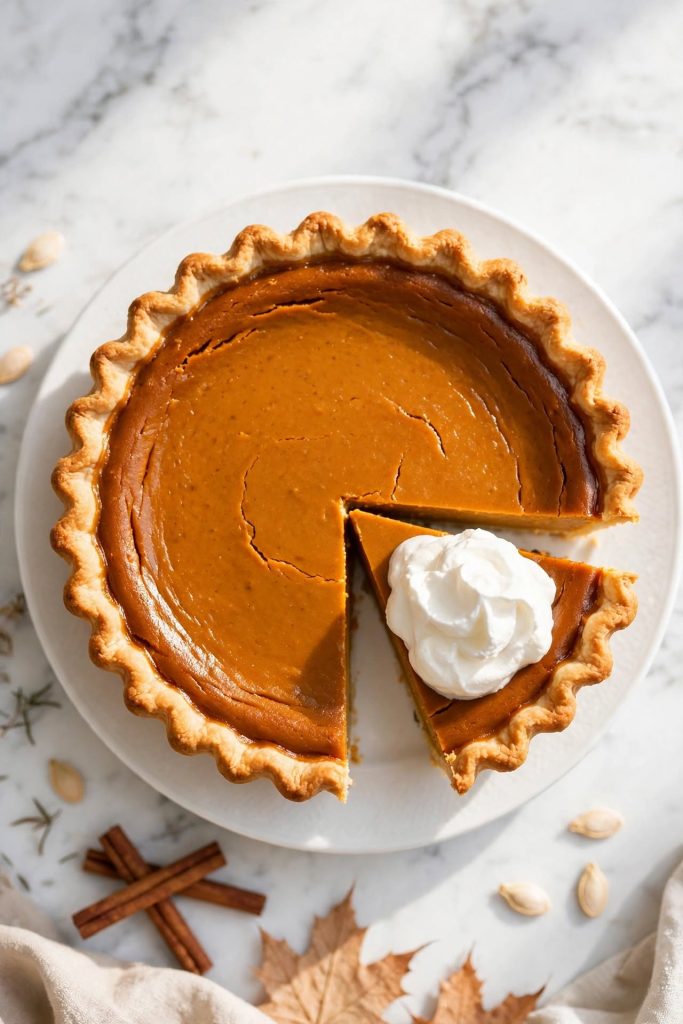
Pumpkin pie is a baked custard dessert made from spiced pumpkin purée set in a flaky pastry crust. It uses eggs and evaporated milk to create a filling that firms from the edges inward during baking, then slices cleanly once fully cooled. Total time runs under 2 hours including bake and cool. Best for anyone who wants a Thanksgiving staple that holds together on the plate without cracking.
This pumpkin pie delivers a filling with the custard texture that makes a clean, smooth slice — not a grainy one, not a cracked one. The spice balance sits at warm without being sharp, and the filling sets at the edges before the center, which means pulling it at the right moment is the only real skill the recipe asks of you. If your past pumpkin pies cracked across the top or wobbled like soup when you sliced them, overbaking and underbaking are the two culprits — and this recipe shows you exactly how to avoid both. I tested this recipe 5 times across two different ovens before publishing, adjusting the egg ratio and bake temperature each time until the custard set consistently without a crack.
Why This Recipe Works
Most pumpkin pie recipes borrow directly from the can label — and they produce results that range from fine to a cracked, weeping custard that puddles on the plate. This recipe takes a different approach to the egg ratio and bake method, and the difference shows in every slice.
- A partial blind bake prevents a soggy bottom. Pre-baking the crust for 15 minutes before adding the filling gives the pastry a head start — by the time the wet custard goes in, the crust base is already set and will not absorb moisture from the filling as it bakes.
- The custard sets from the edges inward — which means the moment the edges are puffed and set but the center still jiggles is exactly when you pull it. This produces a smooth, uncracked surface that holds a clean slice after cooling.
- Evaporated milk instead of heavy cream keeps the filling set at a firmer, more sliceable density without making the custard heavy or gluey. It also browns less on the surface than cream, giving you a flat, even top.
- Warming the pumpkin and spices on the stovetop first blooms the cinnamon, ginger, and nutmeg into the purée before the eggs go in — deepening the flavor in a way that adding cold spices to cold filling simply cannot match.
- Two to four hours of cooling time is non-negotiable. The custard finishes setting as it cools — a pie sliced warm is undercut; a pie sliced after 3 hours is silky, firm, and holds a sharp edge.
- This is a make-ahead pie by design. Baked and refrigerated the day before, it actually improves — the spices bloom further overnight and the custard texture firms to its best quality.
Internal Link 1 [IL-1]: If you are looking for more [anchor: Thanksgiving dessert recipes], that is a good place to start.
Ingredients for Pumpkin Pie
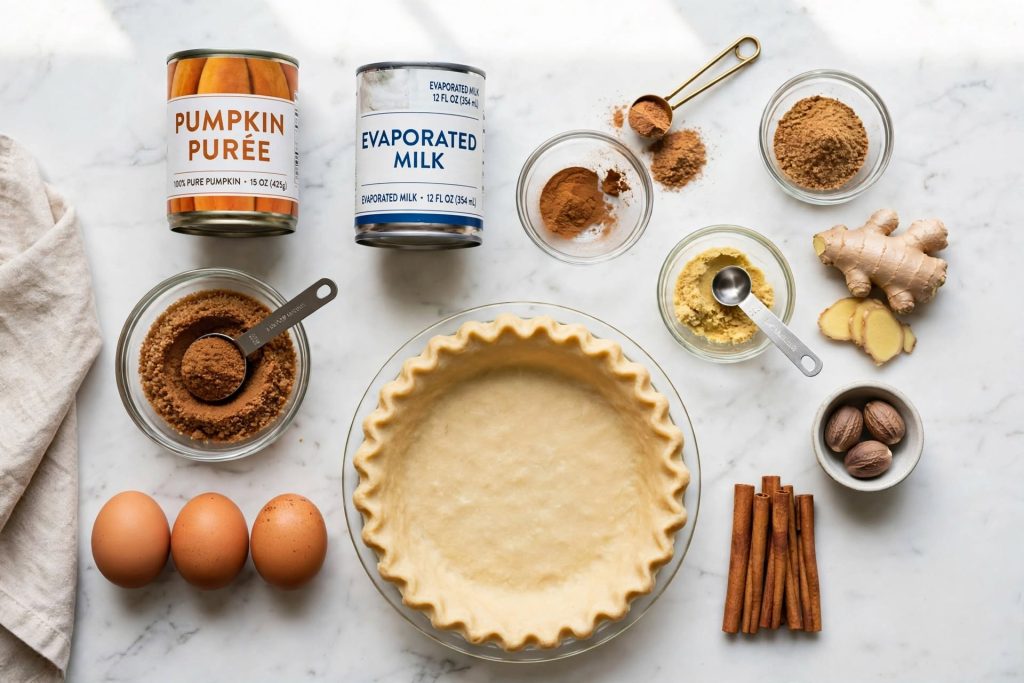
Every ingredient here has a specific job. Here is what each one does — and what to use if you need to make a substitution.
The Crust
| Ingredient | Amount | What It Does | Best Substitute + Impact |
|---|---|---|---|
| All-purpose flour | 1¼ cups (155 g) | Forms the structure of the pastry — the gluten network created during mixing gives the crust its firm, flaky layers | Gluten-free 1:1 flour blend — works, slightly more crumbly texture |
| Cold unsalted butter, cubed | ½ cup (113 g) | Creates steam pockets during baking that separate the dough into flaky layers — must be cold to prevent it from coating the flour before baking | Cold lard — flakier, more traditional; cold shortening — flakier but less flavor |
| Fine salt | ½ teaspoon | Sharpens the buttery flavor of the pastry and prevents a bland, flat-tasting crust | Skip — crust tastes noticeably flatter |
| Ice water | 3 to 4 tablespoons | Hydrates the flour just enough to bind the dough without activating too much gluten — add one tablespoon at a time | No substitute — ice cold is essential; room-temperature water develops gluten too quickly |
The Pumpkin Custard Filling
| Ingredient | Amount | What It Does | Best Substitute + Impact |
|---|---|---|---|
| 100% pumpkin purée (canned, not pie filling) | 15 oz / 425 g (1 standard can) | The base of the custard — provides the body, color, and earthiness of the filling | Butternut squash purée — slightly sweeter, very similar texture; sweet potato purée — richer, darker orange color |
| Evaporated milk | 12 oz / 355 ml (1 standard can) | The liquid base of the custard — concentrated milk with less water than regular milk, producing a denser, more stable custard | Heavy cream — richer, denser result; half-and-half — lighter, slightly less firm set |
| Eggs, large | 3 eggs | Coagulate as the pie bakes, turning the liquid filling into a sliceable custard — the ratio here prevents both a rubbery and an underset texture | No direct substitute in a baked custard |
| Brown sugar, packed | ¾ cup (165 g) | Sweetens and adds a molasses depth that white sugar cannot provide — the moisture in brown sugar also keeps the custard surface from drying and cracking | White granulated sugar — works but produces a slightly lighter, less complex sweetness |
| Ground cinnamon | 1½ teaspoons | The dominant warm spice — too little and the filling tastes bland, too much and it overpowers the pumpkin | Do not substitute — it is the flavor backbone of the filling |
| Ground ginger | ½ teaspoon | Adds a mild heat and sharpness that lifts the filling flavor and prevents it from tasting flat | Fresh grated ginger (½ teaspoon) — brighter, slightly more intense |
| Ground nutmeg | ¼ teaspoon | Adds a warm, slightly floral note — best freshly grated, where it is noticeably sharper than the pre-ground version | Allspice — similar warmth, slightly different nuance |
| Salt | ½ teaspoon | Sharpens all the spice flavors and prevents the filling from tasting one-dimensionally sweet | Do not skip |
| Pure vanilla extract | 1 teaspoon | Rounds out the spice combination and adds a background warmth that makes the filling taste more complete | Vanilla bean paste — slightly bolder; skip entirely — filling still works but tastes slightly flat |
Key Ingredient Notes
Pumpkin purée vs pumpkin pie filling: These are not the same product. Pumpkin purée is 100% cooked, blended pumpkin with nothing added. Pumpkin pie filling already contains sugar, spices, and thickeners — use it here and your pie will be over-sweetened, over-spiced, and the texture will be off. Check the label: the only ingredient should be pumpkin.
Eggs at room temperature: Cold eggs added directly to a warm pumpkin mixture can start to scramble at the surface where they contact the hot purée. Let eggs sit out for 20 minutes, or place them in a bowl of warm water for 5 minutes before cracking. Room-temperature eggs also incorporate more evenly, giving you a smoother custard.
Brown sugar, firmly packed: Measure brown sugar by pressing it firmly into the measuring cup until it holds the shape of the cup when tipped out. Loosely measured brown sugar can under-sweeten the filling significantly — the difference between a lightly packed and a firmly packed ¾ cup can be 20 grams or more.
The Pumpkin Guide — Choosing and Preparing Your Pumpkin
The pumpkin purée you use is the single biggest factor in how your pumpkin pie filling turns out — its moisture content, density, and flavor all affect the final texture of the custard.
| Pumpkin Type | What It Looks / Tastes Like | Use for This Recipe? |
|---|---|---|
| Canned pumpkin purée (100%) | Deep orange, thick, consistent moisture level, earthy and slightly sweet | Best — the go-to for consistent results; Libby’s brand sets the flavor benchmark |
| Sugar pumpkin (fresh, roasted) | Brighter orange, sweeter than canned, moisture level varies by individual pumpkin | Yes — but must be blotted thoroughly dry before using to prevent a watery custard |
| Carving pumpkin (jack-o-lantern) | Watery, stringy, low in flavor, hard to purée smooth | No — too much water and too little flavor; the custard will not set properly |
| Butternut squash (fresh, roasted) | Bright orange, slightly sweeter and nuttier than pumpkin, thick purée | Yes — an excellent substitute; blot dry and use in equal amounts |
| Sweet potato purée (fresh or canned) | Darker orange, sweeter, very dense — may need thinning with 2 tablespoons of milk | Yes — adjust sugar down by 2 tablespoons to account for the higher natural sweetness |
How to prepare fresh pumpkin purée: Halve a sugar pumpkin, scoop out the seeds, brush the cut sides with neutral oil, and roast cut-side down at 375°F (190°C) for 45 to 60 minutes until the flesh is completely tender. Scoop out the flesh, purée in a blender until smooth, then spread on a paper-towel-lined baking sheet and blot firmly to remove excess moisture. Fresh purée holds significantly more water than canned — skipping the drying step produces a watery, underset custard.
Visual cue for dry-enough purée: After blotting, the purée should look matte and thick — similar in density to the canned version. If it still looks glossy or wet, blot again with fresh paper towels.
How to Make Pumpkin Pie — Step by Step
Follow these steps in order. The one rule that changes everything: do not pour the filling into a cold, unbaked crust — the partial blind bake is what stands between you and a pale, doughy bottom that absorbs moisture from the custard.
Step 1 — Make or Prepare the Pie Crust and Pre-Bake It
If making the crust from scratch: combine flour and salt, cut in cold butter until the mixture looks like rough, uneven crumbs — some pea-sized butter pieces should still be visible. Add ice water one tablespoon at a time, mixing gently with a fork until the dough just comes together when pressed. Form into a disc, wrap in plastic, and refrigerate for at least 30 minutes. Roll to a 12-inch circle on a lightly floured surface and transfer to a 9-inch pie pan. Trim the edge to a 1-inch overhang and fold it under itself to create a thick rim, then crimp. Prick the base 20 times with a fork, line with parchment, fill with pie weights or dried beans, and bake at 375°F (190°C) for 15 minutes. Remove the weights and parchment, then bake 5 more minutes until the bottom looks dry and just beginning to color.
What to look for: The base of the crust should look dry and matte — no raw, shiny patches. The sides should be lightly golden. Small cracks in the base are fine and will seal when the filling goes in.
⚠️ Do not skip the blind bake. Pouring wet custard into an unbaked crust produces a pale, undercooked base that stays doughy even after the filling is fully set. Fifteen minutes of pre-baking is the difference between a crust you can eat and one you leave on the plate.
Step 2 — Whisk the Pumpkin Filling
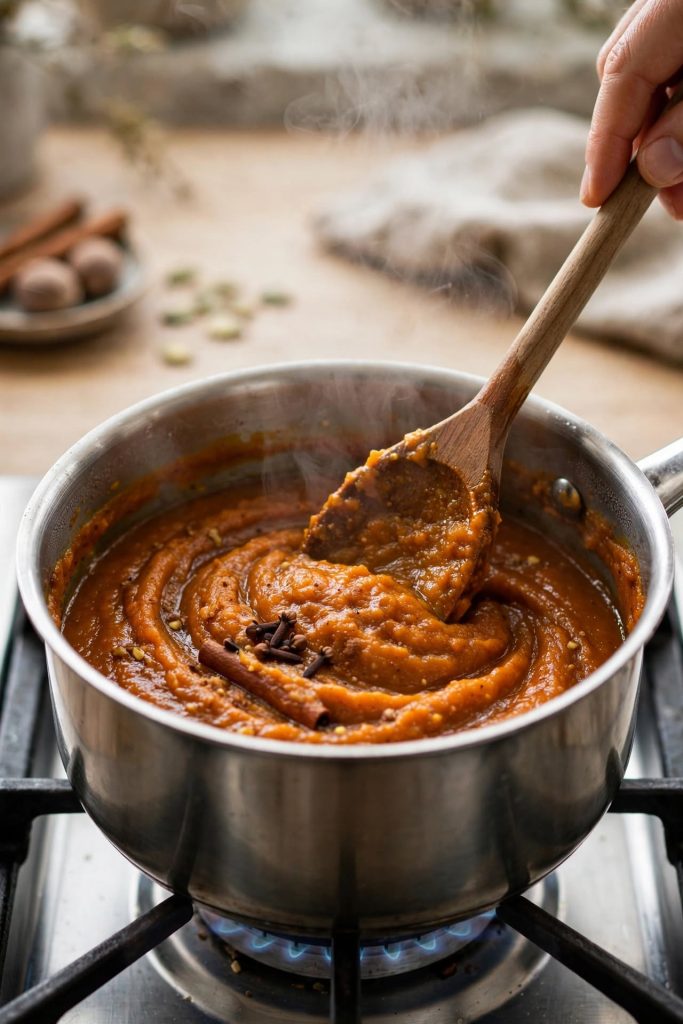
While the crust is in the oven, combine the pumpkin purée, brown sugar, cinnamon, ginger, nutmeg, salt, and vanilla in a medium saucepan over medium-low heat. Stir constantly for 3 to 4 minutes until the mixture is steaming and fragrant — you will smell the spices blooming into the purée. Remove from heat and let it cool for 5 minutes until it is warm but not hot to the touch.
What to look for: The mixture will darken slightly in color and become visibly thicker as the moisture cooks off. The aroma will shift from raw spice to warm, rounded, caramel-edged spice. If you skip this step and add the spices cold, the flavor in the finished pie will taste raw and one-dimensional.
Internal Link 2 [IL-2]: Once you are comfortable with this method, [anchor: spiced custard technique] is worth trying next.
Step 3 — Add the Eggs and Cream
Whisk the three room-temperature eggs in a separate bowl until the yolks and whites are fully combined — about 20 seconds. Slowly pour the eggs into the warm pumpkin mixture while whisking continuously. Add the evaporated milk and whisk until everything is fully incorporated and the filling looks smooth, with a uniform amber-orange color throughout.
What to look for: No streaks of egg white visible in the filling. The texture should be pourable and slightly thick — similar to a thin pancake batter. If the pumpkin mixture was too hot when you added the eggs, small flecks of cooked egg may appear — strain the filling through a fine-mesh sieve to remove them.
Step 4 — Pour the Filling Into the Crust
Place the pre-baked pie crust on an oven-safe baking sheet — this catches any spills and makes it easier to move the pie in and out of the oven without tilting the liquid filling. Pour the custard filling slowly into the center of the crust, letting it spread outward naturally until it reaches about ¼ inch below the top of the crust edge.
What to look for: The filling surface should be level and smooth. If small bubbles appear on the surface, pop them with a toothpick or pass a kitchen torch over them briefly. Transfer the baking sheet to the oven carefully — do not tilt or the filling will slosh onto the crust edge.
Step 5 — Bake Until the Edges Are Set and the Center Jiggles
Bake at 350°F (175°C) for 50 to 60 minutes, checking at the 50-minute mark. The pie is ready when the edges are puffed slightly and feel firm when you gently touch them, and the center — roughly a 2 to 3 inch circle — still has a gentle wobble when you nudge the pan. It should not slosh or ripple like liquid, but it should not be completely still either.
⚠️ Pull it before you think it is done. The center continues to set from residual heat for 20 to 30 minutes after leaving the oven. A pie that looks perfectly still in the center when you remove it has been overbaked — it will crack as it cools. The wobble you see when you pull it is not underbaking; it is the plan.
What to look for: Edges puffed and set. A 2-inch jiggle at the center. An instant-read thermometer inserted at the center reads 170°F to 175°F (77°C to 79°C). Edges may be slightly darker than the center — this is normal.
Step 6 — Cool Completely Before Slicing
Transfer the pie to a wire rack and cool at room temperature for a minimum of 2 hours before slicing — 3 to 4 hours is better. Do not refrigerate it to speed up cooling — moving a hot custard to the cold refrigerator causes the surface to condense moisture and can produce a wet, grainy top layer. Once it has cooled fully at room temperature, cover loosely with plastic wrap and refrigerate until serving.
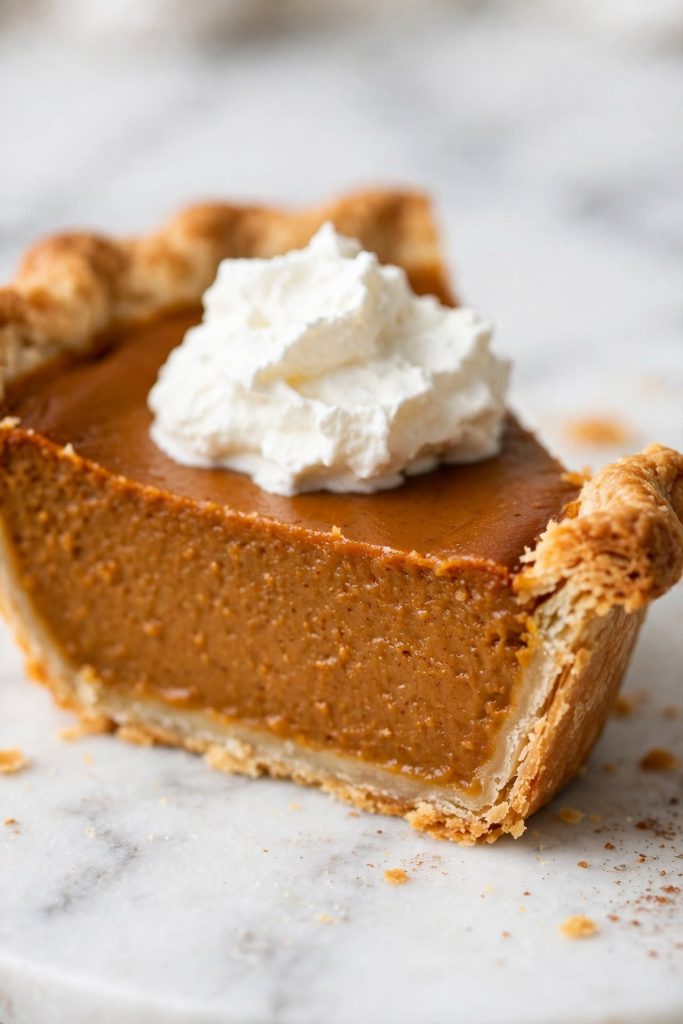
What to look for: The filling should be completely firm to the touch at the center. Press gently — it should not give or wobble. The surface should look flat, smooth, and dry. If small cracks formed during cooling, they will not affect the flavor — they only appear when the pie was pulled slightly late.
The Science Behind a Perfect Custard Slice
A clean, smooth pumpkin pie slice is not luck — it is the result of egg proteins, milk solids, and controlled heat doing specific, predictable jobs.
Why Evaporated Milk Beats Heavy Cream in Pumpkin Pie
Evaporated milk has roughly 60% of its water removed through heat processing, which concentrates the milk proteins and sugars. When added to a custard, those concentrated proteins set at a lower temperature than cream, producing a firmer, more sliceable result without making the filling heavy or dense. Heavy cream has more fat but more water — the result is a richer filling that takes longer to set and can remain slightly wobbly in the center even when the edges look done. Evaporated milk produces a more predictable, even set across the entire pie.
Why the Jiggle Test Matters
Egg proteins begin to set at around 160°F (71°C) and are fully coagulated by 180°F (82°C). Between those temperatures, they are transitioning — the outer edges of the pie, which are thinner and receive more direct heat, set first. The center, which is insulated by the surrounding custard, lags behind by 15 to 20 minutes of residual heat after the oven turns off. Pulling the pie while the center still jiggles is not underbaking — it is trusting the carry-over cooking to finish the job. Waiting for the center to look set in the oven guarantees the edges have already been overcooked and the pie will crack as it contracts during cooling.
Why Your Spice Ratio Changes Everything
The cinnamon-to-ginger-to-nutmeg ratio in this recipe is 6:2:1. Cinnamon is the dominant note; ginger provides the heat and lift; nutmeg adds the floral, almost savory undertone that makes the filling taste complex rather than one-note. Shifting too far toward cinnamon makes the pie taste like Red Hots candy; too much ginger makes it taste like a ginger snap. Heating the spices with the pumpkin purée before the eggs go in — a technique called blooming — releases the volatile oils in the spices into the fat of the purée, amplifying the flavor in a way that adding cold spices to cold custard cannot match.
Tips for the Best Result
These are the details that separate a good pumpkin pie from one people ask you to bring to every holiday dinner.
- Use an oven thermometer. Most home ovens run 25°F to 50°F hotter or cooler than the dial setting — and a 25°F difference in a custard pie changes the bake time significantly and can cause cracking. A $10 oven thermometer removes this variable entirely.
- Tent the crust edge with foil after 30 minutes. The thin edge of the crust browns faster than the filling sets — tear off a strip of foil and drape it loosely over the crust edge at the 30-minute mark to prevent it from burning before the filling is done.
- Let the blind-baked crust cool slightly before adding the filling. Pouring cold filling into a hot crust starts the egg proteins cooking at the base before the pie is even in the oven — give the crust 5 to 10 minutes to cool to warm rather than hot before filling.
- Bake the day before serving. A pumpkin pie baked the morning of Thanksgiving runs the risk of still being warm when you slice it at dinner. Baked the day before and refrigerated overnight, the custard reaches its best texture, the spices bloom fully, and you eliminate the timing pressure on the day itself.
- Slice with a thin, sharp knife. A wide chef’s knife or a pie server drags and tears the custard edge. A thin slicing knife cuts through the custard cleanly — one smooth downward stroke, not a sawing motion.
- Bring slices to room temperature before serving. A pumpkin pie slice straight from the refrigerator is cold enough to mute the spice flavor noticeably. Fifteen to 20 minutes at room temperature sharpens the cinnamon and ginger and makes the custard texture more silky rather than dense.
- To double the recipe, make two separate pies on two separate baking sheets on the same oven rack. Two pies bake at the same rate as one — rotate them halfway through for even heat distribution.
Common Mistakes to Avoid
❌ Skipping the Blind Bake
Result: Your crust base will be pale, doughy, and wet — it absorbs moisture from the liquid filling during baking and never crisps up, even when the custard is fully set.
Fix: Pre-bake the crust at 375°F for 15 minutes with weights, then 5 more minutes without, before adding any filling. A dry, lightly golden base is the only starting point for a crust that stays crisp under a wet custard.
❌ Using Pumpkin Pie Filling Instead of Pumpkin Purée
Result: Your pie will be over-sweetened with an artificial spice flavor — pumpkin pie filling contains sugar, thickeners, and pre-blended spices that make the filling taste processed and unbalanced when combined with additional sugar and spices from this recipe.
Fix: Use 100% pumpkin purée — one ingredient on the label. The cans look nearly identical; check the label. Libby’s 100% Pure Pumpkin and similar products are what you want.
❌ Overbaking Until the Custard Cracks
Result: As the pie cools, the overcooked custard proteins contract and pull away from each other, splitting the surface into cracks that run from the center outward.
Fix: Pull the pie when the center still has a 2-inch jiggle. If you have an instant-read thermometer, pull it at 170°F to 175°F. Cracks do not affect flavor — they only affect appearance — but a cracked pie is a signal that the custard texture will be slightly grainy rather than silky.
❌ Slicing Before the Pie Is Fully Cool
Result: The custard is still setting as the pie cools — a warm slice will look set on the outside but be underset in the center, producing a filling that flows and collapses on the plate.
Fix: Cool at room temperature for a minimum of 2 hours, then refrigerate. Slice cold and let individual slices warm for 15 minutes before serving.
❌ Cold Eggs Going Into Warm Filling
Result: Cold eggs added to warm pumpkin mixture can start to scramble at the surface contact point, producing tiny flecks of cooked egg white visible in the finished custard and a slightly grained texture.
Fix: Use room-temperature eggs — leave them out for 20 minutes or place in warm water for 5 minutes. If you do add cold eggs and see scrambled flecks, strain the filling through a fine-mesh sieve before pouring into the crust.
❌ Overmixing After Adding the Eggs
Result: Overmixing incorporates too much air into the custard — air bubbles rise to the surface during baking and produce a pitted, uneven top on the finished pie that looks curdled rather than smooth.
Fix: Whisk the eggs just until combined, then fold them into the pumpkin mixture with the whisk — do not beat. You want a smooth, uniform filling with no visible streaks, but no foam on the surface.
Internal Link 3 [IL-3]: For more guides like this one, [anchor: baked pie troubleshooting] covers everything in the same detail.
Variations Worth Trying
Brown Butter Pumpkin Pie
What changes: Brown 4 tablespoons of the butter (if making homemade crust) until it smells nutty and is deep amber — use it instead of plain melted butter in the crust. Additionally, cook the pumpkin-spice mixture in Step 2 for an extra 2 minutes until it darkens slightly and smells caramelized.
When: Apply to the crust at Step 1; apply to the filling at Step 2.
Result: A noticeably deeper, nuttier flavor in both the crust and the filling — the custard tastes like caramelized pumpkin rather than spiced purée. Best for a dinner party presentation where the flavor complexity will be appreciated.
Maple Pumpkin Pie
What changes: Replace the brown sugar with ½ cup of pure maple syrup (Grade A dark, for the most pronounced maple flavor). Reduce the evaporated milk by 2 tablespoons to compensate for the additional liquid from the syrup.
When: Substitute at Step 2, before adding the eggs.
Result: A lighter-colored custard with a distinct maple sweetness layered under the spice. The texture is slightly less firm than the brown sugar version — plan for an additional 5 to 10 minutes of bake time.
Dairy-Free Version
What changes: Replace the evaporated milk with full-fat canned coconut milk (shaken well, not the separated cream). Use a dairy-free butter substitute in the crust (Miyoko’s Creamery or similar work well for flaky pastry).
When: Swap at Step 3 for the filling; swap at Step 1 for the crust.
Result: A light coconut undertone in the finished custard that pairs well with the warm spices. The set is slightly softer than the dairy version — add an extra 5 to 8 minutes to the bake time and rely on the thermometer rather than the jiggle test.
Gingersnap Crust Version
What changes: Replace the pastry crust entirely with a gingersnap cookie crust — 24 gingersnap cookies (about 250 g) processed to crumbs, mixed with 4 tablespoons of melted butter, pressed into the pie pan, and baked at 350°F for 10 minutes before filling.
When: Replace the crust entirely at Step 1.
Result: A crunchy, gingery base that amplifies the spice in the filling and adds a satisfying texture contrast under the smooth custard. No blind-bake weights needed — the cookie crust pre-bake is shorter and simpler than the pastry version.
Mini Pumpkin Pie Tarts
What changes: Divide the pastry crust and filling across 12 individual 4-inch tart pans or muffin tin cups lined with strips of parchment. Each tart takes the same crust-prep steps at reduced scale.
When: Divide at Steps 1 and 4. Bake at 350°F for 25 to 30 minutes — they set faster because they are shallower.
Result: Individual servings that look polished for a dinner party, are easier to transport, and eliminate the need to slice at the table. The custard-to-crust ratio per bite is higher in the tarts — each one tastes more intensely spiced than a standard slice.
Spiced Pumpkin Pie with Cardamom and Black Pepper
What changes: Add ¼ teaspoon of ground cardamom and a generous pinch of freshly cracked black pepper to the spice mixture in Step 2.
When: Add at Step 2 when blooming the spices.
Result: A more complex, slightly floral and warm filling that tastes distinctly different from the classic version — the cardamom adds a citrus-adjacent brightness and the black pepper creates a slow, gentle heat at the back of the palate. A conversation-starting version of the holiday standard.
How to Store
Room Temperature
Because the filling is an egg-based custard, pumpkin pie should not sit at room temperature for more than 2 hours total — the USDA recommends refrigerating custard-based pies after baking and cooling. This is a food safety guideline, not just a quality one. During serving, slices left at room temperature for up to 1 hour are fine — the custard texture is at its best slightly warmer than refrigerator-cold anyway. Do not leave the whole pie out overnight. After 2 hours at room temperature, the custard can develop a wet, slightly weeping surface layer.
Refrigerator
Pumpkin pie keeps at best quality for 3 to 4 days in the refrigerator, covered loosely with plastic wrap or stored in an airtight container (if your pan fits one). After day 4, the crust begins to soften from moisture absorption and the custard can develop a slight graininess at the surface. This is a quality window — the pie is likely still safe to eat, but the texture and flavor are past their best. To serve after refrigerating, let individual slices sit at room temperature for 15 to 20 minutes — cold custard mutes the spice flavor and makes the texture feel denser than it is.
Freezer — Complete Guide
Pumpkin pie freezes well. Freeze the whole pie or individual slices — individual slices are more practical for everyday use.
- To freeze whole: Cool the pie completely at room temperature, then refrigerate until cold. Wrap the pan tightly in two layers of plastic wrap, then in foil. Label with the date.
- To freeze slices: Place individual slices on a parchment-lined tray and freeze uncovered for 1 hour until firm. Wrap each slice tightly in plastic wrap and store in a freezer bag or airtight container.
- Duration: Best quality for up to 1 month. Safe beyond this window, but the custard can develop a slightly grainy texture and the crust softens significantly after longer freezing.
- To thaw: Move from the freezer to the refrigerator overnight — 8 hours for a whole pie, 2 to 3 hours for a single slice. Do not thaw at room temperature — the outside of the custard becomes watery while the center remains frozen.
- Texture note: The spice flavor holds very well through freezing. The custard texture may feel slightly less silky than fresh — this is normal and does not affect the flavor.
Use your judgment — if it smells off or shows any mold, discard it.
Internal Link 4 [IL-4]: If make-ahead holiday baking is something you enjoy, [anchor: make-ahead Thanksgiving desserts] fits perfectly into that routine.
How to Serve
Classic Ways to Serve
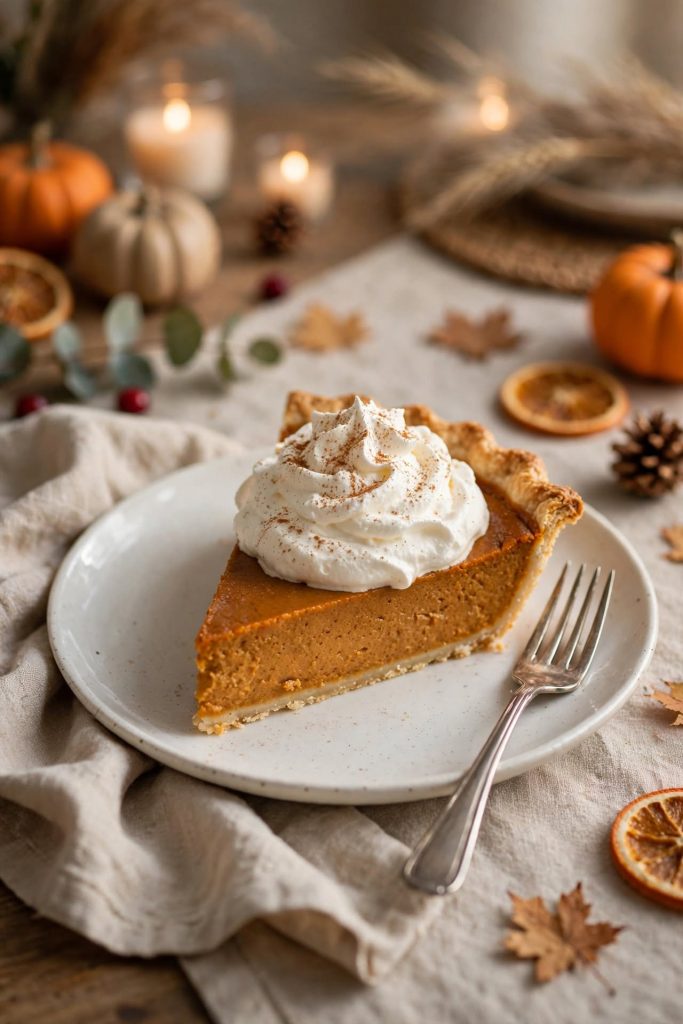
- At room temperature after 15 minutes out of the refrigerator, with a generous dollop of freshly whipped cream and a dusting of cinnamon
- Cold from the refrigerator with a scoop of vanilla ice cream — the contrast of cold custard and creamy ice cream is the simplest upgrade possible
- Plain, with nothing added — a well-made pumpkin pie with a flaky crust does not need embellishment
Upgraded and Occasion-Worthy
- With a drizzle of salted caramel sauce over the slice and a pinch of flaky sea salt — the caramel pulls out the brown sugar notes in the custard
- Topped with brown butter whipped cream: whip 1 cup of heavy cream with 2 tablespoons of browned butter (cooled to room temperature) and 1 tablespoon of powdered sugar — nutty and rich alongside the spiced custard
- As part of a pie bar at Thanksgiving, served alongside apple pie and pecan pie for guests to sample all three — pumpkin pie slices hold at room temperature for up to 1 hour, making them ideal for buffet-style serving
- Individual tart-size versions (see Variations) plated on small dessert plates with a sprig of thyme and a curl of orange zest — an elevated presentation for a dinner party
This pie pairs well with black coffee, spiced apple cider, and dessert wines with honeyed, nutty notes. Best occasion: Thanksgiving, autumn gatherings, and any make-ahead dinner party where you want the dessert done the day before.
Frequently Asked Questions
Can I make pumpkin pie without evaporated milk?
Yes — heavy cream or half-and-half work as direct substitutes in equal amounts. Heavy cream gives you a richer, denser custard that takes a few extra minutes to set. Half-and-half produces a slightly lighter texture closer to the classic canned-milk result. Avoid regular whole milk alone — the custard will be thinner and may take significantly longer to set fully in the oven.
Why did my pumpkin pie crack on top?
Cracks form when the custard is overbaked — the proteins in the eggs tighten past the point of setting and pull the surface apart as the pie cools. The fix is to pull the pie from the oven while the center still has a 2 to 3 inch wobble. The residual heat finishes the set during cooling. A crack does not affect the flavor or texture of the slice — it only affects the surface appearance.
How do I know when pumpkin pie is done?
Pumpkin pie is done when the edges are fully set and puffed slightly, and the center — roughly a 2 to 3 inch circle — still has a gentle jiggle when you nudge the pan. It should not slosh or ripple like liquid. An instant-read thermometer inserted in the center reads between 170°F and 175°F (77°C to 79°C) when it is ready to come out of the oven.
Can I make this ahead of time?
Yes — pumpkin pie is one of the best make-ahead pies. You can bake it up to 2 days before serving and keep it covered in the refrigerator. The flavor actually deepens after 24 hours as the spices bloom further into the custard. Bake, cool fully at room temperature, then refrigerate covered. Add whipped cream just before serving.
Internal Link 5 [IL-5]: If you enjoyed this recipe, [anchor: more holiday pie recipes] is the next one worth making.
How long does pumpkin pie last?
Pumpkin pie keeps at best quality for up to 3 to 4 days in the refrigerator, covered with plastic wrap or stored in an airtight container. Because the filling is an egg-based custard, it should not sit at room temperature for more than 2 hours total. After 4 days the custard can develop a slightly watery surface and the crust softens noticeably.
Can I freeze pumpkin pie?
Yes, pumpkin pie freezes well. Cool the pie completely before freezing. Wrap it tightly in two layers of plastic wrap, then in foil. Best quality for up to 1 month — the custard can develop a slightly grainy texture after longer freezing. Thaw overnight in the refrigerator, not at room temperature. Serve cold or allow to come to room temperature for 30 minutes before slicing.
What can I substitute for canned pumpkin?
Butternut squash purée is the closest substitute — roast, scoop, and purée it until completely smooth, then blot dry with paper towels to remove excess moisture before using. Sweet potato purée also works well and gives a slightly sweeter, more orange-colored filling. Do not substitute with pumpkin pie filling, which already contains sugar and spices — your pie will be over-sweetened and over-spiced.
Can I double this recipe?
Yes — doubling works well. Make two separate pies rather than one deeper pie; a deeper custard bakes unevenly and the center may remain undercooked while the edges overbake. Double every ingredient exactly. Both pies can bake on the same oven rack at the same time, though you may need to rotate them halfway through for even browning.
Why did my pumpkin pie come out watery?
A watery filling typically means the custard was underbaked, or the pumpkin purée had too much moisture in it. If using fresh or homemade pumpkin purée, spread it on a paper-towel-lined baking sheet and press dry before using — fresh purée holds significantly more water than canned. For an underbaked pie, return it to a 325°F (165°C) oven for 10 to 15 minute increments, checking the jiggle test each time.
What size pan works best?
A standard 9-inch pie pan gives you the right depth for this filling — deep enough to hold the custard without overflowing, shallow enough to bake evenly. A 9.5-inch pan also works and gives you a slightly shallower custard that sets a few minutes faster. Do not use a pan smaller than 9 inches — the filling will overflow. A ceramic or glass pan conducts heat more gently than metal and can reduce crust browning issues.
Can I use fresh pumpkin instead of canned?
Yes, but it requires extra preparation. Roast a sugar pumpkin or pie pumpkin at 375°F (190°C) until tender, then scoop and purée the flesh until completely smooth. The critical step: spread the purée on paper towels and press it firmly to remove as much moisture as possible. Fresh pumpkin purée holds more water than canned, and failing to dry it produces a watery, under-set custard.
Why is my pumpkin pie filling dark on top but pale underneath?
This is normal and happens because the top surface of the custard caramelizes slightly in the oven heat before the interior is fully set. The color difference fades as the pie cools and the layers equalize in temperature. It does not affect texture or flavor. If the top is much darker than expected, your oven may run hot — try reducing the temperature by 25°F (15°C) next time.

Pumpkin Pie
Ingredients
Method
- Make and blind-bake the crust. Make pastry, form into a disc, refrigerate 30 min. Roll to 12 inches, transfer to a 9-inch pan, trim and crimp. Prick the base 20 times. Line with parchment and pie weights. Bake at 375°F (190°C) for 15 min. Remove weights, bake 5 more min until dry and lightly golden. What to look for: dry, matte base with no raw shiny patches.Bloom the spices. In a saucepan over medium-low heat, combine pumpkin purée, brown sugar, cinnamon, ginger, nutmeg, salt, and vanilla. Stir for 3 to 4 minutes until steaming and fragrant. Remove from heat and cool 5 minutes. What to look for: mixture darkens slightly, aroma deepens and rounds out.Add eggs and milk. Whisk 3 room-temperature eggs until combined. Slowly pour into the warm pumpkin mixture while whisking. Add evaporated milk and whisk until smooth throughout. What to look for: no egg streaks, smooth uniform amber color, thin batter consistency.Fill the crust. Place the pre-baked crust on a baking sheet. Pour the filling into the center and let it spread to ¼ inch below the crust rim. Pop any surface bubbles with a toothpick. What to look for: level, smooth surface.Bake at 350°F (175°C) for 50 to 60 minutes. Check at 50 min — edges should be set and puffed, center should have a 2-inch jiggle. Center thermometer reads 170°F to 175°F (77°C to 79°C). What to look for: jiggly center, firm edges, golden crust.Cool completely. Transfer to a wire rack. Cool at room temperature for 2 to 3 hours before refrigerating. Do not rush cooling in the refrigerator. Slice cold; serve at room temperature. What to look for: fully firm center, flat and dry surface.
Notes
- Use 100% pumpkin purée — not pumpkin pie filling. Check the label: one ingredient only.
- Room-temperature eggs are important — cold eggs can scramble at the surface of the warm pumpkin mixture.
- To prevent a cracked pie: pull it with a center jiggle still present. The carry-over heat finishes the set outside the oven.
- Tent the crust edge with foil at the 30-minute mark if it is browning too fast before the filling is set.
- Store covered in the refrigerator for up to 4 days. Freeze tightly wrapped for up to 1 month; thaw overnight in the refrigerator.
Nutrition (per slice, estimated)
More Dessert Recipes You Will Love
If this pumpkin pie worked for you, these are worth making next:
- [Post Title — IL-1 recipe] — link — if you liked the custard filling format, this one uses the same egg-and-cream base in a different flavor profile that works for any season.
- [Post Title — IL-2 recipe] — link — the spice-blooming technique from this pie translates directly into this recipe, where the same method amplifies flavor in a baked custard tart.
- [Post Title — IL-3 recipe] — link — another make-ahead pie with the same Thanksgiving appeal, ready the day before with no timing pressure on the day.
- [Post Title — IL-4 recipe] — link — if you liked the gingersnap crust variation, this recipe uses it as the standard base with a complementary filling.
- [Post Title — IL-5 recipe] — link — uses the same blind-bake technique you just learned, applied to a different filling that comes together in under 20 minutes of prep.
Did you make this pumpkin pie? Leave a ⭐⭐⭐⭐⭐ rating below and let me know in the comments how it turned out. I read every comment and would love to know what worked for you.