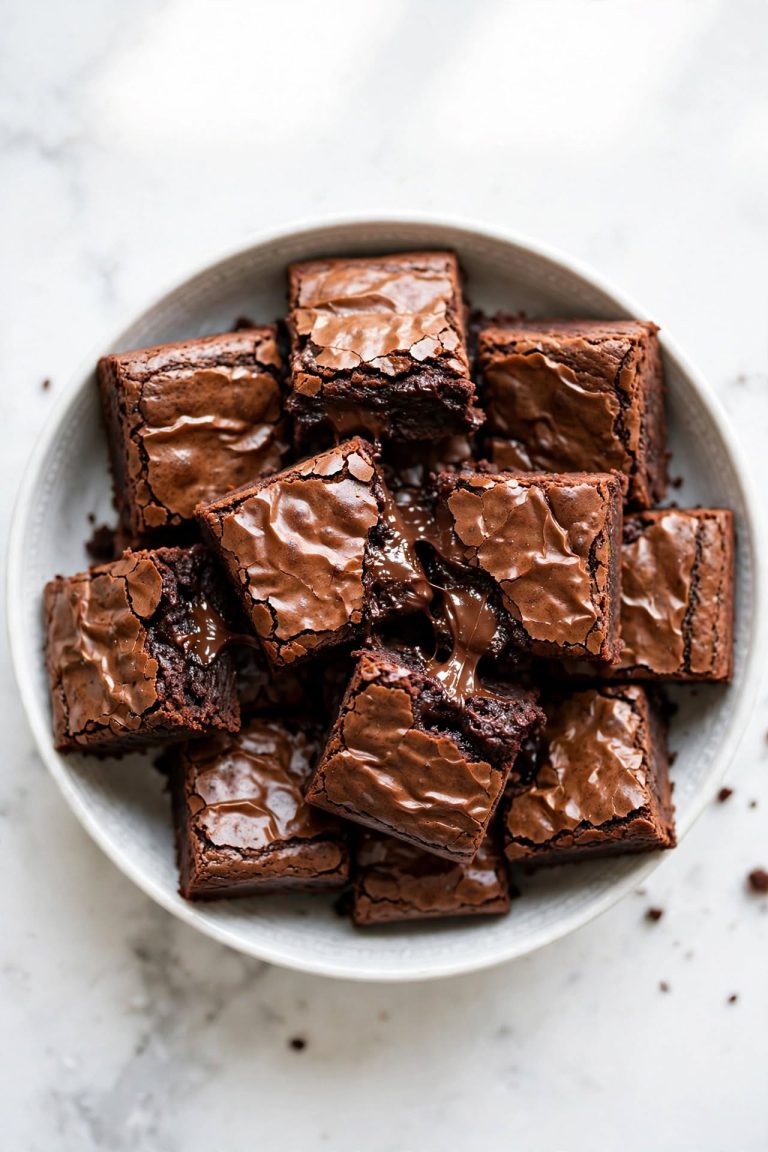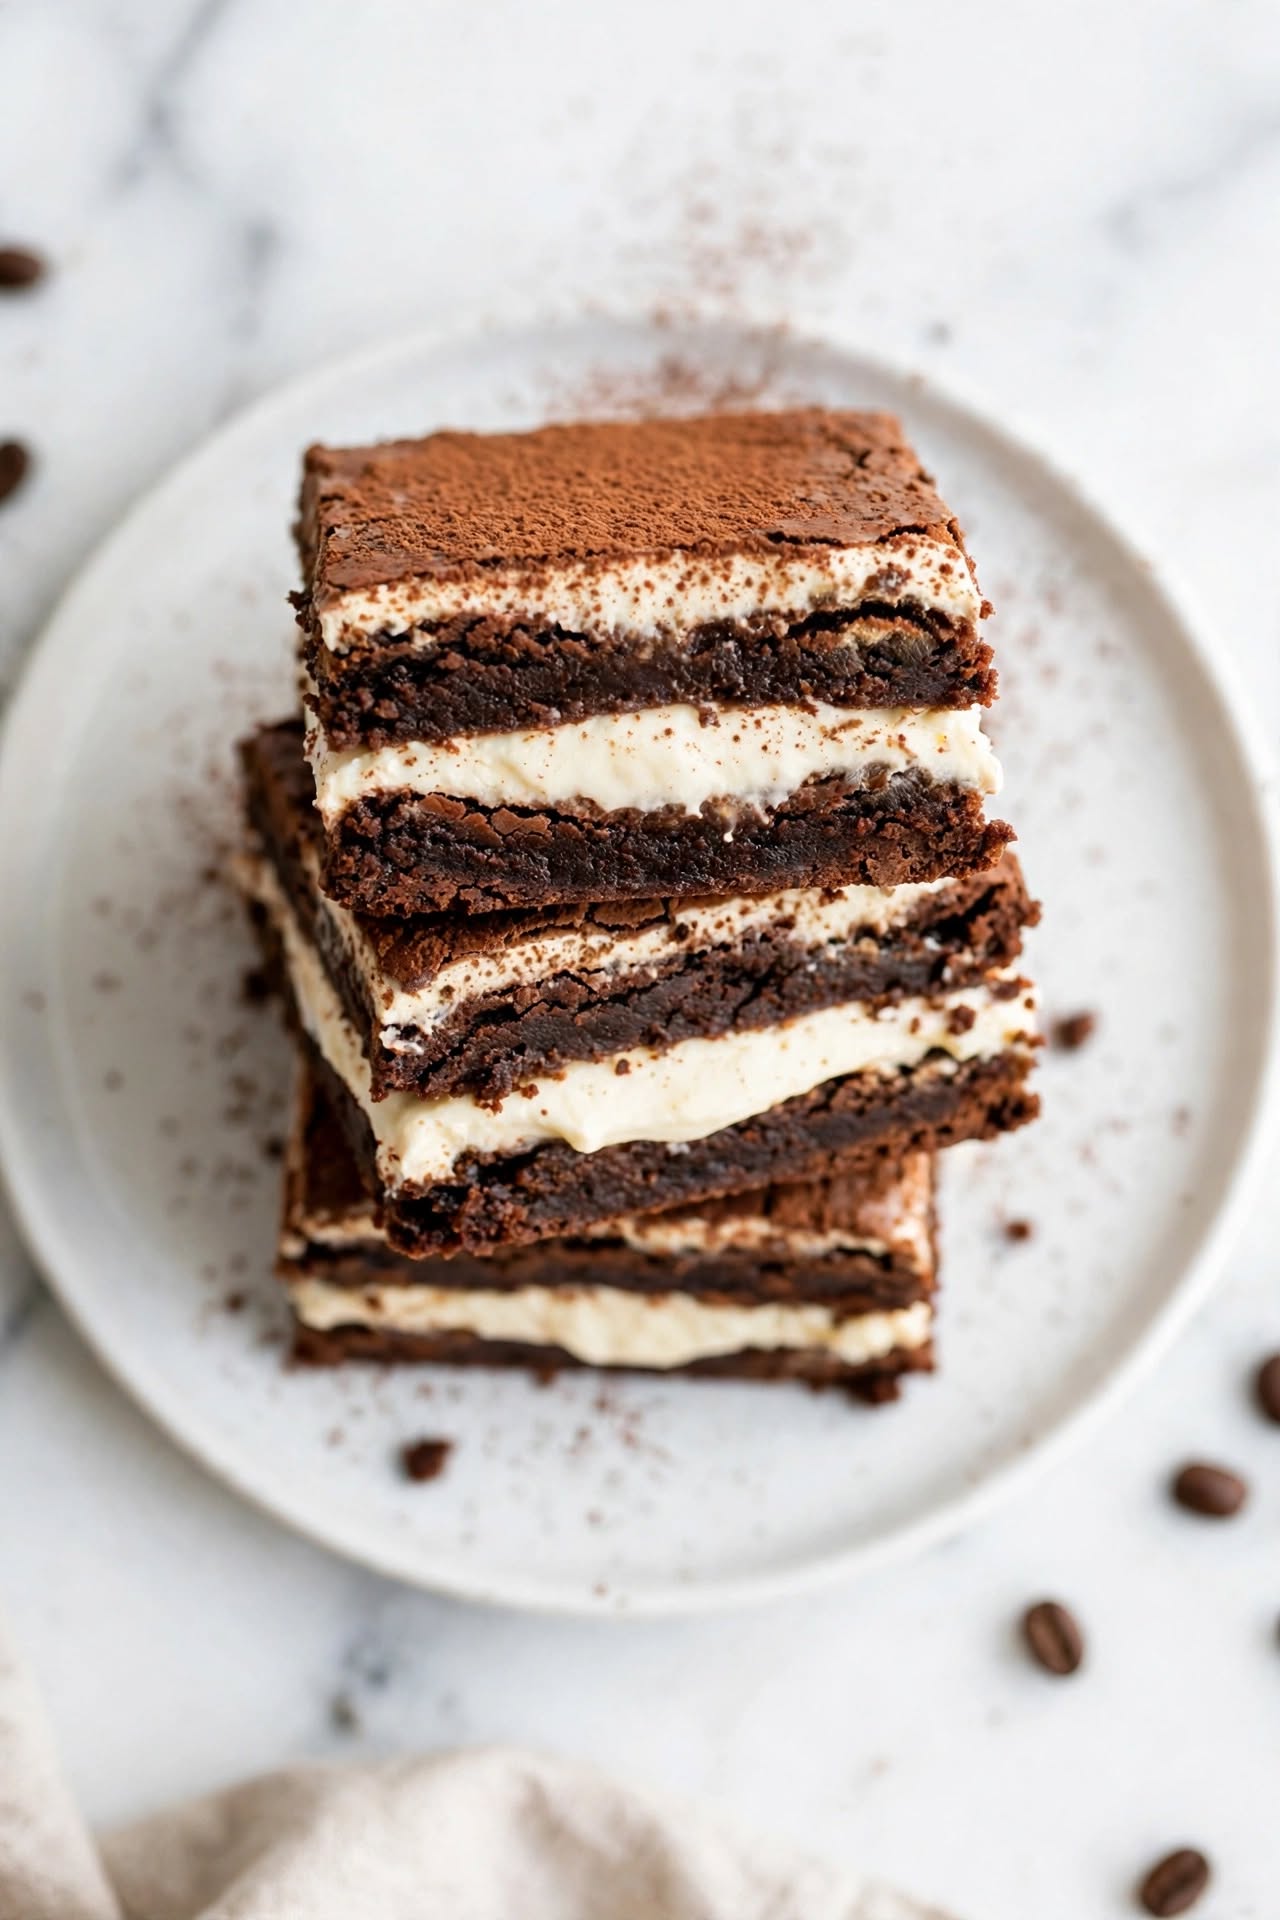
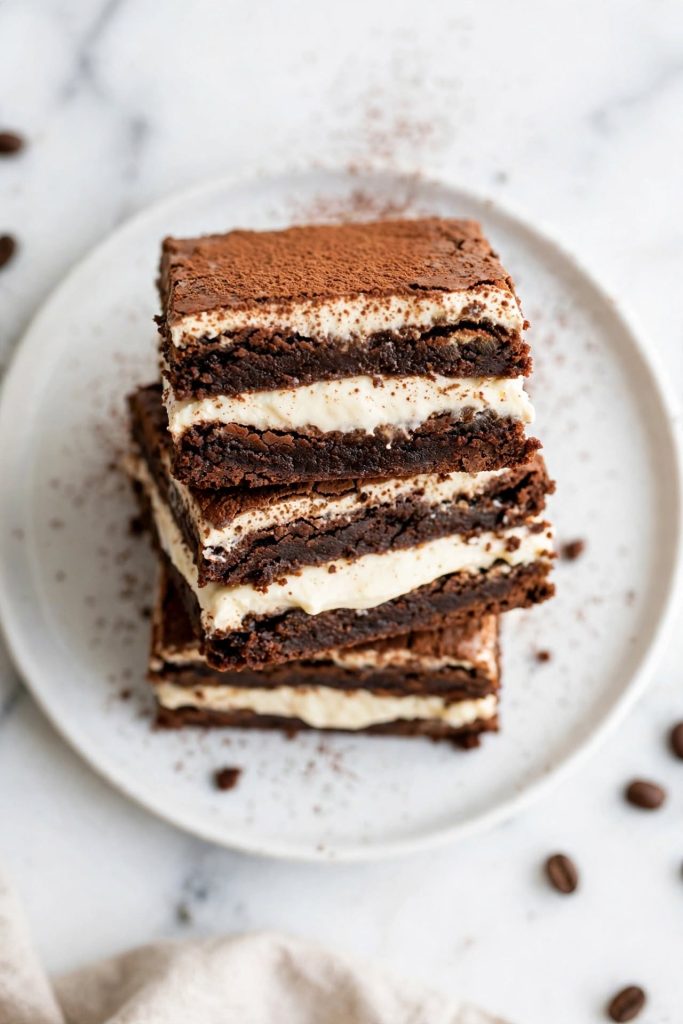
What are tiramisu brownies? Tiramisu brownies are a two-layer dessert bar that fuses a dense, fudgy chocolate brownie base with a whipped mascarpone cream topping, finished with an espresso soak and a dusting of cocoa powder. The base bakes in 22 to 25 minutes, the mascarpone layer takes 10 minutes to assemble, and the finished bars chill for 2 hours before slicing. Best for anyone who wants a showstopping dessert that looks restaurant-quality without advanced technique.
This is the tiramisu brownie recipe that looks like something you ordered at a restaurant and tastes even better the next day. Two layers — fudgy espresso-spiked brownie base and whipped mascarpone cream — separated by a coffee soak that carries flavour through both. The problem most bakers run into: a runny mascarpone layer, a brownie base that went dry, or a finished bar that falls apart when cut. Every one of those failures comes down to technique, not ingredients. This version solves them at the source. I tested this recipe across seven batches before publishing — the method here is the only one that gives you clean slices, a stable topping, and consistent results regardless of your oven.
1. Why This Recipe Works
Dozens of brownie recipes exist. Dozens of tiramisu recipes exist. The challenge with tiramisu brownies is that combining the two creates a new set of problems that neither recipe alone prepares you for. This version is designed around exactly those problems.
- Fudgy base that doesn’t crumble under the weight of the topping — the brownie layer uses a high butter-to-flour ratio that keeps it dense and compact, so it holds the mascarpone layer without buckling or sogging through when you slice.
- Espresso soak as the flavour bridge — brushing the cooled brownie base with strong espresso before spreading the mascarpone carries coffee flavour into every layer. Skip it and the two layers taste like separate desserts that happen to be stacked.
- Mascarpone layer that sets firm enough to slice — a specific ratio of mascarpone to heavy cream whipped to soft peaks gives you a layer that holds its shape when cold but melts when eaten. No gelatine required.
- Make-ahead by design — tiramisu brownies are one of those rare desserts that genuinely improve overnight. The layers meld, the espresso soak absorbs fully, and the mascarpone firms into sliceable layers by the next day.
- Six core ingredients for each layer — nothing specialty or difficult to source; this is a pantry-and-fridge recipe that works any time of year.
- Clean slices every time — chilling before cutting and using a hot knife produces the two-layer cross-section that makes these tiramisu brownies worth photographing.
If you are looking for more chocolate dessert ideas, our full collection is a good place to start.
2. Ingredients for Tiramisu Brownies
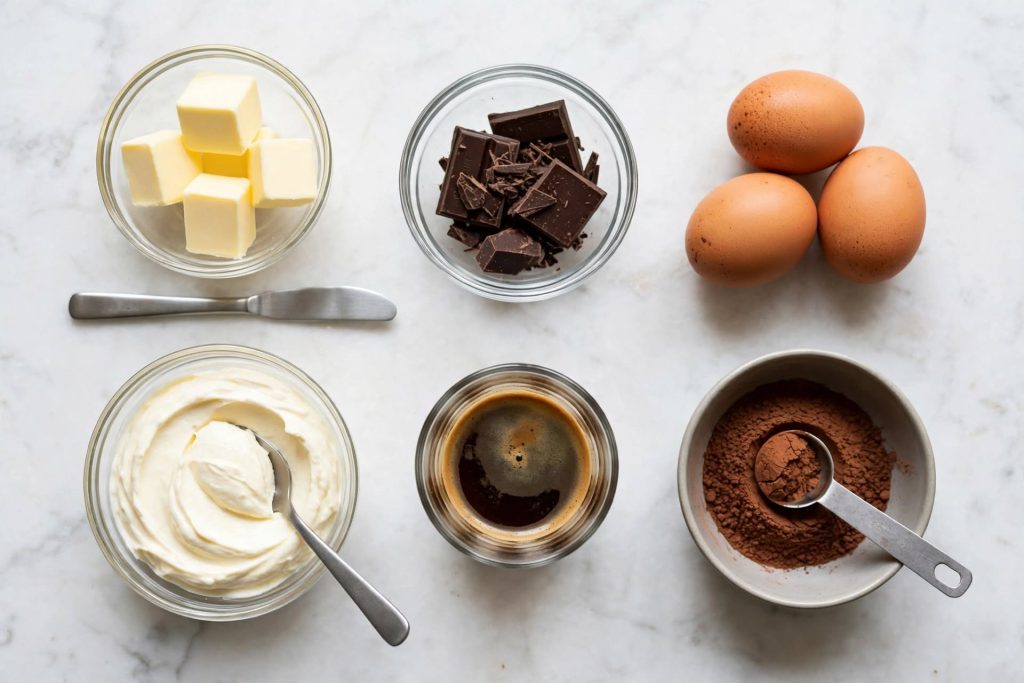
The Brownie Base
| Ingredient | Amount | What It Does | Best Substitute + Impact |
|---|---|---|---|
| Unsalted butter | 115 g (½ cup) | Creates the fudgy, dense texture; more butter = denser brownie | Vegan butter 1:1 — nearly identical result if melted the same way |
| Dark chocolate (70%) | 170 g (6 oz) | Primary flavour and structure; use 70% for bittersweet depth that balances the sweet mascarpone | Semi-sweet chocolate chips — slightly sweeter, less intense; reduce sugar by 20 g |
| Granulated sugar | 200 g (1 cup) | Sweetness and shiny crackle top; sugar dissolves into the warm butter-chocolate | Caster sugar 1:1 — dissolves faster, negligible texture difference |
| Large eggs | 2 | Structure and binding; the ratio of eggs determines fudgy vs cakey texture | Flax eggs (2 tbsp ground flax + 6 tbsp water) — slightly denser, fudgier; chill for 30 extra minutes |
| All-purpose flour | 75 g (⅔ cup) | Minimal flour = maximum fudge; this low quantity is intentional — do not add more | 1:1 gluten-free flour blend — same quantity, texture holds well |
| Fine sea salt | ½ tsp | Sharpens the chocolate and offsets the sweetness of the mascarpone topping | Table salt — reduce to ¼ tsp; it is finer and stronger |
| Instant espresso powder | 1 tsp | Amplifies chocolate depth without a detectable coffee flavour in the base | Strong brewed coffee (1 tsp reduced) — less concentrated; add ½ tsp extra |
The Mascarpone Layer
| Ingredient | Amount | What It Does | Best Substitute + Impact |
|---|---|---|---|
| Mascarpone cheese | 250 g (9 oz) | Rich, lightly sweet base for the cream layer; much lower tang than cream cheese | Full-fat cream cheese — 1:1 by weight, tangier flavour, same texture when whipped |
| Heavy cream (36%+ fat) | 120 ml (½ cup) | Whips into mascarpone to add lightness and help the layer set without gelatine | Coconut cream (full-fat, chilled overnight) — works well for a vegan version; slight coconut flavour |
| Powdered sugar | 60 g (½ cup) | Sweetens the mascarpone layer without adding graininess | Granulated sugar blended to powder — same result if finely processed |
| Vanilla extract | 1 tsp | Rounds the flavour of the mascarpone and adds warmth | Vanilla bean paste 1:1 — richer, with visible specks |
| Espresso Soak | Amount | Purpose |
|---|---|---|
| Brewed espresso (or strong coffee) | 60 ml (¼ cup) | Saturates the top of the brownie base, bridges the two layers with coffee flavour |
| Unsweetened cocoa powder | 2 tbsp | Dusted on top for the visual finish and faint bitterness that balances the sweet cream |
Key Ingredient Notes
Dark chocolate: Use a bar of 70% dark chocolate rather than chips if possible — bars melt smoother and produce a shinier top on the brownie. If using chips, melt gently over a double boiler and stir until completely smooth before adding butter.
Mascarpone: Use it straight from the fridge — cold mascarpone whips without breaking. If it warms past 65°F (18°C) before whipping, it will turn greasy and separate. Once that happens, no amount of extra whipping recovers it. Keep it cold until the moment it goes into the mixer.
Heavy cream: Must be at least 36% fat to whip properly. Lower-fat creams do not hold peaks and will produce a runny mascarpone layer that will not set over the brownies regardless of chill time.
Equipment You Need
- 8×8-inch (20×20 cm) square pan — produces the right brownie thickness for a balanced two-layer ratio; a 9×9-inch pan produces thinner layers
- Parchment paper with overhang — essential for clean removal; press into all four corners and leave 2 inches of overhang on two sides
- Stand mixer or electric hand mixer — needed for whipping the mascarpone layer to the correct consistency; a whisk by hand is not reliable here
- Double boiler or heatproof bowl — for melting chocolate without seizing; microwave works in 30-second bursts with constant stirring
- Pastry brush — for applying the espresso soak evenly across the brownie base without flooding any single spot
- Fine-mesh sieve — for dusting cocoa powder in an even, light layer over the finished bars
3. The Espresso Strength Guide
Espresso strength is the single biggest flavour variable in tiramisu brownies. Too weak and the coffee note disappears under the chocolate. Too strong and it overwhelms the mascarpone layer. Here is exactly what to use at each stage.
| Stage | Espresso Type | Strength | Use In This Recipe? |
|---|---|---|---|
| Brownie batter | Instant espresso powder | 1 tsp dissolved in batter | ✅ Best — most consistent; dissolves evenly without adding liquid |
| Espresso soak | Freshly brewed espresso shot | Single or double shot (~60 ml) | ✅ Best — fresh espresso gives the sharpest, most authentic coffee flavour |
| Espresso soak (alternative) | Strong brewed filter coffee | Brewed at 2× strength (1 tbsp per 60 ml water) | ⚠️ Acceptable — flavour is less intense; use double strength |
| Espresso soak (avoid) | Standard instant coffee | 1 tsp per 60 ml hot water | ❌ Not recommended — produces a flat, slightly bitter note without the roasted depth of espresso |
| Mascarpone layer | None | — | ✅ The soak provides all the coffee flavour the mascarpone needs by osmosis during chilling |
Workaround if you only have instant coffee: Use 2 teaspoons dissolved in 60 ml of hot water and add ¼ teaspoon of unsweetened cocoa powder to the soak — the cocoa deepens the flavour and partially compensates for the missing roasted note.
4. How to Make Tiramisu Brownies — Step by Step
Follow these steps in order. The most important rule: never rush the cooling steps — warm brownies destroy the mascarpone layer.
Step 1 — Melt the Butter and Chocolate
Add the butter and chopped dark chocolate to a heatproof bowl set over a pot of barely simmering water — the bowl should not touch the water. Stir gently with a rubber spatula until both are completely melted and the mixture is smooth and glossy. Remove from heat and cool for 10 minutes until the bowl is warm but not hot to the touch. What to look for: a silky, uniform dark brown mixture with no visible lumps of chocolate or separate pools of butter.
⚠️ Do not let any water or steam contact the melted chocolate — even a drop causes it to seize into a grainy, unworkable paste. Keep the bowl dry and the simmering water at a gentle level, not a rolling boil.
Step 2 — Add Sugar and Eggs
Whisk the sugar into the slightly cooled chocolate mixture until combined — about 30 seconds. Add the eggs one at a time, whisking vigorously after each addition. Add the vanilla extract. Continue whisking for 1 full minute — the mixture will go from dull brown to glossy and slightly ribbon-like in texture. What to look for: a thick, shiny batter that falls from the whisk in a slow, wide ribbon and holds its shape briefly on the surface before sinking back in.
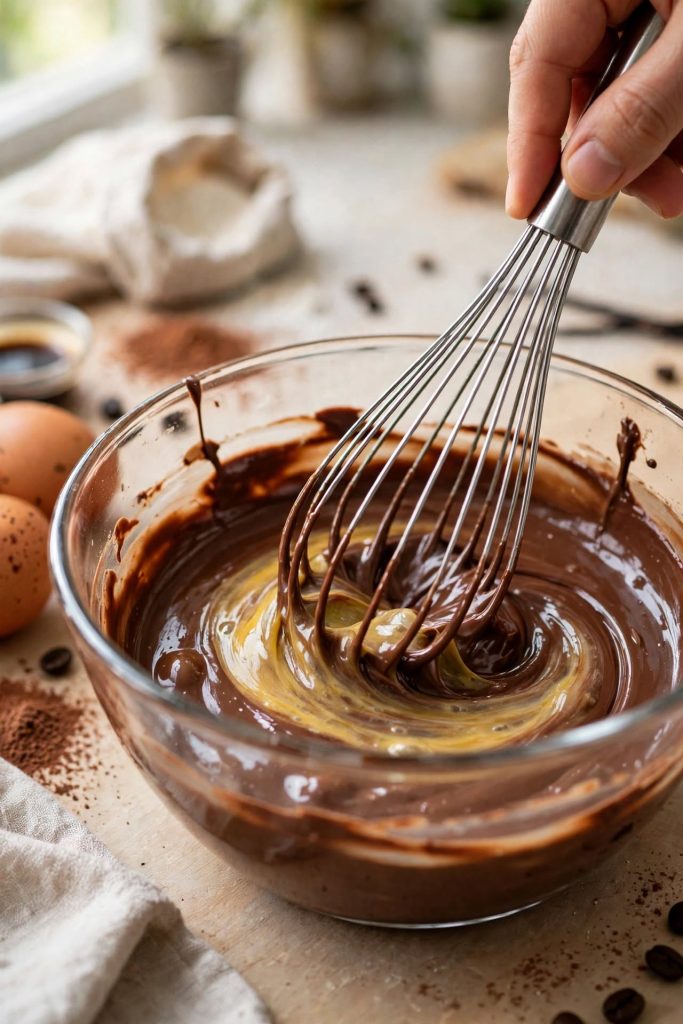
Step 3 — Mix the Dry Ingredients
In a separate small bowl, whisk together the flour, espresso powder, and salt. Whisking first distributes the espresso powder and salt evenly through the flour — if added directly to the wet batter, both tend to clump. What to look for: an even, pale-tan mixture with no visible clumps of espresso powder.
Step 4 — Combine and Pour
Add the flour mixture to the chocolate batter and fold with a rubber spatula — do not switch back to the whisk. Use slow, sweeping folds from the bottom of the bowl upward. Stop the moment you see no more dry flour streaks. The batter will look thick, glossy, and very dark. Pour into the prepared parchment-lined pan and smooth to the edges with an offset spatula. What to look for: a level surface with no thick or thin patches — uneven spreading causes uneven baking.
⚠️ The mixer goes off the moment flour streaks disappear. Overmixing past this point builds gluten — the enemy of a fudgy brownie. Even 20 extra folds changes the final texture from dense and yielding to cakey and tight.
If you enjoy mastering techniques like this, our guide on fudgy brownie techniques covers the same principles in more detail.
Step 5 — Bake the Brownie Base
Bake in a preheated 175°C (350°F) oven on the middle rack for 22 to 25 minutes. Start checking at 22 minutes by inserting a toothpick 2 cm from the edge. Moist crumbs clinging to the toothpick means done — pull the pan immediately. A clean toothpick means overbaked. What to look for: set, slightly matte edges pulling slightly from the pan sides, with a centre that still has the faintest shimmer when the pan is gently rocked.
Step 6 — Make the Espresso Soak
Let the baked brownie base cool in the pan on a wire rack for 30 minutes to room temperature, then refrigerate for 20 more minutes — the base must be cold before the soak is applied. Brew a single or double espresso shot and let it cool to room temperature. Using a pastry brush, apply the espresso evenly across the entire top surface of the brownie — use all 60 ml. What to look for: the surface will absorb the espresso within 30 to 60 seconds, turning slightly darker and appearing very slightly wet.
Step 7 — Whip the Mascarpone Layer
In the cold bowl of a stand mixer fitted with the whisk attachment, combine the cold mascarpone, heavy cream, powdered sugar, and vanilla. Beat on medium-high speed for 60 to 90 seconds until the mixture forms soft, billowy peaks that hold their shape when the whisk is lifted. Stop at soft peaks — the mixture should look creamy, not stiff. What to look for: peaks that droop at the tip rather than standing straight up. Stiff peaks mean you have gone too far.
Step 8 — Assemble and Chill
Spread the mascarpone mixture evenly over the espresso-soaked brownie base, using an offset spatula to bring it all the way to the edges. Dust a generous, even layer of cocoa powder through a fine-mesh sieve over the entire surface. Cover with plastic wrap without pressing it against the cream layer and refrigerate for a minimum of 2 hours, or overnight. What to look for: a firm, set mascarpone layer that doesn’t jiggle when the pan is moved.
5. The Science Behind Perfect Tiramisu Brownies
Great tiramisu brownies are not luck — they are the result of chocolate, dairy, and espresso doing specific, predictable jobs under the right conditions.
Why Espresso Soak Changes Everything
Without the soak, the two layers taste like separate desserts: a chocolate brownie on the bottom and a coffee-flavoured cream on top. The soak is the flavour bridge. Espresso applied to the cooled brownie surface wicks into the crumb within minutes, carrying coffee flavour deep into the base. After chilling, the espresso migrates upward through osmotic diffusion into the mascarpone layer, so every bite contains all three flavour elements simultaneously — chocolate, espresso, and cream — rather than depending on which layer happens to hit your tongue first.
Why Mascarpone Beats Cream Cheese Here
Mascarpone has a fat content of 40 to 45% versus cream cheese at 30 to 33%. That extra fat does two things: it produces a richer, denser mouthfeel that more closely mimics traditional tiramisu, and it provides a more stable emulsion when whipped with cream, which means the layer holds its shape cleanly over the brownie base for up to 4 days without weeping. Cream cheese is slightly tangier and slightly more acidic — it works as a substitute but the flavour profile shifts away from classic tiramisu toward something that tastes more like a cheesecake brownie.
Why Chilling Is Non-Negotiable
The 2-hour chill does three things simultaneously: it firms the mascarpone layer from soft-spreadable to sliceable; it allows the espresso soak to distribute evenly through the brownie crumb; and it melds the flavours of both layers so the finished bite is a unified dessert rather than two textures sitting next to each other. Cutting before chilling produces smeared layers, a collapsed mascarpone edge, and a cocoa-dusted surface that smudges rather than holding its pattern.
6. Tips for the Best Result
These are the details that separate decent tiramisu brownies from the ones people ask you to make again before the plate is finished.
- Line the pan with parchment overhang — extend parchment 5 cm (2 inches) past two opposite sides of the pan to create handles. Cold tiramisu brownies lift out cleanly in one piece; without the overhang you are cutting them in the pan and losing edge definition.
- Cool the batter before adding eggs — if the melted chocolate-butter mixture is too hot when the eggs go in, the eggs begin to cook and you get scrambled streaks in your batter. Wait until the bowl is warm but comfortable to hold on the underside.
- Use a hot knife for slicing — run a sharp knife under hot water and wipe dry between every cut. The warm blade glides through the mascarpone layer cleanly rather than dragging it. This single step is the difference between clean, photo-worthy squares and smeared edges.
- Make it the day before — tiramisu brownies are one of those rare desserts that are measurably better after 12 to 24 hours in the refrigerator. The layers meld, the soak distributes fully, and the cocoa dusting softens from powdery to the characteristic tiramisu texture.
- Dust cocoa just before serving if chilling longer than overnight — after 48 hours, the cocoa powder absorbs moisture from the mascarpone and can look patchy. Reserve 1 teaspoon and dust again right before serving for a fresh appearance.
- To double the recipe — use a 9×13-inch pan and increase bake time to 28 to 32 minutes. All other ratios and timings remain identical.
7. Common Mistakes to Avoid
These seven errors account for the overwhelming majority of failed tiramisu brownies. Every one of them has a direct, simple fix.
❌ Overbaking the Brownie Base
Result: A dry, crumbly base that crumbles when you try to slice the assembled bars and cannot absorb the espresso soak properly.
Fix: Pull the brownie base when a toothpick comes out with moist crumbs — never clean. A clean toothpick at the 22-minute mark means the moisture has already baked out. Start checking at 22 minutes and treat moist crumbs as the target, not a sign of underdone.
❌ Using Warm Brownies for the Mascarpone Layer
Result: The mascarpone melts on contact with the warm base, seeps into the brownie crumb rather than sitting on top as a distinct layer, and produces a wet, undefined surface rather than a clean two-layer cross-section.
Fix: Cool the base to room temperature (30 minutes on a rack), then refrigerate for at least 20 minutes before applying the espresso soak and mascarpone. If you are short on time, 15 minutes in the freezer achieves the same effect.
❌ Skipping the Espresso Soak
Result: Two flavour profiles that sit next to each other without integrating — chocolate brownie underneath, vanilla cream on top, with no unifying coffee note running through the whole bite.
Fix: The soak is not optional in a tiramisu brownie. Apply all 60 ml of cooled espresso to the cold brownie base using a pastry brush — this takes under 2 minutes and is the single most impactful step in the recipe for the finished flavour.
❌ Overwhipping the Mascarpone
Result: The mascarpone mixture breaks — it turns grainy, weeps liquid, and produces a curdled-looking layer that will not spread smoothly or set properly over the brownies.
Fix: Stop at soft peaks — the mixture should droop from the lifted whisk rather than stand straight up. At the first sign of stiff peaks, stop the mixer immediately. If it has already broken, add 2 tablespoons of cold heavy cream and fold gently — this sometimes rescues a slightly overwhipped batch.
❌ Cutting Before Fully Chilled
Result: Smeared mascarpone layers, collapsed edges, and a cocoa-powder surface that drags rather than cuts — the finished bars look messy regardless of how clean the layers were before cutting.
Fix: Minimum 2 hours of refrigerator time before cutting, with overnight being ideal. Use a hot knife, wiping between every cut. Patience here is the only fix — there is no shortcut.
❌ Using Instant Coffee Instead of Espresso
Result: A flat, slightly bitter coffee note that lacks the roasted depth and complexity of espresso — the final flavour reads as “coffee-flavoured” rather than “tiramisu.”
Fix: Use brewed espresso for the soak and espresso powder (not instant coffee granules) in the batter. If espresso is not available, brew double-strength filter coffee and add ¼ teaspoon of cocoa powder to the soak to compensate for the missing roasted note.
❌ Measuring Flour by Scooping
Result: Up to 20% too much flour — the brownie base goes cakey instead of fudgy and lacks the dense, compact texture needed to support the mascarpone layer without crumbling.
Fix: Spoon flour into the measuring cup and level with a straight edge — or use a kitchen scale (75 g is unambiguous). With only ⅔ cup of flour in this recipe, even a small overage significantly changes the final texture.
For more guides that break down common baking problems in this kind of detail, our post on troubleshooting brownie baking is worth reading before you start.
8. Variations Worth Trying
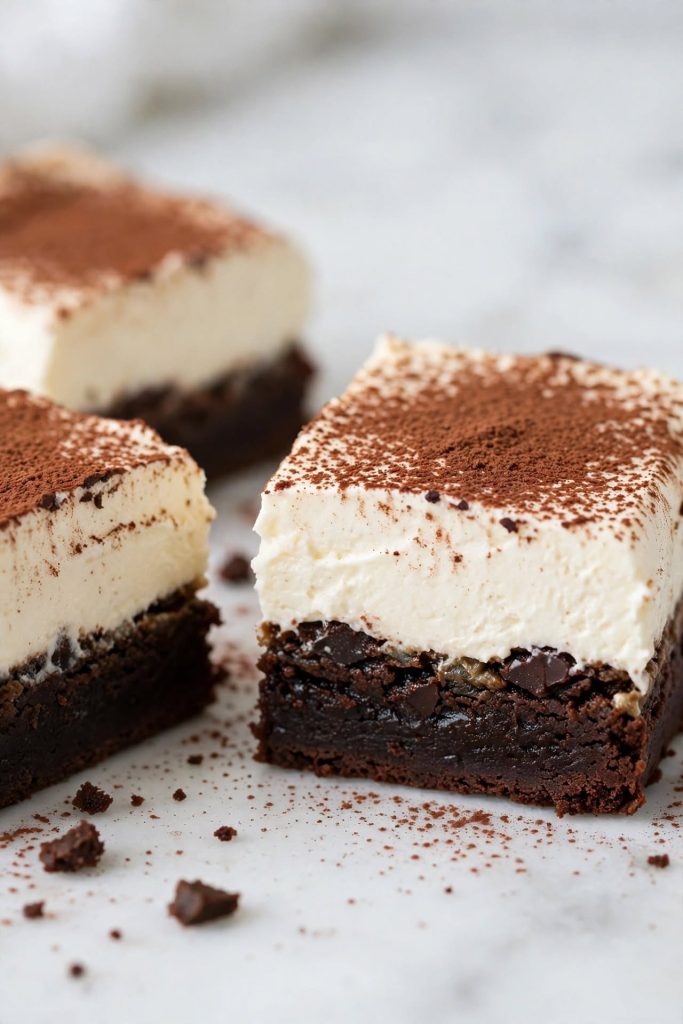
Kahlúa-Spiked Version
What changes: Add 2 tablespoons of Kahlúa or other coffee liqueur to the espresso soak. Reduce the brewed espresso to 45 ml and add 15 ml Kahlúa. You can also add 1 tablespoon to the mascarpone layer before whipping.
When: Add to the espresso soak at Step 6; stir Kahlúa into mascarpone before whipping at Step 7.
Result: A noticeably more complex, adult dessert with the warm vanilla and caramel undertones of the liqueur complementing the espresso and chocolate. The alcohol also softens the brownie base slightly, producing an even more yielding texture after chilling.
White Chocolate Tiramisu Brownies
What changes: Replace the dark chocolate in the brownie base with 170 g of good-quality white chocolate. Reduce sugar to 150 g since white chocolate is significantly sweeter. Omit the espresso powder from the batter — the espresso soak carries all the coffee flavour.
When: Straight substitution in the brownie batter at Steps 1 through 4.
Result: A blonde brownie base with a butterscotch-vanilla flavour that contrasts beautifully with the espresso soak and mascarpone topping. Visually striking when sliced — the pale base against the white cream layer and dark cocoa dusting makes for a dramatic cross-section.
Vegan Tiramisu Brownies
What changes: Replace butter with vegan butter. Replace eggs with flax eggs (1 tbsp ground flax + 3 tbsp water per egg, rested 5 minutes). For the mascarpone layer, use a blend of cashew cream and chilled coconut cream (1:1 ratio, 125 ml each) whipped together with powdered sugar and vanilla.
When: Straight substitutions throughout — no method changes.
Result: A dairy-free version that is very close to the original in both flavour and texture. The coconut cream layer has a subtle coconut note — use refined coconut oil in the brownie if you want to avoid any coconut flavour in the base. Extend chill time to 3 hours for the coconut cream layer to set fully.
Gluten-Free Version
What changes: Replace all-purpose flour with the same weight (75 g) of a 1:1 gluten-free flour blend that contains xanthan gum.
When: Straight substitution at Step 3.
Result: A slightly denser, more fudgy brownie base that is barely distinguishable from the original. Most gluten-free flour blends produce a marginally stickier batter — this is normal. Chill the assembled bars for an additional 30 minutes to allow the gluten-free base to firm up fully before slicing.
Mini Tiramisu Brownie Bites
What changes: Use a mini muffin tin instead of a square pan. Grease with butter and dust with cocoa powder. Fill each cup two-thirds full with brownie batter. Bake at the same temperature for 10 to 12 minutes. Cool, apply a tiny amount of espresso soak with a brush, and pipe a small rosette of mascarpone on top using a piping bag with a star tip. Dust with cocoa.
When: Full method change — use mini muffin tin from the start.
Result: Two-bite portions ideal for parties, dessert tables, and gifting. One batch produces approximately 24 mini bites — enough to serve 12 people at a gathering. The individual portions eliminate the need for slicing and make clean presentation effortless.
9. How to Store
Room Temperature
Tiramisu brownies are not suitable for room-temperature storage beyond 2 hours due to the mascarpone and heavy cream topping. If left at room temperature, the mascarpone layer will soften past the point of stability and lose its definition. Unlike plain brownies, which can sit on a counter for days, these require refrigeration the moment they are assembled. If you are serving them at a party, keep the pan in the refrigerator right until the moment you plate them.
Refrigerator
Store tiramisu brownies in an airtight container in the refrigerator. Best quality for up to 4 days. The mascarpone layer and brownie base actually meld together more over the first 24 to 48 hours, producing an improved, more integrated flavour after the first day. What degrades first: the cocoa powder dusting absorbs moisture from the mascarpone after about 48 hours and can look uneven — dust fresh cocoa on top with a sieve right before serving if appearance matters. Bring to the table cold — these bars eat best cold, not at room temperature.
Freezer — Complete Guide
Can tiramisu brownies be frozen? The brownie base freezes excellently; the mascarpone layer does not — it separates on thawing into grainy curds and liquid. Freeze the two components separately for best results.
Freezing the brownie base: Bake and cool completely. Do not apply the espresso soak or mascarpone layer. Wrap the cooled base tightly in plastic wrap, then in foil. Freeze for up to 2 months. Label with the date.
Thawing and assembling: Transfer the wrapped base to the refrigerator and thaw overnight — do not thaw at room temperature. Once cold throughout, apply the espresso soak and make a fresh mascarpone layer. Assemble and chill for 2 hours before slicing. The thawed base actually absorbs the soak slightly more readily than a freshly baked base, producing an especially pronounced espresso flavour.
Freezing fully assembled bars: Not recommended. Mascarpone does not freeze and thaw cleanly — the texture degrades significantly and the layer will appear curdled. Make a fresh mascarpone layer every time from the frozen brownie base.
Use your judgment — if anything smells off or shows visible mould, discard it.
If batch baking ahead and building a dessert repertoire that works around a schedule is part of how you cook, our guide on make-ahead dessert baking fits perfectly into this approach.
10. How to Serve
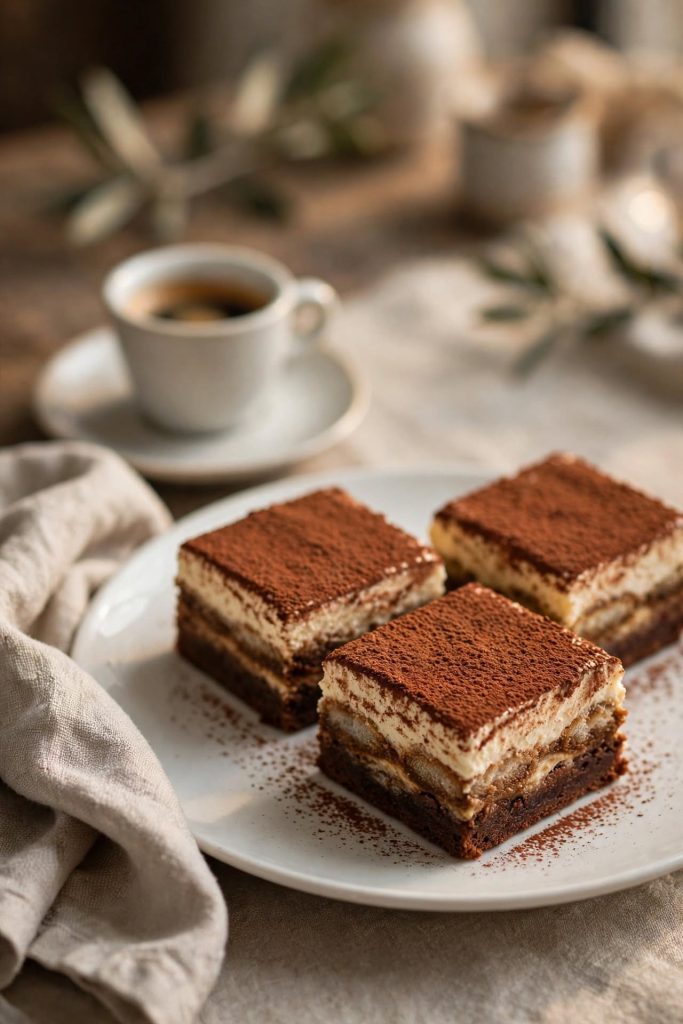
Classic Ways to Serve
- Cold, straight from the refrigerator, on a small dessert plate with a hot espresso alongside
- Stacked two-high on a tiered dessert stand for a coffee table display or brunch spread
- Plated individually with a dust of extra cocoa powder applied at the table for a restaurant-style presentation
Upgraded and Occasion-Worthy
- For a dinner party: plate one square per person on a warmed (not hot) white plate with a small side of cold heavy cream and a sprinkle of flaky sea salt — the salt against the bittersweet chocolate creates an unexpected contrast
- For a dessert table: cut into 1-inch square bites and arrange on a flat board with cocktail picks; the two-layer cross-section is visually dramatic at any scale
- For gifting: cut into generous rectangles, stack with parchment between layers in a small pastry box, and refrigerate until the moment of delivery; they travel well up to 2 hours out of the fridge
- Pairing: tiramisu brownies pair best with freshly brewed espresso, an Americano, or a glass of sweet Marsala wine — the classic Italian pairing for tiramisu
- Occasion: ideal for dinner parties, holiday gatherings, Valentine’s Day, and any occasion where you want a dessert that looks sophisticated but was assembled in under 20 minutes of active work
11. Frequently Asked Questions
Can I Make Tiramisu Brownies Without Eggs?
Yes. Replace each egg with a flax egg — 1 tablespoon of ground flaxseed mixed with 3 tablespoons of water, rested for 5 minutes until it gels. The brownie base will be slightly fudgier and denser, which actually works in favour of this recipe since you want a compact base that holds the mascarpone layer without buckling or sogging through when you slice. Add 5 extra minutes to the chill time after assembly.
Why Did My Tiramisu Brownies Turn Out Dry?
Dry tiramisu brownies almost always come from overbaking the base. The brownie layer should be pulled when a toothpick inserted in the centre comes out with moist crumbs — not clean. A clean toothpick means the moisture has already baked out. Additionally, skipping or reducing the espresso soak will cause dryness, since the soak re-introduces moisture that carries the coffee flavour into every bite.
How Do I Know When Tiramisu Brownies Are Done?
Insert a toothpick in the centre at the 22-minute mark. Moist crumbs clinging to the toothpick means done — pull the pan. A wet batter means another 2 to 3 minutes. A clean toothpick means overbaked. The edges will look set and slightly pulling from the pan sides, while the centre still has the faintest jiggle — this is correct and firms up as it cools on the wire rack.
Can I Make the Brownie Base Ahead of Time?
Yes — the brownie base is actually better made a day ahead. Bake it, let it cool completely, wrap tightly in plastic and refrigerate. The next day, add the espresso soak and mascarpone layer, then chill for a minimum of 2 hours. Day-old brownie bases absorb the espresso soak more evenly and hold the mascarpone layer without softening.
How Long Do Tiramisu Brownies Last?
Tiramisu brownies are best quality for up to 4 days stored in an airtight container in the refrigerator. The mascarpone layer must be kept cold — these are not suitable for room-temperature storage beyond 2 hours due to the dairy topping. The brownie base itself stays fudgy in the fridge; if anything, the texture improves slightly after 24 hours as the layers meld together.
Can I Freeze Tiramisu Brownies?
Yes, with one condition: freeze the brownie base and mascarpone layer separately for the best result. Baked and cooled brownie base freezes well for up to 2 months wrapped tightly in plastic wrap and foil. The mascarpone layer does not freeze well — it separates on thawing. Assemble after thawing the base overnight in the fridge, then add a fresh mascarpone layer and chill for 2 hours.
What Can I Substitute for Mascarpone?
Full-fat cream cheese is the closest substitute — use it at room temperature and blend until smooth before whipping with cream. The result is slightly tangier and less rich than mascarpone but holds the same texture. A 1:1 swap works by weight. Avoid low-fat cream cheese, which has too much water and produces a runny layer that will not set properly over the brownies.
Can I Double This Recipe?
Yes — double all ingredients and use a 9×13-inch (23×33 cm) pan instead of an 8×8-inch pan. Bake time increases to 28 to 32 minutes; start checking at 26 minutes. Double the espresso soak and mascarpone layer proportionally. Chill time stays the same at 2 hours minimum. A doubled batch yields approximately 24 brownies at the standard 1.5-inch square cut size.
Why Did My Mascarpone Layer Turn Runny?
A runny mascarpone layer has two main causes: overwhipping the mixture past soft peaks, which breaks the emulsion and causes it to weep liquid; or spreading it over a brownie base that was still warm. Mascarpone destabilises above 70°F (21°C). Always cool the brownie base to room temperature first, then refrigerate it for 20 minutes before spreading. Whip only to soft, billowy peaks — the mixture should hold its shape but still look creamy.
What Size Pan Works Best for Tiramisu Brownies?
An 8×8-inch (20×20 cm) square pan is ideal for this recipe. It produces brownies approximately 1.5 inches thick after the mascarpone layer is added — substantial enough to slice cleanly and show the two-layer interior when cut. A 9×9-inch pan works but produces thinner brownies that are harder to photograph and easier to overbake. Line the pan with parchment paper overhanging on two sides for clean removal.
Can I Use Decaf Espresso in Tiramisu Brownies?
Yes — decaf espresso works exactly the same in both the brownie batter and the soak. The flavour profile is identical since the bitter, roasted notes that define the tiramisu flavour come from the coffee solids, not the caffeine. Use a strong decaf shot or brew double-strength decaf for the soak to ensure the same flavour intensity.
Can I Add a Chocolate Ganache Topping?
Yes — a thin layer of dark chocolate ganache between the brownie base and the mascarpone layer adds a third flavour dimension. Make ganache by heating 60 ml (¼ cup) of heavy cream to a simmer and pouring it over 60 g of chopped dark chocolate. Stir until smooth, spread over the cooled brownie base, refrigerate for 20 minutes until set, then add the mascarpone layer. If you enjoyed this recipe, our post on chocolate layered desserts is the next one worth exploring.

Tiramisu Brownies
Ingredients
Equipment
Method
- Preheat oven to 175°C (350°F). Line an 8×8-inch pan with parchment paper, leaving 5 cm overhang on two sides.
- Melt butter and chopped chocolate together over a double boiler, stirring until smooth and glossy. Cool for 10 minutes.
- Whisk sugar into the chocolate mixture. Add eggs one at a time, whisking vigorously after each. Add vanilla. Whisk 1 minute until glossy and ribbon-like.
- In a separate bowl, whisk together flour, espresso powder, and salt. Add to chocolate batter and fold with a rubber spatula just until no dry streaks remain — do not overmix.
- Pour batter into prepared pan and smooth the surface. Bake on the middle rack for 22 to 25 minutes until a toothpick inserted in the centre comes out with moist crumbs. Cool to room temperature (30 min), then refrigerate 20 minutes.
- Brush all 60 ml of cooled espresso evenly over the cold brownie base. Let absorb for 1 minute.
- In a cold mixing bowl, beat mascarpone, heavy cream, powdered sugar, and vanilla on medium-high for 60 to 90 seconds until soft, billowy peaks form. Stop at soft peaks — do not overwhip.
- Spread mascarpone mixture evenly over the espresso-soaked base. Sift cocoa powder in an even layer over the surface. Cover and refrigerate for a minimum of 2 hours.
- To slice: lift bars from pan using the parchment overhang. Run a sharp knife under hot water, wipe dry, and cut into 16 squares — wiping and re-warming the knife between every cut.
Notes
- The brownie base is better made the day before — it absorbs the espresso soak more evenly after 24 hours and holds the mascarpone layer more firmly.
- Keep mascarpone cold until the moment it goes into the mixer — warm mascarpone breaks when whipped and cannot be recovered.
- Stop at soft peaks when whipping — stiff peaks indicate overwhipping and will produce a grainy, weeping layer.
- Use a hot knife for every cut — this is the single most important presentation step for clean, photo-worthy slices.
- Dust fresh cocoa powder right before serving if chilling longer than 48 hours.
13. More Chocolate Baking Recipes You Will Love
- “Classic Fudgy Brownies” — the single-layer foundation for anyone who wants to master the pure brownie before adding toppings; uses the same butter-to-chocolate ratio as this recipe without the mascarpone complexity.
- “No-Bake Chocolate Cheesecake Bars” — same mascarpone-and-cream-cheese technique but no baking required; the chocolate base sets in the refrigerator and the bars are ready in under 3 hours of total time.
- “Espresso Chocolate Chip Cookies” — for when you want the same coffee-and-chocolate combination in a format that requires no chilling time and comes together in 20 minutes of active work.
- “Layered Chocolate Coffee Cake” — a three-layer cake built around the same espresso-and-dark-chocolate flavour profile as these tiramisu brownies, designed for a dinner party centrepiece rather than a sliced bar.
- “Mocha Mousse Cups” — the same mascarpone-whipped-cream technique from this recipe applied to individual glasses; no baking, no slicing, and ready in under 30 minutes.
Did you make these tiramisu brownies? Leave a ⭐⭐⭐⭐⭐ rating below and let me know in the comments how they turned out. I read every comment and would love to know what worked for you.