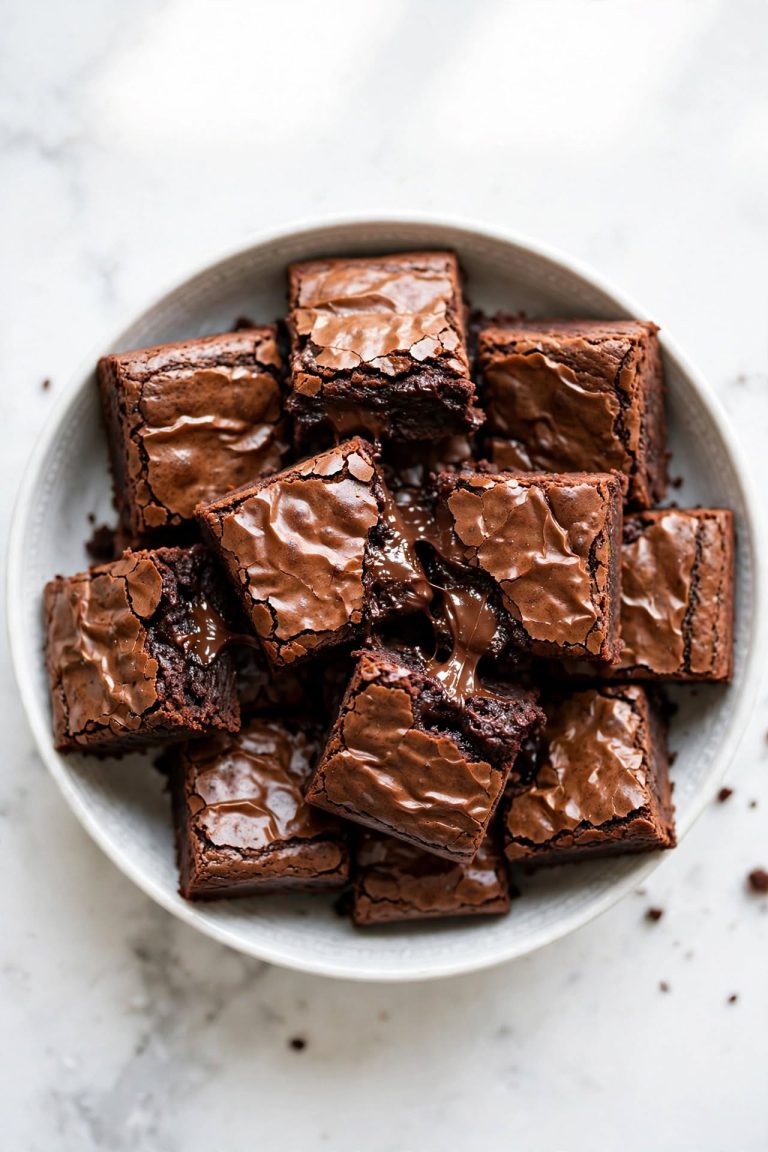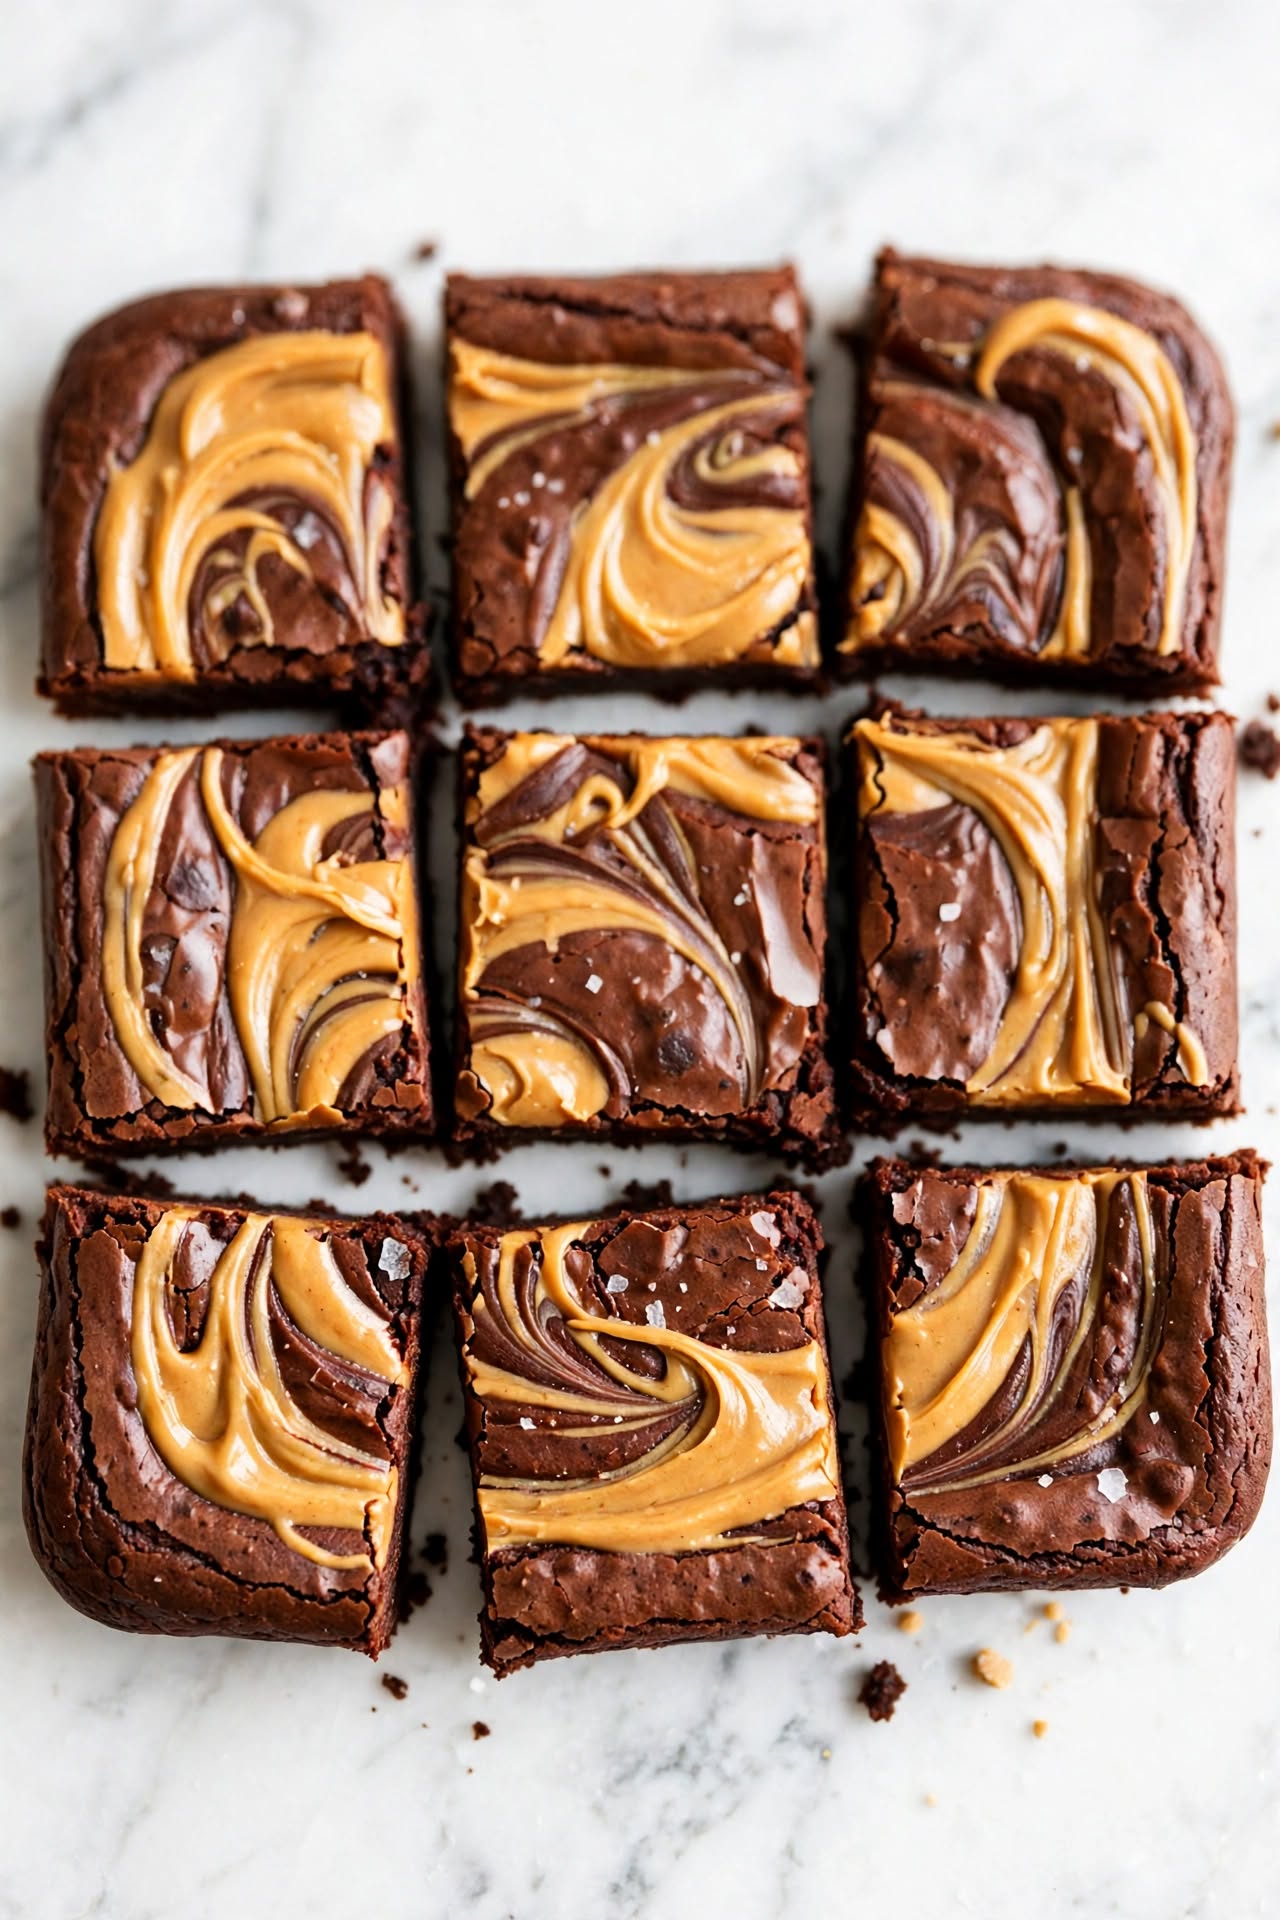
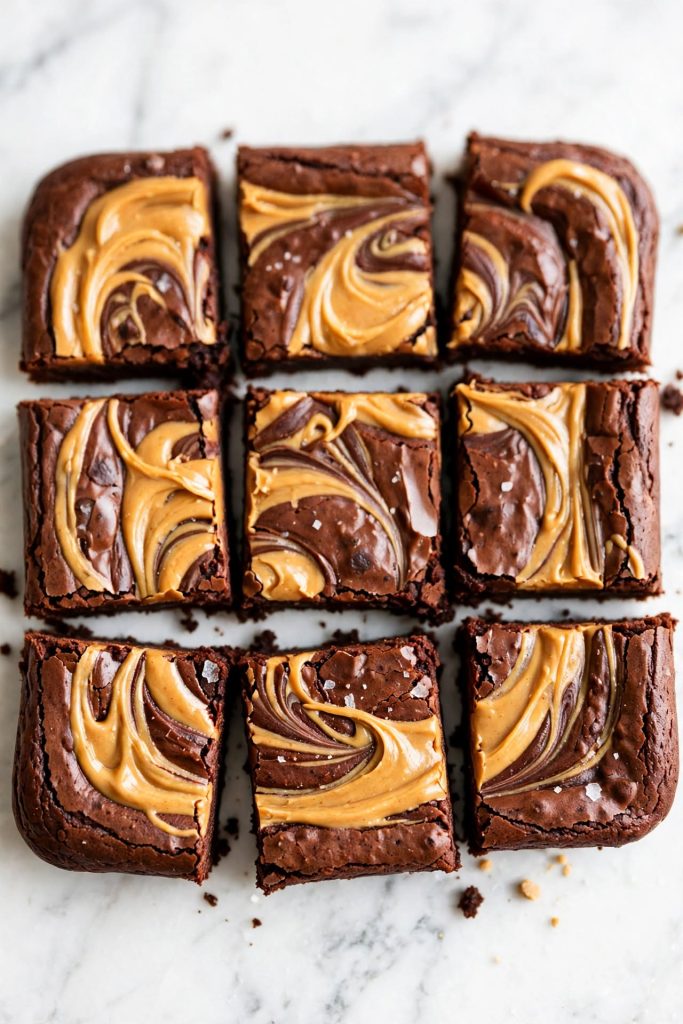
Peanut butter brownies are fudgy chocolate brownies made with smooth peanut butter added directly to the batter and a second layer of warm peanut butter swirled across the top before baking. The batter peanut butter adds fat and flavor that survives the oven; the swirl delivers a concentrated peanut butter hit on the surface where it is not exposed to prolonged heat. Bake time is 28 to 32 minutes in an 8×8 inch pan. Total hands-on time is about 20 minutes. Best for home bakers who want genuine, distinct peanut butter flavor alongside deep chocolate — not just a hint of PB in an otherwise plain brownie.
This peanut butter brownies recipe fixes the most common failure in peanut butter chocolate baking: the peanut butter flavor disappears after baking, leaving you with something that tastes mostly of chocolate with a faint aftertaste of nuts. The solution is two separate applications — peanut butter stirred into the batter so the flavor is throughout the crumb, and a warm peanut butter swirl added to the top just before the pan goes in the oven so the surface has a concentrated hit that the oven cannot fully bake away. I tested this recipe eight times before publishing, adjusting both the ratio of peanut butter in the batter and the consistency of the swirl, until the finished brownie tasted genuinely of both dark chocolate and peanut butter from the first bite to the last.
Why These Peanut Butter Brownies Work
Most peanut butter brownies fall into one of two traps: either the peanut butter is barely detectable in the finished brownie, or the chocolate is overpowered and you end up with something closer to a peanut butter bar. This recipe avoids both by making the peanut butter work in two distinct ways at once.
- Peanut butter in the batter, not just on top — 80g of peanut butter is stirred directly into the chocolate batter before baking. This means the peanut butter flavor is distributed throughout every bite of the crumb, not just in the visible swirl on the surface.
- A second peanut butter swirl on top — the remaining 80g is warmed until pourable and swirled across the surface of the batter before the pan goes in the oven. This surface layer is exposed to less heat than the batter, so it retains more of the aromatic peanut butter flavor. It also creates the visual that makes these peanut butter brownies instantly recognisable.
- Dark chocolate, not milk — 60 to 70% cacao dark chocolate has enough bitterness and complexity to stand up to the sweet, rich peanut butter without one flavor dominating. Milk chocolate would create a much sweeter result where the chocolate becomes a background note.
- Natural peanut butter, not processed — natural peanut butter (just peanuts, sometimes salt) has a stronger, more roasted flavor than commercial brands with added sugar and hydrogenated oil. The extra fat from the natural kind also contributes to the fudgy texture of the crumb.
- High fat-to-flour ratio maintained — even with peanut butter added as a second fat source, this recipe keeps the flour quantity low (120g) to stay on the fudgy side of the texture spectrum.
- Salt in the batter and optionally on top — salt suppresses bitterness in both the chocolate and the peanut butter, making both flavors more recognisable and distinct. A pinch of flaky salt on the surface before baking heightens every flavor note in the finished brownie.
If you want to go deeper into how fat sources affect brownie texture, our guide to brownie fat ratios covers the full chemistry including how nut butters behave differently from pure fat.
Ingredients for Peanut Butter Brownies
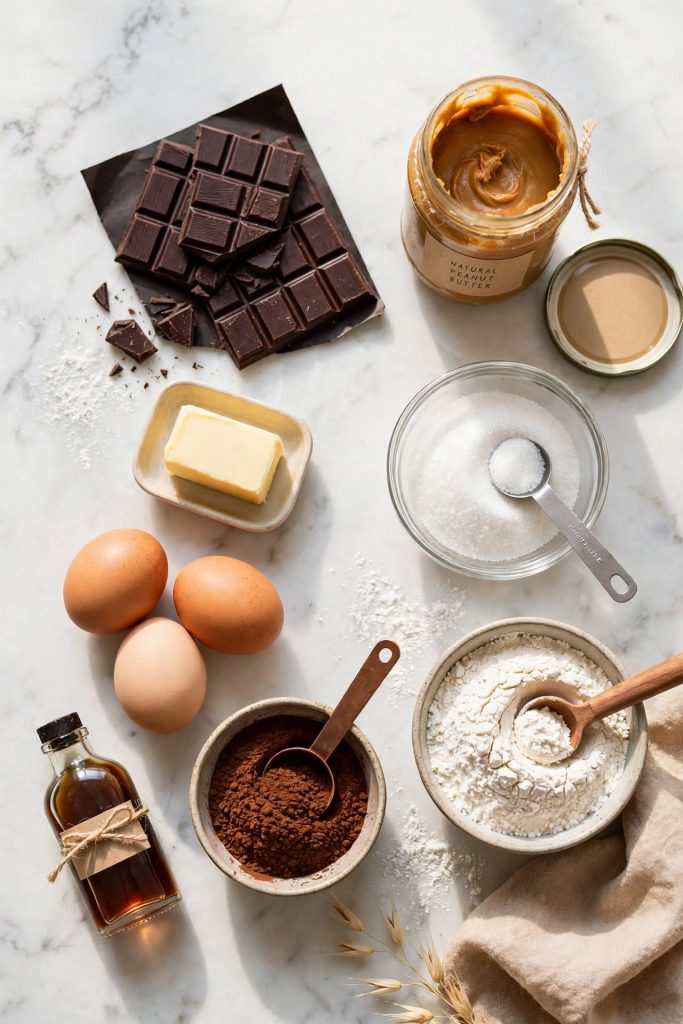
Every ingredient here does a specific job — and two of them appear twice in the recipe in two different forms. Here is what each one does and what to use if you need a substitution.
The Brownie Batter
| Ingredient | Amount | What It Does | Best Substitute + Impact |
|---|---|---|---|
| Unsalted butter | 225g (1 cup) | Primary fat, richness, fudgy structure | Salted butter — reduce added salt to ¼ tsp |
| Dark chocolate, 60–70% cacao | 150g (5 oz) | Deep chocolate flavor, fat, structure | Semi-sweet chips — less intense flavor |
| Granulated sugar | 300g (1½ cups) | Sweetness, moisture, crinkle top | Half brown sugar — chewier, slightly less crinkle |
| Large eggs | 4 | Structure, binding, glossy crumb | 4 flax eggs — denser, no crinkle top |
| Pure vanilla extract | 2 tsp | Rounds out both chocolate and peanut butter | Vanilla bean paste — stronger |
| Natural peanut butter (smooth) | 80g — in batter | PB flavor throughout the crumb, added fat | Commercial PB — sweeter, less intense flavor |
| Natural peanut butter (smooth) | 80g — for swirl | Concentrated PB flavor on the surface | Crunchy PB not recommended for swirl |
| All-purpose flour | 120g (1 cup) | Structure — kept low for fudginess | 1:1 GF flour blend — same weight |
| Dutch-process cocoa powder | 40g (⅓ cup) | Additional chocolate intensity | Natural cocoa — swap baking powder for ¼ tsp baking soda |
| Fine sea salt | 1 tsp | Sharpens both chocolate and PB flavor | Kosher salt — use 1½ tsp |
| Baking powder | ½ tsp | Minimal lift for crinkle top only | Omit for flatter, denser result |
Key Ingredient Notes
The peanut butter split: The total 160g of peanut butter is divided equally — 80g into the batter, 80g reserved for the swirl. Do not combine them before using; keep the swirl portion separate in a small bowl from the start. The batter peanut butter should be added at room temperature; the swirl peanut butter should be warmed to just-pourable consistency right before you need it.
Natural vs commercial peanut butter: Natural peanut butter (ingredients: peanuts, salt) gives a stronger, more roasted peanut flavor than commercial brands like Jif or Skippy, which contain added sugar, hydrogenated oil, and sometimes molasses. The added ingredients in commercial brands make them sweeter and milder — they do not disappear in the batter, but the flavor they contribute is noticeably less intense. Either works; natural is better for flavor.
The chocolate bar: Use a bar at 60 to 70% cacao, roughly chopped — not chocolate chips. Chocolate chips contain stabilizers that prevent the cocoa butter from fully releasing into the batter, which reduces fudginess. A bar melts completely and contributes its full fat content to the crumb.
Equipment You Need
- 8×8 inch (20×20cm) light-colored metal baking pan
- Parchment paper with overhang on two sides
- Large heatproof mixing bowl
- Medium saucepan (for double boiler) or microwave
- Small bowl (for the swirl peanut butter)
- Whisk and rubber spatula
- Butter knife, skewer, or chopstick (for swirling)
The Peanut Butter Guide — Which Type Works Best
Not all peanut butter behaves the same way in a baked recipe. The type you choose affects the flavor intensity, the texture of the crumb, and how the swirl holds its shape on the surface. Here is the full breakdown.
| Type | Flavor Intensity | Performance in Batter | Performance in Swirl | Verdict |
|---|---|---|---|---|
| Natural smooth (peanuts + salt) | ⭐⭐⭐⭐⭐ Strongest | ⭐ Best — no added sugar masks the batter balance | ⭐ Best — warms to ideal pourable consistency | ✓ Use this — recommended for both |
| Commercial smooth (Jif / Skippy) | ⭐⭐⭐ Moderate | ✓ Works — sweeter result, slightly less PB punch | ✓ Works — very consistent and easy to swirl | ✓ Good backup — easier to find |
| Natural crunchy | ⭐⭐⭐⭐⭐ Strongest | ✓ Works — adds peanut pieces in the crumb | ⚠️ Difficult — pieces interrupt the swirl pattern | Use in batter only; smooth for swirl |
| Commercial crunchy | ⭐⭐⭐ Moderate | ✓ Works — adds texture | ⚠️ Not ideal — same swirl issues as natural crunchy | Use in batter only if texture is the goal |
| Peanut butter powder (PB2) | ⭐⭐ Weak | ❌ Do not use — insufficient fat for batter texture | ❌ Do not use — does not melt to a pourable swirl | Not suitable for this recipe |
| Old-fashioned / fresh-ground | ⭐⭐⭐⭐⭐ Strongest | ✓ Works — most intense flavor | ⚠️ Can be oily — stir thoroughly before using | Great if available; stir before measuring |
The takeaway: smooth natural peanut butter is the best choice for both applications. Commercial smooth peanut butter is a reliable backup. If you want peanut pieces in the finished brownie, use crunchy in the batter only and smooth for the swirl.
How to Make Peanut Butter Brownies — Step by Step
Follow these steps in order. The timing of when the swirl peanut butter goes on is the most important detail in this recipe — it must be the last thing before the pan goes in the oven.
Step 1 — Melt the Butter and Chocolate
Combine the butter and chopped chocolate in a large heatproof bowl. Set over a saucepan of barely simmering water and stir until completely smooth — about 4 to 5 minutes. Alternatively, microwave in 30-second bursts, stirring between each, until smooth. Remove from heat and cool for 10 minutes. Measure out 80g of peanut butter into a small separate bowl for the swirl; set aside.
What to look for: The mixture should be completely smooth, dark, and glossy with no visible chocolate pieces. It should feel warm but not hot — if it steams when you put your hand near it, wait another 3 minutes before adding the sugar.
⚠️ Do not rush the 10-minute cool. Hot chocolate mixture added to eggs causes them to scramble on contact. The peanut butter that goes into the batter also emulsifies better into a warm (not hot) base.
Step 2 — Whisk in the Sugar
Add the sugar to the cooled chocolate mixture and whisk vigorously for 1 to 2 minutes until fully combined. The mixture will look thick and somewhat grainy — this is normal. The friction from whisking begins dissolving the sugar crystals, which is what creates the glossy crinkle top.
What to look for: A thick, uniform chocolate-sugar paste with no separate pools of butter or chocolate. It should look cohesive when you drag a spatula through it.
Step 3 — Add the Eggs, Vanilla, and Peanut Butter
Add the eggs one at a time, whisking for 30 seconds after each addition. Add the vanilla extract and the 80g of peanut butter reserved for the batter. Whisk for 60 seconds until the batter is completely smooth, glossy, and slightly thickened. The peanut butter will fully incorporate into the batter.
What to look for: A smooth, glossy batter with no visible streaks of peanut butter. It should be thicker than a plain chocolate brownie batter due to the peanut butter adding fat and body. The color will be dark brown with a slight sheen.
Step 4 — Fold in the Dry Ingredients
Sift the flour, cocoa powder, salt, and baking powder directly into the bowl. Fold with a rubber spatula using slow, deliberate strokes — stop the moment no dry flour or cocoa streaks remain. About 20 strokes is all you need.
What to look for: A thick, uniform batter with no white flour or cocoa patches. The peanut butter in the batter makes it slightly denser than a plain chocolate brownie batter — this is correct. Do not add any liquid to thin it.
⚠️ Overmixing after the flour goes in develops gluten — which pushes the texture toward cakey rather than fudgy. Count your strokes: 20 is enough.
Once you are comfortable with this folding technique, our chocolate brownie technique guide covers the same method for multiple brownie variations.
Step 5 — Add the Peanut Butter Swirl
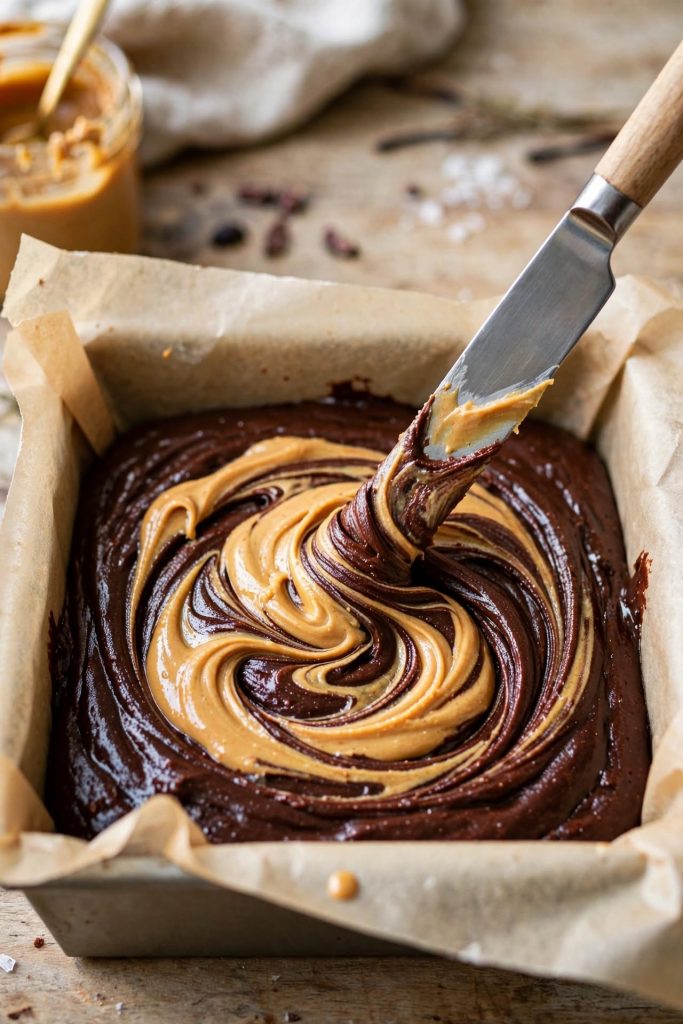
Preheat your oven to 175°C / 350°F. Pour the batter into a parchment-lined 8×8 inch pan and smooth it to all four edges. Now warm the reserved 80g of swirl peanut butter in the microwave for 20 seconds until it is just pourable — the consistency of warm honey, not water. Drop the warmed peanut butter in 8 to 10 small spoonfuls evenly spaced across the surface of the batter. Drag a butter knife or skewer through the spoonfuls in a figure-eight or S-pattern — 6 to 8 passes total. Optionally add a pinch of flaky sea salt over the entire surface before baking.
What to look for: Distinct golden-amber ribbons of peanut butter running through the dark chocolate batter surface. The pattern should look marbled but not fully blended. If the peanut butter appears to have sunk into the batter rather than sitting on top, it was too liquid — this will still taste good but the visual swirl will be less defined.
Step 6 — Bake, Cool, and Cut
Bake at 175°C / 350°F for 28 to 32 minutes. At 28 minutes, insert a toothpick into the chocolate portion of the center — avoiding the peanut butter swirl areas. Moist fudgy crumbs attached = done. Wet batter = 2 more minutes. Clean toothpick = already overbaked. Cool in the pan on a wire rack for at least 1 hour, then refrigerate for 30 minutes before cutting. Cut with a hot dry knife wiped between every cut.
What to look for: The swirl on top should look set and matte. The edges will have pulled slightly from the pan. The peanut butter areas of the surface will always look slightly less done than the chocolate areas — this is normal and not a sign of underbaking.
The Science Behind Peanut Butter Brownies
Getting peanut butter flavor to survive baking and stay distinct from the chocolate requires understanding how these two ingredients interact at oven temperatures.
Why Peanut Butter Goes Into the Batter — Not Just on Top
Peanut butter is approximately 50% fat by weight, and that fat is what carries the flavor compounds through the crumb. When peanut butter is stirred into the brownie batter, its fat integrates with the butter-chocolate fat matrix — which means every section of the crumb contains peanut butter fat carrying peanut butter flavor. A swirl-only approach puts all the peanut butter flavor on the surface, which bakes away more than the interior does. The combination of both — batter and swirl — gives you flavor throughout and a concentrated surface hit that the oven does not fully diminish.
Why Dark Chocolate Balances Peanut Butter Better Than Milk Chocolate
Peanut butter has a rich, sweet, slightly salty flavor with roasted depth. Milk chocolate has a very high sugar content and a mild, creamy flavor that competes with rather than contrasting peanut butter — the two sweet flavors blur together. Dark chocolate at 60 to 70% cacao has bitterness, complexity, and enough acidity to create a genuine contrast with the sweet, fatty peanut butter. The bitterness of the chocolate makes the sweetness of the peanut butter more noticeable; the sweetness of the peanut butter makes the bitterness of the chocolate more approachable. This tension is what makes the combination worth eating.
Why Natural Peanut Butter Gives a Stronger Flavor
Natural peanut butter is made from peanuts that have been roasted and ground without added ingredients except sometimes salt. The roasting process creates hundreds of flavor compounds through the Maillard reaction, and those compounds are preserved intact in the pure ground peanut. Commercial peanut butters add sugar, hydrogenated vegetable oils, and sometimes molasses — which dilute the peanut flavor with sweetness and mask the roasted depth with a uniform, mild flavor profile. After baking, the difference is notable: natural peanut butter leaves a distinct, recognizable peanut flavor; commercial peanut butter leaves a sweeter, less sharp result that some people do prefer for its milder character.
Tips for the Best Result
These are the details that make the peanut butter as noticeable as the chocolate in every bite.
- Stir the natural peanut butter before measuring — natural peanut butter separates in the jar, leaving an oil layer on top and a dry paste below. Stir from the bottom up until fully combined before measuring either portion. Oil-separated peanut butter baked into a swirl will spread unpredictably and leave oily patches.
- Warm the swirl peanut butter only 20 seconds — the goal is thick-honey consistency, not watery liquid. Over-warmed peanut butter is too liquid and sinks into the batter rather than sitting on the surface. If it sinks, the swirl will not be visible after baking.
- Use a thin-bladed knife for swirling — a butter knife, chopstick, or wooden skewer gives you the most control over the swirl pattern. A spatula or spoon is too wide and tends to fully blend rather than marble.
- Stop swirling at 6 to 8 passes — more than 8 passes blends the peanut butter fully into the chocolate batter. You want distinct ribbons, not a uniform mocha-colored batter.
- Test doneness in the chocolate, not the peanut butter — the peanut butter swirl areas will always look underdone compared to the chocolate portions. Insert the toothpick into a purely chocolate area for an accurate reading.
- Add flaky salt just before baking — a pinch of flaky sea salt scattered over the surface after swirling and before the pan goes in the oven elevates both the chocolate and peanut butter flavors significantly. This is the single best finishing touch for these peanut butter brownies.
- Refrigerate before cutting — the peanut butter fat in the crumb makes the brownies slightly softer at room temperature than a plain chocolate brownie. Refrigerating for 30 minutes after cooling firms both the chocolate and peanut butter fat enough to cut cleanly without smearing.
Common Mistakes to Avoid
❌ Using Cold Peanut Butter for the Swirl
Result: Cold peanut butter is too stiff to drop in spoonfuls or to drag into a swirl pattern. It tears through the batter rather than flowing, leaving a patchy, uneven surface with no defined marble.
Fix: Warm the swirl peanut butter in the microwave for 20 seconds until it is just pourable — thick like warm honey. If you forgot to warm it, it will still work once warmed. Do not add it cold.
❌ Over-Swirling the Peanut Butter Layer
Result: The peanut butter blends fully into the chocolate batter, creating a uniform brownish surface with no visible swirl pattern. The baked brownies look like plain chocolate brownies with slightly odd coloring.
Fix: Count your passes — 6 to 8 is the maximum. Each pass of the knife should create a new ribbon without fully blending what came before. When in doubt, stop one pass earlier than feels right.
❌ Skipping Peanut Butter in the Batter
Result: The peanut butter flavor is concentrated only on the surface. The interior of the brownie tastes entirely of chocolate, with peanut butter appearing only when you hit a swirl area. The flavor is inconsistent bite to bite.
Fix: Always use both applications — 80g in the batter and 80g as the swirl. The batter peanut butter is what makes every bite taste of both chocolate and peanut butter, not just the swirl pieces.
❌ Using Sweetened Peanut Butter in the Batter
Result: Commercial sweetened peanut butter adds extra sugar to the batter on top of the 300g already in the recipe. The brownies can become cloying — too sweet overall, which actually suppresses the perception of peanut butter flavor rather than enhancing it.
Fix: Use natural peanut butter (just peanuts and salt) in the batter. Commercial peanut butter is acceptable for the swirl where the extra sweetness is less likely to unbalance the whole batch.
❌ Overbaking the Brownies
Result: The crumb dries out and the peanut butter flavor in the batter becomes harder to detect — dry baked goods always taste less intensely flavored than moist ones because the fat that carries flavor has been driven off.
Fix: Check at 28 minutes with a toothpick in a chocolate area (not peanut butter swirl). Moist fudgy crumbs = done. Pull now. Do not wait for the top to look completely dry — the peanut butter swirl areas will always look slightly underdone even when the brownie is fully baked.
❌ Cutting Before Fully Cool
Result: The peanut butter in both the crumb and the swirl is still warm and soft — the brownie smears when cut and the swirl pattern on top is distorted by the knife rather than cutting cleanly through it.
Fix: Cool fully at room temperature for 1 hour, then refrigerate for 30 minutes. The combination of butter fat and peanut butter fat makes the crumb softer than a plain brownie at room temperature — refrigerating before cutting gives you much cleaner results.
For more guides at this level of detail, our peanut butter baking guide covers how peanut butter behaves across cookies, brownies, bars, and cakes.
Variations Worth Trying
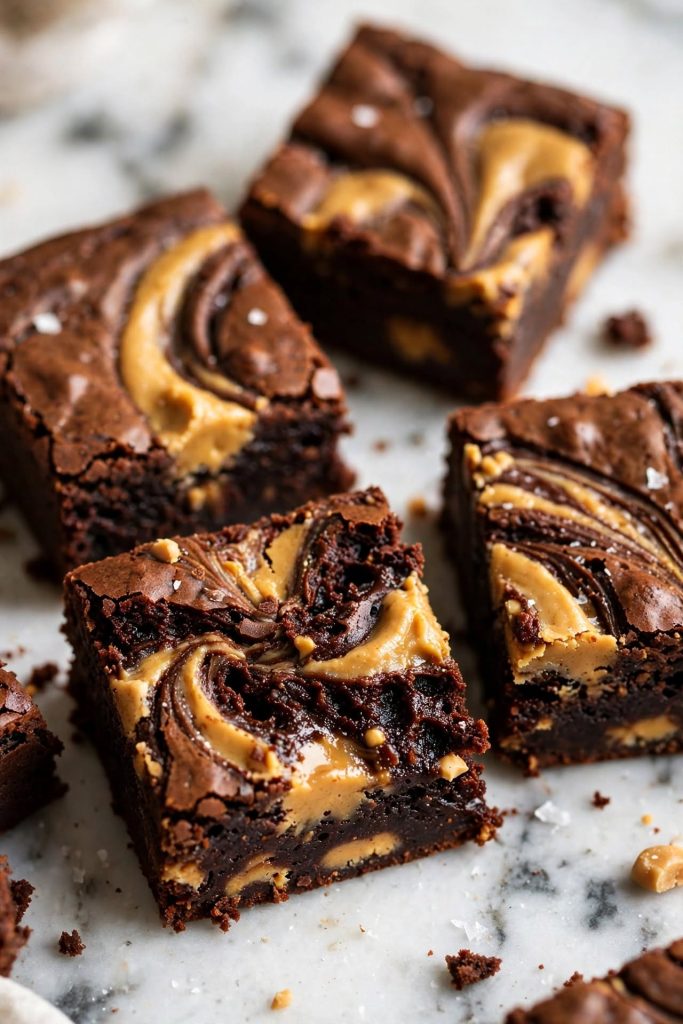
Reese’s Peanut Butter Brownies
What changes: Fold 150g of roughly chopped Reese’s Peanut Butter Cups into the batter at the end of Step 4. Press additional halved cups onto the surface of the batter alongside the peanut butter swirl before baking.
Result: Each brownie square contains pockets of the peanut butter cup’s chocolate-peanut butter layer baked into the crumb. The cups partially melt into the batter and partially hold their shape, creating dramatic pockets of candy flavor. These are the most visually striking variation.
Peanut Butter Blonde Brownies
What changes: Remove the dark chocolate and Dutch-process cocoa entirely. Replace the granulated sugar with 300g of packed brown sugar. Increase the peanut butter in the batter to 120g and reduce to a swirl-only topping of 40g.
Result: A butterscotch-flavored blondie base with strong peanut butter presence throughout — closer to a peanut butter bar than a chocolate brownie. The brown sugar gives a deep caramel flavor that pairs naturally with peanut butter without chocolate competing for attention. These bake in 22 to 25 minutes.
Double Layer Peanut Butter Brownies
What changes: After baking and cooling completely, spread 120g of softened peanut butter mixed with 60g of powdered sugar and 2 tablespoons of melted butter over the top of the cooled brownie slab. Chill for 30 minutes until the peanut butter layer sets firm, then drizzle with 60g of melted dark chocolate.
Result: A no-bake peanut butter layer baked on top of a fudgy brownie base, finished with a chocolate drizzle — essentially a homemade version of a Reese’s cup in bar form. Refrigerate before cutting; these must be stored cold.
Gluten-Free Version
What changes: Replace the all-purpose flour with a 1:1 gluten-free flour blend containing xanthan gum at the same weight (120g).
Result: Very similar to the original — the high fat content from both the butter and peanut butter makes the texture change from going gluten-free minimal. Refrigerate before cutting — gluten-free baked goods are more fragile when warm and crumble at the cut edge.
Vegan Peanut Butter Brownies
What changes: Replace the butter with 225g of solid coconut oil. Replace the eggs with 4 flax eggs (1 tablespoon ground flaxseed + 3 tablespoons water per egg, rested 5 minutes). Use dairy-free dark chocolate for the batter.
Result: A denser, slightly less glossy crumb — the flax eggs do not emulsify quite as smoothly as whole eggs and the crinkle top will be less pronounced. The peanut butter swirl still works exactly as written. Natural peanut butter is already vegan, so no changes needed there. Coconut oil gives a very slight coconut background that pairs well with peanut butter.
How to Store
Room Temperature
Store peanut butter brownies in an airtight container at room temperature for up to 4 days. The peanut butter fat in the crumb actually helps retain moisture, so these stay softer for longer than plain chocolate brownies. The peanut butter swirl on top may develop a slight sheen or look slightly matte after a day at room temperature — this is the peanut oil naturalizing and does not affect flavor or texture. Store in a single layer or with parchment paper between layers to protect the swirl surface.
Refrigerator
Refrigerate peanut butter brownies in an airtight container for up to 7 days. Cold temperatures firm both the chocolate and peanut butter fat into a denser, candy-bar-like bite that many people prefer. Let refrigerated brownies come to room temperature for 15 to 20 minutes before eating — cold peanut butter fat can taste slightly waxy straight from the refrigerator. Alternatively, microwave one brownie for 15 to 20 seconds, which softens both fats and makes the peanut butter flavor more pronounced.
Freezer — Complete Guide
Peanut butter brownies freeze well for up to 3 months. To freeze: cool completely, cut into individual squares, wrap each tightly in plastic wrap, and place in a freezer bag or airtight container. The peanut butter swirl pattern may look slightly less defined after thawing as the peanut oil redistributes — the flavor is fully preserved. To thaw: unwrap and leave at room temperature for 30 to 40 minutes, or microwave for 20 to 25 seconds for a warm result. Do not freeze the uncut slab — it thaws unevenly, with the outer portions over-softening before the center thaws. Always cut before freezing.
If you bake these for events or like keeping a freezer stash, our guide to freezing bars and brownies covers the full workflow including how to protect the swirl surface during storage.
How to Serve
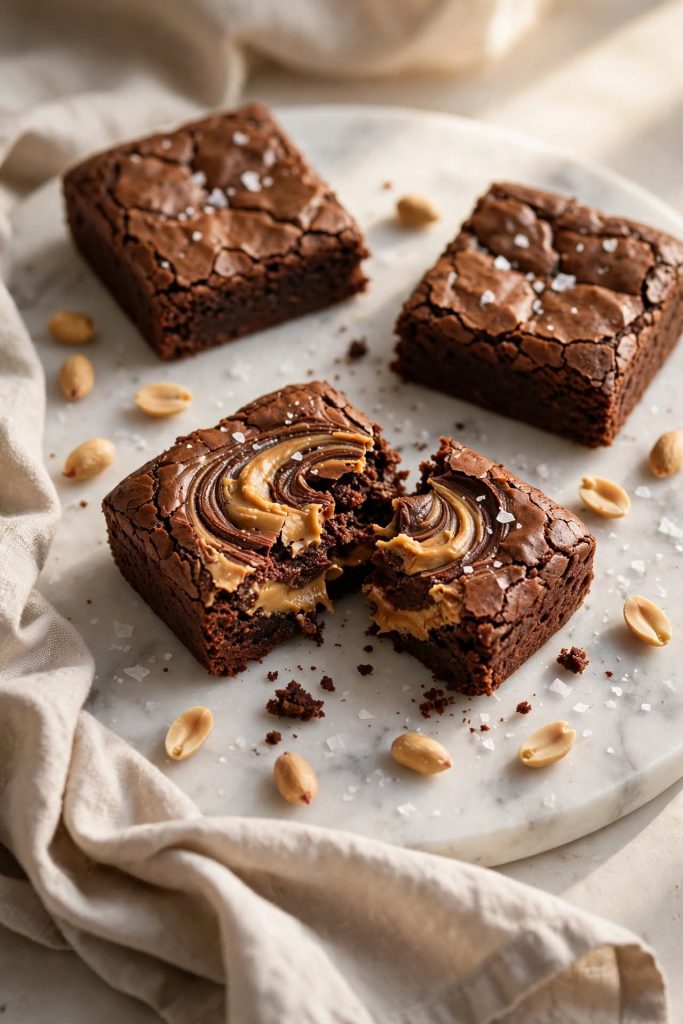
Classic Ways to Serve
- At room temperature on day two — both the chocolate and peanut butter flavor deepen and become more distinct as the crumb settles overnight
- Slightly warm with a 15 to 20 second microwave blast — the peanut butter in both the crumb and swirl softens and becomes more fragrant, making the PB flavor more forward
- Stacked on a plate with a light dusting of flaky salt right before serving — the salt makes both the chocolate and peanut butter taste more of themselves
Upgraded and Occasion-Worthy
- Warm with a scoop of vanilla ice cream and a drizzle of warm salted caramel — the four flavors (chocolate, peanut butter, vanilla, caramel) together is genuinely excellent and requires no more effort than reheating and scooping
- Cut into 2-bite pieces and piled on a board with other bars for a dessert spread — the golden peanut butter swirl makes these instantly visually distinct from other brownies and draws the eye immediately
- Packaged in cellophane bags tied with ribbon — peanut butter brownies are one of the most popular homemade gifts because most people love the chocolate-peanut butter combination and they stay fresh for four days without refrigeration
- Used as the base of a peanut butter brownie sundae: one warm brownie in a bowl, two scoops of vanilla or chocolate ice cream, crushed salted peanuts, chocolate sauce, and whipped cream — a restaurant-quality dessert made entirely from your own kitchen
These peanut butter brownies pair well with cold milk, black coffee, vanilla ice cream, or a glass of stout or porter. They are the right bake for bake sales (consistently one of the first things to sell), gifting, dinner parties, and any occasion where the Reese’s-style chocolate-peanut butter combination is appropriate — which is most occasions.
Frequently Asked Questions
Can I use crunchy peanut butter?
Yes — crunchy peanut butter works in the batter and gives you small peanut pieces distributed throughout the crumb. For the swirl on top, smooth peanut butter is strongly recommended: the pieces in crunchy peanut butter interrupt the visual swirl pattern and make it harder to drag a clean marble. Use crunchy for the batter and smooth for the swirl if you want the best of both.
Why did the peanut butter sink to the bottom?
The most common cause is peanut butter that was too warm and liquid when dropped onto the batter — it sinks before the batter can support it. Warm the swirl peanut butter only until just pourable: about 20 seconds in the microwave. It should be the consistency of thick honey, not water. A thicker batter also holds the swirl on the surface longer — if your batter was thin, check your flour measurement.
Can I use peanut butter chips instead of peanut butter?
Chips can be folded in as a texture add-in, but they do not replace the smooth peanut butter in this recipe. The fat from the peanut butter is part of what keeps the brownies fudgy — chips do not contribute fat in the same way. You can fold 100g of peanut butter chips into the batter at the end of Step 4 in addition to the peanut butter for extra intensity.
Do peanut butter brownies need to be refrigerated?
No — peanut butter brownies are shelf-stable for up to 4 days in an airtight container at room temperature. The peanut butter is shelf-stable. Refrigeration is optional and firms the texture into a denser, candy-like bite. If you have added any perishable filling or topping — such as a cream cheese layer — refrigerate and eat within 4 days.
How long do peanut butter brownies last?
Stored in an airtight container at room temperature, they stay at their best quality for up to 4 days — and the flavor improves on day two. The peanut butter helps retain moisture, so the texture stays softer longer than plain chocolate brownies. Refrigerated, they keep for up to 7 days. Serve at room temperature or warm for the best flavor.
Can I freeze peanut butter brownies?
Yes — they freeze well for up to 3 months. Cool completely, cut into individual squares, wrap each in plastic wrap, and freeze in an airtight bag. The swirl may look slightly less defined after thawing but the flavor is completely preserved. Thaw at room temperature for 30 minutes or microwave for 20 seconds. If you enjoyed these, our peanut butter cookies are the next recipe worth making.
Can I double this recipe?
Yes — double every ingredient exactly, including both portions of peanut butter. Use a 9×13 inch pan and increase baking time to approximately 32 to 38 minutes. Check at 32 minutes with the toothpick test (in the chocolate, not the swirl). The doubled batter still only requires one large mixing bowl and the swirl technique is unchanged.
Why did the peanut butter swirl disappear during baking?
If the peanut butter was too warm and liquid before adding, it will have spread into the batter during baking and become invisible. Warm to just-pourable consistency — thick honey, not water. Also avoid over-swirling: 6 to 8 passes maximum. More passes blend the peanut butter fully into the chocolate batter rather than leaving distinct ribbons.
Can I use almond butter instead of peanut butter?
Yes — almond butter works as a direct swap at the same weight for both the batter and the swirl. The flavor will be milder and nuttier with less of the sharp, roasted quality that peanut butter has. Use smooth, natural almond butter with no added sugar. Cashew butter and sunflower seed butter (for peanut allergy) also work at the same ratio.
How do I know when peanut butter brownies are done?
Insert a toothpick into the center of the brownie in the chocolate portion — not through a peanut butter swirl area, which will always read differently. Moist fudgy crumbs attached = done. Wet batter = 2 more minutes. Clean toothpick = already overbaked. The swirl areas will look slightly underdone even when the chocolate portions are perfectly baked — this is normal.
Can I add chocolate chips to the batter?
Yes — fold in 100g to 150g of semi-sweet or dark chocolate chips at the very end of Step 4, after the flour is just incorporated. Dark or semi-sweet chips work best — they keep the chocolate-to-peanut-butter balance from tipping too sweet. You can also press a handful of chips into the surface alongside the peanut butter swirl before baking.
What can I use instead of peanut butter for a peanut allergy?
Sunflower seed butter (sun butter) is the most direct substitute — it has a similar fat content, roasted flavor, and spreadability. Use the same weight in both the batter and the swirl. Note that sunflower seed butter can turn baked goods slightly green due to a reaction between its chlorogenic acid and baking powder — this is harmless and does not affect flavor. Cashew butter and tahini also work without this color reaction.

Peanut Butter Brownies
Ingredients
Method
- Preheat oven to 175°C / 350°F. Line an 8×8 inch (20×20cm) metal pan with parchment, leaving overhang on two sides. Measure out 80g of peanut butter into a small bowl for the swirl; set aside.
- Melt butter and chopped chocolate together over a double boiler or in 30-second microwave bursts, stirring until smooth. Cool 10 minutes.
- Add sugar to the cooled chocolate mixture and whisk vigorously for 1 to 2 minutes.
- Add eggs one at a time, whisking 30 seconds after each. Add vanilla and the 80g of batter peanut butter. Whisk for 60 seconds until smooth, glossy, and slightly thickened.
- Sift flour, cocoa powder, salt, and baking powder into the bowl. Fold with a rubber spatula until no dry streaks remain — about 20 strokes. Stop immediately.
- Pour batter into the prepared pan and smooth to the edges. Warm the reserved 80g of swirl peanut butter in the microwave for 20 seconds until just pourable. Drop in 8 to 10 spoonfuls across the surface. Drag a knife or skewer through in a figure-eight pattern — 6 to 8 passes. Scatter flaky salt over the top.
- Bake 28 to 32 minutes — toothpick in the chocolate center should come out with moist fudgy crumbs. Cool in the pan 1 hour, then refrigerate 30 minutes. Cut with a hot dry knife wiped between every cut.
Notes
More Dessert Recipes You Will Love
- Peanut Butter Cookies — crispy-edged, chewy-centered cookies made with natural peanut butter and a cross-hatch press on top. The fork pattern is not just decorative — it controls how the cookie spreads during baking.
- Fudgy Brownies — the plain chocolate version of this recipe, without peanut butter, using both melted dark chocolate and Dutch-process cocoa for the deepest chocolate flavor a home brownie can deliver.
- Peanut Butter Blondies — brown sugar bars with natural peanut butter throughout the batter and dark chocolate chunks folded in. The butterscotch base amplifies the peanut butter flavor even more than chocolate does.
- Chocolate Peanut Butter Bars — a no-bake peanut butter base pressed over a fudgy brownie layer and topped with a thin dark chocolate ganache. Chills in the fridge and cuts into 24 clean bars with zero oven time after the brownie base is baked.
- Reese’s Stuffed Chocolate Cookies — a thick dark chocolate cookie dough wrapped around a whole Reese’s Peanut Butter Cup, baked until the edges are crisp and the center is molten with peanut butter. The most dramatic peanut butter chocolate dessert in one cookie.
Did you make these peanut butter brownies? Leave a ⭐⭐⭐⭐⭐ rating below and let me know in the comments how they turned out — and whether you used natural or commercial peanut butter. I read every comment and would love to know what worked for you.